
Transplanting an Established Hydrangea

I have moved more than one “perfectly placed” hydrangea after realizing it was only perfect for the first season. Maybe the afternoon sun got harsher, maybe a downspout changed, maybe the shrub simply grew up and started swallowing a path. The good news is that established hydrangeas transplant well when you respect two things: roots hate drying out, and leaves lose water faster than stressed roots can replace it.
This guide will walk you through the best season to move a mature hydrangea, how large a root ball to take, how to water through the inevitable wilt, and what bloom loss to expect next year.

Best time to transplant a mature hydrangea
The best time to transplant an established hydrangea is when it is dormant and temperatures are mild.
Ideal season
- Late fall after leaf drop: My favorite window in many gardens. The plant is winding down, the soil is still workable, and winter moisture helps settle the root zone.
- Early spring before bud break: Also excellent. You get a full growing season for re-rooting, but you must stay on top of watering as days warm up.
When to avoid (if you can)
- Summer: Moving a leafy hydrangea in heat is like asking it to run a marathon while you are taking away its water bottle. It can be done in emergencies, but expect more wilt and a longer recovery.
- Frozen or waterlogged soil: If you cannot dig cleanly and safely, wait for a workable day.
Rule I follow: If the forecast shows a stretch of mild, cloudy days, that is your green light. Bright sun and wind are what turn a routine transplant into a drama.
Before you dig: set the new hole first
If you do one thing to reduce transplant stress, do this: prepare the new planting hole before you lift the shrub. The less time those roots spend exposed, the better.
- Choose the right spot: Morning sun with afternoon shade is the sweet spot for most bigleaf hydrangeas (Hydrangea macrophylla). Panicle hydrangeas tolerate more sun, but even they appreciate consistent moisture.
- Dig wide, not deep: Hydrangea roots are relatively shallow and spread outward.
- Check drainage: Hydrangeas like moisture, not swamp. If water sits in the hole for hours after filling it once, you may need to improve drainage or choose a different location.
How big of a root ball to take
A larger root ball means less stress, but there is a practical limit based on what you can lift and how much root loss the plant can tolerate.
A simple sizing guide
- Small to medium established hydrangea (3 to 4 feet wide): Aim for a root ball about 18 to 24 inches across and 12 to 16 inches deep.
- Large mature hydrangea (5 to 6+ feet wide): Aim for 24 to 36 inches across and about 16 to 20 inches deep.
Depth matters less than width. Most of the fine feeder roots you are trying to keep are in the upper soil layers. If you can keep the root ball wide and intact, the plant will rebound faster.
Mark your cut line
Start by tracing a circle around the plant at your intended root ball width. For very old shrubs, expect a few thicker roots. Cut cleanly with a sharp spade or loppers. Ragged tears heal slower.
Step-by-step: digging and moving an established hydrangea
- Water the day before. Moist soil holds together and protects roots. You want damp, not muddy.
- Tie up the branches loosely. Use soft twine to gather stems so you can work without snapping them.
- Slice down around the root ball. Make a clean trench to your planned depth, then angle the spade under the root ball to begin loosening.
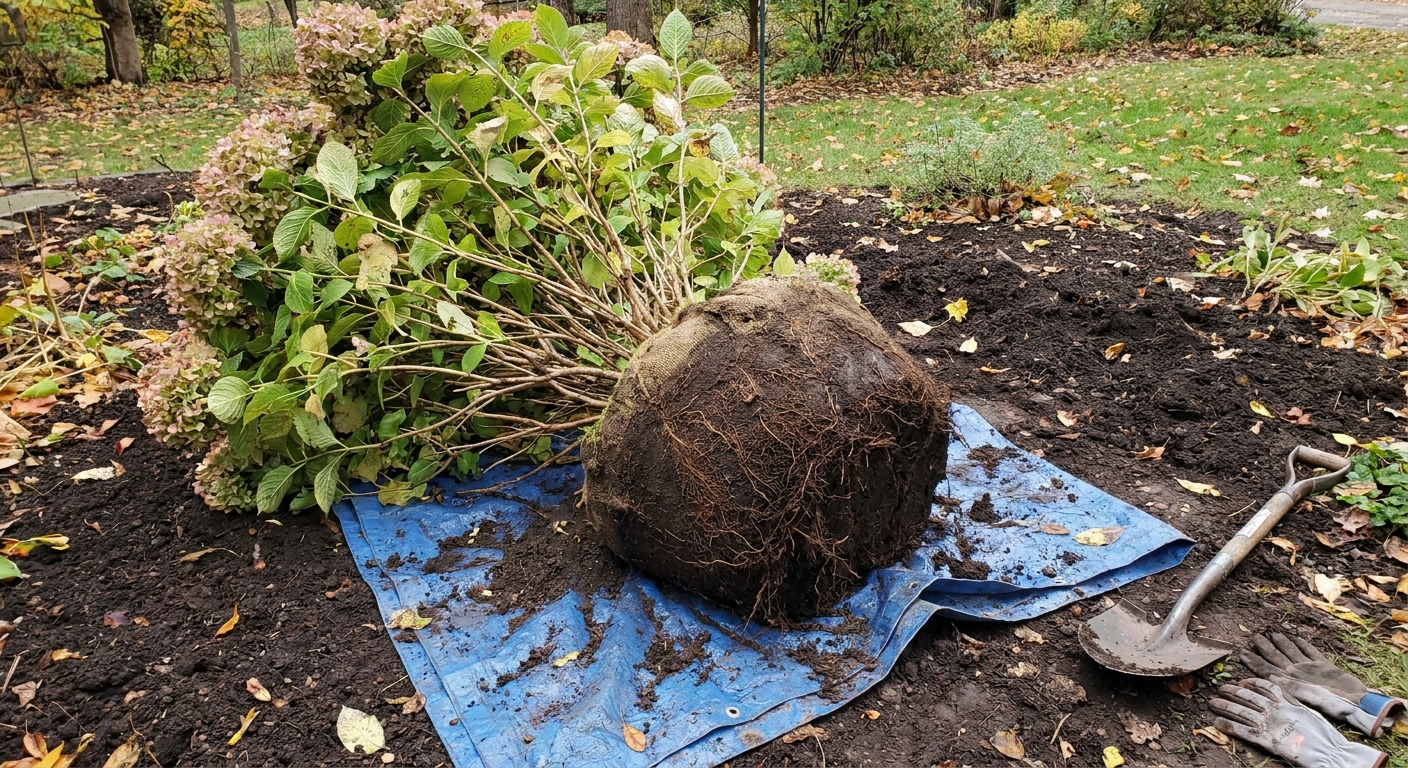
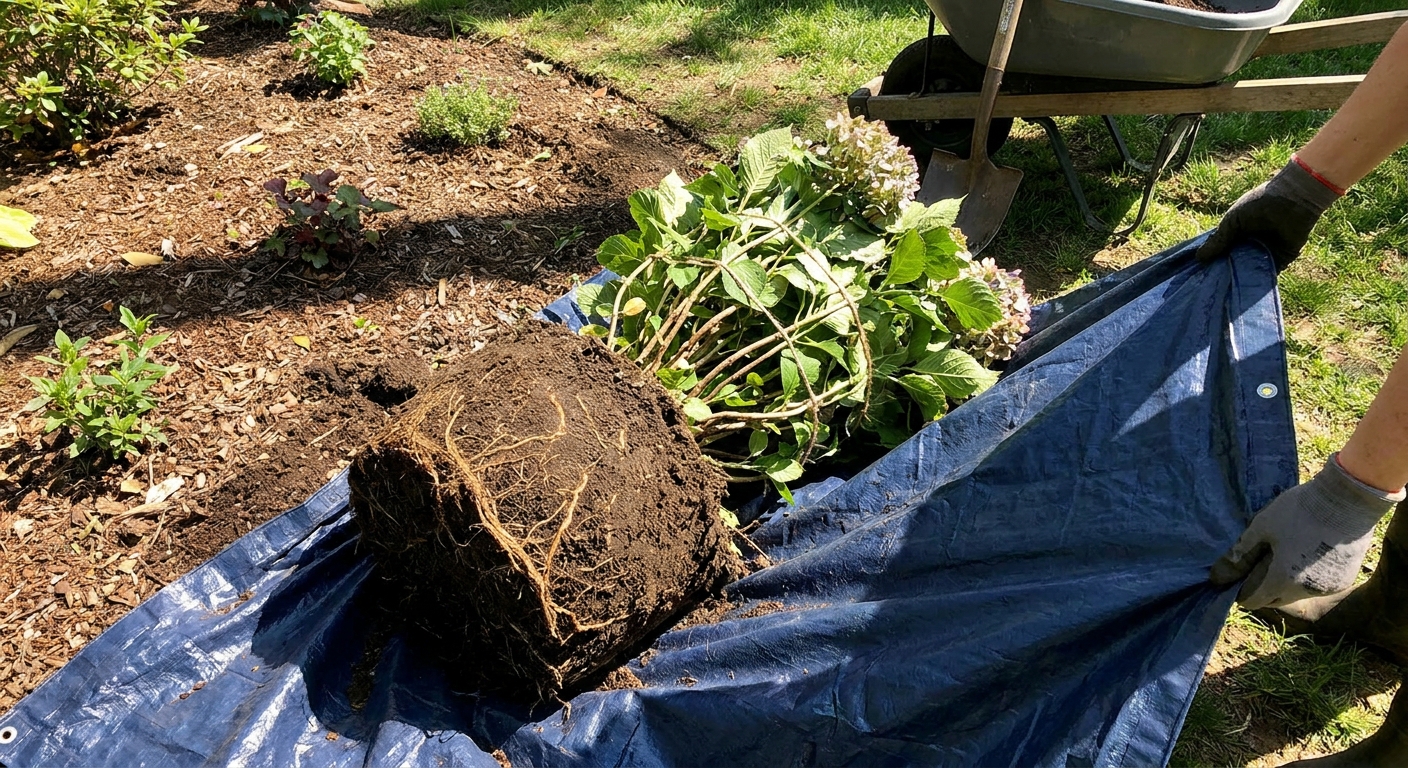
- Lift with support. Slide a tarp or burlap under the root ball and use it like a sling. This keeps the soil together and makes the carry smoother.
- Move immediately. If you must pause, keep the root ball shaded and covered, and do not let it dry out.
Replanting depth: the most common mistake
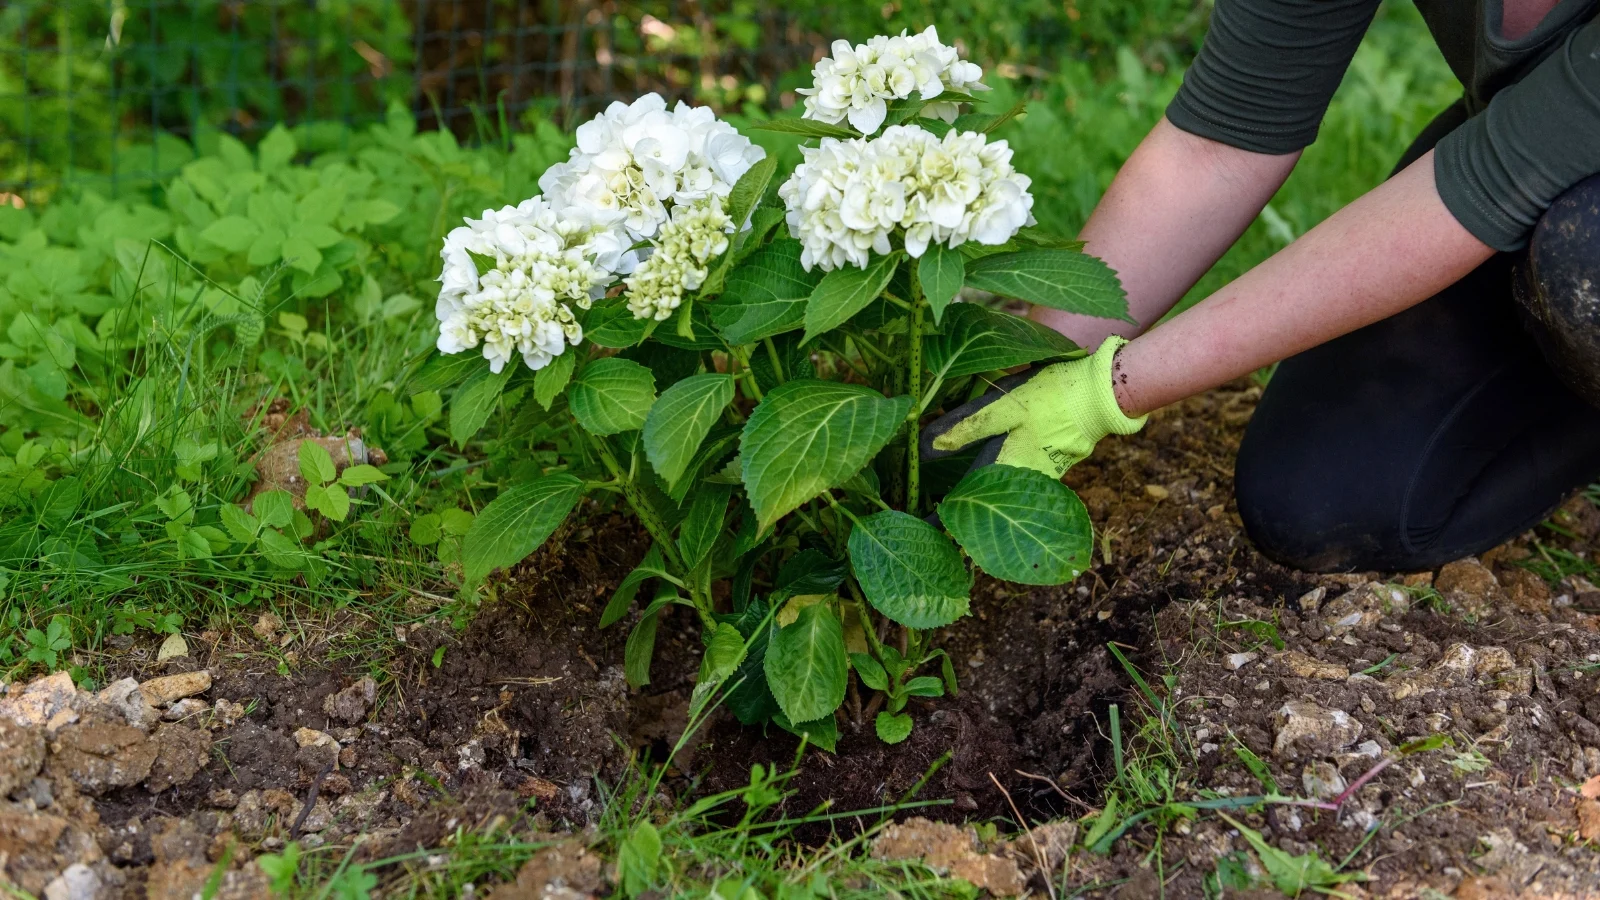
Hydrangeas strongly prefer being replanted at the same depth they were growing before.
- Find the soil line on the stems or crown. You will often see a faint change in bark color where soil used to sit.
- Set the plant slightly high if your soil is loose or tends to settle. You can always add a thin layer of compost and mulch later, but planting too deep can lead to poor growth and stress.
Backfill tip: Use the native soil you dug out, breaking up big clods. If your soil is extremely sandy or heavy clay, blend in a modest amount of finished compost to improve texture, but avoid creating a radically different “pot of nice soil” in the ground. Roots need to move outward into the surrounding soil.
Watering after transplant: how to get through the wilt
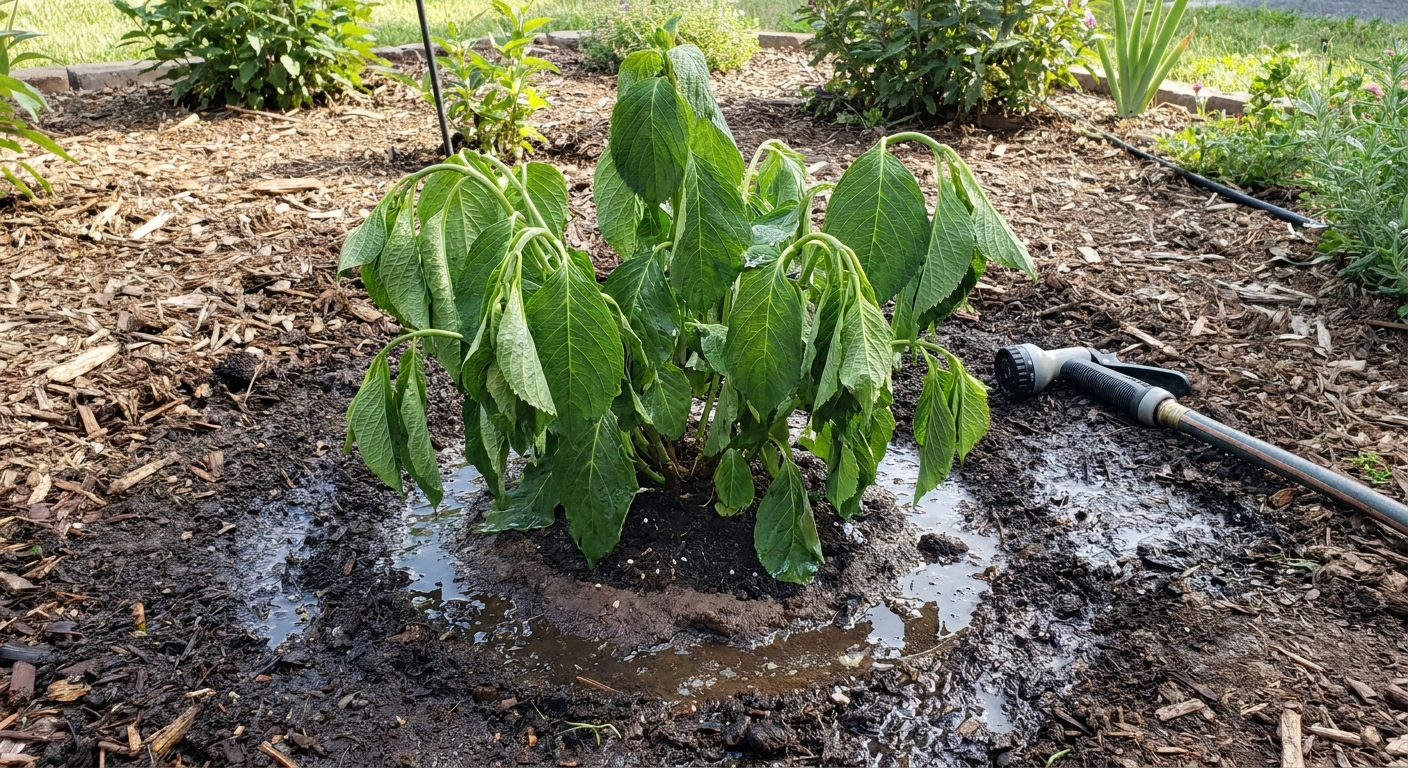
Even with perfect timing and a gorgeous root ball, many hydrangeas wilt after transplanting. That wilt is not a moral failing. It is just physics: leaves are still losing water while the disturbed root system is catching up.
Right after planting
- Soak slowly and deeply. Water until the root zone is thoroughly moist, pause, then water again. This settles air pockets.
- Mulch 2 to 3 inches deep. Use shredded bark, leaf mold, or composted leaves. Keep mulch a couple inches back from the stems to prevent rot.
The first 2 weeks (my recovery routine)
- Check moisture daily. Stick a finger 2 to 3 inches into the soil. If it feels barely damp or dry, water.
- Water deeply, not just a sip. A slow soak encourages roots to re-establish outward.
- Morning watering is best. It prepares the plant for the day and reduces nighttime sogginess.
If it wilts hard
Here is what actually helps when a transplanted hydrangea flops dramatically:
- Provide temporary shade. A patio umbrella, shade cloth, or even a bedsheet propped on stakes can reduce leaf water loss for a few days.
- Water the root zone, not the leaves. Leaf-spraying feels kind, but it does not rehydrate the plant effectively and can encourage leaf diseases if done late in the day.
- Do not fertilize to “perk it up.” Fertilizer pushes growth when the plant needs to focus on rebuilding roots, and salts can stress damaged root tips.
Most hydrangeas look worse before they look better. If the stems stay firm and you see improvement in the evenings or mornings, recovery is underway.
What bloom loss to expect next year
This is the part I wish more gardeners were told plainly: transplanting often reduces blooms the following season, even if the plant survives beautifully.
Why flowers can be fewer
- Root loss equals energy loss. The plant diverts resources into rebuilding roots rather than producing flowers.
- Bud timing varies by type. Some hydrangeas form flower buds earlier than others. If a plant is stressed during bud formation, it may set fewer buds.
A realistic expectation
- Next summer: Expect fewer blooms and possibly smaller flower heads, especially on bigleaf types. Some plants skip flowering entirely if the move was stressful or late.
- The following year: Many established hydrangeas are back to normal flowering once the root system re-establishes.
My gentle mindset shift: treat the next season as a “rooting year.” If you get flowers, they are a bonus. Your real goal is a hydrated, stable shrub that is ready to show off again.
Aftercare that makes the biggest difference
- Keep moisture consistent. Uneven watering is the fastest way to prolong transplant shock.
- Hold off on feeding. Wait until you see strong new growth, then use a light, balanced organic fertilizer if your soil is poor. In decent soil, compost top-dressing is often enough.
- Watch for leaf scorch. Crispy edges often mean sun and wind plus not enough water, not necessarily disease.
- Do not pile mulch against stems. This invites rot and rodents.
Troubleshooting transplant shock
Leaves are wilting every day, even after watering
- Check that water is actually soaking in. In very dry or compacted soil, water can run off. Water slowly in repeated rounds.
- Consider temporary shade for a week.
Leaves are yellowing
- Mild yellowing can be stress and may resolve as roots recover.
- If the soil stays constantly soggy, yellowing may be a drainage issue. Let the top inch dry slightly between deep waterings.
The plant looks fine, then suddenly crashes
- Look for a hot spell or wind event that increased water loss.
- Check mulch coverage and soil moisture under the mulch.
Quick answers
Can I transplant a hydrangea while it is blooming?
You can, but it is the hardest time for the plant. If you must move it in bloom, take the largest root ball you can manage, transplant on a cool day, add temporary shade, and be extremely consistent with watering. Expect the flowers to fade faster and next year’s bloom to be reduced.
Should I amend the hole with lots of compost?
A little compost to improve texture is fine, especially in very poor soil. But keep the backfill mostly native soil so roots do not stall at the edge of an overly rich pocket.
How long does transplant shock last for hydrangeas?
Visible wilting often improves within 1 to 3 weeks with good watering and mild weather. Full recovery, meaning the plant is growing and blooming like normal, can take one full season or longer for very large shrubs.
Will it bloom next year?
Sometimes yes, sometimes not much, sometimes not at all. The most honest answer is: plan for fewer blooms next season, especially if the shrub is large or the move happened outside the dormant window.