
Rose Cane Borers: Holes and Sawdust in the Canes


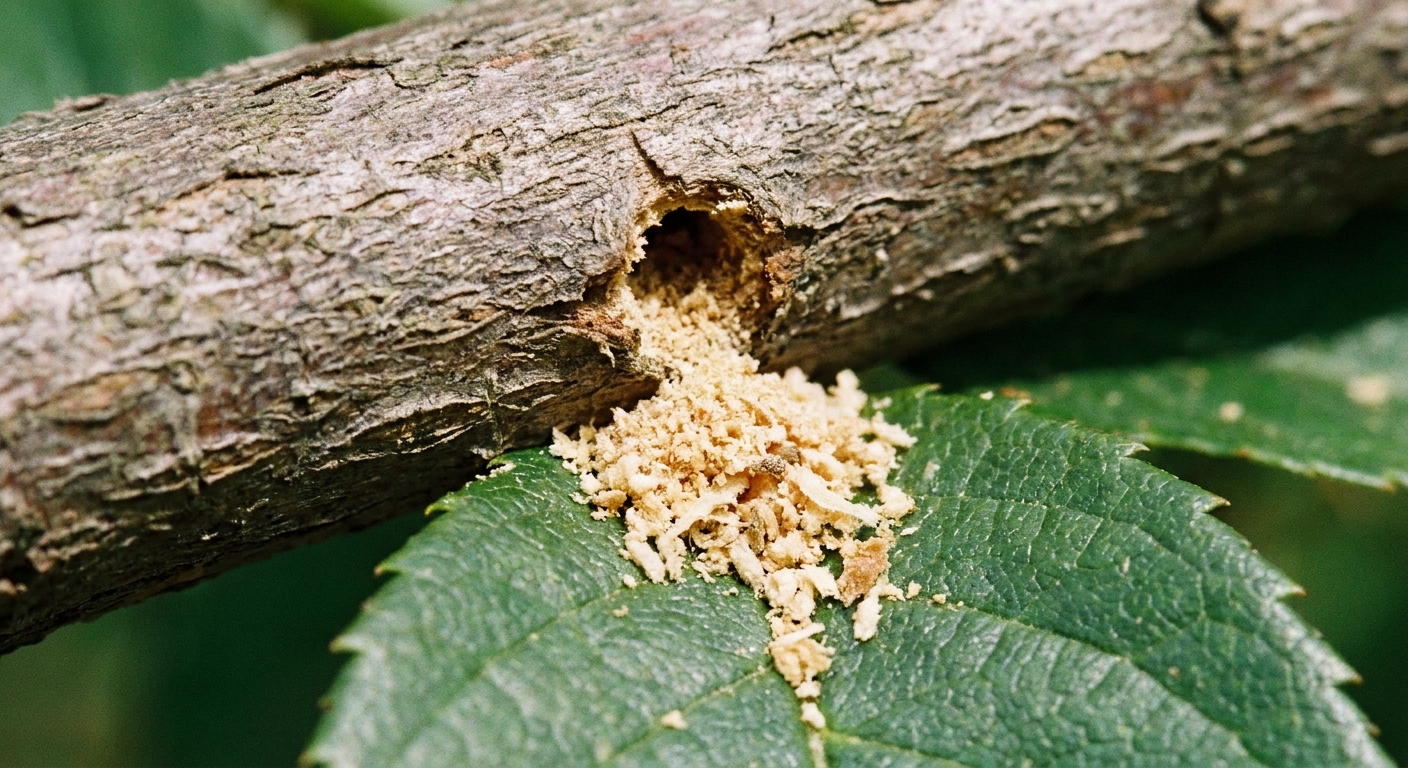
The first time I saw pale, talc-like dust sprinkled on a rose cane, I assumed it was just dirt kicked up by watering. Then I noticed the tiny hole above it, like a pinprick someone had made with a needle. When I snipped the cane, the center was hollowed out like a straw.
That combo of holes plus sawdust-like pith dust is one of the strongest clues of what gardeners lump together as rose cane borers. It is not always one single pest species, but the damage pattern and the fix are usually the same. The good news is you can often turn things around with a careful cut back to healthy wood, plus a little attention to timing so you are not leaving fresh cuts open during peak borer activity.

What damage looks like
Cane borers are insects whose larvae tunnel into the soft center (the pith) of rose canes. You rarely see the culprit at first. You see the clues they leave behind.
Common signs
- A small round hole on the cane, often near the top of a pruned stem or just below a spent bloom.
- Pith dust and frass that looks like fine sawdust, flour, or light tan shavings collecting around the hole or on lower leaves.
- Tip dieback, where the top portion of a cane wilts, browns, or fails to leaf out while the rest of the plant looks mostly normal.
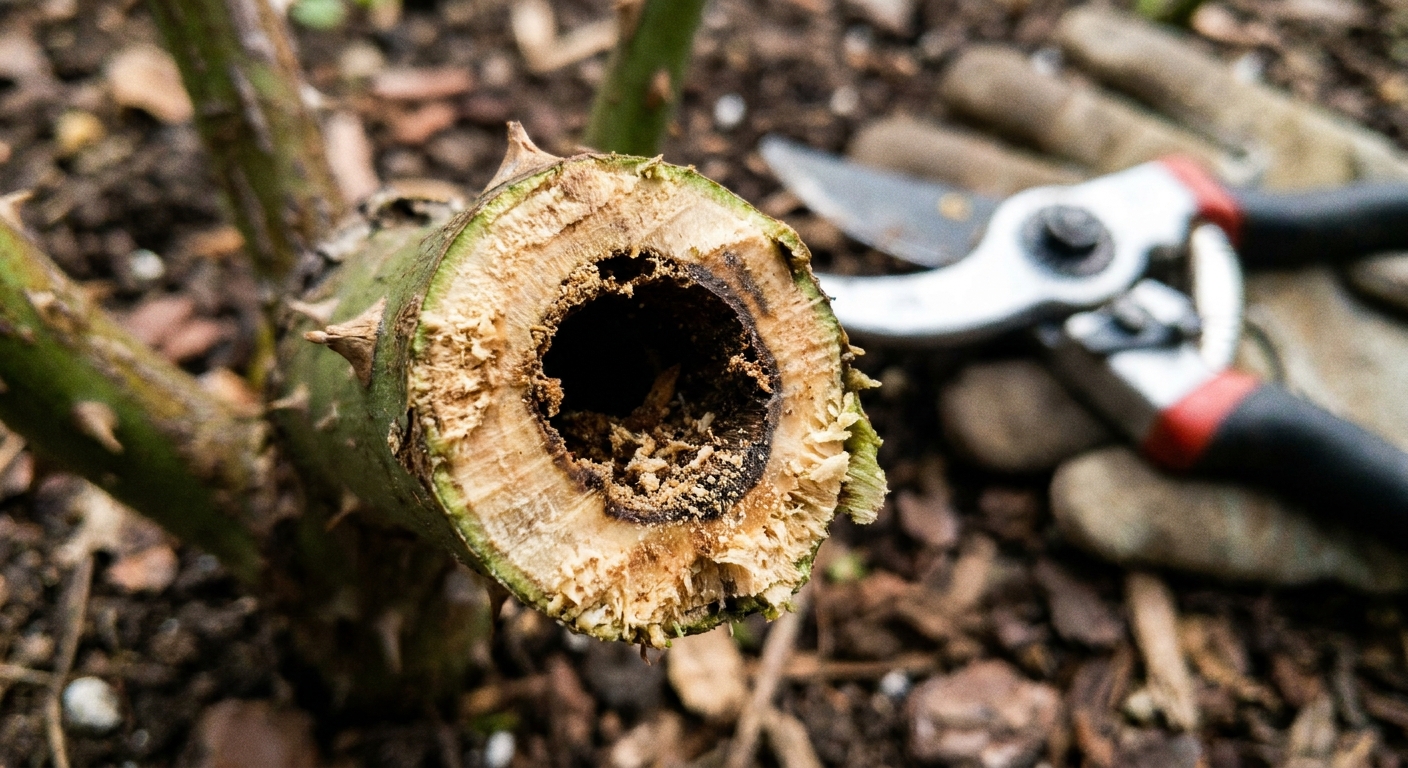
- Hollow canes when you cut, sometimes with brown, crumbly pith inside.
- Weak, snapping stems because tunneling compromises the cane’s structure.
If you are unsure, do a simple check: gently bend the suspected cane. A tunneled cane can sometimes feel oddly light or papery compared to a solid, healthy one.
How to confirm it
Older rose canes can have darker centers, especially toward the base. That is not automatically borer damage. Borers are more likely when you see a distinct entry hole and crumbly dust, plus dieback above the point of entry.
Quick confirmation steps
- Follow the dieback down. Start at the dead tip and look for a hole, discoloration, or a weak spot.
- Make a test cut. Snip 1 to 2 inches below the suspected area. If the center is hollow or brown and dry, keep going downward.
- Stop when the pith is clean. Healthy pith is typically pale and firm. The cut surface should look moist and solid, not crumbly or tunneled.
If the cane looks fine inside but the plant is struggling overall, you may be dealing with a different stressor like drought, root issues, or a disease affecting leaves rather than canes.
Fix it: cut to healthy wood
With cane borers, the most reliable low-tox fix is simple: remove the tunnel.
Step-by-step
- Sanitize your pruners. A quick wipe with isopropyl alcohol (70 percent) is easy and helps avoid spreading disease as you work.
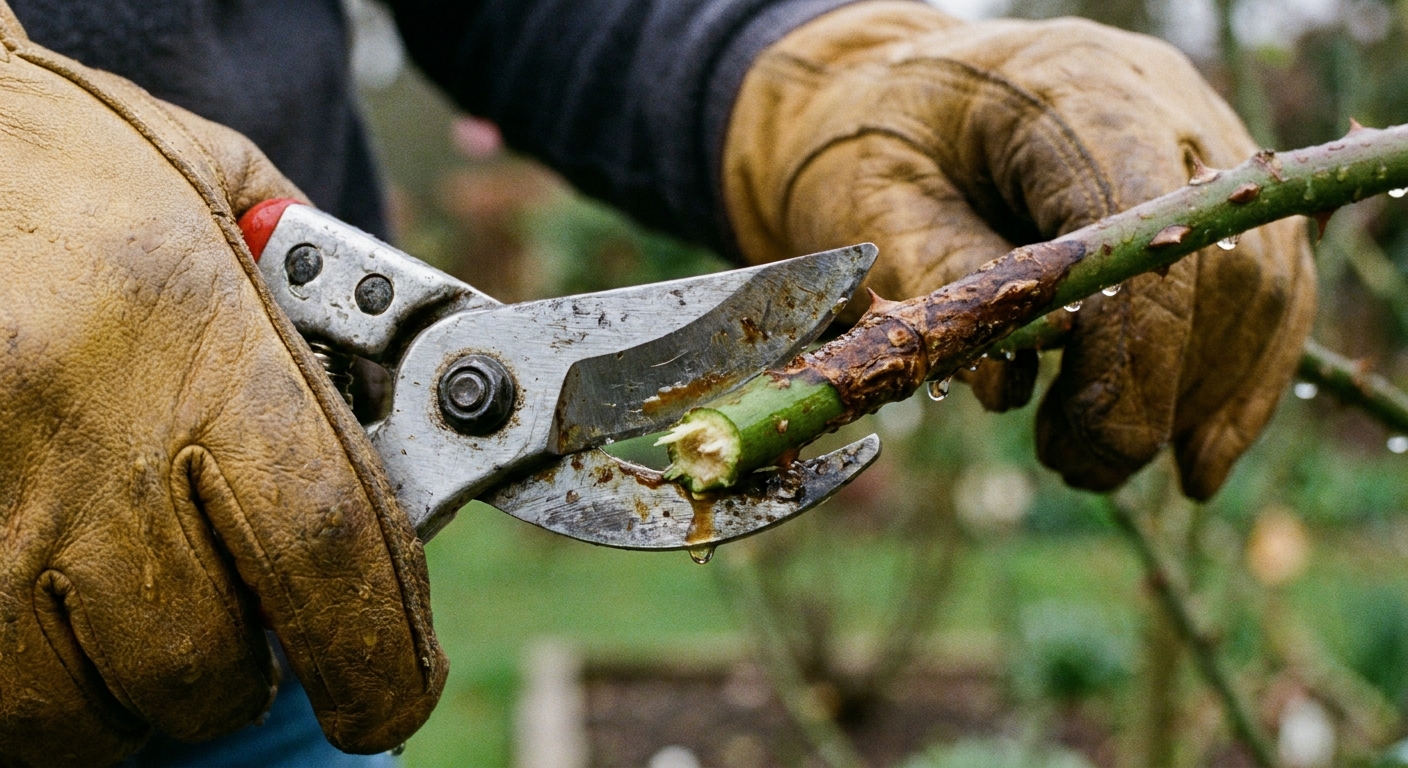
- Prune below the damage. Cut the cane back in small increments until you see solid, pale pith with no tunneling or browning.
- Make a clean cut. Use sharp pruners for a smooth cut that the plant can seal more easily.
- Remove the cane piece from the garden. Do not compost borer-infested canes unless your compost gets reliably hot. When in doubt, bag and trash.
If the borer damage is on a main structural cane and you have to cut very low, do not panic. Roses are tough. A healthy plant will usually push new basal shoots when conditions are good.
One more practical rule: if a cane is badly weakened, repeatedly dies back, or the tunnel seems to run a long way down, it is often better to remove the whole cane at the base rather than playing whack-a-mole at the tips.
Timing: protect fresh cuts
Cane borers often take advantage of freshly cut or broken stems. That is why gardeners sometimes notice problems after deadheading or pruning. Your goal is not to never prune. It is to reduce how long fresh cuts stay exposed during periods when borers are active in your area.
Practical timing tips
- Do major pruning when plants are dormant in late winter or early spring, when many borer species are often less active in many climates.
- During the growing season, deadhead with intention. If you notice recurring borer issues in your garden, avoid lots of tiny snips that leave many fresh ends. Fewer, more purposeful cuts can be easier to monitor.
- After storms, inspect broken tips quickly. Jagged breaks are invitations. Make a clean cut below the break as soon as you can.
Local weather drives insect timing, so use your own garden as the guide: if you have seen fresh pith dust recently, treat that as a high-alert window and keep cuts to a minimum until you are back in the clear.
Prevent borers (low-tox)
You cannot bubble-wrap a rose bush. But you can make your garden less appealing to borers and reduce repeat problems.
Smart prevention habits
- Prune cleanly. Smooth cuts heal better than crushed ones.
- Remove and dispose of infested canes. This is the biggest one. Leaving tunneled pieces nearby can allow larvae to continue developing.
- Do not leave dead wood lying around. Clean up dead canes and stem piles near the bed, since some boring insects can continue their life cycle in cut stems.
- Keep roses vigorous. Healthy plants tolerate damage better. Focus on soil health, consistent watering, and avoiding over-fertilizing with quick nitrogen that makes soft, tender growth.
- Encourage beneficial insects. Diverse plantings and blooms nearby help predators and parasitoids that keep pest populations in check.
Should you seal pruning cuts?
You will hear conflicting advice about sealing cut ends with glue or pruning sealer to block borers. Some gardeners swear by it, especially on large cuts. Others avoid it because sealers can trap moisture or interfere with natural healing, and some extension offices discourage routine sealing.
My practical take: if you have repeated borer issues and you are making a fresh cut during a period of known activity, sealing just the tip can be a reasonable, targeted step. Follow local guidance if you have it. Just do not use sealing as a substitute for cutting out existing tunnels. Once a larva is inside, sealing the outside does not solve the problem.
Lookalikes
When you are staring at a struggling rose, it is easy to lump every problem into one basket. Here is how cane borers differ from other common rose troubles.
Black spot
- Main symptoms: black, roundish spots with fringed edges on leaves, yellowing, leaf drop.
- Key difference: black spot is primarily a leaf disease, not a hole-and-sawdust cane issue.
Rose rust
- Main symptoms: orange or rusty pustules on leaf undersides, yellow spotting on tops.
- Key difference: rust shows orange spores on leaves, not hollow pith inside canes.
Rose slugs (sawfly larvae)
- Main symptoms: “windowpane” damage where leaf tissue is scraped, skeletonized leaves.
- Key difference: slugs feed on leaf surfaces. They do not drill into canes.
Rose rosette disease
- Main symptoms: distorted growth, excessive thorniness, witches’ broom clusters, abnormal red growth that does not mature normally.
- Key difference: rosette changes the shape and pattern of growth across the plant. Cane borers typically cause localized dieback above a hole.
If you have leaf symptoms plus cane dieback, you may be dealing with two issues at once. Roses are overachievers like that, unfortunately.
Hollow cane, no hole
Sometimes you cut and discover a hollow center without spotting the original entry point. That can happen if the hole is tiny, weathered over, or higher up on a portion that already broke off.
What to do
- Keep cutting downward in small steps until the pith is solid and pale.
- If multiple canes are affected, thin the plant a bit. Better airflow makes everything easier to manage, including diseases that can compound stress.
- Watch new growth closely. The goal is to catch any new dieback early so you remove tunnels before they extend far down.
FAQ
Will cane borers kill my rose?
They can kill individual canes, and severe infestations can set a rose back hard. Most established roses survive if you remove damaged canes promptly and keep the plant otherwise healthy.
Do I need insecticide?
Usually, no. Because larvae are protected inside the cane, sprays often miss the target. Pruning out the tunnel is the most effective approach for home gardens.
Should I cut below a node or at an angle?
For borer removal, priority number one is getting below the damaged pith. Once you have found healthy tissue, make a clean cut. If you can reasonably choose, cut just above an outward-facing bud to guide regrowth, but do not leave damaged pith just to satisfy a perfect pruning rule.
What do I do with the cuttings?
Bag and dispose of infested pieces, especially if you see hollow pith or dust. Leaving them in the bed or tossing them into a cool compost pile can allow pests to continue their life cycle.
A gentle final note
If you are feeling annoyed, I get it. Cane borer damage feels personal, like the rose was fine yesterday and suddenly it is wearing tiny bite marks.
But this is one of those rose problems where a calm, methodical response works beautifully. Find the hole, follow the tunnel down, cut to clean pith, and keep your future cuts a little less exposed when borers are active. Your rose will do what roses do best: push fresh growth and try again.