Pruning Tool Care: Clean, Sharpen, Sanitize
If you have ever pruned a rose that looked a little suspicious and then moved straight to your healthiest shrub, you have met the sneaky side of gardening. A quick snip can also be a quick transfer of spores, bacteria, or plant viruses. The good news is that tool hygiene is one of those rare gardening habits that is both simple and wildly powerful.
Below is my dirt-under-the-fingernails routine for cleaning, sharpening, and sanitizing pruners, loppers, and saws, with extra attention to slowing problems like rose black spot and mechanical virus spread. Once you do it a few times, it becomes as automatic as washing your hands after potting up seedlings.

Why sanitation matters
Most of the time, a little sap on your blades is just messy. But when disease is present, tools can become a vehicle for trouble.
- Rose black spot is primarily spread by water splashing spores from infected leaves. Tool spread is less common, but tools can still move infected debris and spores plant to plant if you are cutting through diseased growth and not cleaning up between stops.
- Cankers, blights, and bacterial issues can hitch a ride on blades, especially when you make fresh cuts and then immediately cut a healthy plant.
- Plant viruses are the big reason I am picky. Many viruses spread mechanically through sap. If you prune an infected plant and then prune a healthy one, you can transfer virus particles with that sticky residue.
Think of sanitizing as gardening kindness. You are not just protecting your favorite rose. You are protecting everything you will prune after it.
Your quick kit
- Stiff brush or old toothbrush
- Rag or paper towels
- Warm water plus a drop of dish soap
- Rubbing alcohol (70% is ideal) in a spray bottle or wipes
- Bleach (only when needed, and used correctly)
- Sharpening tool: bypass pruner file or fine diamond file, plus a flat file for nicks
- Light lubricant: camellia oil, mineral oil, or a tool oil
- Protective gloves and eye protection for sharpening and disinfecting
Optional but wonderful: a small tray or magnetic parts dish for screws, springs, and bolts.
Also worth knowing: there are commercial disinfectants and hydrogen peroxide based products labeled for garden tool sanitation. I stick with alcohol for everyday speed and bleach as an occasional heavy hitter because both are easy to find. If you are dealing with a specific outbreak, your local extension guidance and product labels are your best north star.
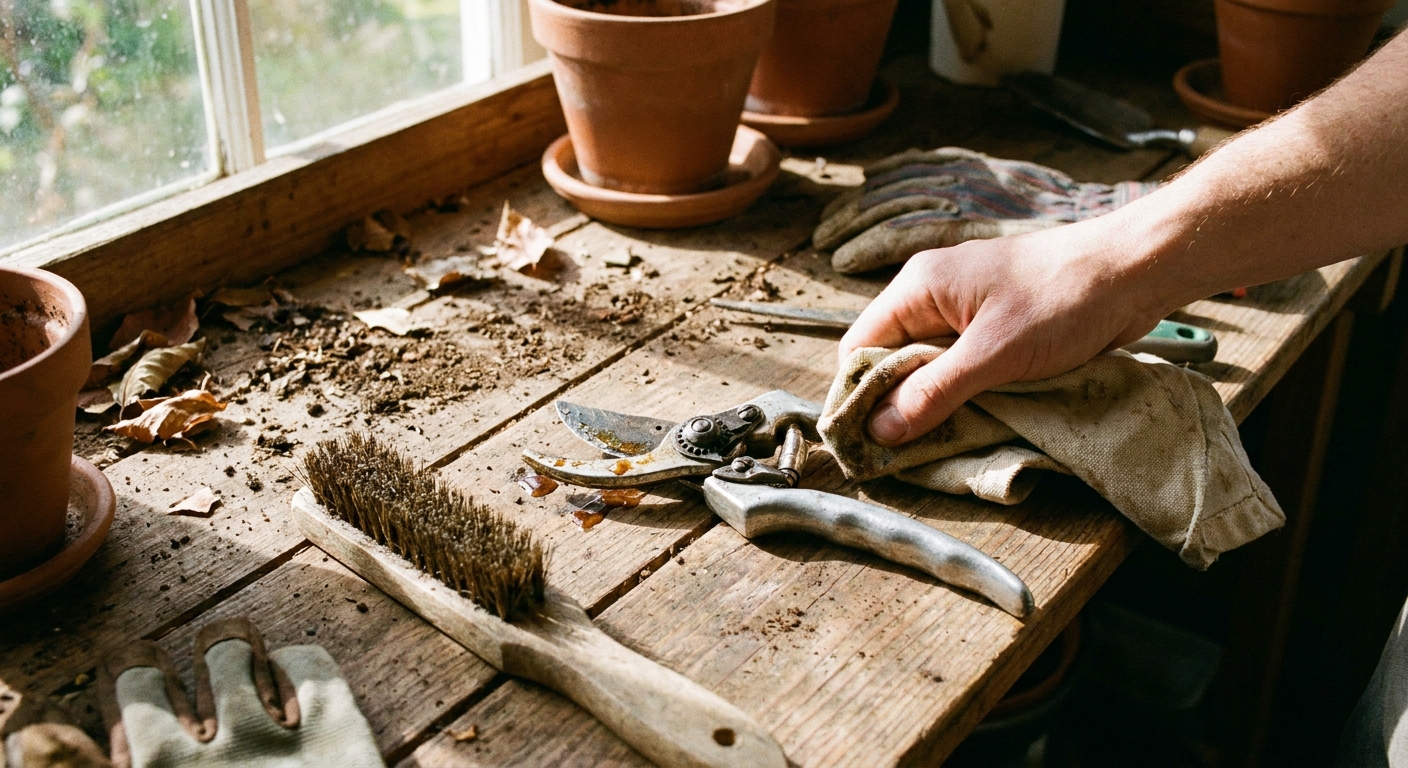
Step 1: Clean first
Sanitizer works best on a clean surface. If there is sap, dirt, or plant gunk on the blade, disinfectant may not contact the metal evenly.
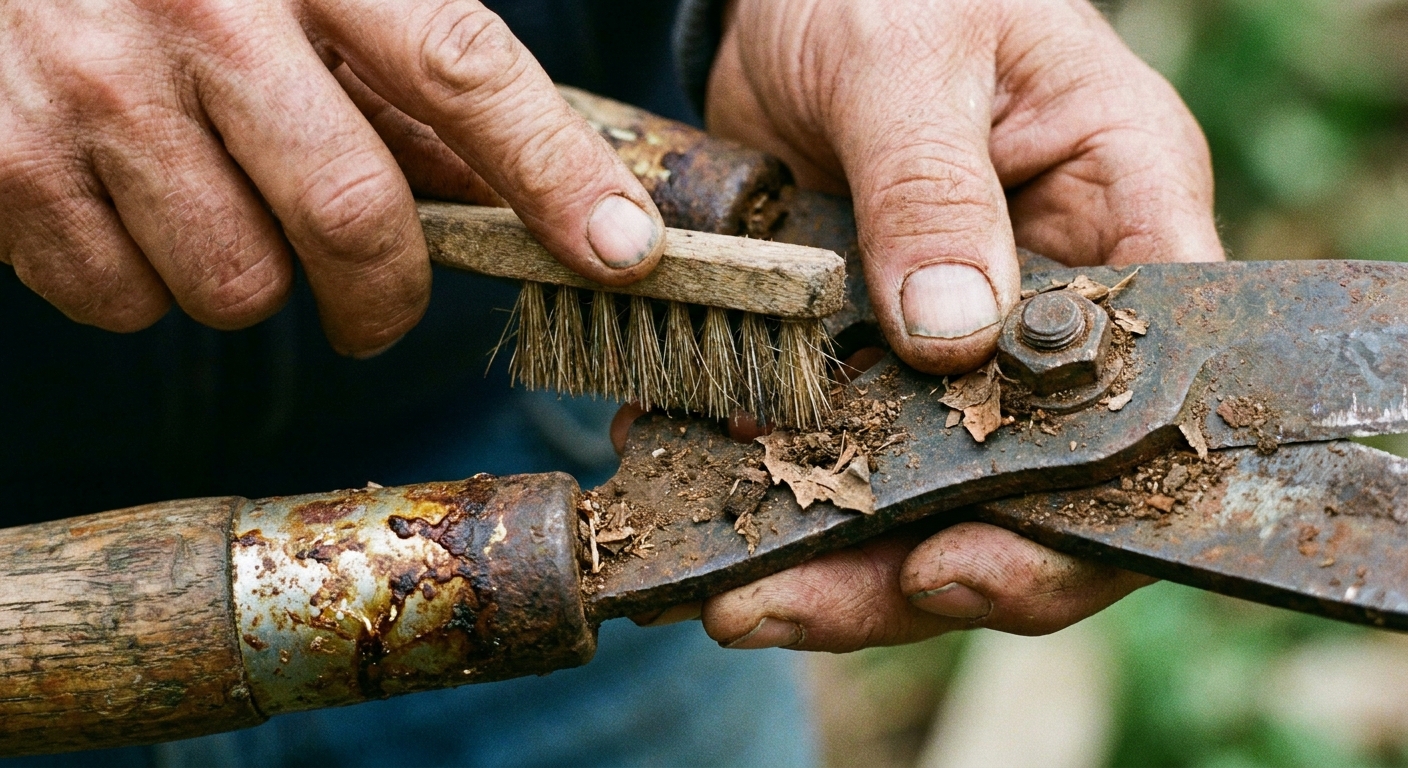
For pruners and loppers
- Brush off debris with a dry brush. Get into the pivot area where bits like to hide.
- Wash with warm soapy water and a rag. Wipe the blades and handles.
- Remove sap if needed. Rubbing alcohol works well on sap. For really stubborn resin, a tiny amount of mineral spirits can help, then wash again.
- Dry completely. Rust starts faster than you think, especially around the pivot.
For pruning saws
- Brush out saw teeth with a stiff brush.
- Wipe with soapy water and a rag, then rinse lightly.
- Dry thoroughly and pay attention to the tooth line and any folding hinge.
If your saw has a wooden handle or a finicky hinge, avoid soaking it. Wipe and sanitize like you would a good kitchen knife: wet, not dunked.
Step 2: Disassemble (sometimes)
You do not have to take tools apart every time you prune. But occasional disassembly helps you clean, sharpen, and lubricate properly, especially if your pruners feel gritty or stiff.
Simple disassembly basics
- Take a quick photo of the pivot area before removing anything. It is the easiest reassembly insurance.
- Loosen the pivot bolt and remove the nut/bolt carefully.
- Lift out the spring and note how it sits.
- Separate the blade and hook/anvil and clean every contact point.
If your tool has a warranty or specialty parts, follow the manufacturer instructions. Some models are designed to be serviced, others are less friendly.
Step 3: Sanitize between plants
This is the habit that prevents the most heartbreak. The goal is not just clean-looking blades. The goal is reducing disease transfer from plant to plant.
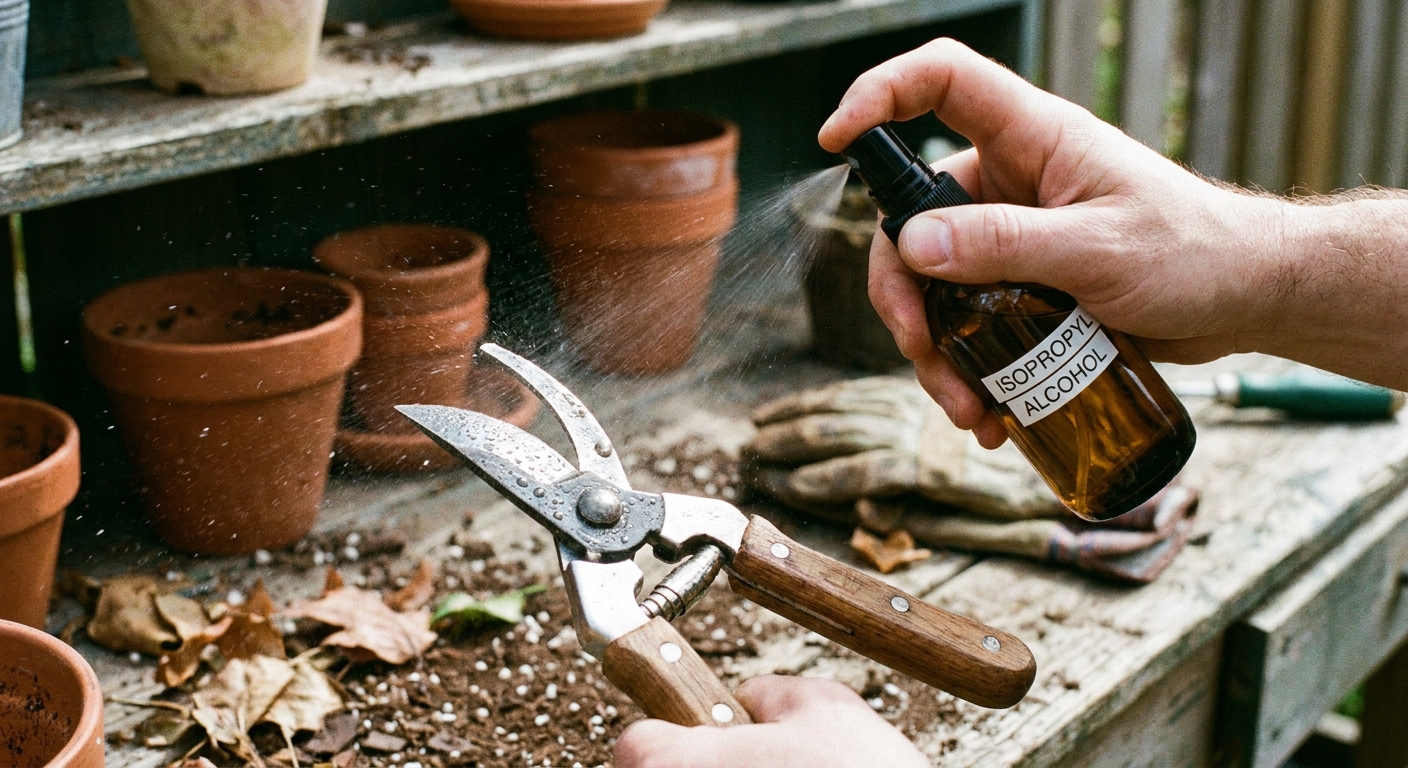
Everyday pruning: alcohol is my go-to
Use 70% isopropyl alcohol (rubbing alcohol) in a spray bottle.
- Spray both sides of the blades until visibly wet.
- Let it sit wet for about 30 seconds, then move on. Air-dry is fine.
- No rinse needed.
Alcohol is fast, easy, and less corrosive than bleach. It is also widely recommended for routine sanitation, including many situations where viruses are a concern. (For specific viruses, always follow local extension guidance.)
Safety note: isopropyl alcohol is flammable. Keep it away from open flames, cigarettes, and sparks, especially in sheds or garages.
When to escalate
My rule of thumb is simple: alcohol for routine plant-to-plant sanitation. I consider a stronger approach when I am cutting out clearly diseased tissue, dealing with a known serious pathogen in the garden, or following specific extension recommendations for a particular disease.
Bleach protocol (use carefully)
Bleach is effective, but it is harsher on metal and can damage clothing and skin. Recommendations vary by pathogen and product label, but this is a common garden tool protocol when a stronger disinfectant is warranted.
- Mix fresh solution: 1 part household bleach to 9 parts water (a 10% solution). Some guidance uses lower concentrations with longer contact times. Follow label and extension recommendations when available.
- Contact time: keep the blade wet for at least 1 minute.
- Rinse and dry: rinse with clean water, then dry fully.
- Oil afterward: apply a light coat of oil to prevent corrosion.
Important: Never mix bleach with vinegar, ammonia, or other cleaners. Use in a well-ventilated area.
One more practical tip: avoid dipping tools into a shared bucket of disinfectant if debris is present. It is an easy way to contaminate your solution. Spraying or using fresh wipes stays cleaner, and if you do use a container, change the solution often.
Step 4: Sharpen
A sharp blade makes a cleaner cut with less crushing and tearing. That is easier on the plant and makes pruning feel like a pleasure instead of a wrestling match. If your pruners are chewing instead of slicing, it is sharpening time.
Know your tool type
- Bypass pruners and loppers: two blades pass each other like scissors. These are best for live stems.
- Anvil pruners: a single blade closes onto a flat anvil. These can crush live stems and are better for dead wood.
- Pruning saws: most modern pruning saws have impulse-hardened teeth and are not meant to be filed. Many are replaceable instead.
Sharpening angle
Match the existing bevel. Many bypass pruners fall in the 20 to 30 degree range, but it varies by brand and model. If you keep your file aligned with the factory bevel, you will be in the right neighborhood.
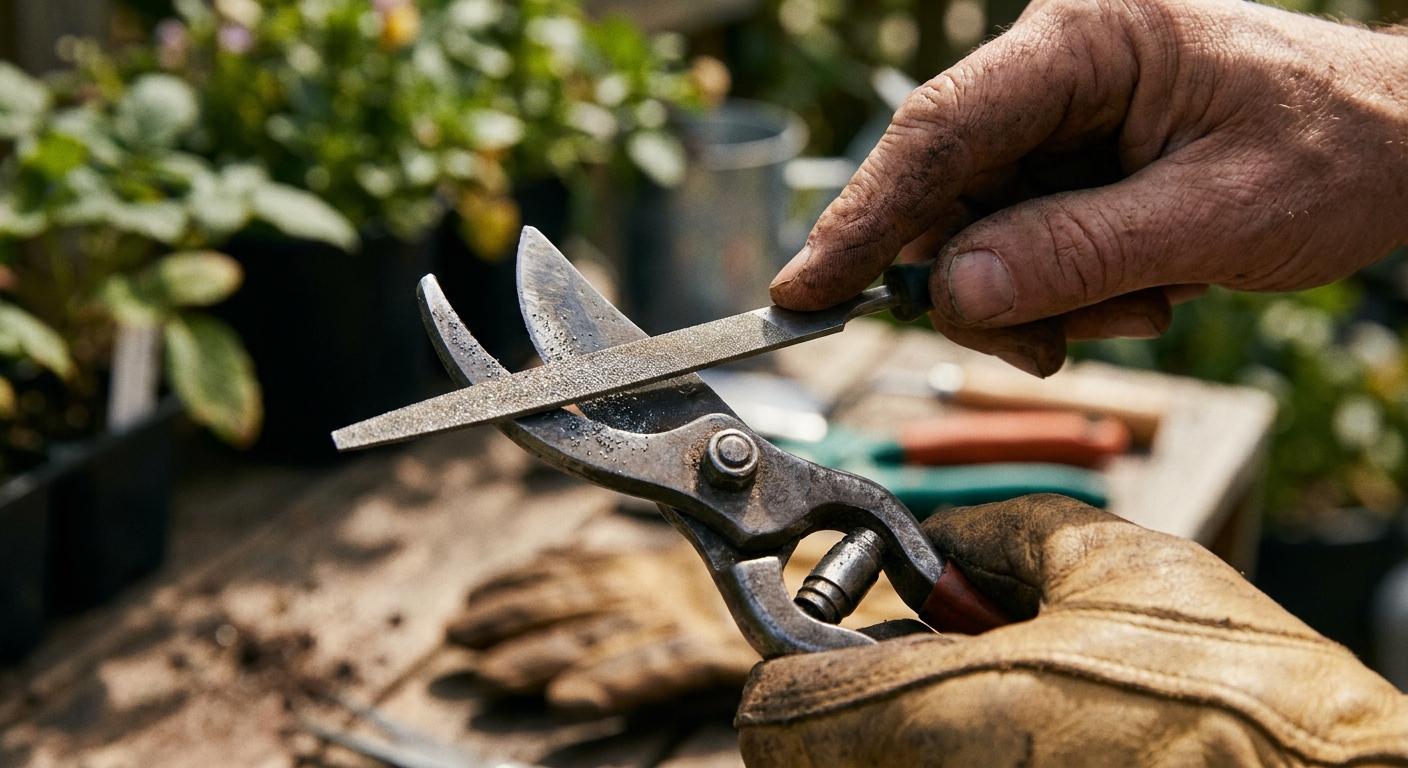
How to sharpen bypass pruners and loppers
- Clean and dry the blade first.
- Hold the blade steady. If possible, remove the blade or open the tool wide and brace it on a bench.
- File the beveled edge only using a diamond file or pruner file. Push strokes in one direction, following the bevel.
- Use light, consistent pressure and count your strokes to keep things even.
- Remove the burr by making one or two very light passes on the flat side, or by gently wiping the burr off with the file held nearly flat.
- Test the cut on a twig. You want a crisp slice, not a tear.
What about nicks?
If you hit a wire fence or cut something you should not have, a flat file can smooth out small nicks before you finish with a fine file. Deep blade damage is a replacement moment, especially on high-quality tools where replacement blades are available.
Step 5: Lubricate and tune
Clean and sharp is great. Clean, sharp, and smoothly moving is even better. Lubrication prevents rust, reduces hand fatigue, and helps tools close fully. It is also one of those two-minute tasks that makes your tools feel strangely expensive again.
Where to oil
- Pivot bolt and moving joint
- Spring (lightly)
- Blade surface (a very thin coat)
Wipe off excess oil. You want a protective sheen, not a slippery mess that attracts grit.
Quick tension check
On bypass pruners, pivot tension matters. Too tight and your hand will complain. Too loose and the blade can wobble and tear. Adjust until the tool moves smoothly but feels stable.
Storage
How you store tools is half the battle. I like tools that are ready to grab, not tools that need a rescue mission.
- Store dry. Never put away tools wet from washing or rain.
- Hang them up or keep them in a dry tote so blades are protected and you are not hunting in the bottom of a bucket.
- Light oil before winter if you live in a damp climate.
- Keep sanitizing supplies nearby, especially during rose season.
Rose black spot: extra hygiene tips
Black spot control is a whole-garden routine, not just a tool routine. But tools still matter, especially when you are pruning out infected growth and moving plant to plant.
- Prune on a dry day if possible. Wet leaves spread spores more easily.
- Sanitize after cutting infected canes and before moving to the next rose.
- Collect and discard infected leaves. Do not leave them under the plant.
- Avoid composting infected rose foliage unless your compost pile reliably heats up.
If black spot returns every year, consider spacing, airflow, and targeted sprays. But start with sanitation, because it is the foundation.
Fast routine
When you are outside with gloves on and a plant begging for a haircut, you need a simple plan.
- Between healthy plants: spray with 70% alcohol and let it sit wet for about 30 seconds.
- After cutting diseased tissue: remove debris, then spray with alcohol and let it sit. Escalate to your bleach protocol when warranted by the situation or local guidance.
- If blades get sticky: quick alcohol wipe for sap, then spray again to sanitize.
I keep a small alcohol spray in my apron pocket. It is the closest thing I have to a gardening superpower.
Troubleshooting
My pruners are sticking
- Clean the pivot area thoroughly.
- Disassemble and remove grit.
- Oil the pivot and spring.
My cuts look crushed
- Sharpen the blade and check pivot tension.
- Make sure you are using bypass pruners for live stems.
- Do not twist while cutting. Let the blades do the work.
Rust spots keep appearing
- Dry tools fully after washing.
- Oil lightly before storing.
- Store in a low-humidity spot, not on damp concrete.
A gentle reminder
If tool care has felt like an extra chore you will do someday, pick just one habit to start: sanitize between plants. You can sharpen on the weekend. You can deep-clean when the rain comes. But a 30-second spray today can prevent weeks of disease frustration tomorrow.
Your roses and shrubs will not just look better. They will handle pruning better. And you will feel that quiet, steady confidence gardeners grow into, one clean cut at a time.