
Iris Borers: Notched Fans, Frass, and Rhizome Damage

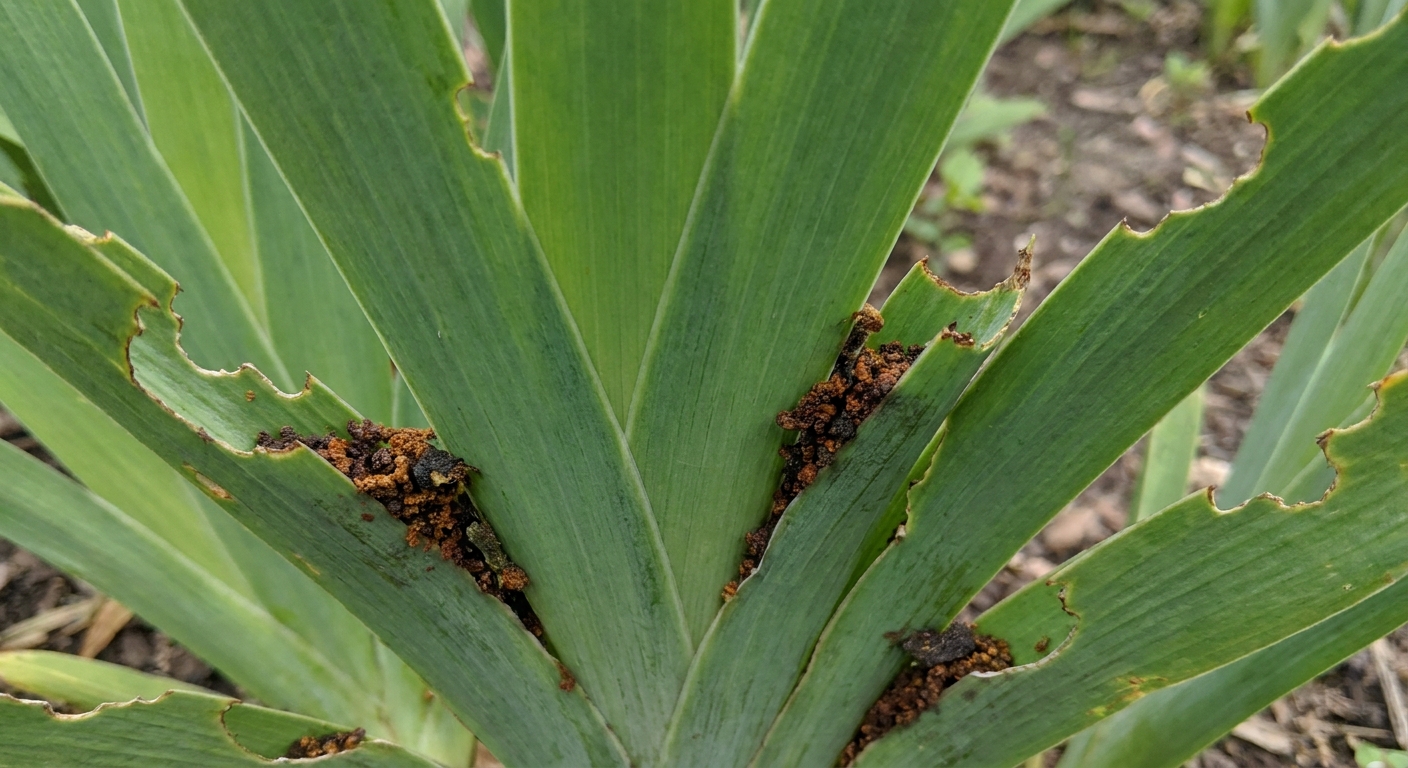
The first time I met an iris borer, I did what any optimistic gardener does. I assumed my bearded iris was being dramatic. A fan looked “creased” and a little chewed, so I watered, fussed, whispered encouragement. Then I tugged on a leaf and it slid out with that awful, soft resistance that tells you something is hollow underneath.
If your iris fans are notched like pinking shears got at them, or you are seeing rusty-brown crumbs tucked in the leaf folds, you are not dealing with normal wear and tear. You are likely hosting iris borer larvae mining their way down into the rhizome. The good news is you can stop the cycle, especially when you are already digging and dividing.

What iris borer damage looks like up top
Iris borers start their mischief in the leaves. The earliest signs are subtle, and they are easy to blame on wind, hail, or a hungry rabbit. Here is what actually points to borers.
Notched fans
Look for small, repeated bites or notches along the edges of the newest leaves, often near the base of the fan. As the larva feeds inside the leaf tissue, the damaged area can look shredded or “stitched.”
Water-soaked streaks and collapse
As larvae tunnel downward, leaves may show pale, wet-looking streaks, then yellowing, then a sudden flop. The fan can loosen at the base and feel unstable, like it is no longer anchored to anything firm.
Frass: the clue most people miss
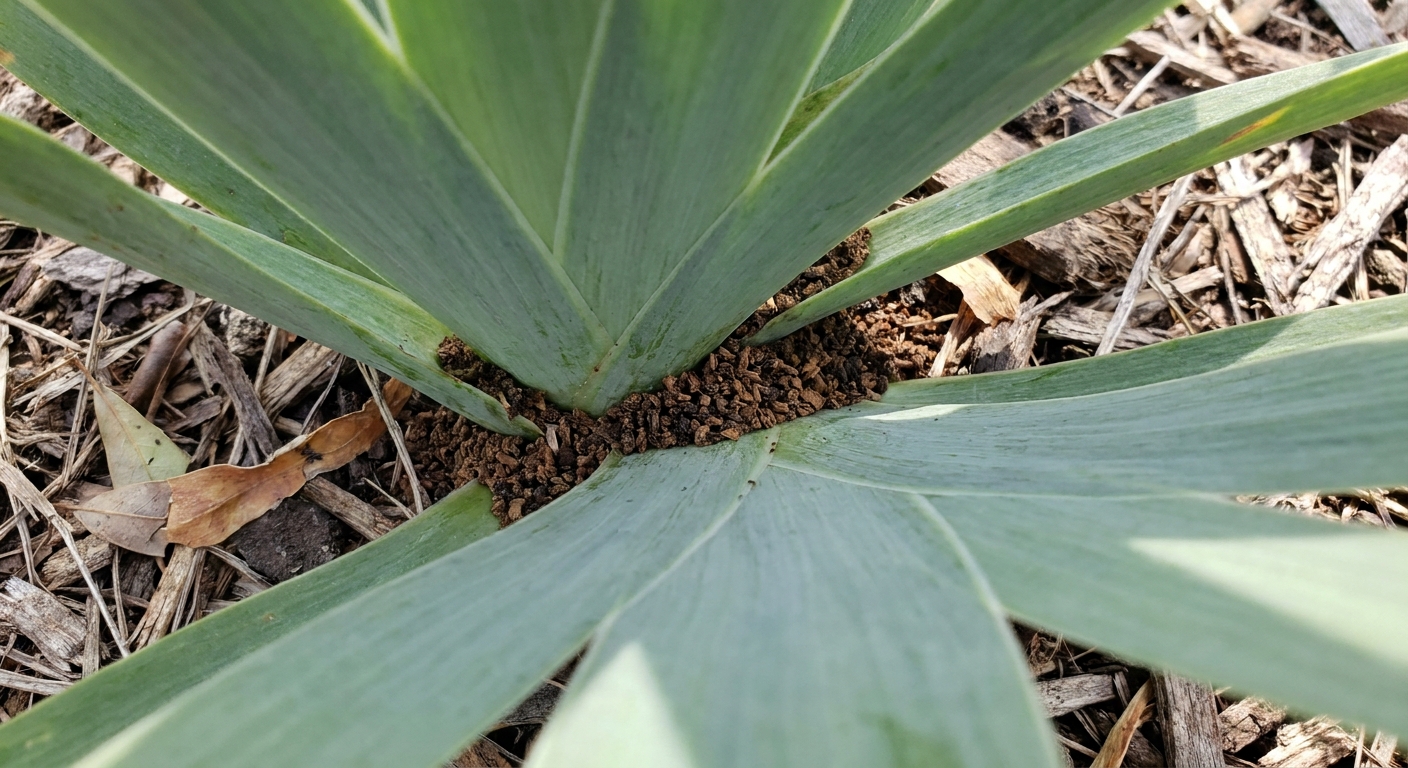
Frass is insect poop mixed with chewed plant tissue. With iris borers, it often looks like rusty brown, peppery crumbs or damp sawdust. You may find it:
- In the folds where leaves overlap
- At small holes near the base of the fan
- On the soil surface near the rhizome
What the rhizome looks like when borers are inside
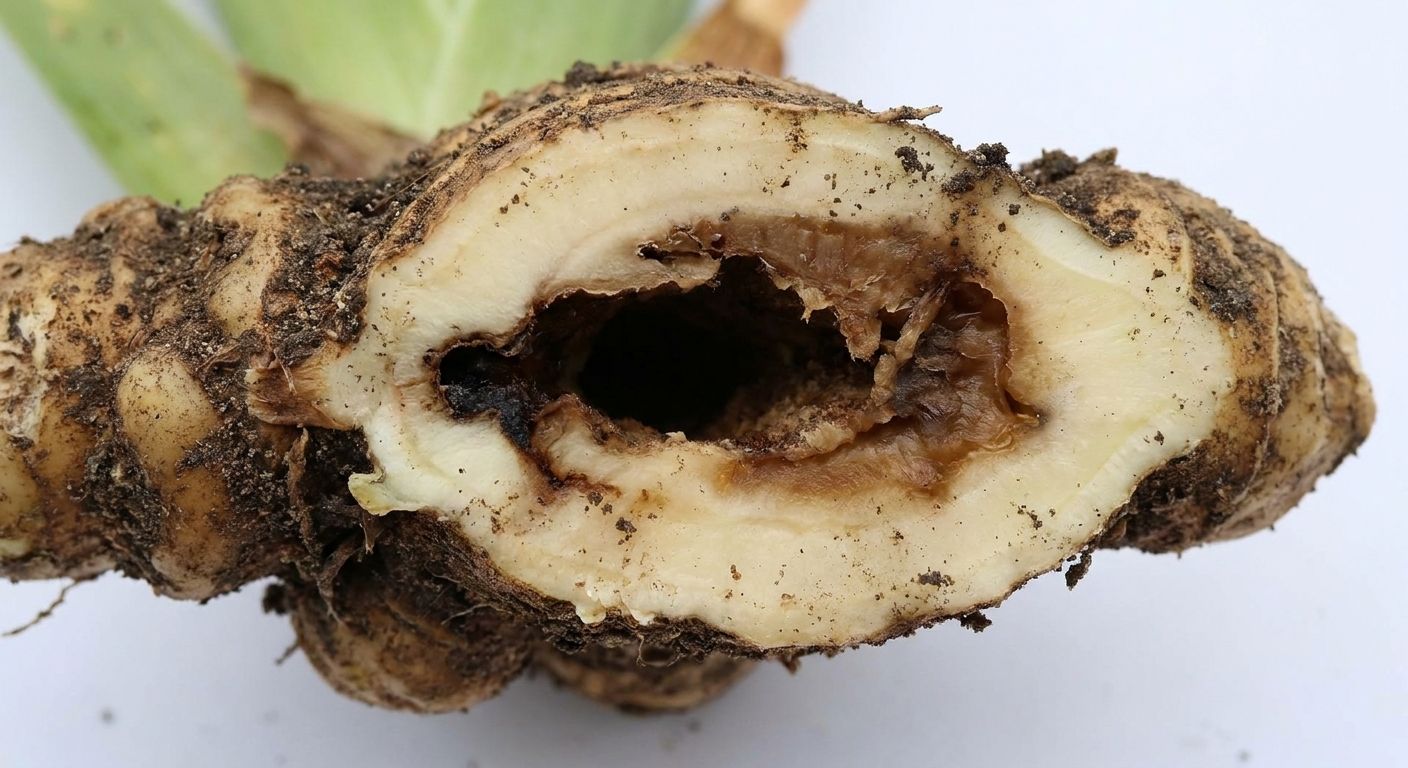
The rhizome is where the real damage happens. A healthy bearded iris rhizome should be firm, crisp, and pale inside when you cut it. An infested rhizome tells a very different story.
- Tunnels: hollowed-out passages, sometimes with brown mush inside
- Soft rot that starts from a point: often where a tunnel opens into the rhizome
- Brown, stringy interiors: instead of a clean, snappable texture
- Occasional sightings: a pinkish to tan larva inside the rhizome or at the base of the leaves
Even if you do not see the larva, tunnels plus frass are enough for a confident diagnosis.
Timing: when borers show up
I find it easier to stay calm when I know the schedule. Iris borers overwinter as eggs, often laid on old, drying iris foliage and nearby plant debris in late summer into fall. In spring, tiny larvae hatch and start feeding in the leaves, then work their way down into the rhizome. They eventually pupate in the soil, and moths emerge later in summer to restart the cycle.
That timing is why cleanup and early-season monitoring make such a difference. You are not just tidying. You are removing next year’s starting point.
Iris borer damage vs winter-killed mush
This is the fork in the road that matters. Both problems can give you a soft, unpleasant rhizome. The difference is in the pattern.
Signs that suggest iris borers
- Leaf fans show notching or streaking before the rhizome turns to mush
- Softness is connected to a tunnel or entry point
- You find frass in leaf folds or near a hole
- Only one fan or section of a clump collapses first, then it spreads
Signs that suggest winter injury or rot
- Rhizomes are soft after freeze-thaw swings, often without any notching or frass
- Damage can look uniform across exposed rhizomes, especially where they heaved out of soil
- The plant may have looked fine going into winter, then fails to firm up in spring
- You do not see tunneling, just waterlogged, translucent tissue
If you are unsure, cut into the rhizome. Winter-killed tissue tends to be evenly watery and collapsed. Borer damage tends to include cavities and a messier, localized breakdown along tunnels.
Quick lookalikes to keep in mind
Not every torn iris leaf is a borer. Before you declare war, consider the simple stuff:
- Wind and storms can shred leaf edges, but you will not find frass tucked in folds.
- Rabbits or deer usually leave bigger, more obvious bites.
- Slugs can chew leaves, especially in damp weather, but they do not tunnel into rhizomes.
- Soft rot can happen without borers, especially in soggy, crowded plantings.
Frass plus tunneling is the combination that really narrows it down.
When a fan is too far gone to save
I am a big believer in second chances, but irises do not love being coddled through major internal damage. Use these quick checks:
You can often save a fan if
- The rhizome piece behind the fan is still mostly firm
- You can cut away a small damaged section and still have clean, white tissue remaining
- The fan is upright and not sliding loose at the base
It is usually a goner if
- The fan pulls away easily or wobbles because the base is hollow
- The rhizome is soft through more than about one third of its length, as a rough rule
- There is a strong rotten odor and the tissue is turning to slime
- You cut and cannot find a solid “stop line” of healthy tissue
When in doubt, prioritize the healthiest rhizome pieces. A smaller, clean division rebounds faster than a bigger, compromised one.
What to cut out when dividing
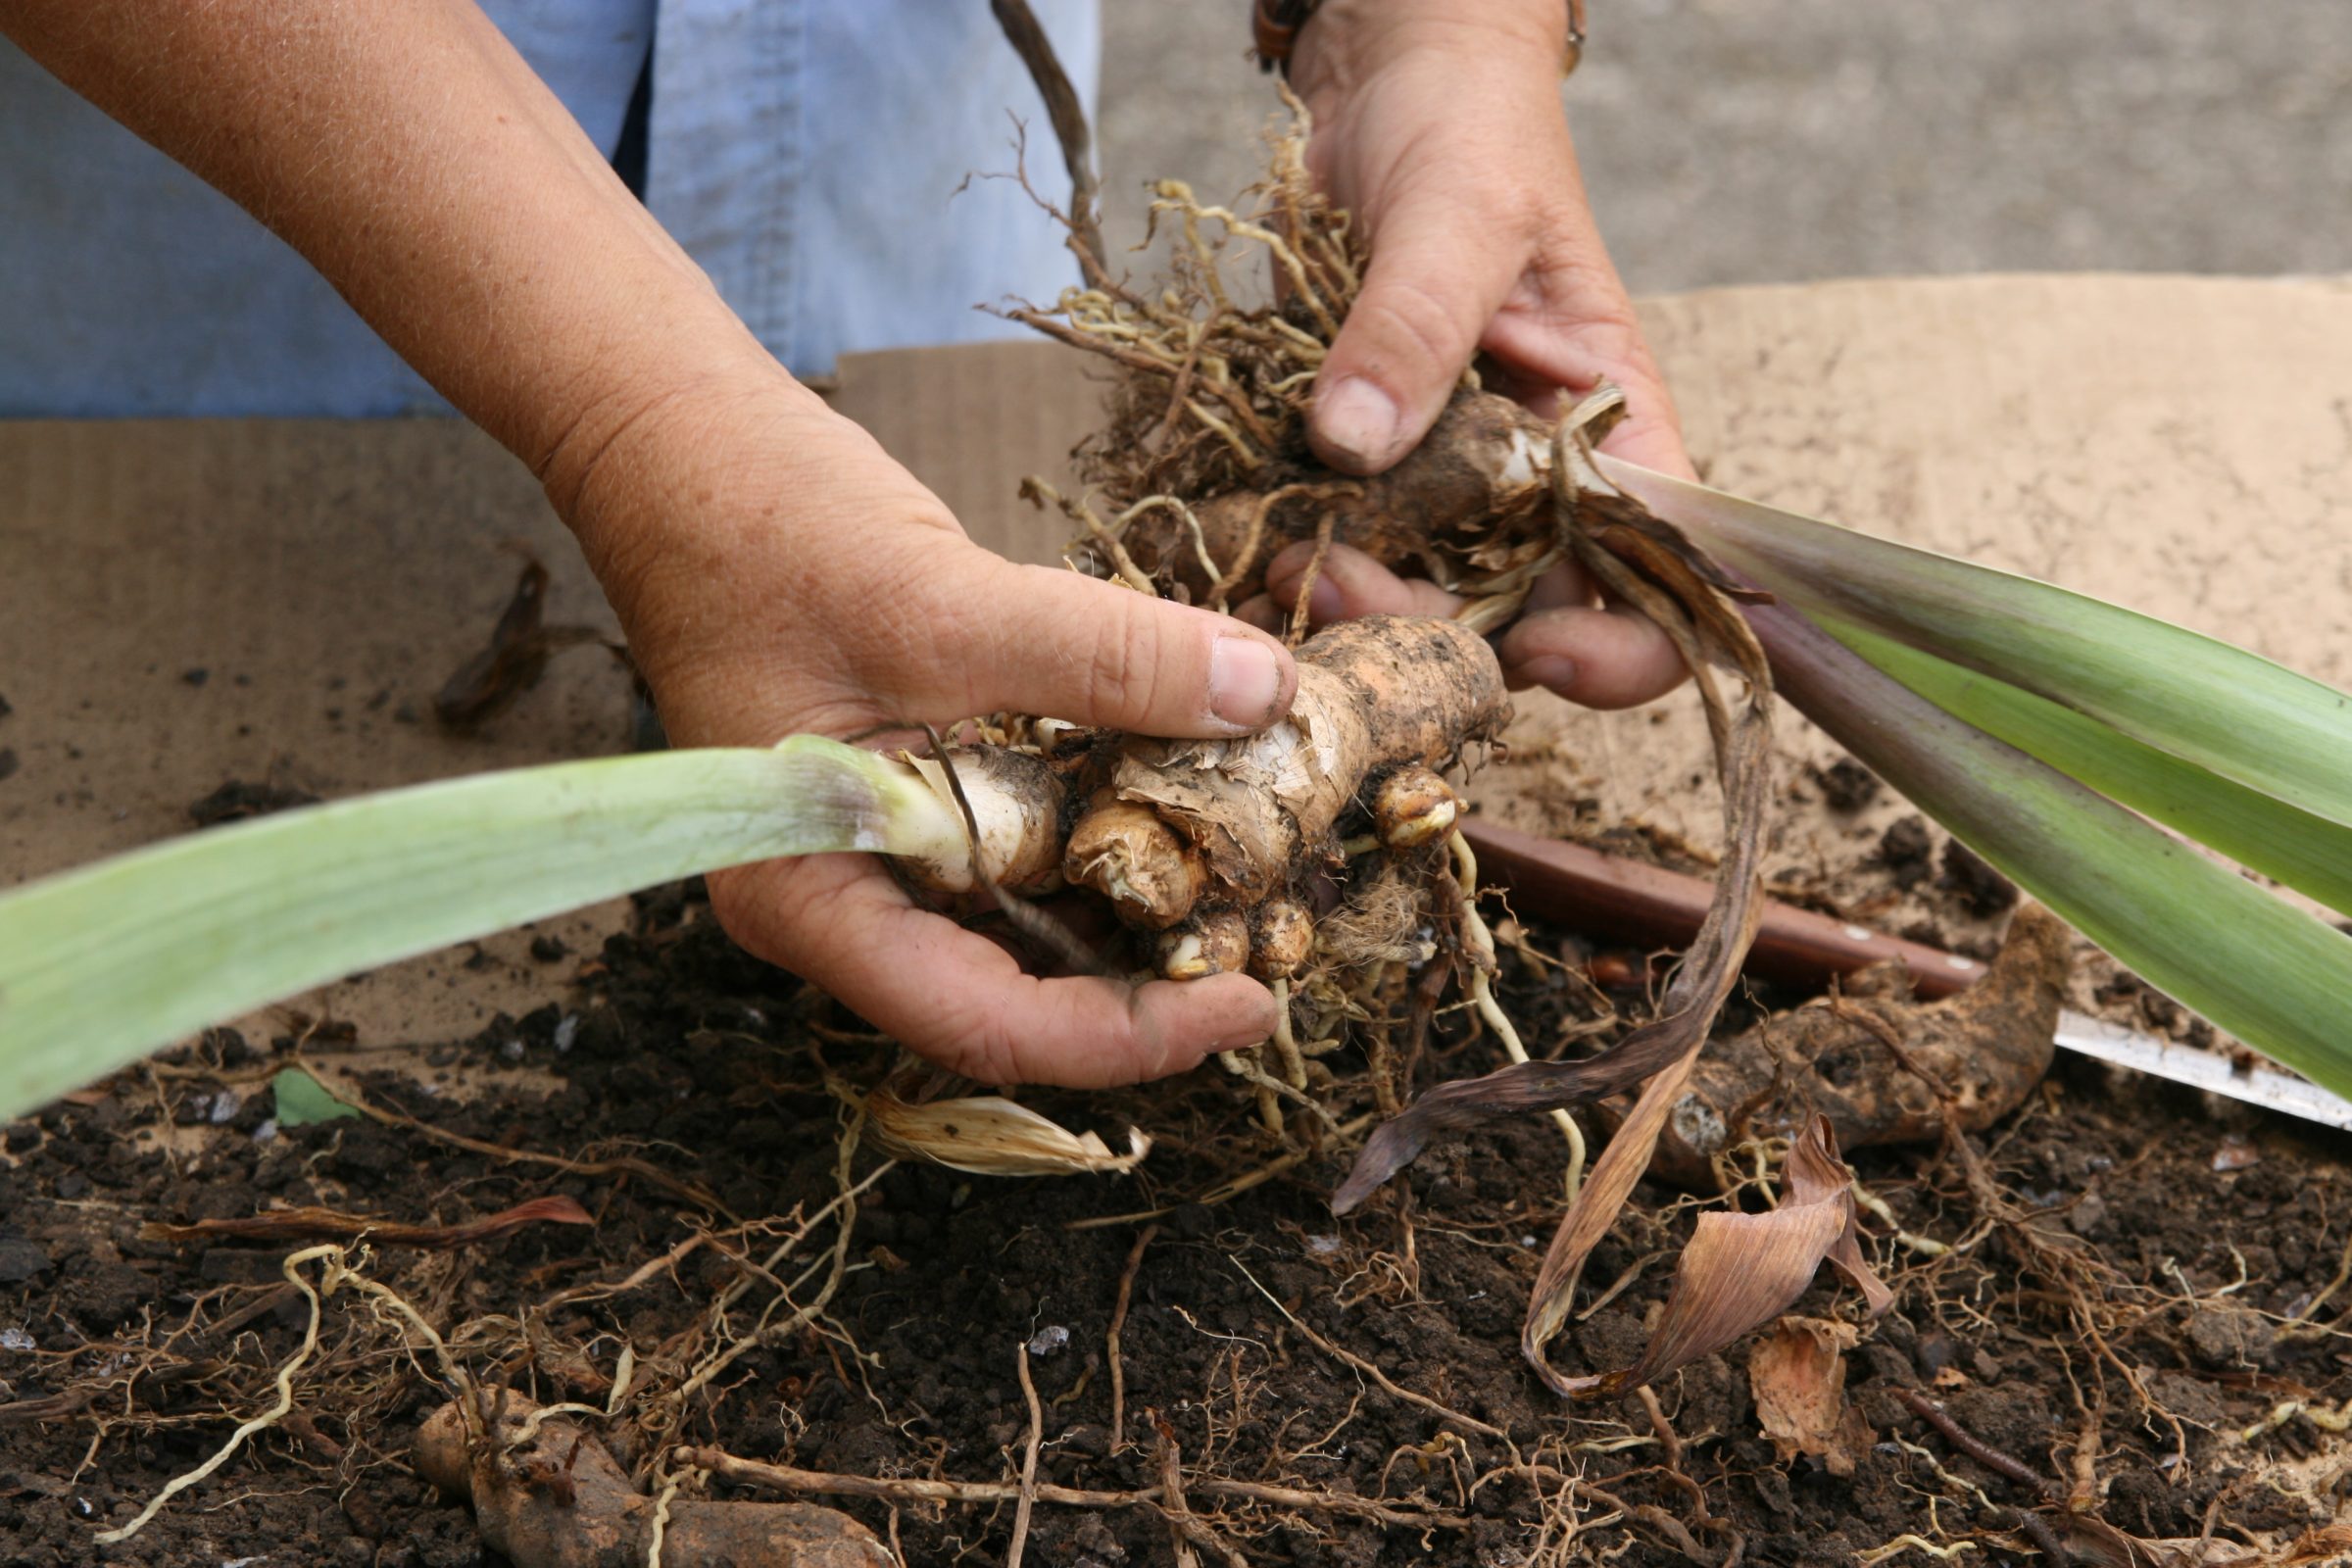
Dividing is the perfect time to do borer control, because you are already holding the evidence in your hands. The goal is simple: only replant firm, clean rhizome with no tunnels, no soft spots, and a healthy fan.
Step 1: Wash and inspect
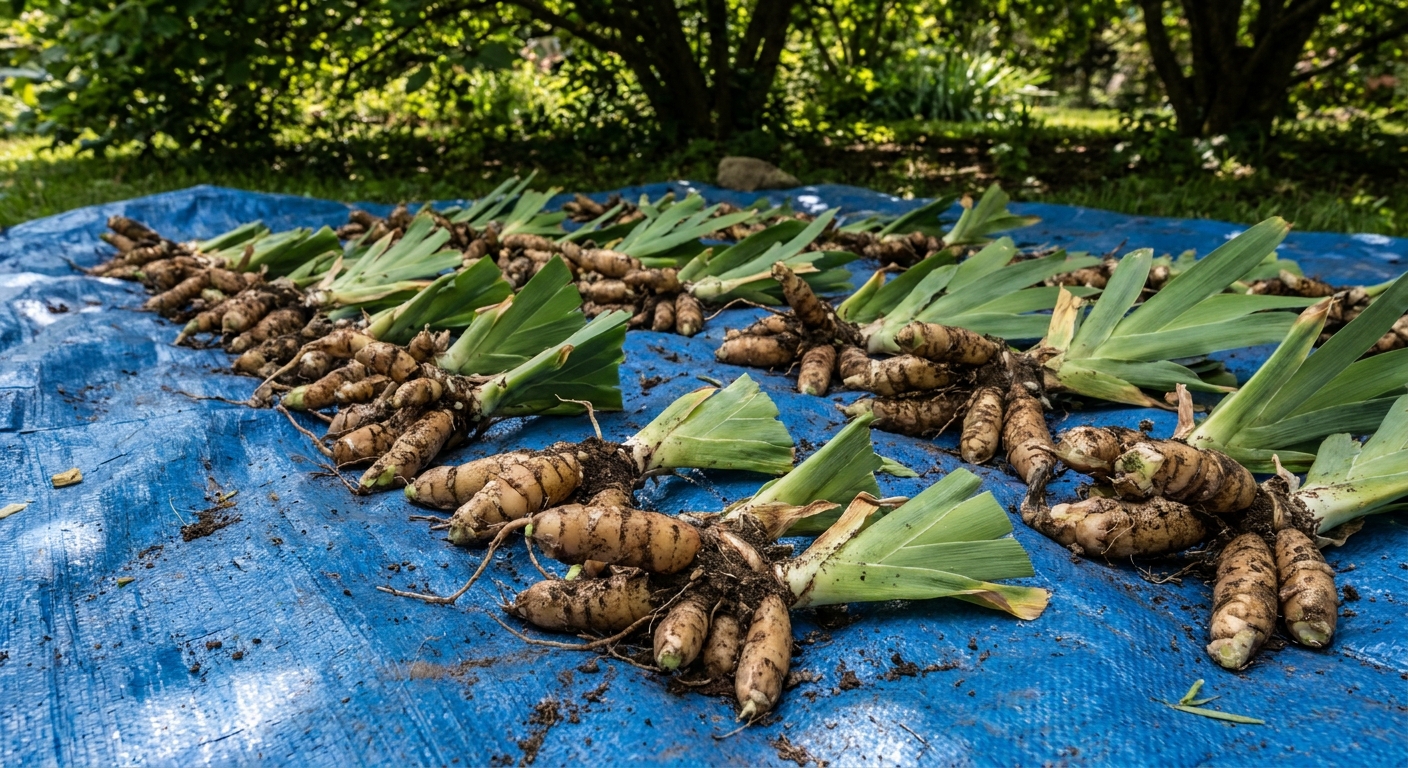
Rinse soil off so you can see the rhizome clearly. I like a gentle hose spray, then I set everything on a tarp in the shade.
Step 2: Follow the tunnel
Use a clean, sharp knife and slice lengthwise along the suspect area or make a careful cross-cut where the rhizome feels soft. If you hit a hollow, keep trimming back until you reach solid, pale tissue. Tunnels can run farther than you expect.
Step 3: Make decisive cuts
- Discard any rhizome section with tunneling, even if the outside looks OK.
- Discard any mushy sections that do not trim back to firm tissue quickly.
- Do not compost infested rhizomes or larvae. Bag and trash them, or dispose of them according to your local guidelines. (This is conservative advice. Hot composting may work only if your pile reliably reaches and holds high enough temperatures.)
Step 4: Save only the keeper pieces
A keeper division typically has a firm rhizome chunk with at least one healthy fan. If you are dividing for replanting, choose pieces that are:
- Firm like a potato, not squishy
- Free of holes, tunnels, or brown stringy interiors
- Carrying a fan with mostly green leaves
If a fan shows minor notching but the rhizome is clean and firm, you can often trim the foliage back and replant. If the notching is paired with frass and any softness, I do not risk it.
Step 5: Sanitize tools between clumps
This is not just about borers. Soft rot organisms can hitch a ride on your knife. Wipe blades between plants with rubbing alcohol or a disinfectant wipe, then let them dry briefly before the next cut.
What to do right now
If you are reading this with a sinking feeling, breathe. You still have options.
If the plant is in the ground and declining
- Gently pull apart the fan at the base and look for frass.
- If a fan is loose, dig that section sooner rather than later.
- Cut out and discard any tunneled or mushy rhizome.
- If you find a larva in the leaves or rhizome, remove it. I am not above a gloved hand and a quick squish.
If you are already dividing a whole clump
- Inspect every rhizome piece before replanting.
- Replant only clean, firm divisions.
- Clean up debris thoroughly. Old leaves are where eggs and tiny larvae often get their start.
Prevention that helps next season
Iris borers have a predictable rhythm, and prevention is mostly about interrupting it. The single most practical habit is fall and early spring cleanup.
Clean up old foliage
Eggs are often laid on old, drying iris leaves and surrounding debris. Remove dried iris leaves and garden litter around the clump and dispose of it. This is one of those unglamorous chores that pays you back in blooms.
Avoid soggy conditions
Borer damage often snowballs into bacterial soft rot. Good drainage and sun help rhizomes stay firm and resilient, even if a pest slips through.
Divide overcrowded clumps
Tight clumps trap moisture and make inspection harder. Regular division keeps plants vigorous and makes it easier to spot trouble early.
Quick diagnosis checklist
- Notched leaf edges: suspicious, especially on newer leaves
- Frass in folds or at holes: strong iris borer signal
- Tunneled rhizome: confirmatory
- Even, watery mush with no tunnels: more consistent with winter injury or general rot
FAQ
Can an iris recover after borer damage?
Sometimes, if you catch it early and the rhizome behind the fan is still mostly firm. Once the rhizome is extensively tunneled or turning to mush, recovery is unlikely and removing that section protects the rest of the clump.
Should I replant a rhizome if only the leaves look chewed?
If you see notching plus frass, inspect the rhizome before replanting. If the rhizome is completely firm and clean when cut, you can keep it. If you find any tunnel, discard that piece.
What do I do with infested rhizomes?
Do not compost them unless you are confident your compost gets hot enough to kill pests. The simplest, most reliable approach is to bag and trash them, or dispose of them according to your local guidelines.
Is this the same as soft rot?
Borers and soft rot often show up together. The larva opens the door by damaging tissue, then rot organisms take advantage. That is why cutting back to clean, firm tissue matters so much.