African Violet Neck: When the Stem Gets Too Long

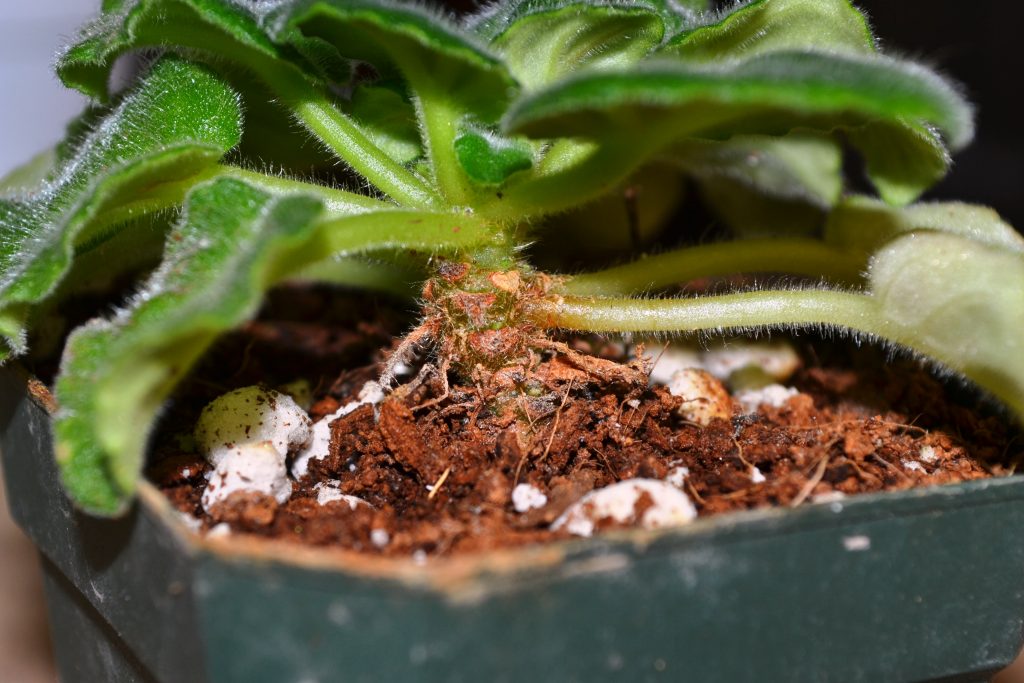
The first time I saw an African violet with a long bare stem, I genuinely thought it was “trying to stand up” and failing. The leaves were all perched at the top like a little green umbrella, and beneath them was this pale, woody-looking stretch of stem. It has a name: an African violet neck. And while it looks alarming, it is usually a normal aging thing, not a moral failing on your part as a plant parent.
This page will walk you through what an African violet neck is, when it is time to repot and bury it, when you might need a more drastic reset, and how to keep the crown dry afterward so your violet settles in without rot.

What “African violet neck” means
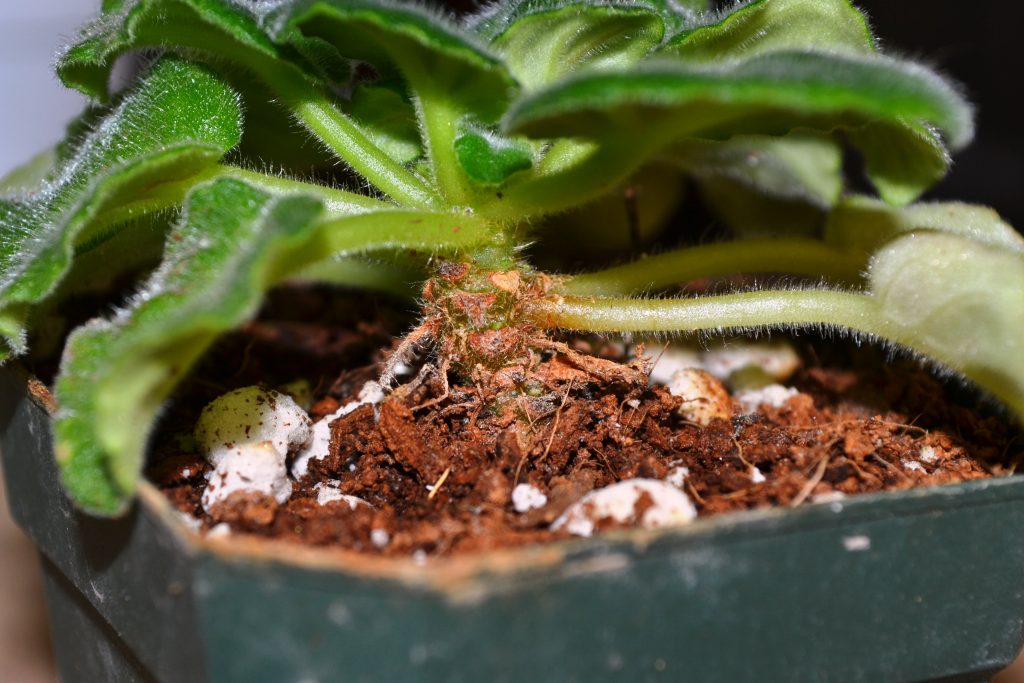
The “neck” is the section of stem between the soil surface and the bottom of the leaf rosette (the crown). On a younger plant, the rosette sits low and tidy. Over time, older leaves are shed from the bottom, and the plant’s growing point slowly rises. That leaves a bare stem that can look like a little trunk.
You might notice:
- A gap of exposed stem under the leaves
- Lower leaves that are smaller, fewer, or missing
- The plant leaning, wobbling, or looking top-heavy
- Roots showing at the soil surface, or soil level that has sunk
A neck is not automatically “bad,” but it does tell you your violet would appreciate a refresh.
Why African violets get a long stem
Necks happen for a few overlapping reasons, and most of them are plain old age.
Natural aging
African violets grow from the crown. As the newest leaves form at the center, the oldest leaves on the outside eventually yellow, get removed, or drop off. Each time that happens, the crown sits a little higher.
Light that is a little too weak
In lower light, leaves can stretch upward and the plant can become looser and leggier. That does not create the neck all by itself, but it can make the whole plant look more “stemmy” and unstable.
Soil that has compacted or sunk
Potting mix breaks down. As it decomposes and compresses, the soil line drops and exposes more stem.
Long stretches between repottings
African violets tend to do best with periodic repotting into fresh mix. When they stay in the same pot for a long time, you are more likely to see a pronounced neck and a tired root zone.
When to repot and bury the neck
If your plant has a tiny bit of neck, you can often top up the pot with fresh mix and keep going. If the neck is longer, the best fix is to repot and set the plant deeper so the bare stem is covered again.
Repot soon if you see any of these
- More than about 1/2 inch to 1 inch of bare stem showing (a rule of thumb, not a law of physics)
- The plant is leaning or top-heavy
- There is a hard, crusty stem section that stays exposed and dries out, which can make re-rooting and stability harder
- The mix looks old: compacted, muddy, or pulls away from the pot edge
- Roots are circling tightly, or the plant dries out too fast after watering
Choose a good moment
I like to do this when the plant is not in a full bloom frenzy and when indoor temperatures are steady. Avoid repotting right after a heavy watering (for example, a thorough bottom-watering) when the root ball is still very wet. Slightly damp, not dripping, is easier to work with.
How to repot and bury the stem safely
The goal is simple: re-seat the violet so the crown sits at the right height, the bare neck is covered, and the plant is stable. The trick is doing it without trapping moisture against the crown.
What you will need
- A clean pot with drainage (often the same size is fine)
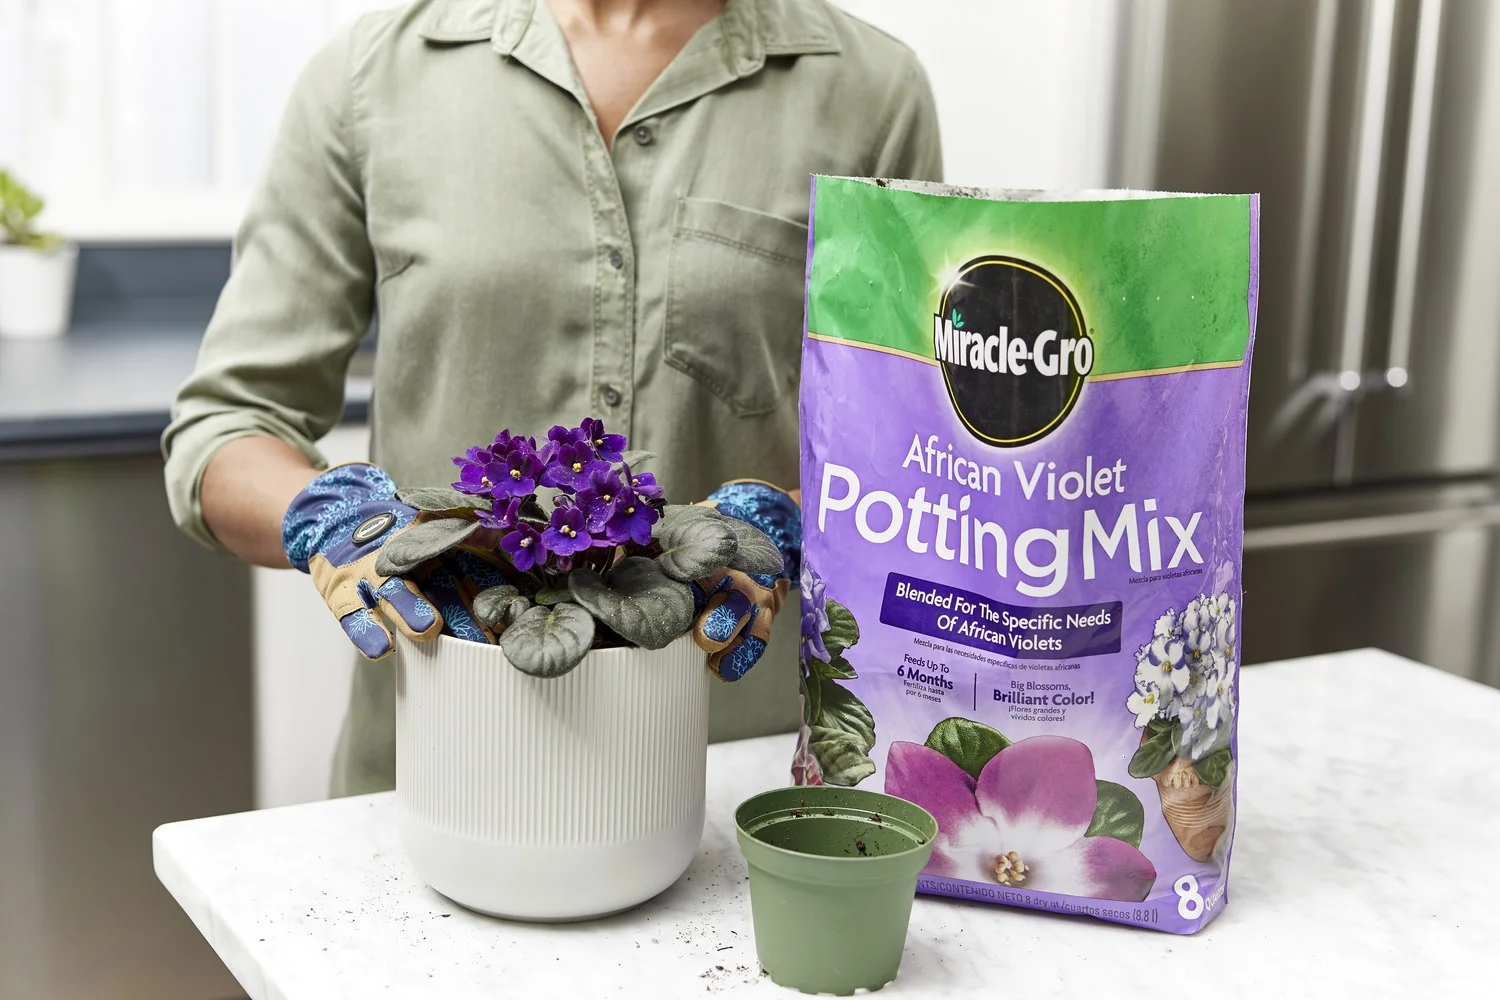
- Fresh African violet mix, or a light, airy indoor mix suited to violets (for example, violet mix cut with extra perlite for airflow)
- A spoon or chopstick for settling mix
- Clean scissors or a small knife
- Paper towels
Step 1: Remove the plant and inspect the neck
Slide the plant out and gently brush away old mix from the top inch or so. You are looking at the bare stem. It may be greenish, tan, or lightly woody. Leaf scars are normal.
Quick safety check: If the neck is soft, mushy, dark, or smelly, do not bury that section. That is rot territory. Skip down to the “severe necks” note below, because your safest path is usually cleaning up and re-rooting rather than covering a problem.
Step 2: Gently scrape the neck (yes, really)
If the exposed stem looks brown and calloused, lightly scrape that thin, dry “skin” off before you bury it. Think: peeling a carrot, but gentler. I use the edge of a clean knife or even a fingernail and take off just the surface until I see fresher green tissue.
This small step can make a big difference because roots tend to form more readily from that fresh layer.
Step 3: Decide how much to bury
A helpful rule is to bury the neck up to the base of the lowest healthy leaves, but not so high that soil touches the crown’s center growth point.
If the neck is very long, you can sometimes bury it, but go slowly and be conservative. A plant that is set too deep can hold dampness where it should not.
Step 4: Refresh the root ball
If the roots are tightly circling, you can loosen them very gently. If the bottom is a dense mat, you can remove a thin layer of old mix from the base. Think “tidy,” not “traumatize.”
Step 5: Re-seat at the correct height
Put a small mound of fresh mix in the pot. Hold the plant so the crown will end up just above the soil line. Then fill around the sides, lightly firming as you go.
Important: Keep mix out of the crown. I usually angle the pot and pour soil around the outside edge first, then nudge it into place with a spoon.
Step 6: Clean up and stabilize
Brush any crumbs off the leaves and crown. If the plant is still a bit wobbly, firm the mix slightly more around the neck area. Stable is safer. A rocking crown can disrupt new roots and slow establishment.
Severe necks: when “bury it” is not enough
If the neck is very long (often around 2 inches or more, or simply too tall to fit comfortably back into a typical shallow violet pot), many growers use the “decapitation” method. It sounds dramatic, but it is basically a reset.
In plain terms, you cut the plant free from most or all of the old root ball, scrape the neck, then re-root the top in fresh, airy mix. This is also the go-to option if the neck is very woody or you suspect rot on the lower stem.
I am keeping this guide focused on repot-and-bury, but if you look at your violet and think, “There is no way this trunk is fitting in that pot,” you are not being difficult. You are being observant.
Keeping the crown dry afterward (this part matters)
After burying the neck, the plant needs time to grow new roots along that stem section. It often can, especially with a clean scraped stem, an airy mix, and steady warmth. During this period, a wet crown is the fastest way to invite crown rot.
Water carefully for the first couple of weeks
- Aim water at the soil, not the leaves or center.
- Use room-temperature water so you do not shock the plant.
- Do not overwater “to help it recover.” Slightly moist is plenty.
Skip misting and keep splashes off the center
I know, humidity feels like love. But water sitting in the crown can turn into a mushy problem quickly. If you want a humidity bump, go for a pebble tray nearby or simply cluster plants together.
If water gets in the crown
Blot it out immediately with the corner of a paper towel. If it pooled, you can gently tip the plant and let gravity help, then blot again. I have saved more than one violet with nothing more glamorous than a paper towel and quick reflexes.
Common mistakes when fixing a long neck
- Burying the crown instead of the neck. Soil should cover the bare stem, not pack into the center.
- Using heavy, water-holding soil. Dense mixes stay wet too long and make rot more likely. An airy mix (often with extra perlite) is your friend here.
- Choosing a pot that is too large. Extra soil volume dries slowly, which can suffocate roots. A common rule of thumb is a pot about one-third the leaf span.
- Watering too much right after repotting. Fresh mix plus a disturbed root system equals slow uptake. Let the plant settle.
What to expect after repotting
A well-repotted violet often looks slightly sulky for a week or two, then perks up once it starts pushing fresh growth. You may see:
- Leaves firming up and sitting flatter
- A steadier, less wobbly crown
- New baby leaves in the center
- Blooming resuming once roots are re-established
If the plant dramatically wilts, the crown turns soft, or there is a sour smell from the pot, stop and reassess moisture and root health right away.
FAQ
Can I just add soil on top instead of repotting?
If the neck is minor and the mix is still in good shape, topping up with a little fresh mix can help. But if the stem is long, the soil is old, or the plant is unstable, a proper repot is the better fix.
Will the buried stem grow new roots?
It often can, especially if you scraped the neck, used an airy mix, and kept conditions warm and steady. Some plants are faster than others, so do not panic if it takes a few weeks to see real momentum.
Do I need to remove a lot of leaves first?
Only remove leaves that are damaged, yellowing, or crowding the pot rim. Keeping a healthy set of leaves helps the plant power new root growth. If you remove many leaves, do it gradually over time.
Is a neck the reason my violet is not blooming?
A long neck can stress a plant and make it less energetic, but blooming depends on several care factors. If blooming is your main concern, it is worth checking a dedicated bloom troubleshooting guide. Here, we are staying focused on fixing the neck safely.
A gentle reminder from one violet-whisperer to another
African violets are wonderfully forgiving when you give them the basics: stable light, airy mix, and a dry crown. A long neck is not a disaster. It is simply your plant quietly saying, “Hey, I could use a fresh pair of shoes and a better seat in this pot.” And honestly, same.