African Violet Watering: Wick Systems, Top vs Bottom Water, and Crown Rot Safety

African violets (Saintpaulia, now generally classified as Streptocarpus section Saintpaulia) are the kind of plant that make you feel like a gardening wizard when they bloom. They are also the kind that can turn mushy overnight if watering goes sideways. The secret is not “more water” or “less water.” It is even moisture, a light, airy potting mix, and a dry crown.
In this guide, we will compare wick watering, top watering, and bottom watering, then tie it all together with simple cues for how often to water based on light, pot size, and seasonal humidity.

What African violets want from watering
If you remember nothing else, remember this: African violets prefer a steady, gentle supply of moisture with plenty of air around their roots. Their fine roots hate sitting in soggy mix, but they also sulk if the pot dries out hard.
The “evenly moist, never waterlogged” target
- Moist like a wrung-out sponge is ideal.
- Dry-to-the-bone causes limp leaves and bud drop, and it can damage roots.
- Sopping wet invites root rot and crown rot.
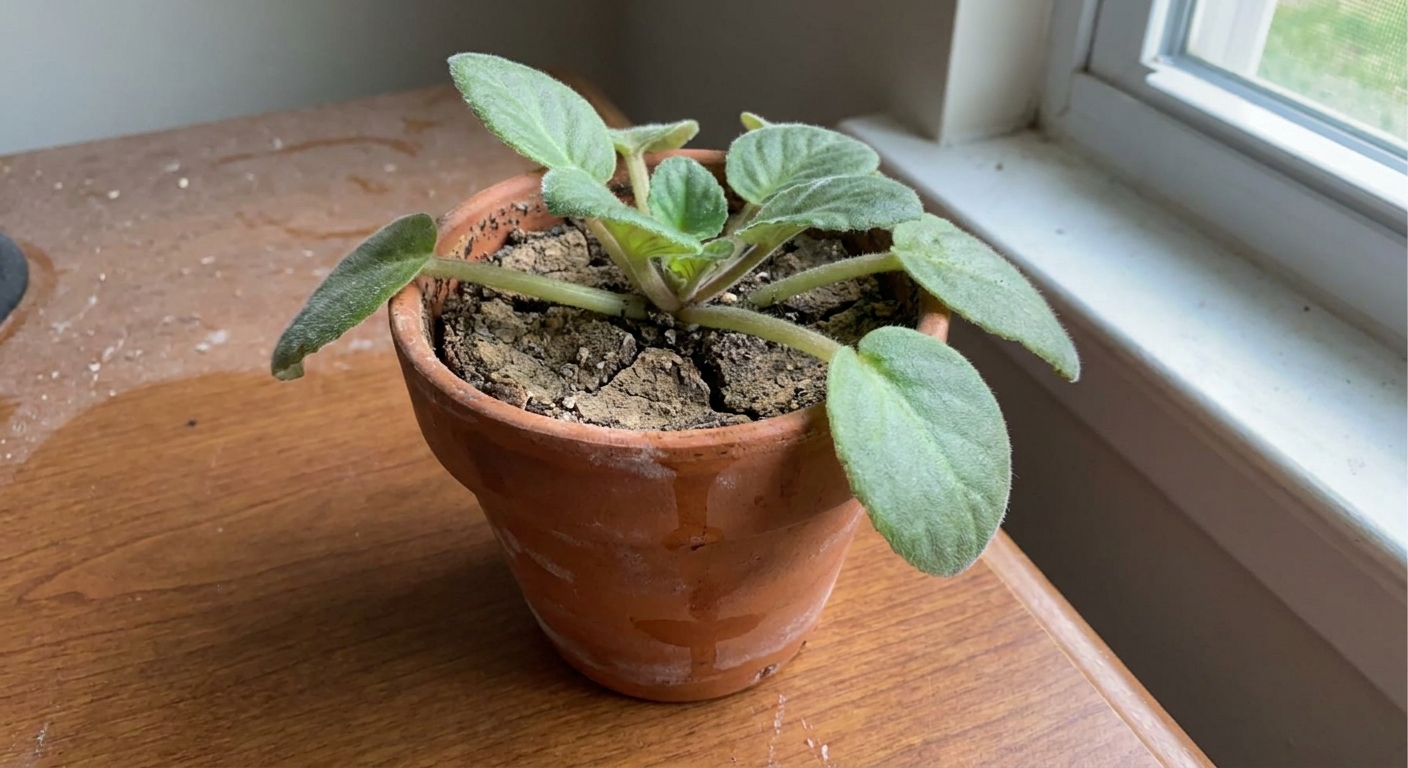
Why the crown matters so much
The crown is the plant’s central growth point where new leaves emerge. When water pools there, especially in cool or low-light conditions, it can set off crown rot. Think of the crown like a tiny funnel. If it stays wet, it stays risky.
Wick watering: steady moisture, low fuss
Wick watering is my favorite for African violets because it smooths out the highs and lows. Instead of soaking then drying, the plant sips what it needs. This method is especially helpful if you are busy, forgetful, or caring for a whole shelf of violets.

How a wick system works
A synthetic wick runs from the potting mix down into a reservoir of water. Capillary action pulls water upward in small amounts. Your job is to keep the reservoir filled and make sure the potting mix is wick-friendly (airy, not heavy).
Simple wick setup (step by step)
- Choose the wick: Use a synthetic cord (nylon or acrylic yarn) about 1/8 to 1/4 inch thick. Cotton can work, but it can break down over time, so synthetics are usually more durable and consistent.
- Thread the wick: Run it through the drainage hole. Leave 2 to 4 inches inside the pot (snaked in a loose “S” under where roots will be) and 4 to 8 inches hanging out the bottom.
- Use the right mix: A light African violet mix works best. If yours feels dense, blend in extra perlite (often 30 to 50% perlite for wick setups) so it stays airy.
- Pot appropriately: Violets like to be slightly snug. A common rule is a pot about one-third the leaf span.
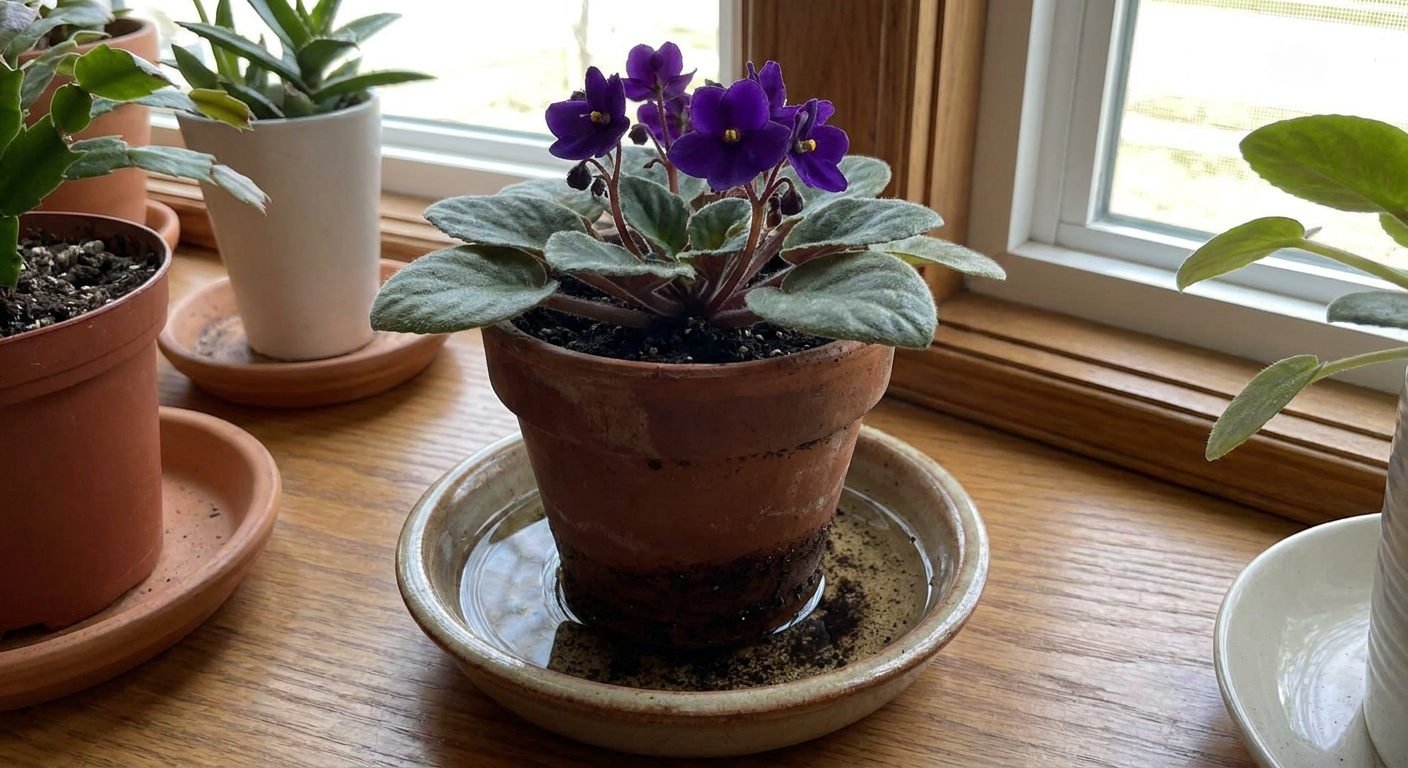
- Add a reservoir: Set the pot above a small container of water so the pot bottom is not submerged. Only the wick should touch the water.
- Fill with water: Use room-temperature water. Keep the water level high enough to cover the wick end.
Why wicks help keep the center dry
Because all the moisture comes from below, you are not pouring water over the leaves or into the center. That alone makes wick watering a crown-rot-friendly option for many homes.
Wick tips that prevent sogginess
- Do not use a heavy potting mix: Dense soil stays too wet on a wick.
- Do not let the pot sit in water: The pot should be above the reservoir, not soaking in it.
- Refresh the reservoir: Dump and rinse weekly or every two weeks to prevent salt buildup and odor or algae.
- Watch winter conditions: In low light and cool rooms, violets drink less. You may need to let the reservoir run lower or switch to periodic bottom watering.
Top watering: fast and precise
Top watering is simple and totally workable, especially if you have just a couple of plants and you like a hands-on routine. The main goal is to avoid wetting the crown and leaves, and to flush enough to prevent mineral buildup without leaving the pot soggy.
How to top water safely
- Use room-temperature water: Cold water can stress roots and may leave spotting on foliage.
- Water at the soil line: Use a narrow-spout watering can and aim between the leaves, right onto the potting mix.
- Keep the crown dry: If water splashes into the center, blot it gently with a paper towel or the corner of a clean cloth. Then give the plant a little warmth and gentle airflow so it dries quickly.
- Water until it drains: A small amount of runoff helps flush salts.
- Empty the saucer: Never let the pot sit in drained water for hours.
When top watering shines
- You want to flush fertilizer salts regularly.
- Your home is humid and you are worried a wick will keep things too wet.
- You are using a very airy potting mix that dries evenly.
Common top watering mistakes
- Pouring into the center: this is the classic crown-rot setup.
- Misting leaves: violets do not need it, and wet fuzzy leaves can spot or invite issues.
- Little sips, no drainage: this can lead to salt buildup and uneven wetting.
Bottom watering: simple and forgiving
Bottom watering is like a “controlled soak.” You set the pot in a shallow dish of water for a short time, then remove it and let it drain. It reduces the chance of wetting the crown while still letting you water on a schedule.
How to bottom water (step by step)
- Fill a saucer: Start with about 1/2 to 1 inch of room-temperature water.
- Set the pot in: Make sure the drainage holes can contact water.
- Wait a bit: Start with 15 to 30 minutes, then adjust based on your pot size and potting mix. The surface should feel evenly damp, not swampy.
- Remove and drain: Lift the pot out, let it drip, then empty the saucer.
Bottom watering notes
- Do not leave it soaking: Long soaks can waterlog the root zone.
- Occasionally flush from the top: Once a month or so, a careful top-water flush helps reduce mineral salt buildup.
Wick vs top vs bottom: which to pick
All three methods can work beautifully. The best one is the one that fits your home, your schedule, and your plant’s potting mix.
- Choose wick watering if you want the most even moisture, travel often, or keep multiple violets and crave consistency.
- Choose bottom watering if you want a low-stress routine and you like checking in weekly.
- Choose top watering if you are comfortable watering carefully at the soil line and you want easy salt flushing.
Crown rot safety
Crown rot can feel dramatic because it often hits the plant’s growing point. The good news is that prevention is mostly about keeping water out of the center and avoiding cool, soggy conditions.
Early warning signs
- Center leaves look limp, soft, or dull even when the soil is moist.
- New growth looks stunted or fails to open normally.
- The crown area feels mushy or darkened at the base of leaf stems.
Prevention checklist
- Water below the leaves (wick or bottom watering makes this easy).
- Use a pot with drainage. No drainage is a gamble.
- Keep the potting mix airy so roots get oxygen.
- Aim for comfortable temps: around 65 to 75°F (18 to 24°C) is a sweet spot for steady growth and safer watering.
- Avoid cold windowsills at night in winter. Cold plus wet is rot’s favorite recipe.
- Provide gentle airflow in stuffy rooms, but avoid blasting vents.
How often to water: reliable cues
There is no universal “water every X days” rule because African violets drink based on light, temperature, humidity, pot size, and how airy your potting mix is. Instead, use a few repeatable cues.
The quick finger test (top or bottom watering)
Touch the top of the potting mix. If the top 1/2 inch feels dry but you can still sense slight coolness or moisture beneath, it is usually watering time. If it feels wet, wait. If it feels bone dry and the pot is very light, water promptly.
Pot weight beats the calendar
Lift the pot right after watering and again a few days later. With practice, you will know “heavy” (recently watered) versus “light” (time to water). This is my favorite low-stress method.
Light level changes everything
- Bright indirect light or strong grow lights: faster growth, faster drying, more frequent watering.
- Medium light: moderate watering needs.
- Low light: slow growth, slow drying, higher risk of rot if you water too often.
Pot size and material
- Small pots dry faster than larger pots.
- Unglazed terracotta dries faster than plastic because it breathes. One caution: porous clay rims can collect fertilizer salts. If violet petioles (those soft leaf stems) rest against a salty rim, you can see irritation or “petiole rot.” This is a big reason many experienced growers stick with plastic, or they cover the rim.
- Self-watering pots act a bit like a wick system and can keep mix too wet if the potting mix is dense.
Seasonal humidity tips
African violets love moderate humidity, but most homes swing between dry winter air and muggy summer pockets. Those swings should change how you water.
Winter
- Water less often if growth slows, especially in cooler rooms.
- Keep water room temperature and avoid chilling roots.
- Watch for heater drafts that dry pots quickly on one side.
- Humidity help: Run a humidifier nearby or use a pebble tray, but keep the pot base above the water line.
Summer
- Check more frequently if your plant is in brighter conditions or near a warm window.
- In very humid homes, be cautious with wick systems unless your potting mix is extra airy.
- Air movement matters: A gentle fan across the room can prevent stale, overly wet conditions.
Rainy seasons or coastal humidity
If your home stays naturally humid, African violets often need less watering than you expect. The potting mix can remain damp longer, so rely on pot weight and the surface feel rather than habit.
Water quality and fertilizer
What water is best?
Room-temperature tap water is fine in many areas, but if you notice white crust on the soil or pot rim, your water may be mineral-heavy. In that case, try filtered water. Letting tap water sit overnight can help free chlorine dissipate, but it does not reliably remove chloramine, which many municipal systems use. If your water is treated with chloramine (or your plants seem touchy), a filter rated for chloramine or an aquarium-style water conditioner can be more effective.
Fertilizing without burning roots
African violets respond well to light feeding during active growth. Many violet growers use a diluted fertilizer regularly. Whatever your approach, remember this: more fertilizer does not equal more blooms, but salt buildup can absolutely stall a plant.
- If you wick water, refresh the reservoir and occasionally top-flush to reduce salts.
- If you top or bottom water, a monthly careful flush can help keep the potting mix sweet.
Troubleshooting
- Droopy leaves but potting mix is wet: possible root rot. Let it dry slightly, improve airflow, and consider repotting into fresh airy potting mix.
- Droopy leaves and potting mix is dry: water thoroughly (bottom watering is gentle here) and do not let it fully dry out next time.
- Leaves feel firm but no blooms: often a light issue, not a water issue. Increase bright indirect light or adjust grow light distance and duration.
- Spots on leaves: can be water droplets plus cool temps or sun. Keep foliage dry and avoid direct sun on wet leaves.
- Center looks soft or collapsing: crown rot risk. Keep the center dry, reduce watering, and consider taking healthy leaf cuttings as backup.
A simple routine
If you want a no-drama plan, here is one I recommend to nervous violet parents:
- Pick one method (bottom watering or wick watering are easiest for keeping the center dry).
- Use pot weight as your main cue.
- Check weekly, water only when the pot feels noticeably lighter.
- Adjust with seasons: less in low light winter, more in bright summer growth.
- Protect the crown every single time.
And if you slip up once, do not panic. African violets are forgiving when you respond gently. Gardening is a conversation, not a test, and your violet is always answering back.