How to Harden Off Seedlings
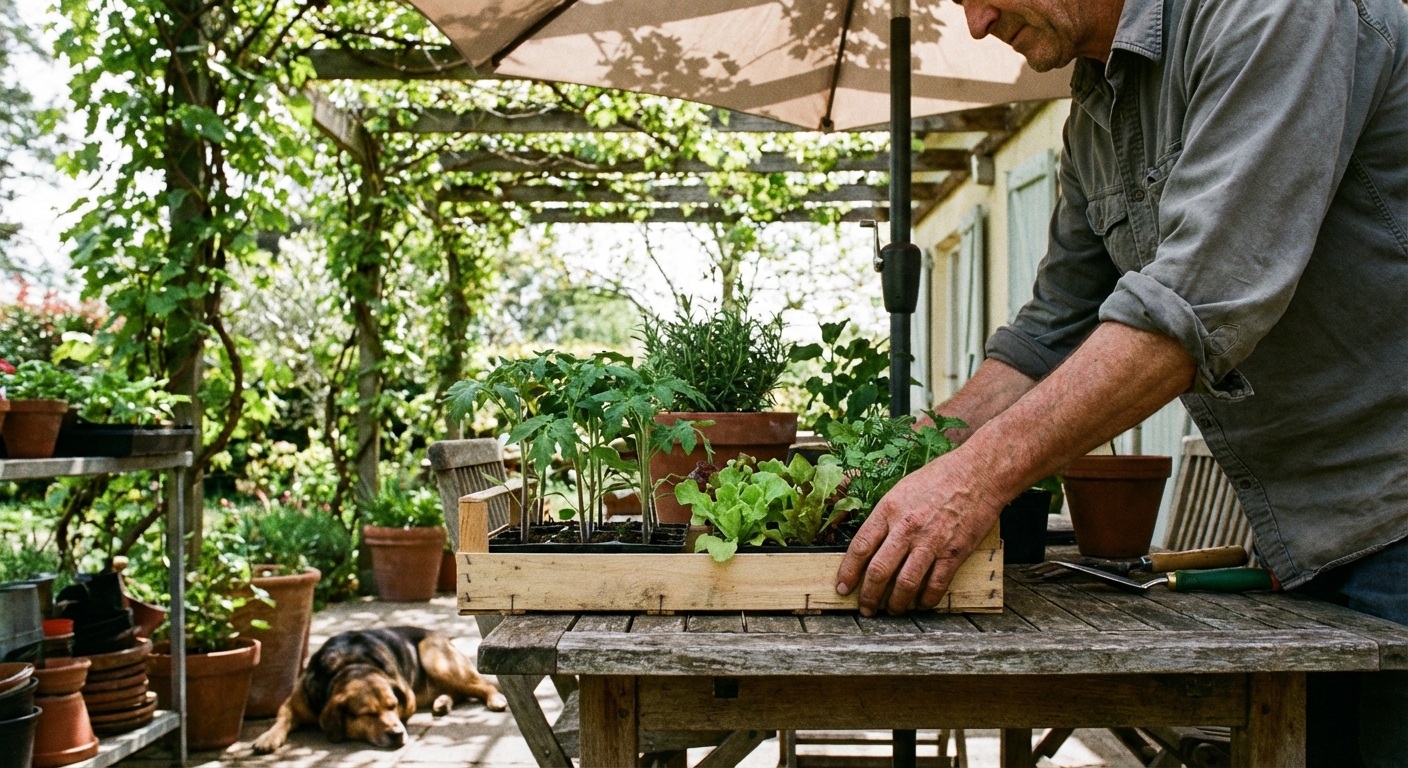
If you've ever moved from a cozy indoor life straight into blustery spring weather, you already understand hardening off. Seedlings raised indoors are pampered. The light is gentle, the wind is nonexistent, and the temperature barely wiggles. Outdoors is a different planet. Hardening off is the simple, gradual process that helps your seedlings build the “skin” and stamina they need to handle sun, wind, cool nights, and the general chaos of real weather.
Do this step well and transplanting feels almost boring, in the best way. Skip it and your healthy starts can stall, scorch, or flop in one rough afternoon.
What hardening off changes
Hardening off isn't about “tough love.” It's plant physiology.
- Sun tolerance: Indoor leaves are thin and used to low light. Outdoor sun is far stronger, even on cool days. Seedlings need time to build up protective cuticle and leaf waxes and adjust to higher light intensity.
- Wind tolerance: Breezes trigger seedlings to build sturdier stems. (A gentle fan indoors helps, but it isn't a full substitute.)
- Temperature tolerance: Outdoor days warm up and cool down fast. Seedlings need gradual exposure so growth doesn't stall from stress.
- Lower humidity: Indoors is steadier. Outside, humidity swings and wind pull moisture from leaves quickly.
Think of hardening off like training for a hike. You don't start with a mountain. You start with a walk around the block.
When to start hardening off
Start hardening off when your seedlings are:
- Old enough to handle a little movement: usually after they have 2 to 3 sets of true leaves (not just seed leaves).
- Well-watered and actively growing: avoid starting during a dry spell in the pot or right after a big setback like damping off or severe legginess.
- Close to transplant time: ideally 7 to 10 days before you plan to plant them in the ground or a larger outdoor container.
If you're still deciding when your seedlings are ready, pair this page with our seed starting guide: How to Start Seeds Indoors.
Shade terms (quickly)
- Full shade: no direct sun hits the plants.
- Bright shade: lots of ambient light (like open shade by a wall or under a porch roof), but still no direct sun.
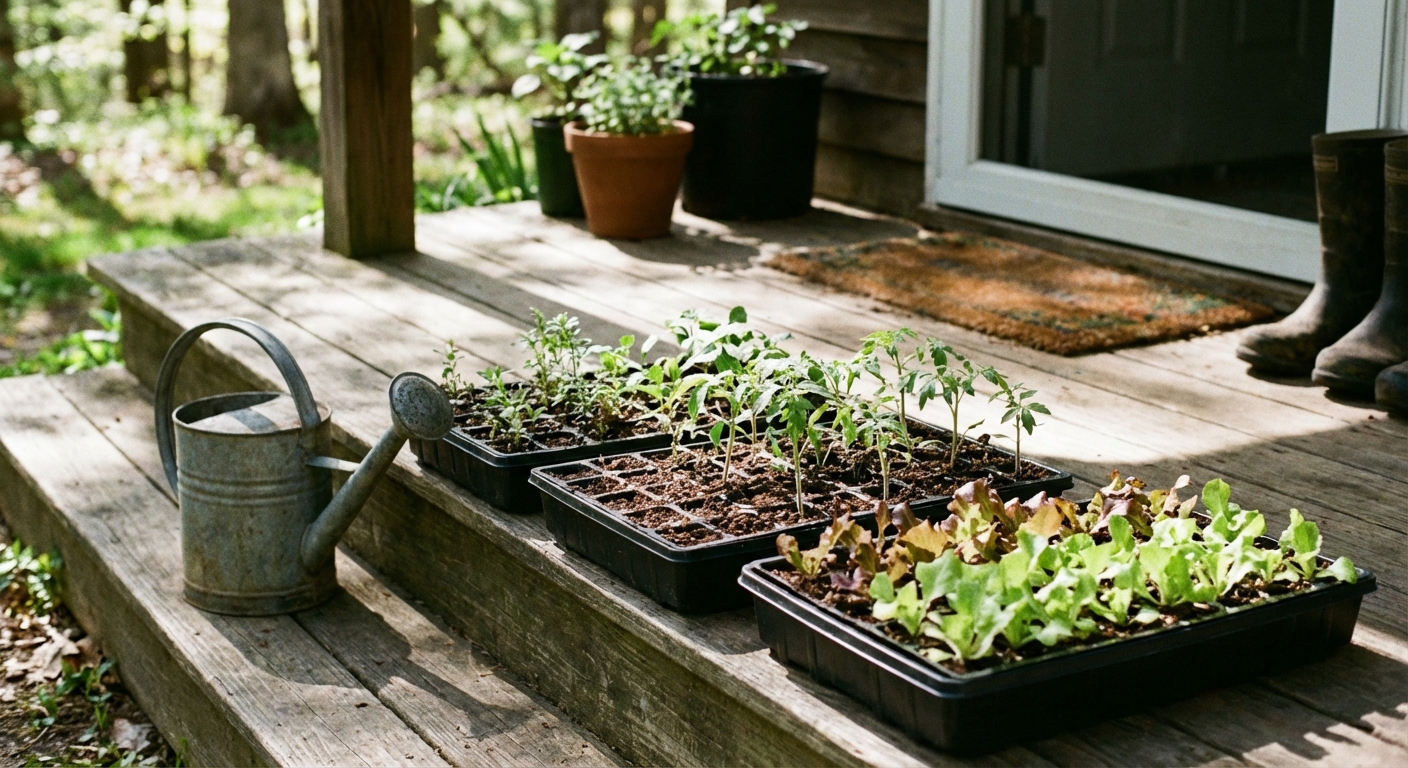
7 to 10 day schedule
This schedule works for most vegetables, herbs, and flowers. If your weather is volatile, stretch it to 10 days. If it's gentle and mild, 7 days is often enough.
Golden rules: Start in shade, keep soil evenly moist, and increase exposure slowly.
Day 1
- Place seedlings outside in full shade for 30 to 60 minutes.
- Bring them back inside.
- Avoid wind if possible. A sheltered spot near a wall or fence helps.
Day 2
- Full shade for 1 to 2 hours.
- Check moisture when they come in. Outdoor air can dry trays fast.
Day 3
- Bright shade for 2 to 3 hours.
- If the day is mild, let them feel a light breeze.
Day 4
- Morning sun for 1 hour, then shade for another 2 to 3 hours.
- Morning sun is kinder than afternoon sun.
Day 5
- Morning sun for 2 hours, then bright shade for 2 to 4 hours.
- If they wilt, shorten the sun window and focus on shade time.
Day 6
- Morning sun for 3 to 4 hours.
- Allow a moderate breeze if temperatures are comfortable.
Day 7
- 6 to 8 hours outdoors, including 3 to 5 hours of sun (preferably earlier in the day).
- At this stage, many sturdy crops are nearly ready for transplanting.
Days 8 to 10 (extra safety)
- Work up to a full day outdoors.
- Introduce a little late afternoon light gradually if that's what your garden bed receives.
- If nights are mild for your crop, you can try 1 night outdoors in a protected spot before transplant day.
Tip from my own slightly chaotic life: Set a daily phone reminder. Hardening off is simple, but it's easy to forget a tray outside until dinner, and then suddenly your basil has been slow roasted.
Temperature cheat sheet
Exact thresholds vary by variety and local conditions, but these are solid, practical guardrails for hardening off and transplant timing:
- Warm-season crops (tomatoes, peppers, basil, cucumbers, squash): aim for night temps consistently above 50 to 55°F. Below that, they may sulk or stall, and a cold snap can set them back hard.
- Cool-season crops (lettuce, kale, broccoli, cabbage, onions): can often handle nights in the 35 to 45°F range once hardened, as long as there isn't a hard freeze.
- Frost risk: if frost is possible, keep seedlings inside overnight unless you're protecting them (and even then, use caution).
If you're hardening off during a chilly week, slow down, use more shade time, and treat wind like the real problem it is. Cold plus wind is where seedlings go to have a bad day.
Weather to avoid
Your goal is “gentle exposure,” not “survival reality show.” Delay hardening off or adjust the schedule when conditions are harsh.
- Strong wind: Gusty days can snap stems and dehydrate seedlings quickly. If it's too windy for you to enjoy standing outside, it's too windy for baby plants.
- Cold nights: Even cool-tolerant crops can stall if nights plunge. Keep seedlings indoors at night unless you know your crop and temps are safely in range.
- Heat spikes: A surprise 85 to 95°F day can scorch indoor-grown foliage, especially in trays that dry fast.
- Intense sun right away: Bright, clear days increase sunburn risk. Start in shade, always.
- Hail or pounding rain: Rain isn't inherently bad, but hard rain can shred tender leaves and flatten trays.
- Frost risk: If frost is possible, don't leave seedlings out overnight, and consider waiting to transplant warm-season crops.
Quick note on greenhouse starts: If your seedlings were raised in a greenhouse or cold frame, they're already partway there. Still harden them off, but you can usually shorten the schedule because they've felt real sun and temperature swings.
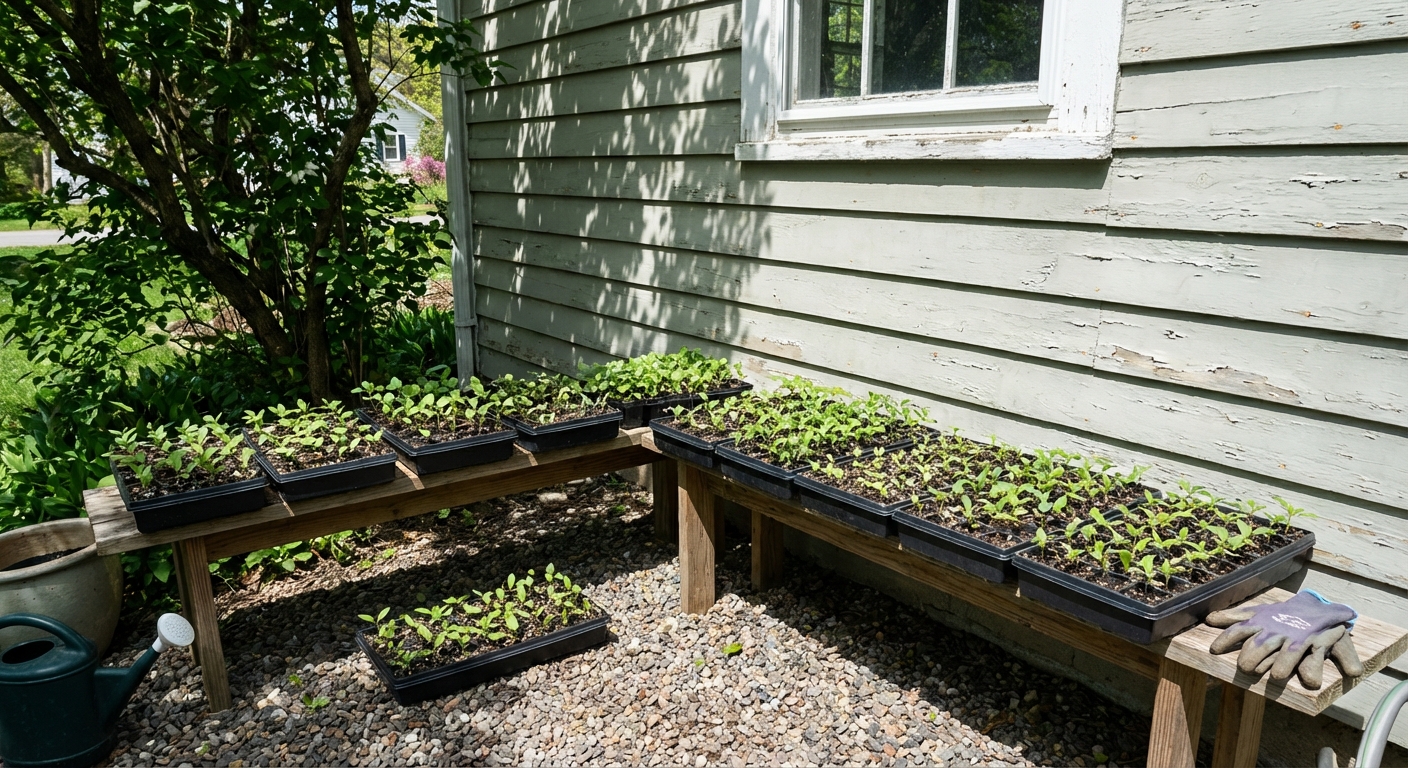
Where to put seedlings
A good hardening off station is shaded, sheltered, and convenient.
- Best spots: North or east side of a house, under a porch roof, behind a low wall, or beneath a tree with light, dappled shade.
- Use a tray: Put cell packs in a waterproof tray so you can move everything fast if weather changes.
- Elevate if pests are an issue: A bench or table reduces slug and earwig surprises.
- Watch for cats and curious birds: Outdoor time is when seedlings can get stepped on. Ask me how I know.
If you're growing under lights, remember to rotate your trays indoors too. Even growth makes hardening off easier because plants aren't already leaning and stressed.
Watering and feeding
Hardening off often fails for one boring reason: seedlings dry out faster outside.
- Keep soil evenly moist: Not soggy, not bone dry. Check twice a day during warm or windy weather.
- Water early: Morning watering helps seedlings face the day hydrated.
- Avoid heavy fertilizing right before transplant: Too much nitrogen can push soft growth that burns easily in sun and wind. Also, many potting mixes already have nutrients, so your seedlings may not need much extra at all.
- If you fertilize, go gentle: A half-strength organic liquid feed once during the week is plenty for most starts.
Container mixes can become water repellent if they dry completely. If that happens, bottom water the tray for 10 to 20 minutes until the surface darkens again.
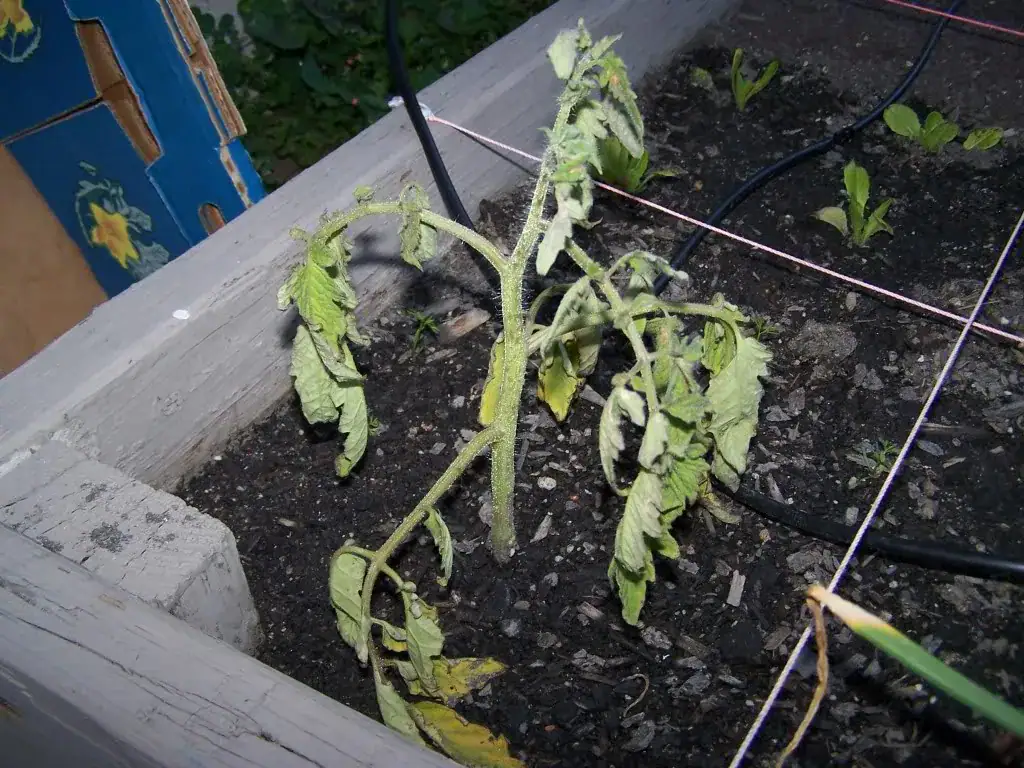
Transplant shock signs
Even well-hardened seedlings can look a little offended after transplanting. The trick is knowing what's normal adjustment versus a problem that needs help.
Often normal for 24 to 72 hours
- Mild midday wilting that improves in the evening
- Slight droop right after transplant, especially on sunny days
- Growth pause for a few days while roots expand
Red flags
- Bleached, white, or crispy patches on leaves (sunscald)
- Persistent wilting morning through evening even with moist soil
- Leaf edges turning brown after a windy or hot day (desiccation stress)
- Purple leaves in some crops, often from cold stress or reduced phosphorus uptake in chilly soil
- Collapsed stems at the soil line (could be damage or disease, and needs quick action)
Prevent shock on planting day
Hardening off is most of the battle, but planting technique matters too.
- Transplant at the right time of day: Late afternoon or an overcast morning is ideal. Avoid planting into the hottest part of the day.
- Water seedlings first: Moist root balls slide out easier and roots are less stressed.
- Water the hole (with nuance): Pre-moisten the planting spot so roots meet welcoming soil. This is especially helpful in sandy or fast-draining beds. In heavy clay, avoid making a muddy “pot” by overfilling the hole with water. Aim for moist, not soupy.
- Handle by a leaf when you can: Never the stem. Stems bruise easily. Leaves can tear too, so be gentle and grab a sturdier true leaf if possible.
- Keep roots covered: Don't let plugs sit in the sun while you dig the next hole.
- Provide temporary shade: For tender seedlings, a light row cover, shade cloth, or even an upside-down milk crate can help for 2 to 3 days.
- Mulch after the soil warms: Mulch helps hold moisture and reduces temperature swings, but in very cool spring soil, wait until the bed is warming consistently.
If you're transplanting tomatoes specifically, you'll love our deeper dive on planting depth and stem rooting: How to Transplant Tomatoes.
Help stressed seedlings recover
First, breathe. Plants are more resilient than we give them credit for, and a rough day doesn't always mean a loss.
Step 1: Add gentle shade
If seedlings are wilting or sunburned, add temporary shade immediately. Even a beach umbrella or a piece of lightweight fabric clipped to stakes can reduce stress fast.
Step 2: Water correctly
- Check moisture at root level: Stick a finger in the soil. The surface can look damp while the root zone is dry.
- Deep water, then pause: Water thoroughly so moisture reaches roots, then let the soil breathe. Constant puddling can suffocate roots.
Step 3: Block wind
Wind burn looks like crispy edges and limp leaves. Use a temporary windbreak such as a piece of cardboard on the windward side or move pots to a sheltered corner.
Step 4: Skip fertilizer for now
Fertilizer isn't comfort food. If roots are stressed, strong feeding can make things worse. Wait until you see new growth, then feed lightly if needed.
Step 5: Prune only if needed
If a few leaves are scorched, you can leave them for now. They still photosynthesize a bit. Remove leaves only if they're truly crispy, mushy, or disease-spotted.
Step 6: Reset the schedule
If plants got scorched during hardening off, move them back a few steps. Return to shade and shorter sessions, then ramp up again more slowly.

Quick troubleshooting
- Seedlings flop outdoors but perk up inside: Too much sun or wind too soon. Return to shade and shorten exposure.
- Leaves turn pale or white: Sunscald. Provide shade and remove only fully dead foliage later.
- Seedlings look purple: Often cold soil or cold nights. Add protection, wait for warmer conditions, and avoid overwatering.
- Plants stop growing after transplant: Normal for a few days. Keep moisture steady and avoid heavy feeding until new growth starts.
- Stems snap in wind: Shelter them, harden off more gradually, and consider a small stake early.
- New transplants disappear overnight: Check for cutworms, slugs, and earwigs. Use collars for cutworms and do a quick evening slug patrol for the first week.
My favorite shortcut
If you can't manage daily in-and-out trips, try a protected “nursery zone” outdoors:
- Bright shade location
- Out of strong wind
- Easy access to water
- Row cover or shade cloth ready to throw on quickly
Then increase sun by moving the tray a little each day toward brighter light, or by shifting the shade cloth back. It's not perfect, but it's far better than going from grow lights to full sun in one leap.
Hardening off checklist
- Seedlings have true leaves and look healthy
- Start in shade for short sessions
- Increase outdoor time and sun gradually over 7 to 10 days
- Avoid extreme wind, heat spikes, hail, and frost risk
- Keep soil evenly moist
- Transplant on a mild day, ideally afternoon or overcast
- Use temporary shade for 2 to 3 days if needed
If you want to plan the whole journey from seed to garden bed, head back to How to Start Seeds Indoors, then come right here when your seedlings are ready for their first breath of real outdoor air.