How to Start Seeds Indoors
Starting seeds indoors feels a little like baking bread. You gather a few simple ingredients, you keep things warm and steady, and then one day you peek in and there is life. If you have ever stared at a sad seedling and wondered what you did “wrong,” I want you to exhale. Seed starting is mostly about timing, light, temperature, and gentle consistency. The rest is small tweaks.
This Leafy Zen guide walks you through the whole indoor seed starting rhythm: choosing containers and mix, dialing in light and warmth, preventing common problems, hardening off, and transplanting outside when the weather and soil are truly ready.
Before you start: Frost dates first
Indoor seed starting is scheduled backward from your area’s average last spring frost date. That frost date is the number you will use for timing.
- Find your average last frost date. Many weather services and local extension offices publish it by zip code.
- Find your USDA hardiness zone (example: Zone 6b). This is about typical winter lows and what perennials survive. It is not a reliable frost date predictor.
- Work backward the recommended number of weeks for each crop (chart below), then fine-tune using your seed packet.
Leafy Zen tip: Microclimates are real. A sheltered urban yard may be effectively “earlier” than a windy rural lot. Still, frost always gets the final vote, so keep row cover or old sheets handy.
Indoor seed starting timing chart
Use this as a starting point, then adjust for your variety (seed packets often differ) and your setup. Under strong lights, seedlings grow faster. On a dim windowsill, they grow slower and leggier.
How to use: Count back from your last frost date. Example: If your last frost is May 10 and tomatoes are 6 to 8 weeks, start tomato seeds indoors roughly March 15 to March 29.
| Crop | Start indoors (weeks before last frost) | Transplant outside | Notes |
|---|---|---|---|
| Tomatoes | 6 to 8 | After last frost and nights mostly above 50°F | Too early indoors leads to big, cranky plants that stall after transplant. |
| Peppers (sweet and hot) | 8 to 10 | 2 to 3 weeks after last frost | Love warmth. Use a heat mat for best germination. |
| Eggplant | 8 to 10 | 2 to 3 weeks after last frost | Similar to peppers. Slow to start if kept cool. |
| Broccoli | 4 to 6 | 2 to 4 weeks before last frost (with protection if needed) | Cool-season crop. Avoid letting seedlings get root-bound. |
| Cabbage | 4 to 6 | 2 to 4 weeks before last frost | Hardy and forgiving. Great beginner seed-start. |
| Cauliflower | 4 to 6 | 1 to 3 weeks before last frost | More sensitive than cabbage. Keep growth steady, not stressed. |
| Lettuce | 3 to 4 | 2 to 4 weeks before last frost | Can bolt if seedlings are heat-stressed. Cooler temps help. |
| Onions (from seed) | 10 to 12 | 4 to 6 weeks before last frost | Long lead time. Start early for good bulb size. |
| Leeks | 10 to 12 | 2 to 4 weeks before last frost | Slow and steady. Trim tops like a haircut to keep them stout. |
| Celery | 10 to 12 | 1 to 2 weeks before last frost with protection, or after last frost | Tiny seed, slow germination. Needs consistent moisture. |
| Basil | 4 to 6 | After last frost | Hates cold. Wait until nights are mild. |
| Parsley | 8 to 10 | 2 to 4 weeks before last frost | Slow to germinate. An overnight soak may help. Keep evenly moist and be patient. |
| Cucumbers | 2 to 4 | After last frost when soil is warm | Often best direct-sown. If starting indoors, do not let roots tangle. |
| Squash and pumpkins | 2 to 4 | After last frost when soil is warm | Start in larger pots. They resent root disturbance. |
| Melons | 3 to 4 | After last frost, warm nights | Warmth is everything. Use a heat mat for germination. |
| Flowers (marigold, zinnia) | 4 to 6 | After last frost | Fast and cheerful. Great practice plants. |
What about herbs and perennials? Many perennials and native plants need a cold period (stratification) before they sprout. If your seed packet mentions chilling or “cold moist stratification,” follow that note rather than the chart.
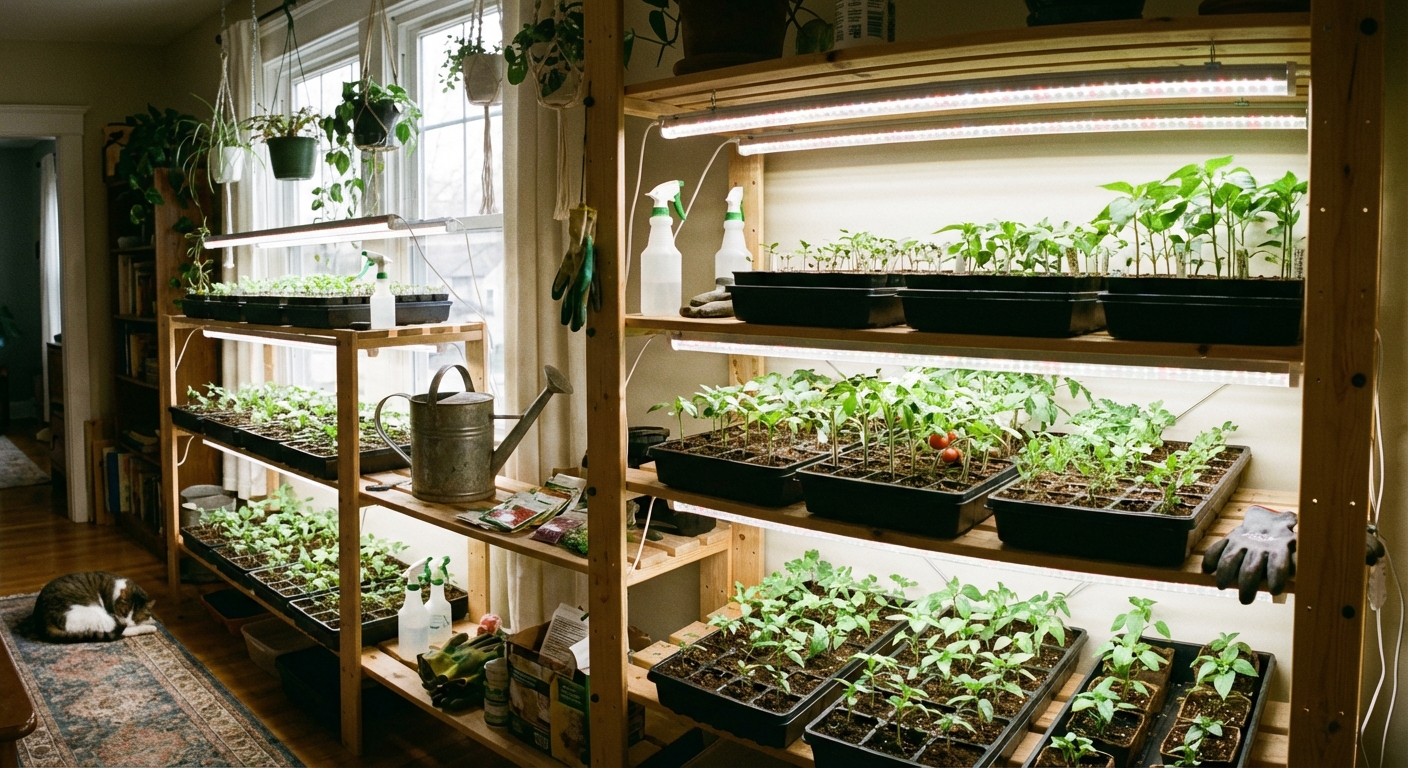
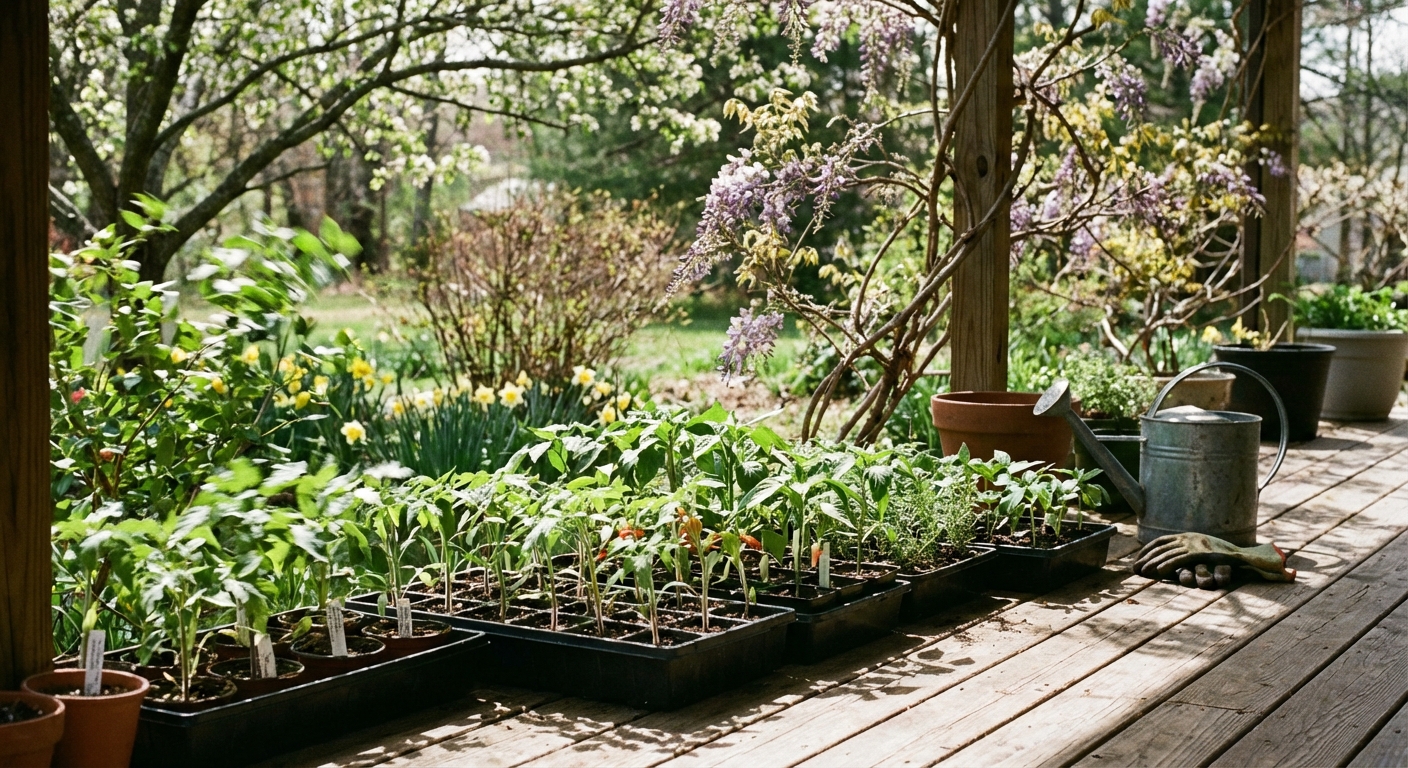
What you need: Simple setup
You can go full plant-parent laboratory, but you do not have to. A dependable setup has four essentials: containers, seed-starting mix, light, and warmth.
Containers
- Cell trays (classic 6-pack or 72-cell) for most veggies and flowers.
- 2 to 4 inch pots for bigger seedlings (tomatoes, peppers once potted up) or anything that will stay indoors longer.
- Soil blocks if you love less plastic and excellent root structure.
Rule you can trust: Every container needs drainage holes. Seeds like moisture, not soggy feet.
Clean start: If you reuse trays and domes, wash them with hot soapy water, then sanitize (a mild bleach solution works) and let them dry. Damping off loves yesterday’s grime.
Seed-starting mix
Use a seed-starting mix, not heavy garden soil. Seed mix is light and airy so tiny roots can breathe. It is usually made from peat or coco coir plus perlite or vermiculite.
- Organic option: Look for OMRI-listed mixes if you garden organically.
- Pre-moisten it: Add water and mix until it feels like a wrung-out sponge. This prevents dry pockets that repel water later.
Light
This is the make-or-break factor for strong seedlings. A bright window is lovely, but it is rarely enough for stocky vegetable starts.
- Best choice: LED shop lights or LED grow lights.
- How close: Start lights about 2 to 6 inches above seedlings (or per manufacturer guidance), then adjust. Stretching means you are too far. Pale or bleached leaf tips can mean you are too close or too intense.
- How long: Aim for 14 to 16 hours of light daily, then darkness at night.
- Buying shortcut: Look for bright fixtures in the 4000K to 6500K range, and use a timer so you are not playing sunrise and sunset every day.
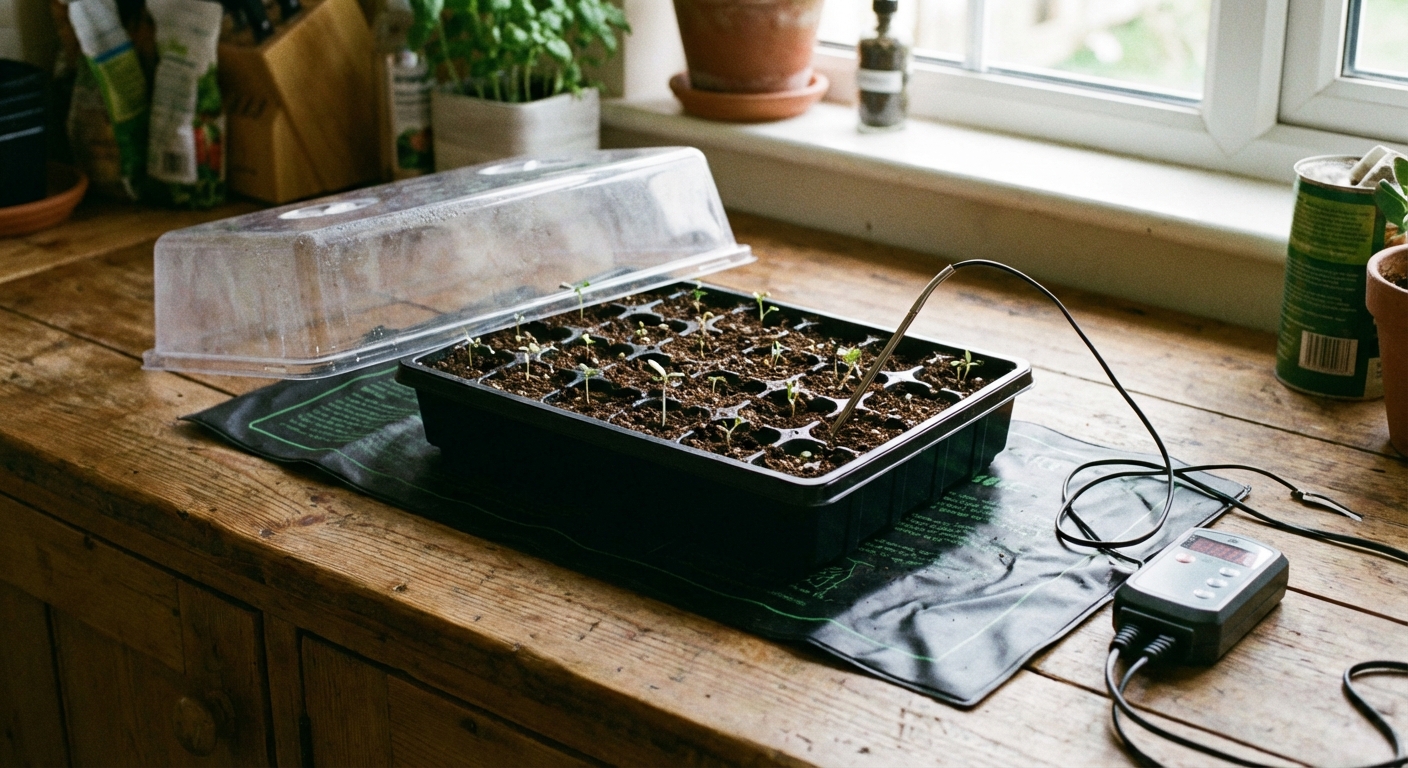
Warmth
Most seeds germinate fastest at warm room temperatures, and warm-season crops need even more.
- Heat mat: Helpful for peppers, eggplant, basil, and anything that likes 75°F to 85°F soil.
- After germination: You can usually remove the heat mat to prevent seedlings from growing too fast and leggy.
Step-by-step: Start seeds indoors
1) Read the seed packet
Look for: days to germinate, ideal temperature, seed depth, light requirements (some seeds need light to germinate), and transplant timing.
Clara’s note: If you do one “extra” thing, label your trays. Future-you will not remember which green sprout is which.
2) Fill containers and firm gently
Fill with pre-moistened seed-starting mix. Tap the tray or pot to settle, then lightly firm. You want contact between seed and mix, not packed concrete.
3) Plant at the right depth
A reliable guideline is plant seeds about 2 to 3 times as deep as they are wide. Tiny seeds like lettuce and many flowers are often surface-sown and pressed in.
- Large seeds: 1/4 to 1/2 inch deep is common (beans are usually direct-sown instead).
- Dust-like seeds: Sprinkle, press, do not bury.
4) Water in, then keep evenly moist
After sowing, water gently so you do not float seeds to the corners of the tray.
- Bottom watering: Place tray in a shallow pan of water for 10 to 20 minutes, then drain.
- Mist the surface: Useful for tiny seeds, especially in the first few days.
5) Cover for humidity, then uncover for airflow
A clear dome or plastic wrap helps hold humidity during germination. The moment you see sprouts, remove the cover. Fresh air helps prevent damping off, the dreaded seedling collapse.
6) Use lights right away
You can place trays under lights from day one, and you should definitely do it as soon as seedlings emerge. Keep the light close and consistent. If seedlings stretch and lean, they are begging for more light.
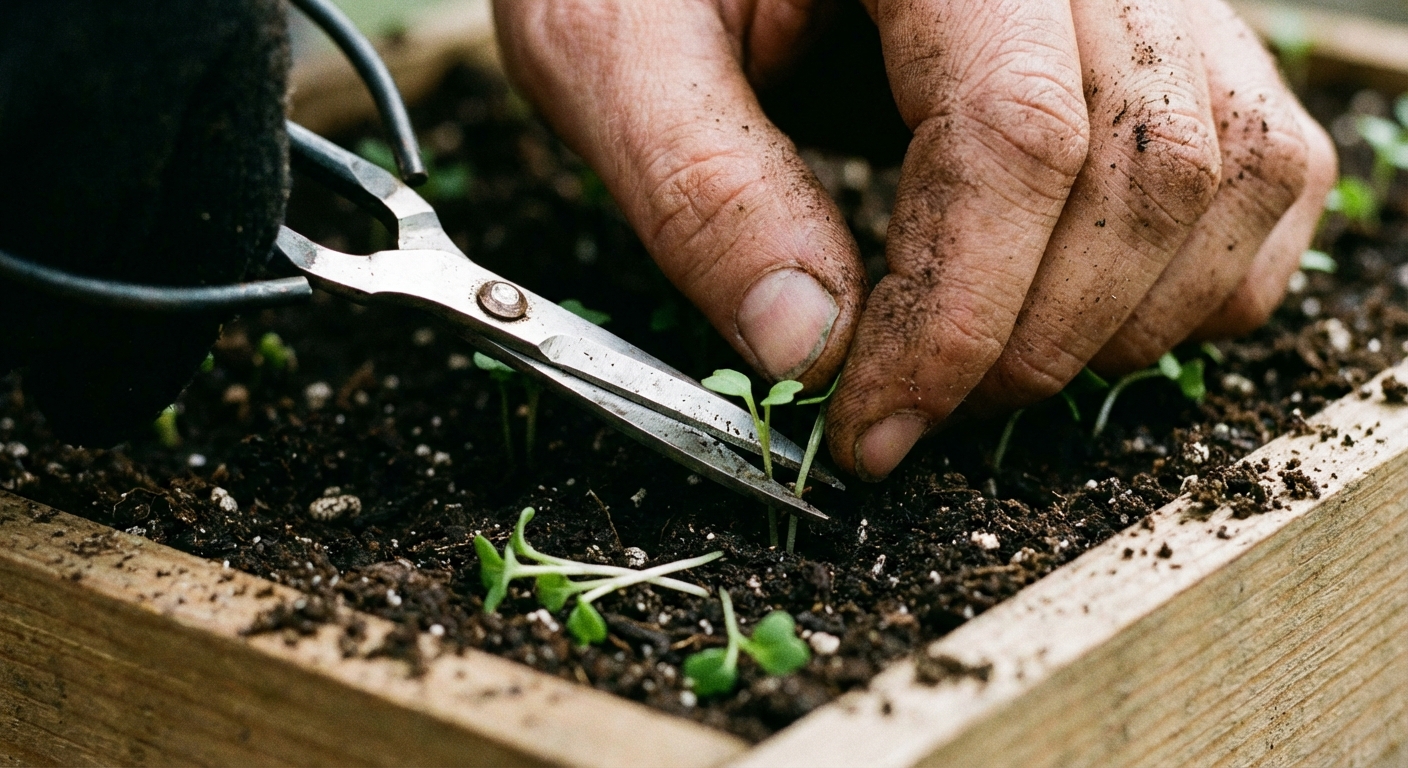
7) Thin seedlings early
If you planted more than one seed per cell, snip extras at the soil line with clean scissors. It feels a little ruthless, but it is kinder than letting seedlings compete until they are weak.
Care basics: Water, air, feeding
Watering without overdoing it
- Surface check: In small cells, check the top 1/4 to 1/2 inch. If it looks pale and dry, it is time to water.
- Lift test: Pick up the tray. Light tray means dry mix. Heavy tray means moisture is still there.
- Avoid soggy soil: Constantly saturated mix invites fungus and gnats.
Airflow and sturdy stems
Seedlings indoors live in still air. A small fan on low, aimed nearby (not blasting directly), encourages sturdier stems and helps prevent fungal issues.
When to fertilize
Most seed-starting mixes contain little to no nutrition. Once seedlings have their first set of true leaves (not the first baby cotyledons), begin feeding lightly.
- Frequency: Every 1 to 2 weeks.
- Strength: Start at 1/4 to 1/2 strength of an organic liquid fertilizer or fish and seaweed blend.
Soil-health note: “More” fertilizer does not mean “better.” Overfeeding creates soft growth that struggles outdoors.
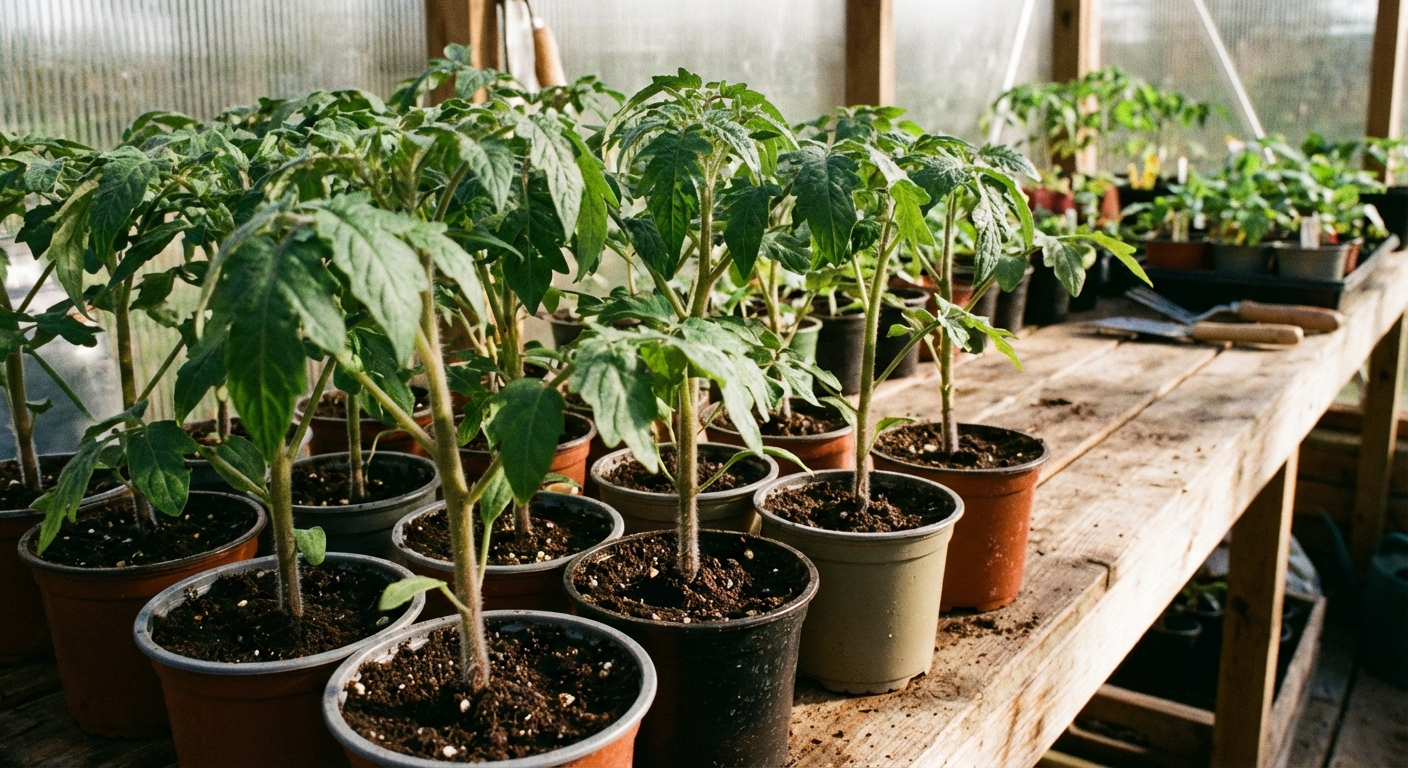
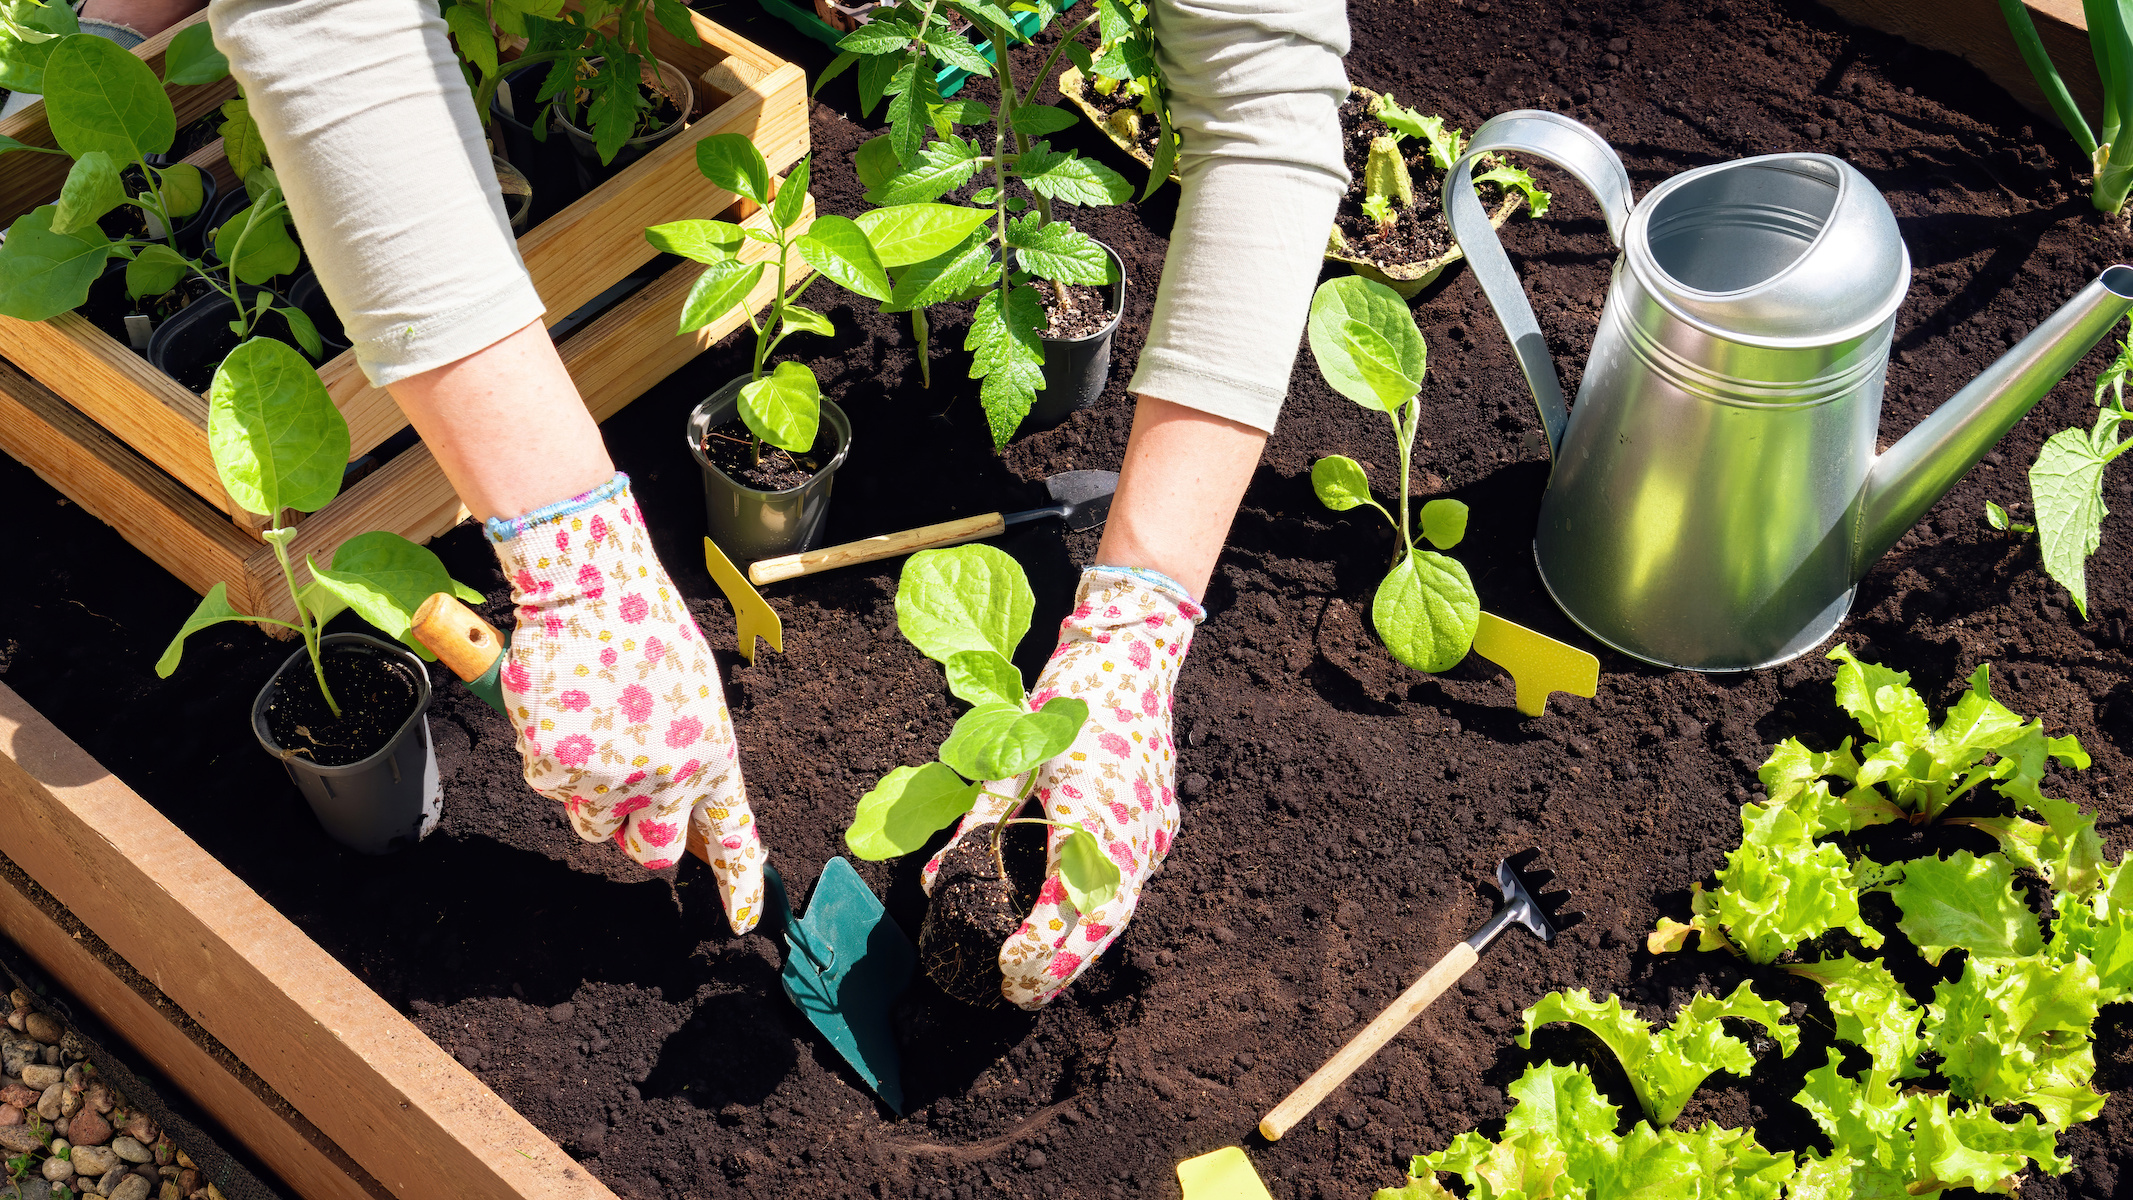
Potting up: When it is time
Some plants, like tomatoes and peppers, often need a step between seed tray and the garden. This is called potting up.
Signs it is time
- Roots are circling the bottom or poking out of drainage holes.
- Seedlings dry out quickly, even with regular watering.
- Plants look top-heavy for their cell size.
How to pot up
- Water the seedlings an hour beforehand so the root ball holds together.
- Fill a larger pot with potting mix (not seed mix). Moisten it lightly.
- Lift the seedling by a leaf, not the stem.
- Set into the new pot and firm the soil gently around it.
Tomato trick: You can bury tomato stems deeper when potting up. They grow extra roots along the buried stem and become sturdier plants.

Common problems and quick fixes
Leggy seedlings
- Cause: Not enough light, lights too far away, or too much heat.
- Fix: Lower lights (within the recommended range for your fixture), increase to 14 to 16 hours daily, and consider a cooler room temperature after germination (around 65°F to 70°F for many crops).
Damping off
- Cause: Fungal disease encouraged by stagnant air and overly wet mix.
- Fix: Remove humidity dome after sprouting, add gentle airflow, bottom water, and avoid reusing dirty trays without washing and sanitizing.
Fungus gnats
- Cause: Constantly wet soil and organic matter.
- Fix: Let the surface dry slightly between waterings, bottom water, use yellow sticky traps, and consider a BTI drench (Mosquito Bits or Dunks) to target larvae. A thin top layer of coarse sand can help sometimes, but drying and BTI are more reliable.
Seeds not germinating
- Cause: Temperature too low, seed too old, planted too deep, or mix dried out.
- Fix: Check packet temp range, use a heat mat for warm-season seeds, keep consistent moisture, and sow at correct depth.
Hardening off: Move outside gently
Indoor seedlings live a pampered life. No wind. No blazing sun. No cold nights. Hardening off is the slow introduction to outdoor reality so plants do not get sunburned or shocked.
When to start
Begin 7 to 14 days before transplant day, once temperatures are appropriate for that crop.
Simple 7-day schedule
- Day 1: 1 to 2 hours outdoors in bright shade, protected from wind.
- Day 2: 2 to 3 hours outdoors, gentle morning sun.
- Day 3: 3 to 4 hours, a bit more sun and breeze.
- Day 4: Half day outside, avoid harsh afternoon sun.
- Day 5: Most of the day outside.
- Day 6: Full day outside. If nights are mild for the crop, try a short overnight.
- Day 7: Ready to transplant, assuming weather cooperates.
Clara’s note: The first warm day of spring makes me overconfident every year. One crisp night can undo a week of good intentions. Check the forecast before leaving seedlings out overnight.
Transplanting: Timing and aftercare
When it is actually safe
Use a three-part check:
- Frost risk: For tender crops (tomatoes, peppers, basil), wait until after the last frost and when nights are reliably mild.
- Soil temperature: Warm-season crops want warm soil. Cool-season crops tolerate cooler soil.
- Seedling readiness: Stocky stems, healthy true leaves, and roots that hold the soil together but are not a tight spiral.
How to transplant
- Choose the right time: Late afternoon or a cloudy day reduces stress.
- Water first: Water seedlings and planting holes.
- Handle gently: Hold plants by leaves, not stems.
- Plant at correct depth: Same depth for most crops, deeper for tomatoes.
- Firm and water in: Press soil lightly around roots and water thoroughly to settle air pockets.
- Protect: Use row cover for cold snaps, and shade cloth for sudden heat.
Aftercare the first week
- Water consistently: Daily checks until plants establish, especially in windy weather.
- Mulch once soil warms: Helps moisture retention and soil life.
- Watch for pests: Slugs and cutworms love tender transplants. Collars and evening slug patrols help.
Zone notes
Hardiness zones vary widely, so here are gentle guidelines to help you translate “weeks before last frost” into real life. Use local frost-date data for the real anchor.
- Zones 3 to 5: Springs can be slow and surprise-frosty. Start seeds on schedule, but be ready to delay transplanting warm-season crops a week or two if nights stay cold.
- Zones 6 to 7: Classic seed-starting territory. Most timing charts match your experience fairly well. Watch for late cold snaps and cold rain.
- Zones 8 to 10: You may transplant earlier, but heat becomes your challenge. Start some cool-season crops indoors for a head start, and consider starting warm-season crops indoors only if summer heat arrives fast and you want plants established early.
Best local clue: When lilacs bloom and dandelions wake up, soil is warming. Nature is an excellent calendar, even if she is a little quirky.
Quick shopping list
- Seeds (fresh, from a reliable source)
- Seed-starting mix
- Cell trays or small pots with drainage
- Waterproof tray to catch drips
- LED light (shop light or grow light) plus a timer
- Optional: heat mat for warm-season crops
- Optional: small fan for airflow
- Optional: BTI (Mosquito Bits or Dunks) if fungus gnats show up
Calm seed-starting checklist
- Find last frost date for your zip code
- Count backward using the timing chart and seed packets
- Pre-moisten seed-starting mix
- Sow at correct depth and label everything
- Keep warm for germination, then prioritize light
- Thin, water evenly, and feed lightly after true leaves
- Pot up if needed
- Harden off 7 to 14 days
- Transplant on a mild day and water in well
If you want, tell me your USDA zone, your last frost date (or nearest city), and what you are growing, and I will help you pick exact start dates and a simple setup that fits your space. I have started seeds on windowsills, bookshelves, and one particularly questionable laundry-room counter. Plants are surprisingly forgiving when we listen to them.