Wrinkled Phalaenopsis Leaves: Roots, Dehydration, and Fixes

When a Phalaenopsis (moth orchid) leaf goes from plump and glossy to wrinkled, leathery, or slightly folded like an accordion, your plant is telling you something very specific: it is not getting enough water into its leaves. The tricky part is that the “why” is not always “you forgot to water.” Sometimes the orchid is surrounded by moisture, but it cannot drink because the roots are damaged, rotting, or simply gone.
This page is about diagnosis and targeted fixes for wrinkled or leathery Phalaenopsis leaves without rehashing general watering basics. We are going to figure out whether you are dealing with plain thirst, root loss, crown trouble, sun or heat stress, or another common stressor, then choose the gentlest recovery plan.

What wrinkled leaves mean
Wrinkles happen when the leaf’s internal water pressure drops. Healthy Phalaenopsis leaves are firm because their cells are full of water. If the plant cannot keep up with water loss through normal transpiration, the leaf surface starts to look:
- Wrinkled or pleated, often lengthwise
- Leathery, flexible but not crisp
- Less glossy, sometimes slightly dull
- Droopy, especially lower leaves
One important comfort: those wrinkles do not always disappear. Mild wrinkling can improve, but if the leaf stayed dehydrated for a long time, some texture can remain even after the plant recovers. Your real success marker is new growth that comes in smooth and firm.
Quick triage: thirsty or root trouble?
Here is my fast, practical way to separate “needs a drink” from “cannot drink.” Do these in order.
1) Check pot weight and media feel
- Very light pot and bark that feels dry and crunchy: likely simple dehydration.
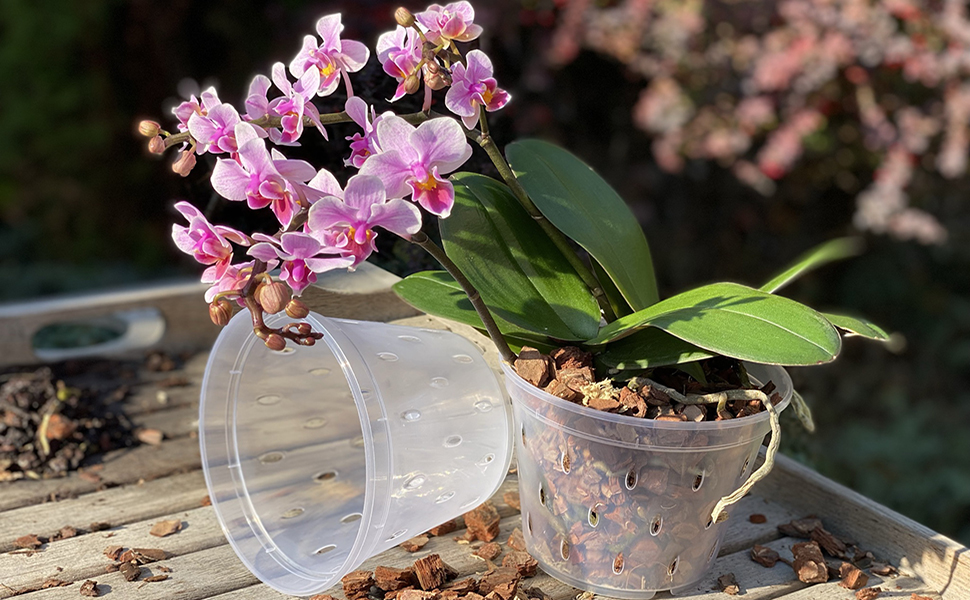
- Pot is heavy or media feels constantly damp: dehydration symptoms may be from root rot and or low oxygen around the roots.
2) Look at root color (if you can)
- Silvery roots (dry) that turn green after watering are usually functional.
- Brown, mushy, hollow roots that stay dark or collapse when pressed are not functional.
Note: root color varies with lighting, algae, pot opacity, and water. Some healthy roots look more yellow-green than bright green. Texture and firmness matter more than perfect color.
3) Do the gentle wiggle test
Hold the plant at the base and gently wiggle. A well-rooted Phal feels anchored. If it rocks easily in the pot, you likely have significant root loss.
4) Check the crown (center of the plant)
Wrinkles plus a crown that is soft, blackened, smelly, or wet can point to crown rot. That is a different emergency than thirst.
Root inspection: healthy vs failing
If the diagnosis is unclear, you will learn the most by inspecting the roots. Most Phals tolerate a careful slide-out and look.
Quick safety note: work with clean hands, clean surfaces, and sterilized cutting tools. A little hygiene goes a long way when roots are already stressed.
Healthy roots
- Firm, round, and slightly springy
- Silvery when dry, greener when wet
- Tips may be bright green or reddish depending on variety
Dehydrated but salvageable roots
- Wrinkled or slightly flattened
- Still firm, not mushy
- May rehydrate and plump a bit after watering
Rotten or dead roots
- Brown to black, translucent, or mushy
- Velamen (outer layer) slides off, leaving a thin stringy core
- Smell can be sour or swampy
Why this matters: if many roots are rotten, “watering more” usually makes the problem worse. The plant needs air, fresh media, and time to regrow roots.
Common causes
1) Simple dehydration
This is the best-case scenario. You will typically see lots of firm roots, but they are silvery and dry most of the time. Causes include under-watering, very chunky bark that dries too fast, warm indoor air, or a plant that recently bloomed heavily and is catching up.
2) Root rot or root loss
Phals can look thirsty while sitting in damp media because damaged roots cannot uptake and transport water effectively. Classic set-ups include:
- Media that stays wet too long, especially old broken-down bark
- No airflow around the pot, no drainage, or a decorative cachepot that traps water
- Watering on a schedule instead of by root and media condition
3) Recent repotting or root disturbance
If you just repotted, removed a plug of old moss, or untangled a tight root mass, the plant may sulk for a bit. Slight wrinkling can happen while it re-establishes contact with the new mix. The fix is usually stability, warmth, bright indirect light, and careful watering rather than more pot-poking.
4) Mineral buildup or fertilizer burn
High fertilizer salts, very hard water, or a mix that never gets flushed can damage roots and mimic dehydration. Clues include crusty deposits on the pot or media and root tips that die back. If you suspect buildup, do a thorough flush with plain water and consider switching to lower-mineral water for a while.
5) Crown issues
If water collects in the crown and sits there, the growing point can rot. Leaves can wrinkle because the plant is stressed and cannot move resources properly. Affected plants often have a soft center, a bad smell, or a newest leaf that yellows from the base. If the growing point is lost, the original crown will not “recover,” but the plant can sometimes survive by producing a basal keiki.
6) Sun, heat, or cold stress
Too much direct sun can cause yellowing patches, bleached areas, or crisp burn spots. Heat stress can increase water loss faster than roots can supply it, especially near a hot window or vent. Cold media can also reduce root uptake even when the mix is moist. You may see wrinkling paired with faded color or scorched sections rather than uniform pleating.
7) Pests (less common, but worth checking)
Wrinkling is usually a water-uptake problem, but pests can add stress. Look for fine stippling, dull patches, webbing (spider mites), or sticky residue (scale or mealybugs). If you see those signs, treat pests alongside the root and watering fix.
8) Normal aging of the oldest leaf
If just one bottom leaf is wrinkly and it is also slowly yellowing, that can be normal leaf retirement. The key is that the rest of the plant stays firm and the decline is gradual.
How to fix it
Path A: Roots are mostly healthy
If roots look firm and viable, your goal is to rehydrate steadily, not flood the pot. Try this for 2 to 3 weeks:
- Deep water, then drain: take the inner pot to the sink and thoroughly flush water through the media until it runs freely out the bottom.
- Optional soak: if bark is very dry and repels water, soak the pot for 10 to 15 minutes, then drain completely. Do not leave it sitting in water.
- Repeat when roots turn silvery again, not by calendar. In warm, dry homes that can be every 5 to 10 days, sometimes sooner.
- Raise humidity gently (a pebble tray with water below the pot level, or grouping plants). Avoid constant misting of the crown.
What to expect: leaves may feel slightly firmer within a week, but visible wrinkles can take longer to soften. Watch for a smooth, firm new leaf as the real sign of recovery.
Path B: Many roots are dead or rotting
If you have mushy roots or a plant that wobbles, do this sooner rather than later. A Phal can regrow roots, but it needs a stable, airy setup.
Step-by-step root rescue
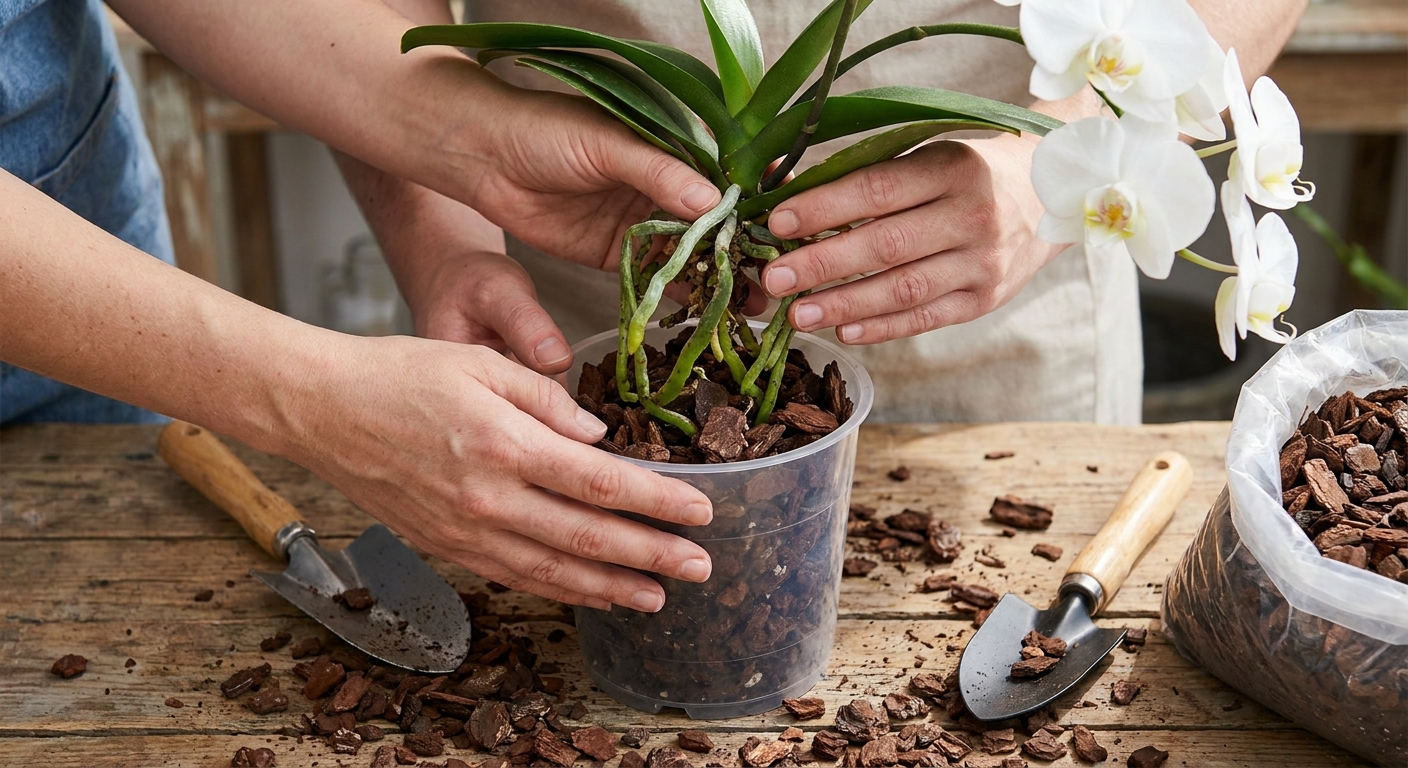
- Unpot and remove old media. Tease bark away gently, especially around the core.
- Rinse roots so you can see what you are dealing with.
- Trim dead roots with sterilized scissors. Cut only what is mushy, hollow, or papery. Keep firm roots even if they look a bit wrinkled.
- Let cuts dry for 30 to 60 minutes in a clean, shaded spot with airflow.
- Repot into fresh orchid bark (or your preferred airy orchid mix). Choose a pot that fits the remaining root mass, not a big pot “for growth.”
- Stabilize the plant with a stake or clip if needed so new roots can grab on without constant movement.
Recovery watering after repotting
After heavy root trimming, many growers wait a couple of days before a full soak. My practical compromise looks like this:
- If you trimmed a few roots: water normally right after repotting to settle bark, then drain well.
- If you trimmed many roots: lightly moisten the media or do a quick rinse-through, then wait 48 hours before the next deeper watering. This can help freshly cut root ends dry and seal.
During recovery, keep the orchid in bright, indirect light and warm temperatures. Avoid fertilizer until you see active new roots or a new leaf starting, then feed lightly.
Path C: Crown concerns
If the crown is wet or soft, pause normal watering until you address it. Do this immediately:
- Tip out any standing water in the crown by gently turning the plant sideways.
- Increase airflow around the plant.
- Keep water out of the crown going forward. Water the media, not the center.
If the crown is mushy, dark, or foul-smelling, you may be dealing with crown rot that can be fatal. If the growing point is destroyed, that crown will not return, but a basal keiki can sometimes save the plant. This is a good moment to consult a local orchid society for hands-on help.
Path D: Sun or temperature stress
Move the orchid out of direct sun, especially hot afternoon rays. Aim for bright shade. If leaves have bleached or burned spots, those areas will not turn green again, but you can prevent further damage.
- Use a sheer curtain on sunny windows.
- Keep orchids away from heater vents and heat pumps.
- In winter, keep the pot from pressing against a cold windowpane.
- Water earlier in the day so the plant is hydrated before peak warmth.
When to repot
Repotting is helpful when the media is old, sour-smelling, or staying wet too long, or when roots are failing. It is not always the first move for a simply thirsty orchid.
Repot soon if you notice
- Media that looks broken down, spongy, or soil-like
- Persistent dampness for many days after watering
- Lots of rotten, hollow roots
- Plant wobble due to poor root anchoring
Hold off if
- Roots are mostly firm and media is still airy
- The plant is already stressed but stable and you can correct hydration without disturbing it
Phals often tolerate repotting even outside the perfect window, but the gentler option is always to disturb as little as possible while still solving the problem.
What not to do
- Do not panic-water. More water does not help if roots are compromised, and it can accelerate rot.
- Be cautious with ice-cube watering on a stressed plant. It can under-water in many setups and may chill roots, especially in cool homes or small pots.
- Do not keep the pot constantly wet to “fix” wrinkles. If roots are compromised, constant moisture speeds up failure.
- Do not pack sphagnum tightly around weak roots unless you are experienced with moisture control. Tight moss can suffocate roots fast in a warm home.
- Do not fertilize heavily during active dehydration or after major root loss. Weak roots burn easily.
- Do not peel the crown or cut leaves to chase texture. Leaves are your plant’s solar panels and pantry.
FAQ
Will wrinkled leaves become smooth again?
Sometimes, especially if the wrinkling was mild and brief. Deep, long-term leathery texture often remains. The best indicator is whether new leaves grow in firm and smooth.
My orchid has wrinkled leaves but lots of aerial roots. Is it still dehydrated?
Yes, it can be. Aerial roots help, but most water uptake still comes from roots in the pot. Wrinkles plus damp media often points to failing pot roots even if aerial roots look okay.
Should I soak the whole orchid for hours?
I do not recommend long soaks for a struggling Phal. Short soaks (10 to 15 minutes) can help bark re-wet, but prolonged soaking reduces oxygen around roots and can invite rot.
Can low humidity cause leathery leaves?
Low humidity can contribute, especially in winter heating season. But in my experience, persistent wrinkling and leathery texture most often trace back to inconsistent watering, root problems, or cold stressed roots. Humidity helps, but it is not a substitute for functioning roots.
When should I worry and get help?
Escalate if wrinkles worsen quickly, the plant becomes limp, you find almost no viable roots, or the crown is soft, dark, or smelly. Those cases can move fast, and experienced eyes can save time and plants.
Checklist for 14 days
If you want a simple plan that prevents panic-watering, follow this rhythm:
- Day 1: Inspect roots and crown. Decide whether you are in Path A, B, C, or D.
- Each watering day: Water thoroughly, then drain completely. No standing water in cachepots.
- Twice weekly: Feel the leaves. Are they getting firmer? Check root condition if you have a clear pot.
- Weekly: Check plant stability. Less wobble usually means roots are regaining traction.
And if you catch yourself apologizing to your orchid, join the club. I talk to my ferns, too. Plants do not need perfection. They need a patient human willing to observe, adjust, and try again.