Why Tomato Leaves Turn Brown
Brown tomato leaves can feel like a personal insult, especially when the plant was lush and green last week. Take a breath. Tomatoes are dramatic, and “brown” is not one problem, it is a symptom with a few very different causes.
The trick is to read the pattern before you reach for a spray bottle or fertilizer. Is the browning on the edges? Is it spotty? Is the whole leaf crisping at once? Once you match the pattern, the fix is usually simple.
Quick note: before you treat anything, avoid the “random spray” reflex. A fungicide will not fix mites, and an insecticide will not fix drought stress.

Quick pattern guide
Grab your coffee, crouch down, and look closely. These patterns are the fastest way to narrow it down.
- Brown, crispy edges or tips: often water stress, salt buildup, or fertilizer burn. Less commonly, potassium deficiency can mimic edge scorch (usually on older leaves).
- Scattered brown spots (sometimes with yellow halos): often fungal or bacterial leaf disease.
- Bleached or tan patches on leaves that face the sun: heat stress or leaf scorch (fruit sunscald is more common, but leaves can scorch too).
- Bronzing, stippling, or “dusty” leaves that turn crispy: often mites (especially in hot, dry weather).
- Lower leaves turn brown first: common with early blight, Septoria, soil splash (from rain or overhead watering), and general aging.
- Whole leaf dries up fast during hot spells: underwatering, inconsistent moisture, container stress, or root trouble.
- Twisted new growth plus bronzing or scorch: consider herbicide drift or chemical injury.
If your leaves are more yellow than brown, you may be dealing with a different set of issues. (We cover yellowing separately.) If you suspect a fast-spreading disease, use reputable local extension resources for confirmation.
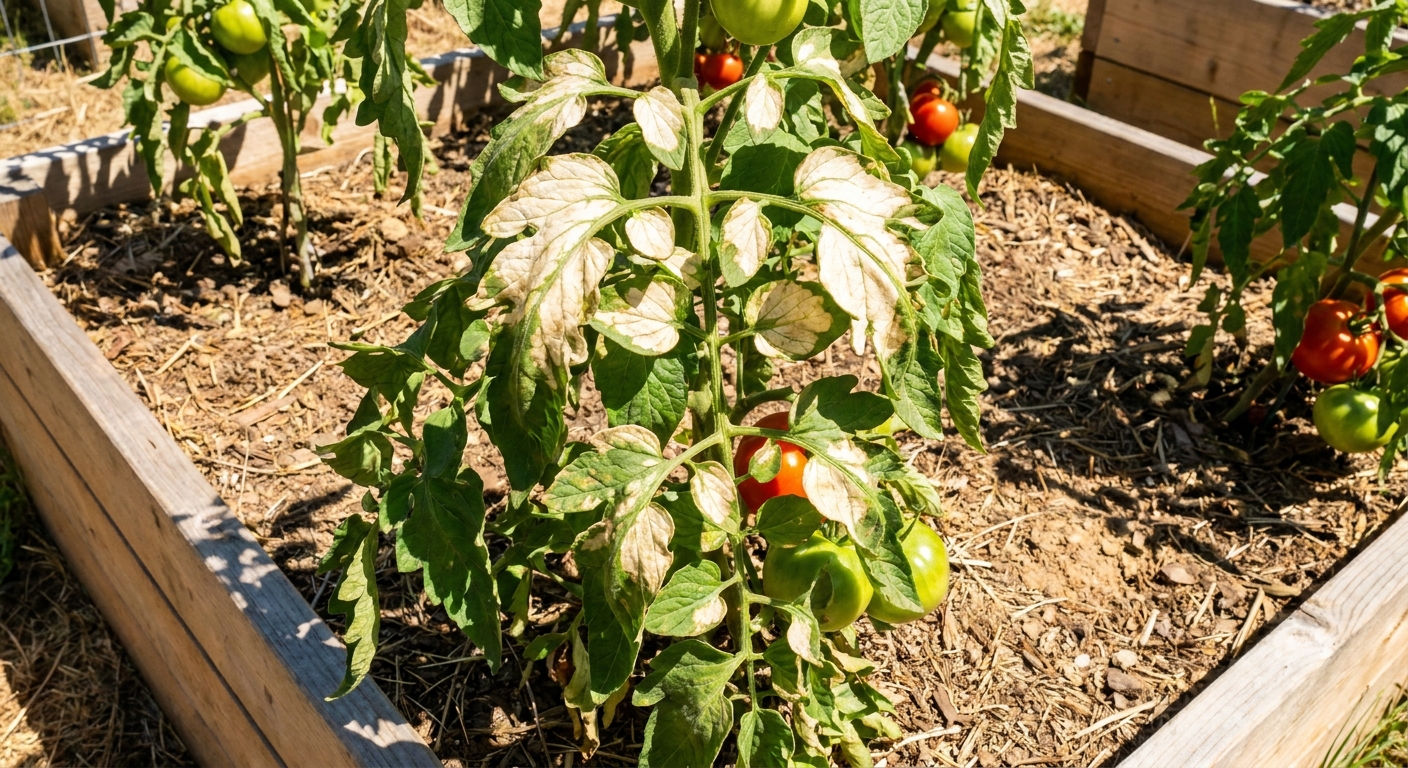
Sun and heat stress
Tomato leaves can scorch, especially if a plant was raised indoors, under lights, or in a protected greenhouse and then moved straight into full afternoon sun. You can also see it after heavy pruning that suddenly exposes inner leaves. The damage often looks like tan, papery patches or bleached areas that later turn brown. It shows up most on the top or outer leaves that face the sun.
Clues it is heat or sun scorch
- Damage is worst on the sun-facing side of the plant.
- Patches look bleached, tan, or papery before browning.
- New growth may look fine if temperatures ease or you provide shade.
- Happens right after a heat wave, a move outdoors, or pruning that exposes the canopy.
What to do
- Give temporary shade during the hottest part of the day for 3 to 7 days. Shade cloth (30 to 40 percent) works beautifully. A bedsheet clipped to stakes works in a pinch.
- Water early so the plant starts the day hydrated, but do not keep the soil soggy.
- Avoid hard pruning in extreme heat. Those leaves are the plant’s sunscreen.
- Do not over-fertilize to “push” recovery. That can backfire in heat.
Scorched leaves will not turn green again, but the plant can outgrow the damage if conditions improve.
Fertilizer burn and salts
When tomatoes get too much fertilizer, especially high-nitrogen products or strong liquid feeds, the leaf edges can turn brown and crunchy. In containers, it can also happen from salt buildup as water evaporates and leaves minerals behind.
Clues it is fertilizer burn
- Browning starts at tips and margins and moves inward.
- You recently fed with a strong mix, fertilized more often, or applied manure that was not fully composted.
- Plants may look dark green but “scorched” at the edges.
- Container soil surface may show white crust (mineral salts).
What to do (garden beds)
- Pause fertilizing for 2 to 3 weeks.
- Water deeply to help dilute salts in the root zone, but only when the top 1 to 2 inches of soil are dry.
- Mulch with straw or shredded leaves to reduce evaporation and salt concentration.
What to do (containers)
- Leach the pot: water slowly until water pours freely from the drainage holes for a minute or two. Repeat once more after 10 minutes. This flushes excess salts.
- Empty saucers after watering. Do not let the pot sit in salty runoff.
- Note: repeated leaching can wash out nutrients too, so once the plant stabilizes, resume feeding at half strength and less often.
- Make sure the container has real drainage holes. A decorative outer pot can trap water at the bottom.
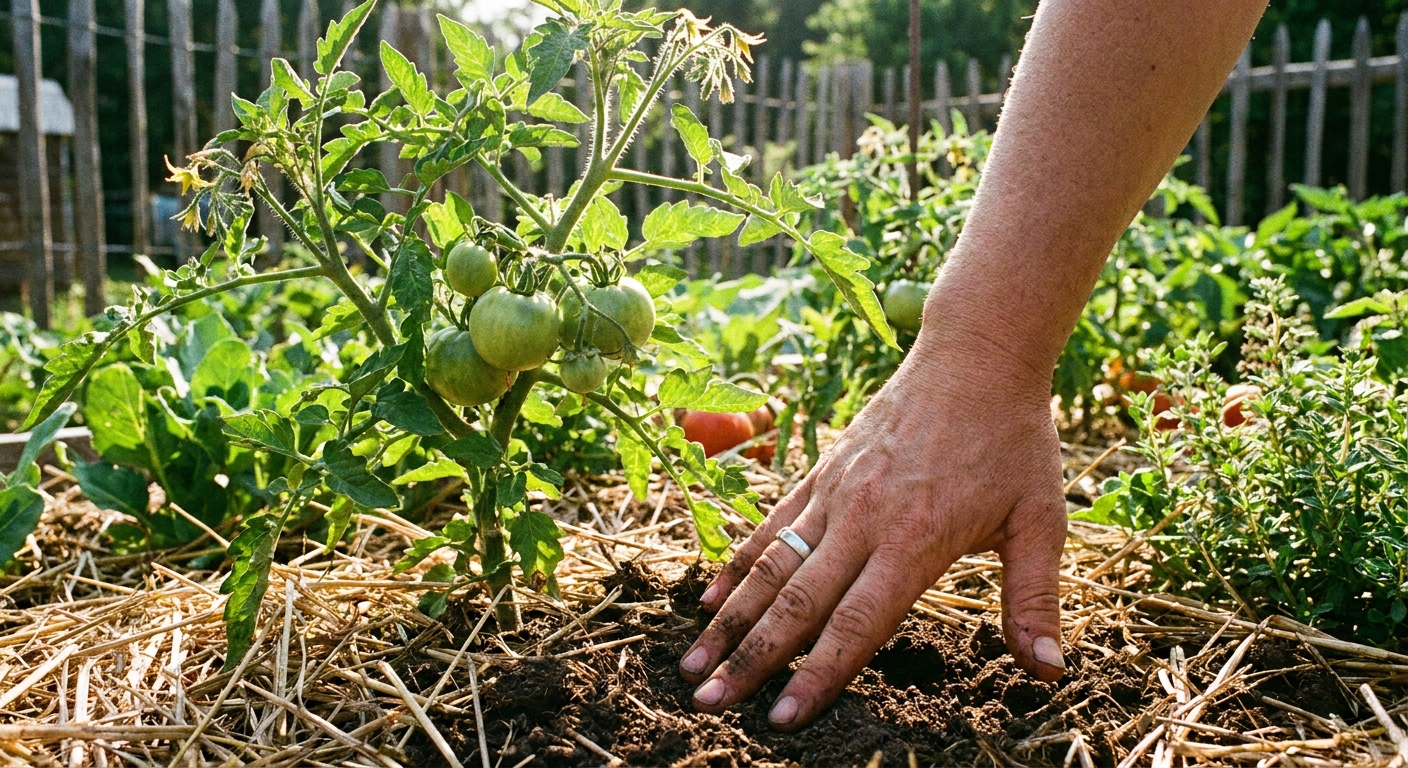
Water problems
Tomatoes want consistent moisture, not a roller coaster. Brown leaves often show up when roots cannot deliver steady water to the canopy, either because the soil is too dry, swings too wildly, or stays wet and oxygen-poor.
1) Underwatering and hot wind
In intense heat, a tomato can go from “fine” to “crispy” fast. Leaves may curl, feel dry, and brown broadly, especially on older leaves first.
- Fix: Water deeply in the morning. Aim for deep watering that wets the main root zone (often about 6 to 12 inches in many garden soils). In containers, water until runoff, then check again later in the day during heat waves.
- Stabilize: Add 2 to 3 inches of mulch and consider a drip line or soaker hose.
2) Inconsistent watering
When soil alternates between dry and soaked, plants struggle to regulate water pressure in their leaves. This can show up as crispy margins and overall “tired” foliage. It also sets you up for fruit problems like blossom end rot.
- Fix: Pick a routine. For in-ground tomatoes, deep watering 1 to 3 times weekly is common depending on heat and soil. For containers, it may be daily in midsummer.
- Check: Use the finger test, or better, a moisture meter. Do not guess by leaf droop alone.
3) Overwatering and poor drainage
Roots need oxygen. If soil stays wet, roots can suffocate and rot, and leaves may develop dull color, brown areas, and persistent drooping that does not perk up after watering.
- Fix: Let the soil dry down before watering again. Improve drainage with compost, avoid planting in low soggy spots, and never let pots sit in standing water.
- Be gentle: Do not fertilize a stressed, waterlogged plant. Focus on roots first.
Pests that cause browning
If your tomato looks like it is drying out even though you are watering correctly, check for pests next. Mites are the classic culprit because they cause bronzing and crisping that can look exactly like heat stress from a few feet away.
Spider mites
- What it looks like: tiny pale stippling on leaves that turns bronze, then brown. Fine webbing may show up on leaf undersides or between stems.
- Where to look: undersides of leaves, especially in hot, dry weather.
- What to do: Hose off leaf undersides (a firm spray of water), remove the worst leaves, and reduce plant stress with consistent watering and mulch. If needed, use insecticidal soap or horticultural oil labeled for mites, and spray undersides thoroughly. Avoid spraying in full sun or extreme heat.
Tomato russet mites
- What it looks like: a subtle “dusty” or russeted bronzing that can start on stems and leaf edges, then spread. Leaves can curl and crisp without obvious webbing.
- What to do: Prune out heavily affected growth and consider a labeled miticide or sulfur product where appropriate. These are microscopic, so if symptoms fit and nothing else does, it may be time to consult local extension help.
Quick pest check
- Look under 5 to 10 leaves with a hand lens if you have one.
- Tap a leaf over white paper. Moving specks can be mites.
- Check nearby plants too, mites spread fast.
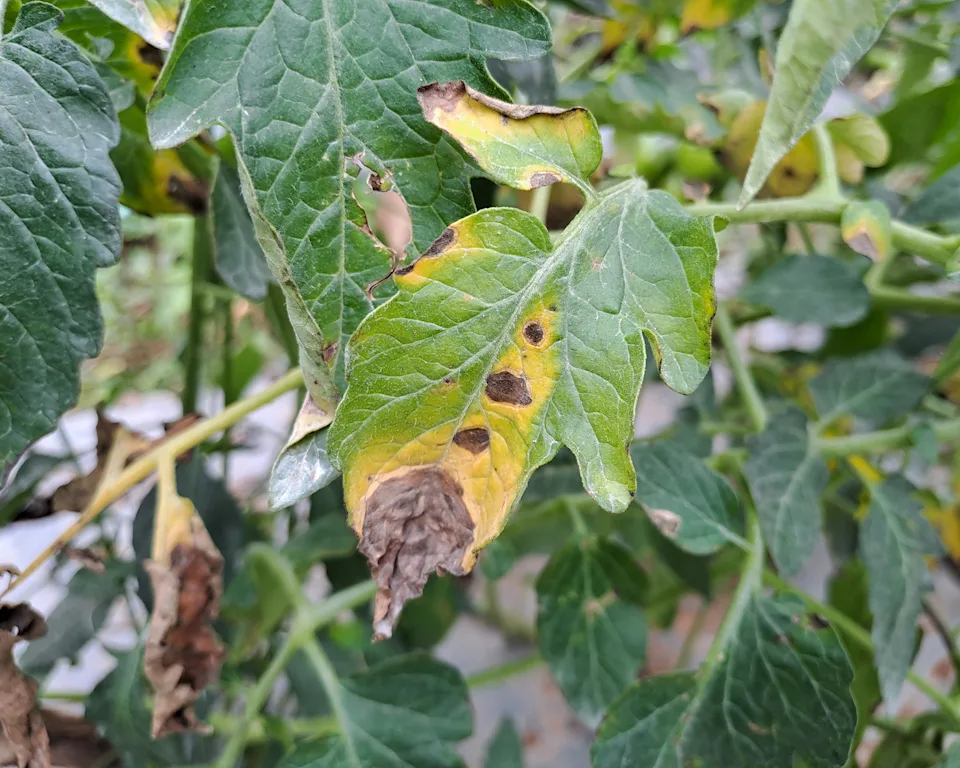
Leaf spot diseases
When browning shows up as spots rather than edge crisping, think disease first. Tomatoes are prone to several leaf spot issues, and the best home-garden approach is usually the same: slow the spread with sanitation and better airflow, then decide whether the plant is still worth saving.
Early blight
Early blight often begins on lower leaves with brown spots that can form faint concentric rings. Leaves yellow around the spots, then brown and drop. The plant can keep producing if you manage it early.
- Do now: Clip off the worst infected lower leaves (avoid removing more than about 25 to 30 percent of the foliage at once).
- Keep leaves dry: Water at the base, not overhead.
- Mulch: Prevent soil splash, which spreads spores.
- Support: Stake or cage for airflow.
Septoria leaf spot
Septoria usually shows as lots of small, round spots on lower leaves, often with tiny dark centers. It climbs upward if unchecked.
- Remove infected leaves promptly and bag them.
- Avoid working plants when wet.
- Consider a fungicide labeled for tomatoes if it is spreading fast and you want to salvage the season. (Always follow the label.)
Late blight (urgent)
Late blight is the one that deserves a flashing caution sign. It can cause fast-spreading dark blotches, leaf collapse, and can devastate plants in cool, wet weather. If you suspect it, confirm quickly using reputable local extension resources and consider removing the plant to protect the rest of your garden.
Chemical injury outliers
Sometimes the pattern does not match watering, sun, or disease at all. If you see distorted, twisted new growth, strange cupping, and uneven bronzing or browning after a neighbor sprayed weeds (or you used a lawn product nearby), consider herbicide drift or chemical injury.
- Clues: new growth looks weird first, symptoms show up fast, and multiple sensitive plants nearby may be affected.
- What to do: Rinse foliage with water if exposure was very recent, keep care gentle (steady water, no extra fertilizer), and wait to see if new growth returns to normal. Severely affected plants may not recover.
When brown leaves are normal
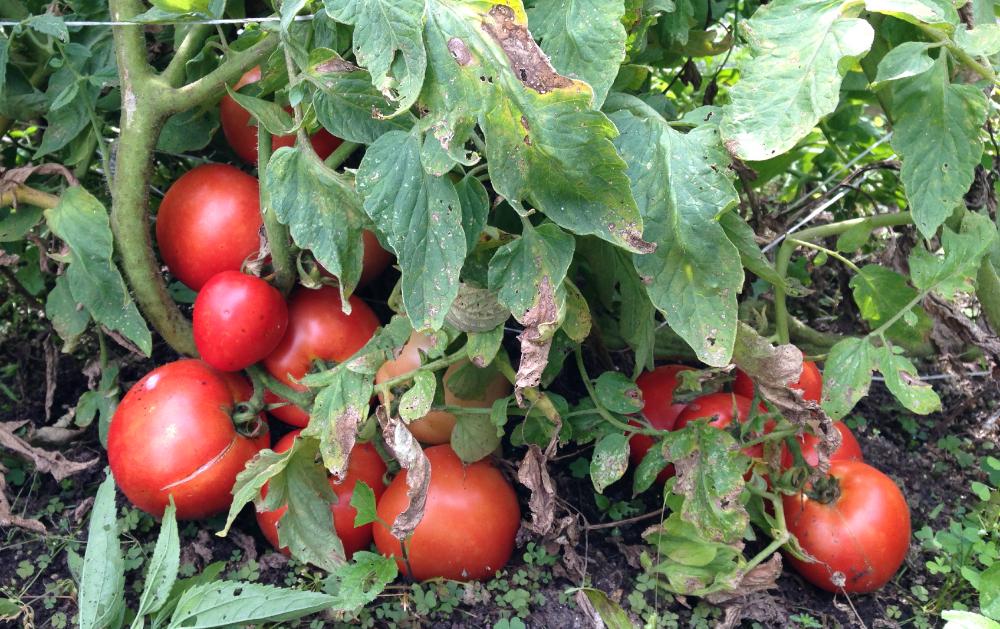
Not every brown leaf is a crisis. Tomatoes naturally shed older leaves, especially the lowest ones that get shaded as the plant grows. If a few bottom leaves brown slowly while the rest of the plant is vigorous, it may just be normal aging.
Likely normal
- Only 1 to 3 of the lowest leaves are browning.
- No spotting pattern, no rapid spread.
- New growth looks healthy and green.
Not normal
- Browning is moving upward quickly.
- Spots multiply after rain or overhead watering.
- Whole sections of the plant collapse or stems show dark lesions.
- Leaves bronze and crisp while you see stippling or webbing underneath.
Should you remove brown leaves?
Usually, yes, with a little restraint. Removing damaged leaves can reduce disease spread and improve airflow, but over-pruning can expose fruit and inner leaves to sunscald and can stress the plant.
How to prune safely
- Use clean snips.
- Remove leaves that are more than 50 percent damaged or clearly infected with spotting.
- Start with lower leaves, especially those touching soil.
- Avoid removing more than about 25 to 30 percent of foliage at one time.
- Do not compost diseased foliage. Bag it or trash it.
- Keep enough foliage to shade fruit, especially in hot climates.
When to pull the plant
I am a “try to save it” gardener by nature, but sometimes the kindest thing is to cut your losses and protect the rest of your tomatoes.
Consider pulling it if
- You suspect late blight and it is progressing rapidly, especially in cool, wet weather.
- The plant is more than half defoliated and still losing leaves weekly.
- Stems show extensive dark lesions and the plant wilts even with proper watering.
- Multiple nearby plants are starting to show the same fast-spreading spotting pattern.
When you remove a plant, do not leave it on the ground. Bag it, sanitize tools, and plan a rotation away from tomatoes and their close relatives (peppers, potatoes, eggplants) for 2 to 3 years if disease pressure was high.
10-minute troubleshooting
If you only do one thing, do this quick check. It is my go-to when I am standing in the garden with dirt on my knees and a worried look on my face.
- Pattern: edge scorch, spots, sun-facing patches, or bronzing and stippling?
- Location: lower leaves first, upper leaves first, or one side only?
- Undersides: flip leaves and look for webbing, mites, or eggs.
- Moisture: feel the soil 2 inches down.
- Recent changes: heat wave, pruning, new fertilizer, heavy rain, weed spray nearby?
- Act: prune the worst leaves, adjust watering, add mulch, and improve airflow.
Prevention
Once you have identified the likely cause, prevention is mostly about making the plant’s life boring in the best way.
- Mulch to steady moisture and stop soil splash.
- Water at the base, ideally in the morning.
- Stake or cage for airflow and faster drying after rain.
- Feed gently and consistently, especially in containers.
- Keep foliage off the soil by pruning the lowest leaves as the plant grows (go gradually).
- Scout weekly for mites and spots so you catch problems early.
- Rotate crops and clean up plant debris at season’s end to reduce disease carryover.
And if you are reading this with a guilty look because you missed a watering or two, welcome to the club. Tomatoes are forgiving when you give them steady care going forward.