Why Orchid Leaves Turn Yellow
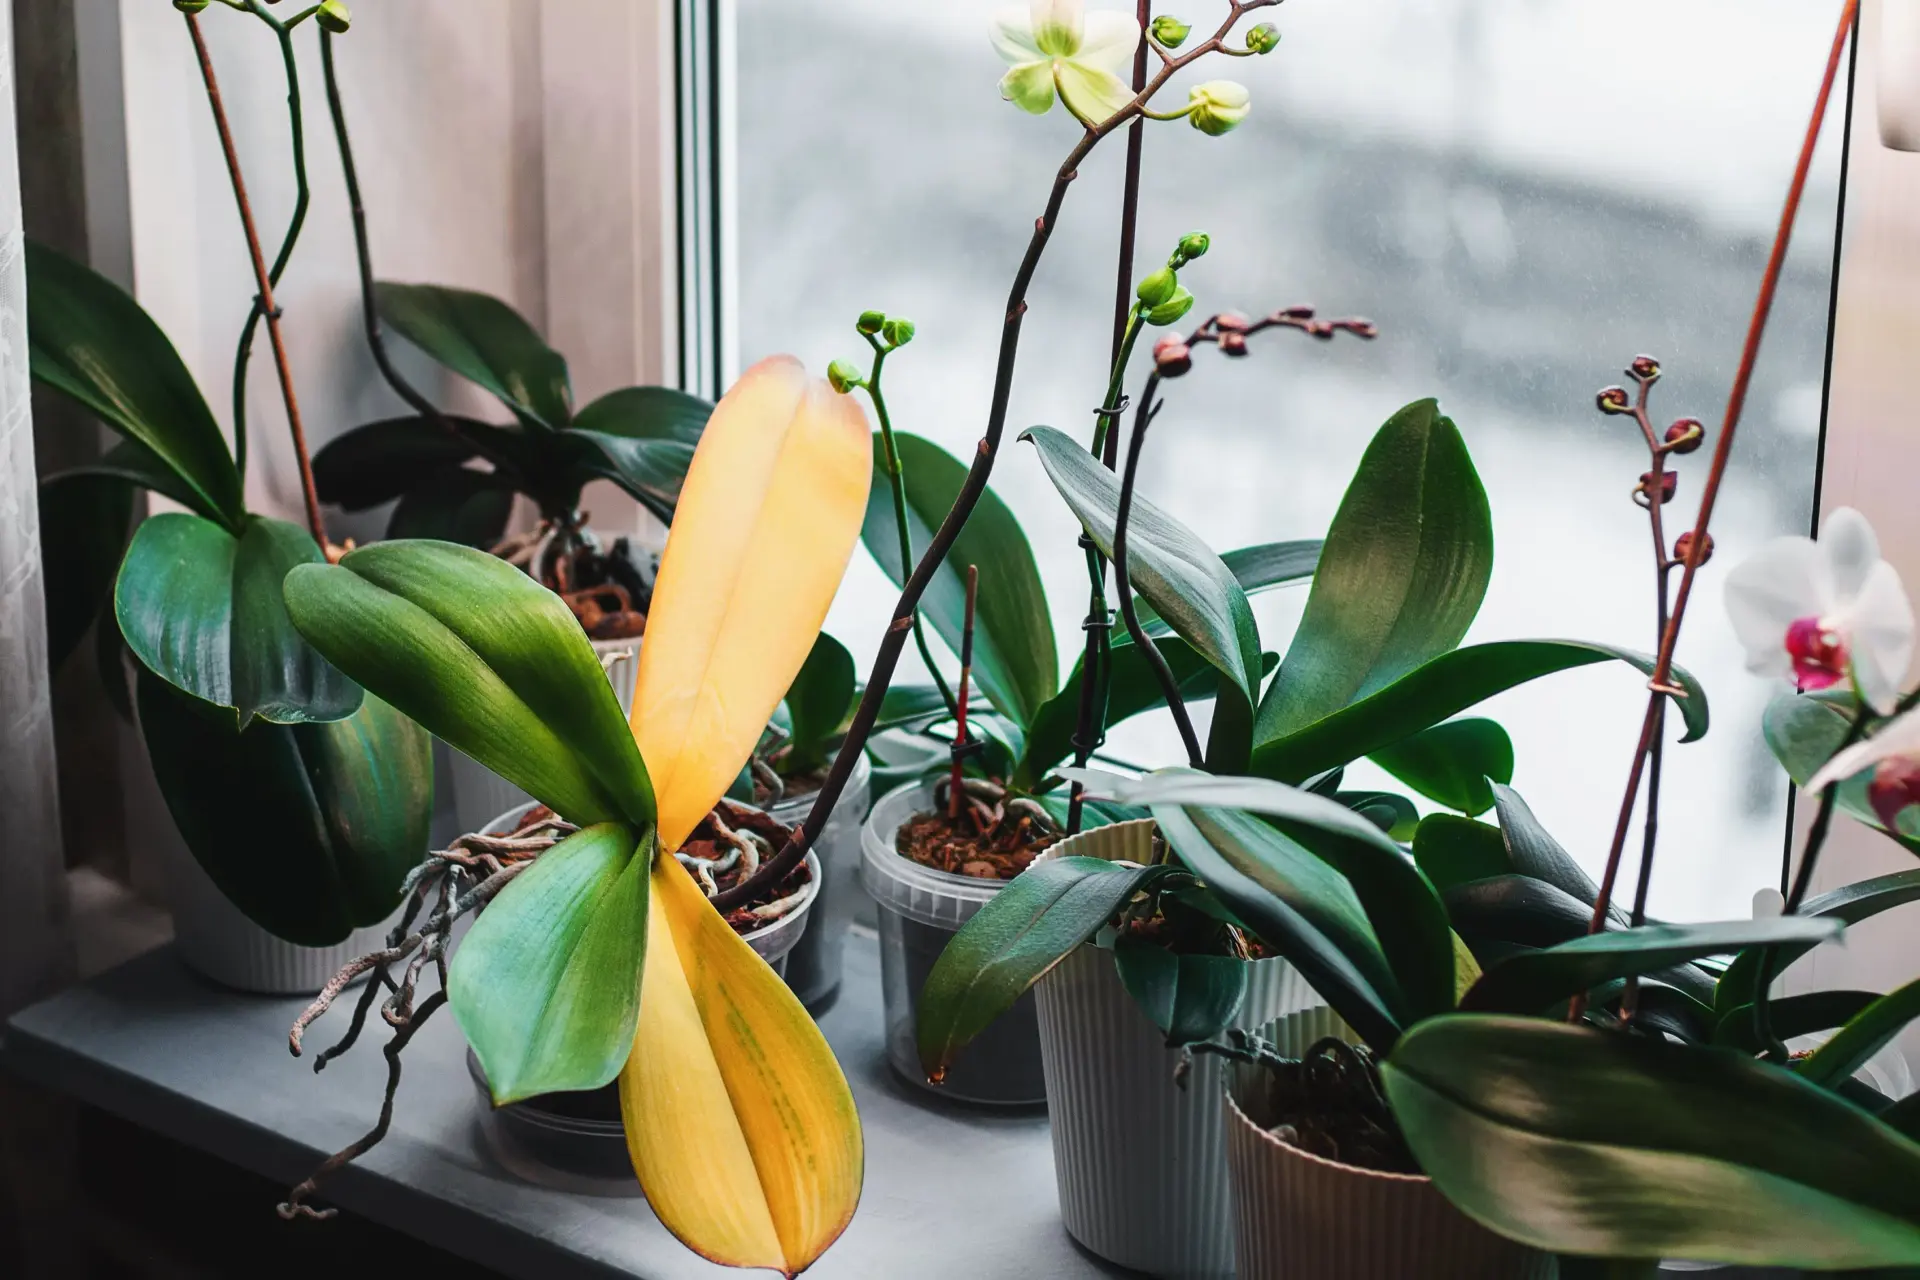
Yellow orchid leaves can feel like a personal insult from a plant that otherwise looks perfectly polite. Take a breath. For Phalaenopsis (moth orchids) and many common hybrids, a yellowing leaf is often either normal aging or a care mismatch you can correct quickly.
Below is my favorite way to troubleshoot: a simple decision tree based on which leaves yellow first, the leaf texture, and what you can see at the crown and roots.
Quick decision tree
Step 1: Which leaves are yellowing?
- Only the oldest, lowest leaf (or two) is yellowing while newer leaves stay firm and green: likely normal leaf shed.
- Several leaves yellowing over a short time, especially from the middle or top: suspect water issues, crown trouble, or severe stress.
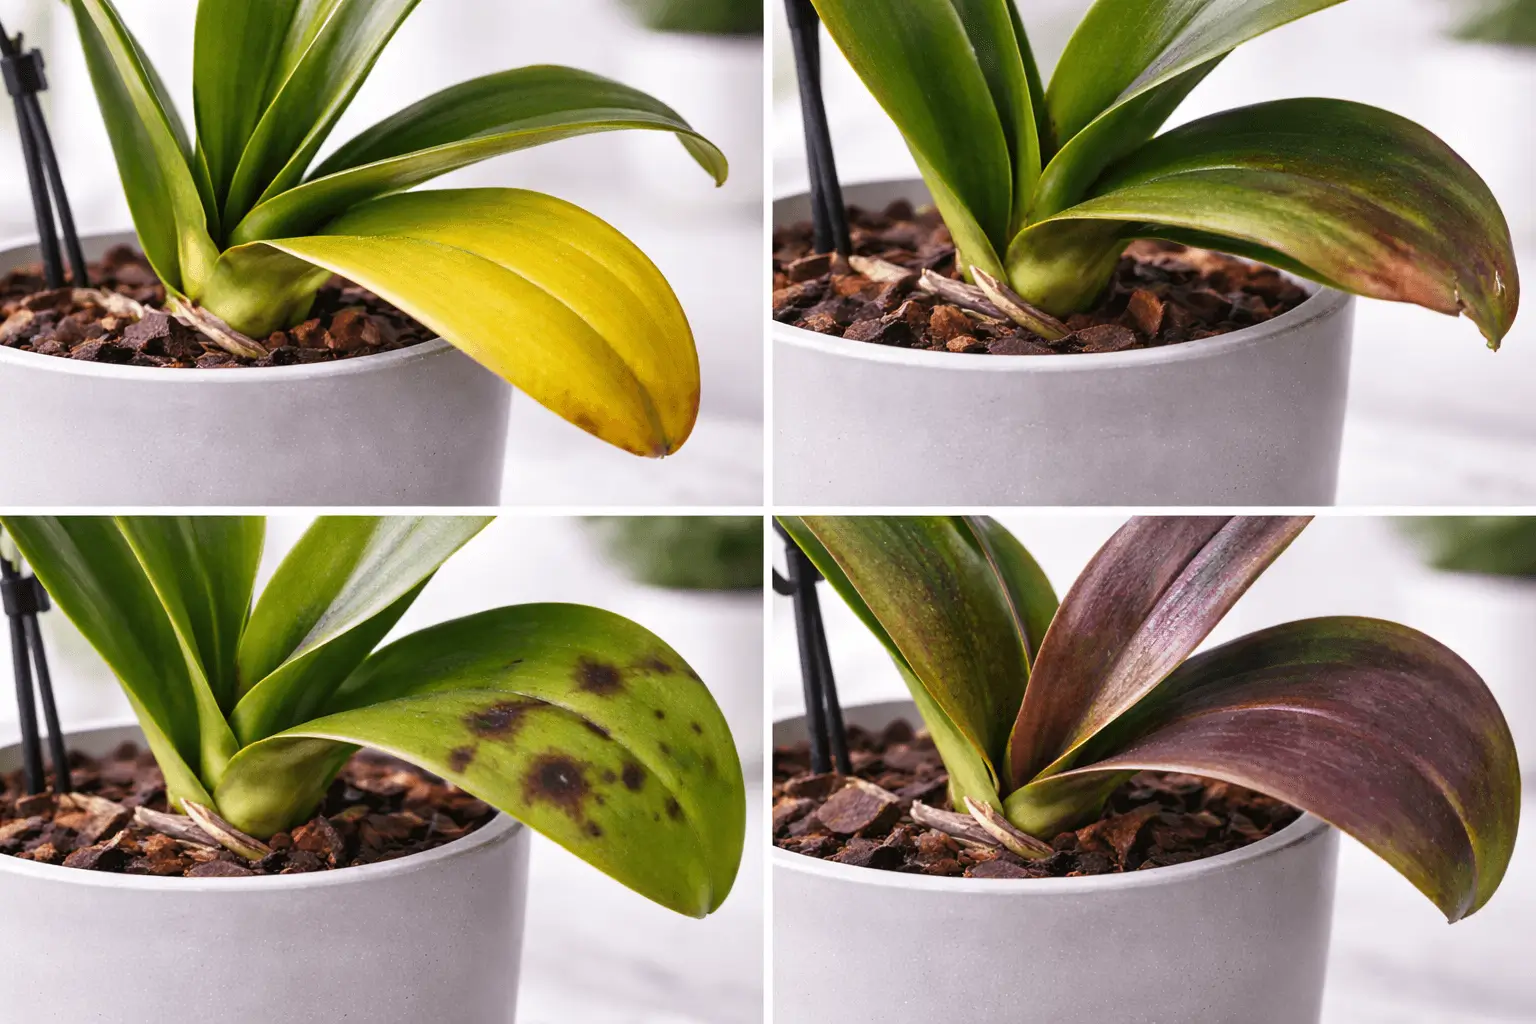
- Yellow patches on the side facing the window: suspect light stress or sunburn.
- Yellowing starts at the leaf tips or edges with a crispy feel: suspect fertilizer burn or salt buildup.
Step 2: Feel the leaf
- Yellow and papery, drying up slowly: often normal aging.
- Yellow and limp, soft, or watery: often overwatering, root loss, or rot.
- Yellow with a distinct bleached patch that later turns tan or brown: light damage.
Step 3: Check the crown and roots
The crown is the center where leaves emerge. For Phalaenopsis, crown health is everything.
- Roots visible at the crown look plump and green or silver: hydration may be okay.
- Roots look brown, hollow, or mushy: likely root rot from staying wet too long.
- Crown looks dark, wet, or smells funky: treat as possible crown rot.
Root color primer (beginner-friendly): Many Phalaenopsis roots turn silver as they dry and look green shortly after watering. Healthy roots also feel firm when gently squeezed, not squishy or hollow.
Cause 1: Normal aging
Orchids do not keep every leaf forever. A Phalaenopsis commonly drops its oldest leaf as it grows new ones, often after blooming or during slower winter growth.
How to confirm
- It is one bottom leaf (sometimes two) turning uniformly yellow.
- The rest of the plant is steady: firm leaves, no rapid decline.
- Roots look generally healthy.
What to do
- Do nothing dramatic. Keep care consistent.
- Let the leaf yellow completely and loosen on its own, then gently peel it away. If it resists, wait.
- Keep the crown dry when watering. Water the potting mix, not the center of the plant.
When to worry: if the yellowing speeds up across multiple leaves, or the plant feels wobbly in the pot, move to the root checks below.
Cause 2: Overwatering and root rot
Phalaenopsis roots want a wet-dry rhythm. Yellow leaves happen when roots stay soggy, lose oxygen, and begin to rot. Once roots fail, leaves yellow because the plant cannot move water properly, even though the pot looks wet. In home growing conditions, this is a very common culprit.
Signs
- Leaves are yellowing and soft or floppy, not just aging off.
- Potting mix smells sour or looks broken down and sponge-like.
- Roots visible through a clear pot are brown, mushy, or hollow.
Safe fixes you can do today
- Stop watering on a schedule. Water only when the potting mix is nearly dry and roots look more silver than green.
- Increase airflow around the pot. Good airflow helps bark dry evenly.
- Check drainage. Decorative cachepots often trap water. Empty them after watering.
Media and pot notes
- Bark usually dries faster and needs more frequent watering than sphagnum moss.
- Moss can stay wet a long time in cool or low-light homes. Great when used well, risky when packed tight.
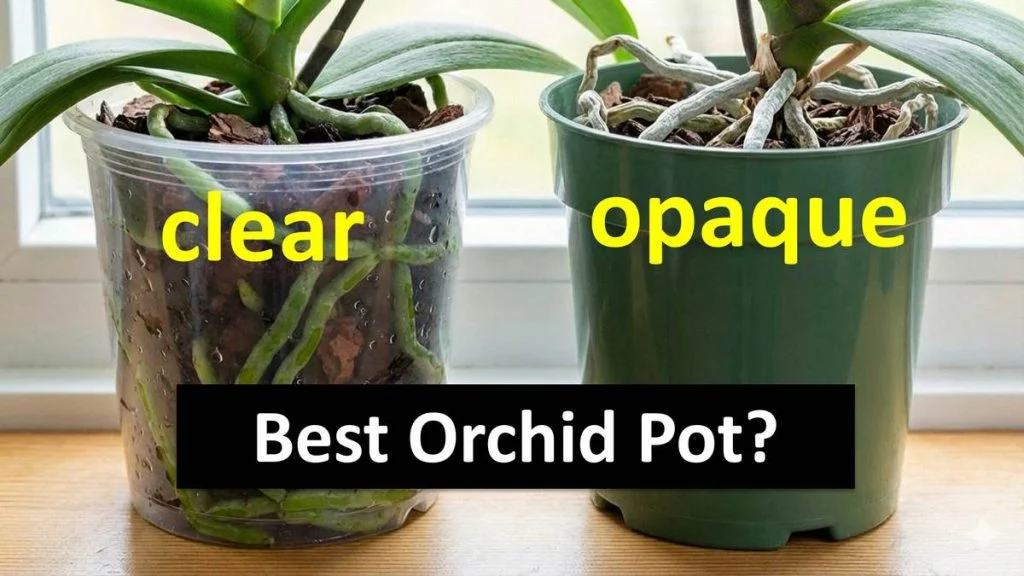
- Clear pots and extra ventilation holes let you see roots and can speed drying, which changes watering needs.
When repotting is appropriate
Repot if you see any of the following:
- Mix is old, compacted, or smells bad.
- More than a few roots are rotten.
- The orchid is unstable or rocking in the pot.
How to repot and trim safely
- Slide the orchid out and gently remove old mix.
- Rinse roots so you can see what is alive.
- With sterilized snips, trim only roots that are mushy, hollow, or black. Firm green or firm silver roots stay.
- Pot into fresh chunky orchid bark (or a bark-based mix). Use a pot with plenty of holes.
- After repotting, wait 2 to 4 days before watering if you had to cut many roots. This lets small wounds dry.
My gentle rule: it is better to keep an orchid a touch too dry than consistently too wet.
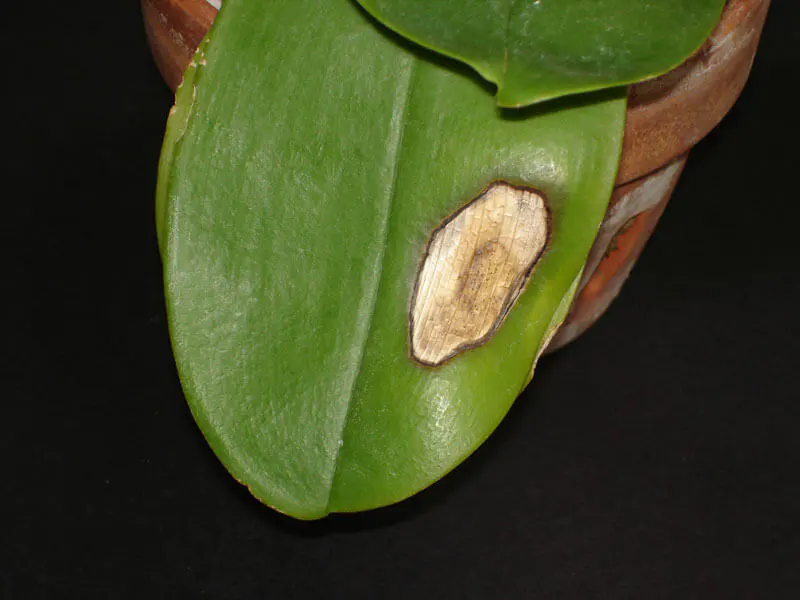
Cause 3: Light stress and sunburn
Orchids love bright light, but most Phalaenopsis prefer bright indirect, not hot direct sun. A sudden move to a sunnier window can bleach leaves. The yellowing is often patchy and located where the sun hits first.
Signs
- Yellowing is strongest on the window-facing side.
- You may see a pale, bleached spot that later becomes tan or brown and dry.
- The leaf tissue stays relatively firm, not mushy.
Fix
- Move the plant back from the glass or add a sheer curtain.
- Aim for gentle morning sun, or filtered light in a bright room.
- Do not cut the leaf unless it is rotting. Sunburned tissue will not turn green again, but the leaf can still photosynthesize around the damaged area.
Note: water droplets on leaves can sometimes worsen scorching in strong direct sun. Keeping leaves dry in bright windows is a tidy habit anyway.
Prevention tip: Whenever you change light levels, do it slowly over 1 to 2 weeks. Orchids like a gradual transition.
Cause 4: Crown rot
Crown rot happens when water sits in the crown, especially in cooler conditions with low airflow. This is one of the few orchid problems where you need to act quickly.
Signs
- Newest leaves yellowing or collapsing.
- Dark, wet-looking tissue in the crown.
- A foul smell, or the center leaf pulls out easily.
What to do right away
- Stop watering into the crown. Water the media only.
- Wick out any water with a paper towel corner.
- Place the orchid somewhere warm with good airflow and bright indirect light.
- If rot is spreading, isolate the plant from others while you stabilize it.
About hydrogen peroxide
If the crown is only slightly affected, some growers carefully dab a small amount of 3% hydrogen peroxide onto the rotting area, let it fizz, then keep the crown dry. Evidence is mixed, and peroxide can irritate healthy tissue too, so treat it like a cautious, one-time spot treatment.
- Do not pour peroxide into the crown.
- Avoid repeated applications.
- Drying, warmth, and airflow are the main interventions. If the situation is severe, consider an appropriate fungicide or bactericide labeled for ornamentals and follow the label.
When to seek help or accept it may not recover: If the crown is deeply mushy and the growth point is gone, a Phalaenopsis may not be able to produce new leaves. Sometimes they surprise you with a basal keiki later, but focus on stabilizing roots and preventing further decay.
Cause 5: Fertilizer burn and salt buildup
Orchids are light feeders. Too-strong fertilizer, fertilizing dry roots, or letting minerals build up can cause yellowing, tip burn, and stressed roots.
Signs
- Leaf tips or edges yellow first, sometimes turning brown and crispy.
- White crust on the pot, bark, or on exposed roots.
- Root tips look burned or blackened.
Fix
- Flush the pot with room-temperature water for 30 to 60 seconds, letting it drain completely. Repeat once more.
- Pause fertilizer for 2 to 4 weeks.
- When you resume: many growers prefer a urea-free orchid fertilizer at 1/4 to 1/2 strength and apply to already-moist media. Adjust based on your light, potting mix, and water source.
- If buildup is heavy or media is old, repot into fresh bark.
Water quality note
If you have hard water, mineral salts can build up faster. Occasional flushing helps, and if crusting is persistent, consider using rainwater, distilled, or RO water (or mixing them with tap water).
My favorite simple routine: “Weakly, weekly” during active growth is a common approach, and less often in winter or low light. If your orchid grows slowly, your fertilizer should too.
Other causes
Temperature stress
Cold drafts near windows or heat blasts from vents can trigger yellowing. Phalaenopsis generally like roughly 65 to 85°F (18 to 29°C). Brief dips can be tolerated, but sustained cold plus wet is where trouble loves to move in.
Underwatering
Chronically dry roots can cause dull, wrinkled leaves that eventually yellow. The difference is the mix is bone dry and roots look shriveled, not mushy.
Pests
Spider mites and scale can weaken leaves, causing stippling, yellowing, and slow decline. Inspect the undersides of leaves and along the midrib.
- Scale looks like small tan or brown bumps that do not brush off easily. You may also notice sticky honeydew.
- Spider mites can cause fine speckling and, in heavy infestations, faint webbing.
If you see pests, isolate the plant. Start gentle: wipe leaves (especially undersides) with a damp cloth or cotton pad. Then treat with insecticidal soap or horticultural oil according to label directions, and repeat as directed.
Cutting yellow leaves?
Most of the time, no. Let the plant reclaim nutrients as the leaf yellows.
- Let it be if the leaf is slowly yellowing and drying.
- Remove it when it is fully yellow and comes away with a gentle tug.
- Cut it only if there is spreading rot. Use sterilized scissors and keep cuts clean and dry.
If you do remove a leaf, avoid creating a big open wound at the crown. Patience is safer than surgery.
7-day recovery plan
- Day 1: Identify the pattern using the decision tree. Check crown and roots.
- Day 1 to 2: Adjust light to bright indirect. Keep away from drafts and vents.
- Day 2: If the mix is soggy or roots look rotten, plan a repot.
- Day 3: Repot into fresh bark if needed. Hold water a few days if you trimmed roots.
- Day 4 to 7: Water only if the mix is nearly dry. No fertilizer this week.
- End of week: Re-check firmness. You are looking for stabilization, not instant greening.
Reality check (the calming kind): visible recovery can take weeks. The best signs are a firm crown, steady leaves, and eventually new root tips or a new leaf.
Act fast if you see
Move quickly if you see:
- Yellowing plus a mushy crown or a newest leaf collapsing.
- Multiple leaves yellowing rapidly within days to a couple weeks.
- Bad smell from the pot or crown.
- Wobbling plant with few healthy roots.
If you want a second set of eyes, take a quick photo of (1) the whole plant, (2) the crown from above, and (3) the roots in the pot. Those three angles usually reveal the real story.
What not to do
- Do not use ice cubes as a watering method. Orchids like thorough watering with proper drainage, not cold shock.
- Do not mist the crown or leave water sitting between leaves.
- Do not repot repeatedly in a panic. Repot when the media breaks down or roots need rescue, then let the plant settle.
- Do not cut aerial roots just because they look wild. Firm aerial roots are normal and helpful.
Leafy Zen takeaway
A yellow orchid leaf is not always a crisis. Start with the simplest explanation: one old leaf yellowing is normal. If more leaves are involved, let the plant show you where it hurts by checking texture, light exposure, crown moisture, root condition, and your potting setup. With orchids, gentle corrections and a little patience usually do more good than dramatic interventions.