Why Is My Boston Fern Turning Brown?
If your Boston fern is turning brown, you are not alone. These fluffy, old-school houseplants are basically humidity detectors with fronds. The good news is that browning is usually a care mismatch, not a death sentence. Let’s separate the most common culprits and get your fern back to pushing out fresh, bright green croziers.
First, what kind of brown are you seeing?
Before you change everything at once, do a quick pattern check. Boston ferns give pretty specific clues.
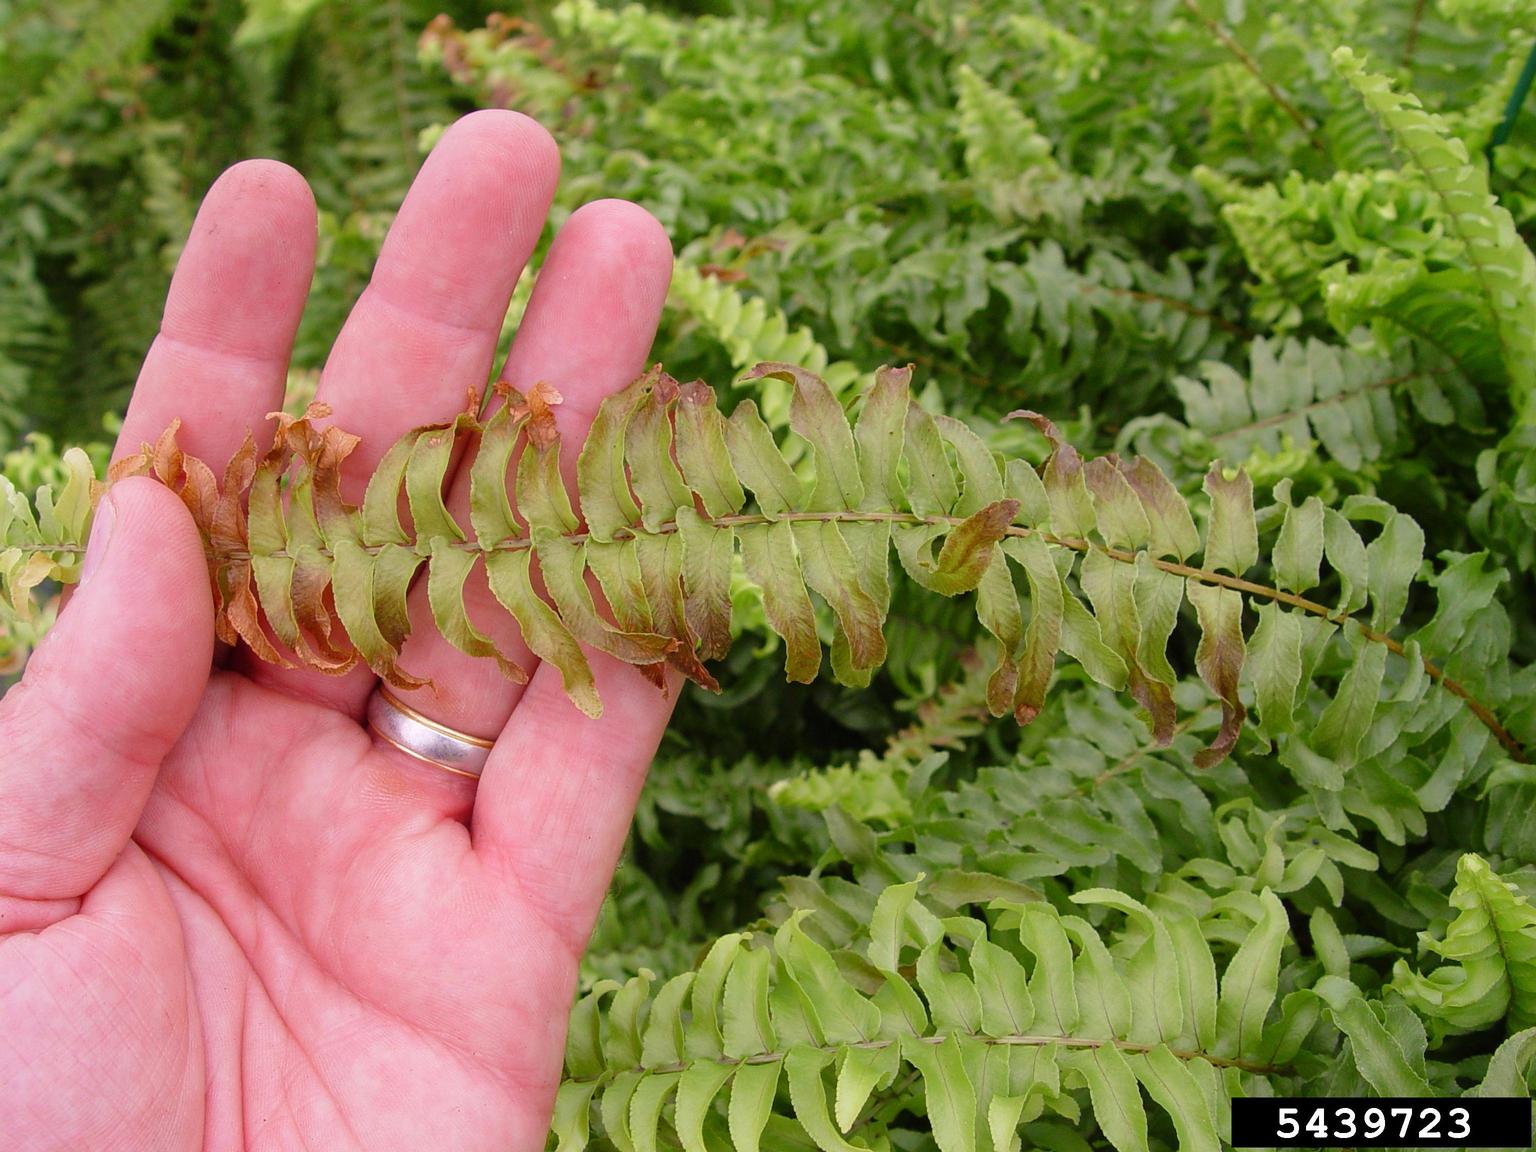
- Crispy brown tips on many fronds: usually dry air, inconsistent watering, or salt buildup.
- Whole fronds turning tan then crisping: underwatering, strong sun, or a big temperature swing.
- Brown patchy areas, especially on the side facing a window: sun scorch.
- Older, outer fronds browning while the center stays green and is unfurling new croziers: normal aging.
- Brown plus a sour smell or mushy base: too-wet soil or poor drainage can also be involved, even if the air is dry.
- Sudden browning after a cold night, drafty doorway, or AC blast: temperature stress.
Now let’s walk through the big five causes you asked about and exactly what to do, plus a few common curveballs (pests and pot issues) that can mimic the same symptoms.
Cause 1: Underwatering (or watering too late)
Boston ferns like evenly moist soil, not bone-dry followed by a flood. When the root ball dries out too far, the plant cannot keep moisture moving to those delicate leaflets, so you get crisping and browning, usually starting at the tips and edges.
How to confirm it
- The pot feels very light.
- The top 1 to 2 inches are dry and the soil has pulled away from the pot edges.
- Fronds look dull or slightly gray-green before they crisp.
Fix it
- Rehydrate thoroughly: Water with room-temperature water until it runs out the drainage holes. If the soil has become water-repellent, bottom-water the pot in a sink or tub for 20 to 30 minutes, then let it drain well.
- Reset your watering rhythm: Aim to water when the top 1 inch feels just barely dry, not when the whole pot is dry.
- Check the pot and soil: Ferns do best in a pot with drainage and a light, moisture-holding mix. If the mix is old and compacted, plan a refresh in spring with a peat-free, coir-based houseplant mix plus extra perlite and fine bark.
Indoor watering schedule (starting point)
Indoors (typical heated or air-conditioned home): check moisture 2 to 3 times per week. Many homes land at watering about every 4 to 7 days, but your finger test beats the calendar.
Porch watering schedule (starting point)
Covered porch or shaded patio: check moisture every 1 to 2 days in warm months. You may water every 1 to 3 days depending on heat, wind, and pot size.
Clara tip: If you travel or forget, a simple self-watering wick setup can steady moisture, but it should not keep the mix constantly saturated. After you set it up, check the soil daily for the first week and adjust the wick or reservoir so the pot stays evenly moist, not wet.
Cause 2: Dry indoor air (the classic Boston fern problem)
Most Boston fern browning indoors is humidity-related. These plants evolved for moist, sheltered conditions. When indoor air is very dry (often under about 40% relative humidity, especially in winter), leaflets lose water faster than roots can replace it, and tips start to crisp. Microclimates vary, so treat the numbers as guidance, not a verdict.
How to confirm it
- Brown tips even though you are watering “enough.”
- More browning in winter heating season or near vents.
- A hygrometer reads low in the fern’s spot.
Fix it
- Pick a realistic target: many homes do well aiming for 45% to 60%. If you can maintain 50% to 70%, Boston ferns usually look their best.
- Use a humidifier: the most reliable solution, especially in winter.
- Create a microclimate: group plants together, keep the fern away from heating and AC vents, and consider moving it to a naturally humid room if you have one.
- Try the pebble tray: helpful for a small boost right around the plant, especially in a smaller nook. It is not a miracle in very dry, open rooms.
About misting: I know misting feels nurturing. It can temporarily raise surface humidity, but it does not replace steady ambient humidity. If you mist, do it in the morning so fronds dry by night, and do not rely on it as your main fix.
Clara tip: If you are choosing between “mist more” and “move it away from vents,” pick the vent move. One drafty blast can undo a week of good intentions.
Cause 3: Salt buildup from fertilizer or hard tap water
Boston ferns are sensitive to dissolved salts. Over time, minerals from hard water and leftover fertilizer collect in the potting mix. That buildup can burn roots and show up as brown tips and browned leaflet edges.
How to confirm it
- A white crust on the soil surface or pot rim.
- You fertilize often, or you use strong plant food.
- Brown tips continue even after you improve humidity and watering.
Fix it
- Flush the soil: Use room-temperature water and flush with 2 to 4 times the pot’s volume (for example, a 1-gallon pot gets 2 to 4 gallons of water run through). Let it drain completely.
- Adjust fertilizer: feed lightly during active growth. A gentle routine is 1/4 to 1/2 strength balanced fertilizer about once a month in spring and summer. Pause or reduce in fall and winter.
- Switch water if needed: if your water is very hard, try filtered, rain, or distilled water for a few weeks and watch the new growth.
Important: once tips are browned, they do not turn green again. Your goal is healthy new fronds and fewer new brown tips.
Cause 4: Sun scorch (too much direct light)
Boston ferns love bright light, but not hot direct sun. A few hours of strong afternoon rays through glass can scorch fronds, leaving bleached areas that turn tan and brown.
How to confirm it
- Browning is worst on the side facing the window or outdoors on the sun-exposed side.
- You see bleached, faded, or papery patches.
- The fern was recently moved to a brighter spot without a transition.
Fix it
- Move to bright, indirect light: near an east window, or a few feet back from a south or west window with a sheer curtain.
- For porch ferns: keep them in full shade to bright shade, protected from midday and afternoon sun.
- Acclimate slowly: if moving outdoors for summer, increase light exposure gradually over 7 to 10 days.

Cause 5: Normal frond aging (yes, some browning is healthy)
Boston ferns constantly replace older fronds with new ones from the center. It is normal for the oldest, outer fronds to yellow, then brown, especially after a change in season, light, or location.
How to confirm it
- The center crown looks firm and is producing new croziers.
- Only the oldest fronds are fading and browning, mostly on the outside.
- Overall plant still looks “alive” and springy, not collapsing.
What to do
- Be patient: if you see new croziers unfurling, you can wait and let the fern cycle naturally.
- Groom for airflow: remove fully brown, crispy fronds to reduce clutter and improve air movement.
Think of grooming like brushing a long-haired pet. It is not punishment, it is maintenance.
Two extra causes worth checking
Pests (especially spider mites)
Dry indoor air does not just brown ferns, it also invites spider mites. They can cause stippling, dullness, and gradual browning that looks like “mystery dryness.”
- Check: look under fronds for fine webbing or tiny moving specks. A gentle tap over white paper can help you spot them.
- Fix: rinse the plant thoroughly in the shower (lukewarm water), then treat with insecticidal soap or horticultural oil, repeating per label directions. Raise humidity and keep it away from other plants until the issue is under control.
Rootbound or compacted mix
If water rushes straight through the pot, or the plant dries out dramatically faster than it used to, the roots may be packed or the mix may be tired.
- Check: slide the root ball out. Circling, matted roots and very little soil left are your clues.
- Fix: repot one size up (or divide) into fresh, airy mix. After repotting, keep moisture steady and avoid heavy feeding for a few weeks.
Indoor vs porch care
Indoor Boston fern routine
- Light: bright, indirect.
- Water: check 2 to 3 times per week. Water when the top 1 inch is just barely dry. Use room-temperature water (very cold water can stress roots).
- Humidity: aim for 45% to 60% as a practical baseline, higher if you can.
- Temperature: ideal around 60°F to 75°F. Keep away from drafts, heaters, and AC blasts.
- Feeding: light monthly feeding in spring and summer, very little in winter.
Porch Boston fern routine (warm season)
- Light: bright shade, no hot sun.
- Water: check daily in heat. Water when the surface begins to dry. Windy porches can dry pots fast.
- Humidity: usually easier outdoors, but baskets dry quickly. Consider a larger pot or a liner to slow drying.
- Storms: heavy rain can saturate baskets. Make sure it drains freely and is not sitting in a cachepot full of water.
When to trim
Browning fronds can make a fern look worse than it is. Trimming is mostly cosmetic, but it also helps the plant focus energy on healthy growth.
Before you cut: sanitize your scissors or shears with rubbing alcohol (or a disinfecting wipe) to reduce the chance of spreading pathogens from plant to plant.
Trim just the tips when
- Most of the frond is still green.
- Only the leaflets at the very ends are brown and crispy.
Use clean scissors and follow the natural shape of the frond, snipping off the brown part. You will still see a blunt edge close up, but from a few feet away it looks much fresher.
Remove entire fronds when
- A frond is more than 50% brown or yellow.
- The frond is fully crisped and shedding.
- It is an older outer frond that is clearly aging out.
Cut the frond at the base, close to the crown, without gouging the crown itself.
Cut back hard only when needed
- The plant is mostly brown but the crown is still firm, not mushy.
- You are entering an active growth period (spring through early summer is best).
- You have already corrected the main cause (humidity, watering, light, salts).
If you need a reset, you can cut back most fronds to 1 to 2 inches above the soil line, keeping the crown intact. Then keep conditions steady and watch for new croziers.
Quick reality check: this is an aggressive cut, and recovery can take weeks to months. Most healthy crowns bounce back, but not every plant rebounds at the same speed.
Wait for new croziers if: you see fresh curls in the center already. In that case, focus on stability, remove only fully dead fronds, and let the fern fill back in gradually.
Quick troubleshooting checklist
- Soil dry deeper than 2 inches? Underwatering, or the mix is too fast-draining.
- Humidity consistently low? Dry air is likely the main driver.
- White crust on soil or pot? Flush salts and ease up on fertilizer.
- Direct sun hitting fronds? Move to bright shade or filtered light.
- Only outer fronds browning and center is growing? Normal aging plus a little grooming.
- Stippling or fine webbing? Check for spider mites.
- Water rushes through and pot dries too fast? Check for rootbound roots or compacted mix.
When browning is a bigger sign
Most browning is fixable with humidity, water timing, and gentler light. But if you notice these red flags, take a closer look at roots and drainage:
- Base is soft, blackened, or smelly.
- Soil stays wet for many days and fungus gnats are constant.
- The crown feels mushy instead of firm.
In those cases, let the mix dry slightly, confirm the pot has drainage, and consider repotting into a fresh, airy mix. A Boston fern wants moist soil, but it also wants oxygen around its roots.
My favorite fern reset
- Stabilize moisture: water deeply, drain well, and then keep evenly moist.
- Raise humidity: humidifier if you can, plus move away from vents and drafts.
- Groom with restraint: remove fully brown fronds, trim tips only if they bother you, then wait for new croziers.
Give it two to three weeks of consistent conditions before you judge results. Ferns are dramatic, but they are also forgiving when you meet them halfway.