Why Are My Calathea Leaves Turning Brown? 9 Causes and Fixes
Calatheas are gorgeous, dramatic, and just sensitive enough to make you question your entire personality when the leaves start looking toasted. If your Calathea leaves are turning brown, you are not failing. You are simply reading the plant’s “comfort meter.” Brown tips, crisp edges, and spotty patches are clues that something in its routine is a little off.
Below you will find the most common causes I see (in apartments, in houses, and yes, in my own fern-talking home), plus exactly what to do to stop the browning and help new growth come in clean.

First, identify the brown pattern
Different browning patterns point to different problems. Take 30 seconds and compare your plant to these quick descriptions.
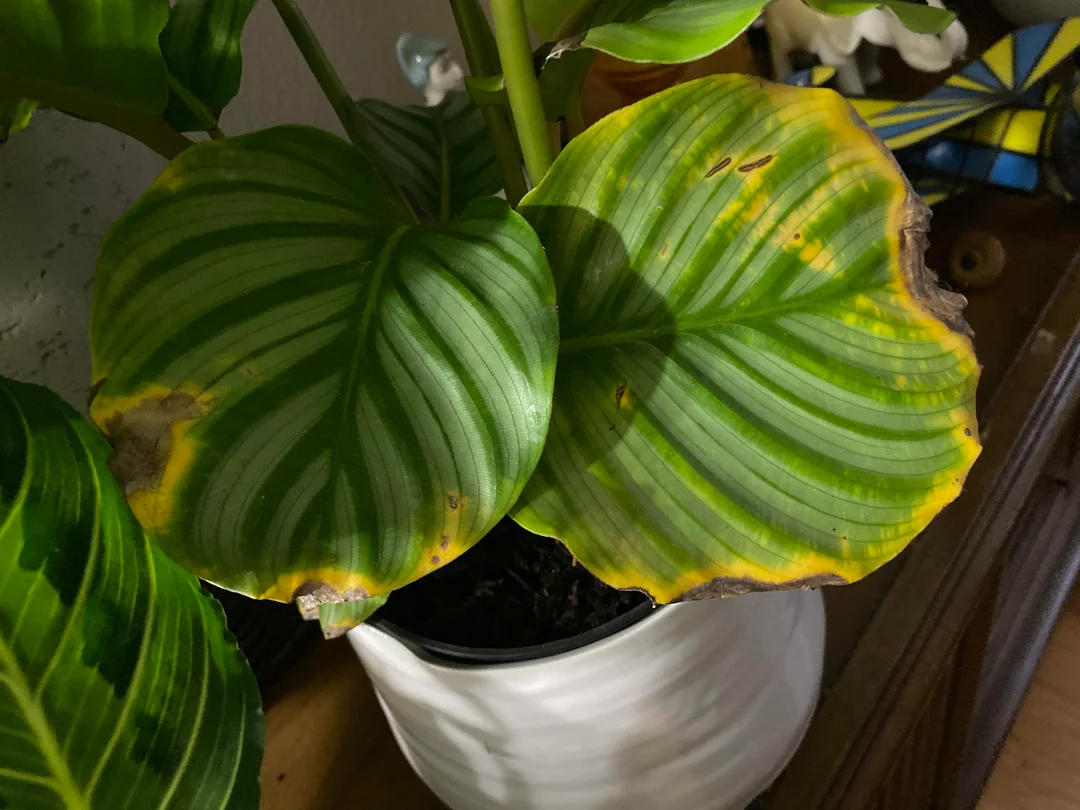
- Brown tips or thin brown outlines: usually water quality, fertilizer salts, low humidity, or inconsistent watering.
- Crispy edges and crunchy leaf margins: often dry air, underwatering, hot sun, heat vent exposure, or fertilizer burn.
- Soft brown patches: overwatering or cold damage can start as water-soaked spots that later turn brown.
- Small brown spots with yellow halos: pests, leaf spot issues, or water sitting on leaves too long.
9 common causes of brown Calathea leaves
1) Low humidity
Calatheas come from humid forest understories. In most homes, especially in winter, the air is simply too dry. The leaf edges are the first place moisture stress shows up, so they crisp and brown.
What you will notice: crispy margins, brown tips, leaves that feel papery, and sometimes a bit of curling too.
Fix it:
- Aim for 50%+ humidity as a strong baseline, with 60%+ giving the happiest, cleanest leaf edges in most homes.
- Run a small humidifier near the plant, especially overnight.
- Create a microclimate: group plants together.
- Keep it away from heating vents, radiators, and forced air.
- Pebble tray note: a pebble tray can slightly boost humidity right at the pot and leaf level in a tiny boundary layer, but it usually will not raise whole-room humidity in an open space. Think of it as a helper, not a replacement for a humidifier.
A gentle truth: misting is usually not enough on its own. It also can encourage spotting if water sits on leaves. I prefer a humidifier every time.
2) Watering inconsistency
Calatheas dislike extremes. Letting the pot go bone dry can crisp the edges, while repeated “dry, then flood” cycles can stress roots and show up as browning.
What you will notice: tips brown after a missed watering, or leaf decline after a cycle of “dry, then flood.”
Fix it:
- Water when the top 1 inch of soil feels dry, but the pot still has a little weight to it. Calatheas like evenly moist soil, not soggy and not dust-dry.
- Water thoroughly until it drains, then empty the saucer soon after (within about 10 to 30 minutes).
- Set a reminder for a check-in day rather than a strict watering day. Your plant wants consistency, not a calendar.
3) Water quality and salt buildup
Many Calatheas react to minerals in tap water. Fluoride, hard water minerals, and salt buildup can show up as brown leaf tips and margins even when you are watering “correctly.”
What you will notice: brown tips that keep returning (even on newer leaves), plus white crust on soil or pot rim.
Fix it:
- Switch to rainwater, distilled, or reverse osmosis water if possible.
- If you must use tap water, letting it sit out 24 hours can reduce chlorine, but it does not remove fluoride. Also, some municipalities use chloramine, which does not off-gas easily, so sitting may not help much.
- Once a month, flush the pot to remove salts: slowly run water through the soil until you get lots of drainage, ideally about 2 to 3 times the pot volume, then let it drain completely.
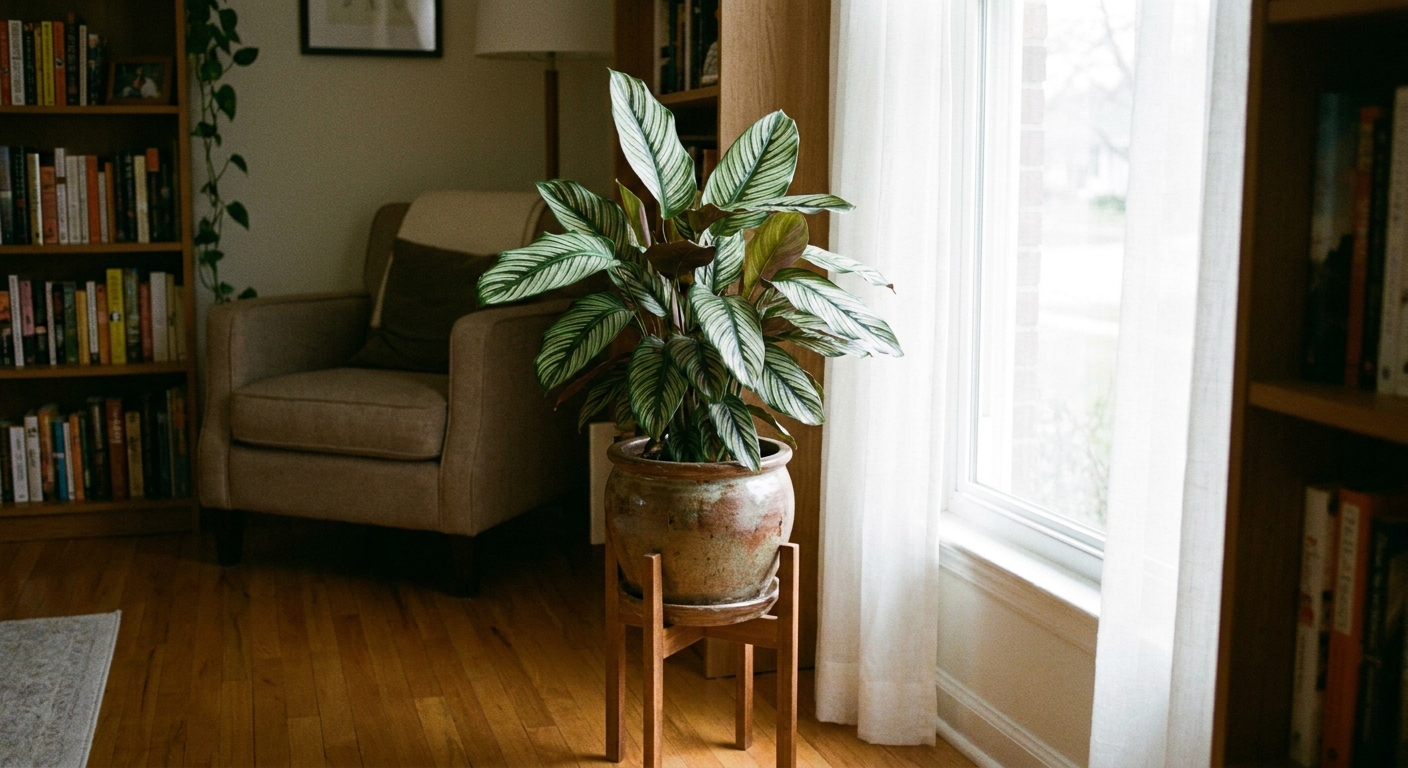
4) Too much light
Calatheas want bright, indirect light. Direct sun can bleach leaves and burn edges and patches, especially on south or west windows.
What you will notice: crispy brown areas on the side facing the window, faded spots, or a general washed-out look before browning.
Fix it:
- Make sure there is no direct sun hitting the leaves. That is the rule.
- As a starting point, pull the plant back 2 to 6 feet from the window, or use a sheer curtain. Adjust based on your window size, season, and how intense the light feels.
- Morning sun is gentler than afternoon sun. If you only have strong light, indirect is your friend.
- Rotate the pot weekly so one side does not take all the intensity.
5) Too little light
Low light does not usually burn leaves, but it can cause the soil to stay wet too long. That stresses roots and can lead to brown patches and general decline.
What you will notice: slow growth, drooping, soil that stays damp for many days, and leaves that brown while the plant seems to be drinking very little.
Fix it:
- Move to brighter, indirect light. Think “I can read a book here comfortably” brightness.
- Consider a small grow light for winter, placed above and set for 10 to 12 hours daily.
- Adjust watering to match drying speed. In low light, watering less often is normal.
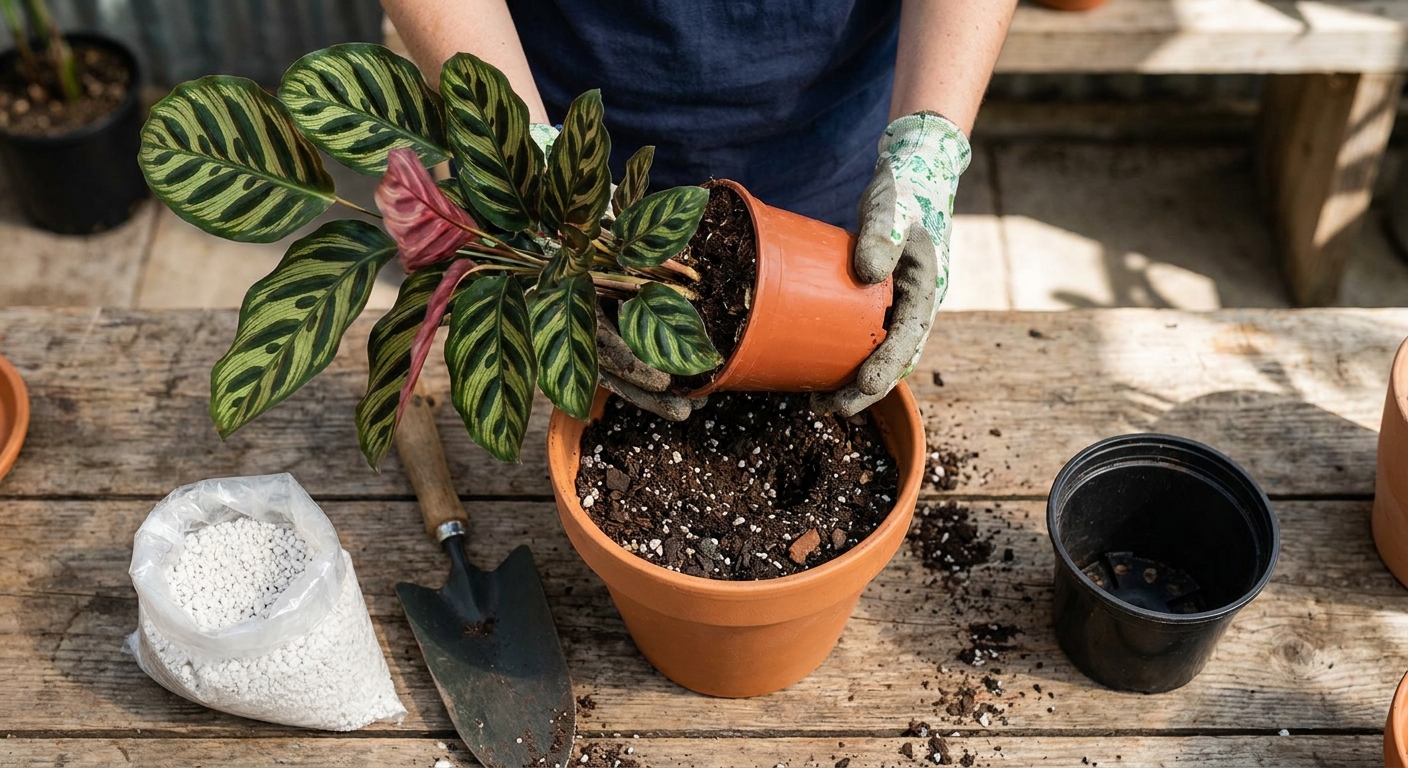
6) Overwatering or poor drainage
When Calathea roots sit in soggy soil, they struggle to take up oxygen. The plant may respond with brown patches, yellowing, and limp leaves. Sometimes the leaf edges brown too, because stressed roots cannot keep up with moisture needs.
What you will notice: soil that smells sour, fungus gnats, yellow leaves, soft stems, or brown areas that look water-soaked at first.
Fix it:
- Make sure the pot has drainage holes. Non-negotiable for Calatheas.
- Use an airy mix: quality potting soil plus perlite and a bit of orchid bark for chunkiness. Your goal is evenly moist, airy soil that does not compact into a wet brick.
- If the soil stays wet longer than a week in decent light, consider a repot into fresh mix.
Quick root check: If you slide the plant out and roots are brown, mushy, or smelly, trim damaged roots with clean scissors and repot into fresh, lightly moist soil.
7) Temperature stress and drafts
Calatheas prefer steady warmth. Cold windows at night, AC blasts, or winter drafts can cause browning, especially along the edges and tips.
What you will notice: browning after a cold snap, leaves that look fine during the day and sad by morning, or damage localized to the side near a window or vent.
Fix it:
- Keep the plant in the 65 to 80°F range when possible.
- Move it away from exterior doors, drafty windows, AC vents, and heaters.
- At night in winter, pull it a bit farther from the glass if the window area gets chilly.
8) Fertilizer burn
Calatheas are not heavy feeders, and they can be sensitive to fertilizer salts. Over-fertilizing, fertilizing too often, or fertilizing a dry plant can cause crispy brown tips and margins that look a lot like low humidity.
What you will notice: browning that appears shortly after feeding, faster tip burn on multiple leaves at once, and sometimes a crusty look on the soil surface.
Fix it:
- Pause fertilizer for 4 to 6 weeks if you suspect burn.
- Flush the soil (see section 3) to reduce salt buildup, then let it drain well.
- When you restart, feed lightly: a diluted houseplant fertilizer during the growing season only, and always follow the label. If you are a “more is more” person, Calatheas will gently teach you otherwise.
- Never fertilize when the soil is bone dry. Water first, then feed.
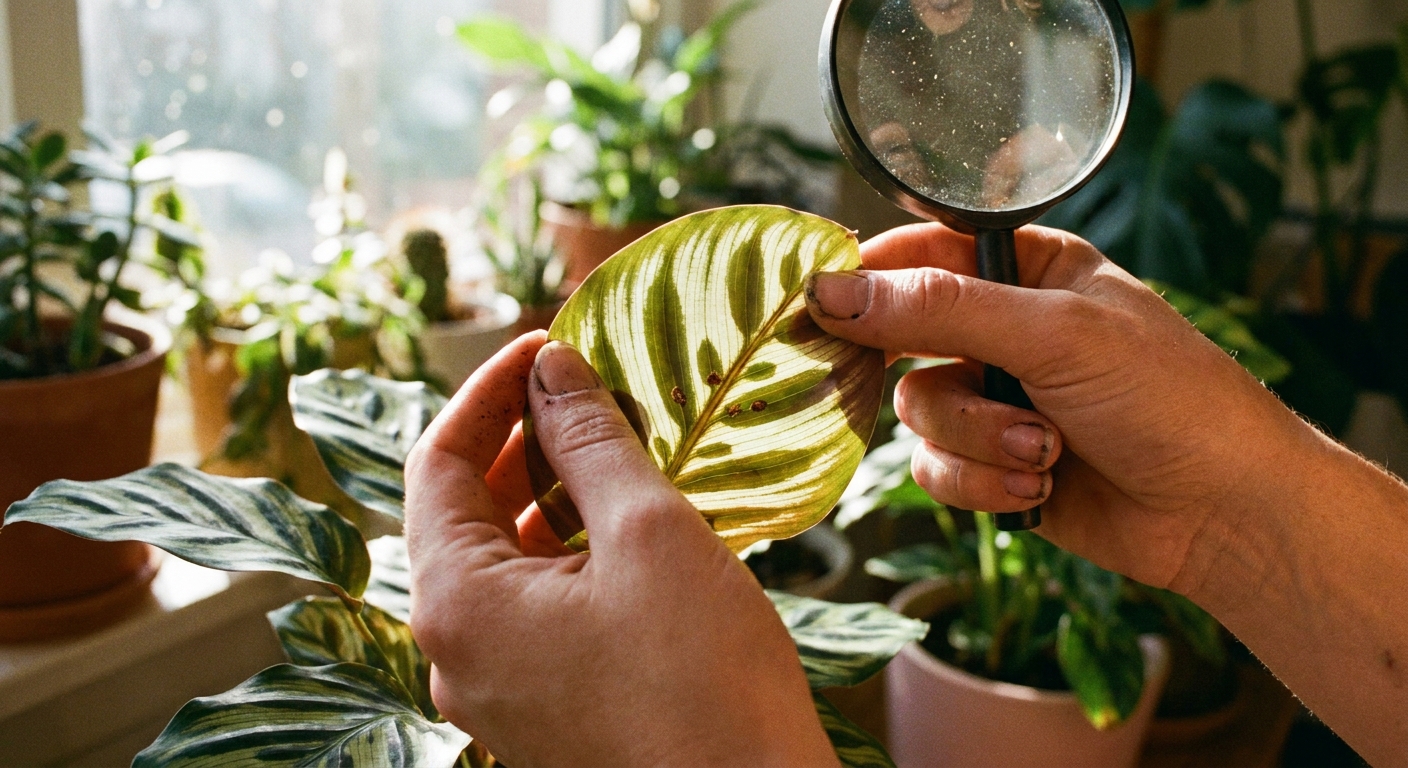
9) Pests and leaf spot
Pests can cause speckling, bronzing, and browning as they feed. Calatheas are especially attractive to spider mites in dry air. Thrips can leave silvery patches that later turn brown. Leaf spot can also show up as small brown spots (often with yellow halos), especially when leaves stay wet and airflow is low.
What you will notice: tiny dots, stippling, fine webbing, distorted new growth, silvery scarring, small moving insects when you inspect the undersides, or spot clusters that slowly expand.
Fix it:
- Isolate the plant.
- Rinse leaves in the shower with lukewarm water, focusing on undersides.
- Wipe with a soft cloth and use insecticidal soap or a houseplant-safe spray, repeating every 5 to 7 days for 3 to 4 rounds.
- Follow label directions and test sprays on one leaf first. Calathea leaves can be sensitive.
- Raise humidity to discourage spider mites.
- If you suspect leaf spot: remove the worst affected leaves, avoid wet foliage (especially overnight), improve airflow, and water at the soil level. Consider a labeled fungicide only if the spotting keeps spreading despite better conditions.
How to trim brown leaves and tips
Once tissue is brown, it will not turn green again. Trimming is cosmetic, but it can also prevent crispy edges from spreading and help you see whether new damage is still happening.
- Use clean, sharp scissors.
- For brown tips, follow the natural leaf shape and snip just the dead area, leaving a thin line of brown if needed to avoid cutting into healthy tissue.
- For heavily damaged leaves, cut the whole leaf stem near the soil line.
- Do not remove more than about one-third of the foliage at once unless the plant is truly declining.
If a leaf is more than 50% brown, I usually remove it. Calatheas would rather spend energy on new leaves than on a sad, crispy one.
Recovery timeline
After you correct the cause, existing brown edges will stay brown. The real win is new growth that unfurls without crisping.
- Within 7 to 10 days: less curling, more stable leaf posture, soil dries at a predictable pace.
- Within 2 to 4 weeks: a new leaf emerges, tips look cleaner, fewer new spots appear.
- Within 1 to 3 months: older damaged leaves can be gradually removed as the plant replaces them.
Week-one checklist
If you are not sure which cause is the culprit, this gentle reset solves most Calathea browning in a week.
- Day 1: Move to bright, indirect light. Check for drafts and vents.
- Day 1: Inspect undersides of leaves for pests. Shower-rinse if you see speckling or webbing.
- Day 1 to 2: Switch to distilled, rain, or RO water for the next month.
- Day 2: Check soil moisture. Water only if the top 1 inch is dry, then fully drain.
- Day 2: Add humidity support: humidifier if possible, and group plants if you can.
- Day 3: If you fertilized recently and browning escalated, pause feeding and flush the soil.
- Day 4: Re-check moisture and leaf edges. Look for new browning versus old browning.
- Day 7: If soil is staying soggy, plan a repot into a chunkier mix and confirm the pot drains well.
Keep notes for one week. Calatheas are moody, yes, but they are also consistent once you find the routine they like.
Quick FAQ
Should I cut off all the brown parts?
You can trim brown tips and edges for looks, but focus on fixing the cause. If you remove everything brown without changing conditions, the plant will simply brown again.
Is browning always a watering issue?
Not always. Watering consistency and water quality are big, but humidity, light, temperature swings, fertilizer salts, and pests are just as common.
Do Calatheas like to dry out between waterings?
They prefer even moisture, not soggy and not bone dry. Let the top inch dry, then water thoroughly.
When to worry
If browning is spreading fast, leaves are turning yellow and collapsing, or you notice a sour smell from the soil, check the roots and drainage immediately. Calatheas can bounce back, but they bounce back best when we catch root stress early.
If you want, you can tell me your Calathea type, where it sits (window direction), what water you use, whether you fertilize, and whether the browning is tips, edges, or spots. I can help you narrow it down like a little plant detective.