Spider Mites on Outdoor Plants: Signs and Treatments
Spider mites are the kind of pest that can make a healthy garden look tired almost overnight. They are tiny, they love hot, dry weather, and outdoors they often show up in a very specific way: a plant that looks sun-stressed even when you are watering. The good news is you can usually turn things around with simple, low-tox steps, especially if you catch them early.

What spider mites do outdoors
Spider mites feed by piercing leaf cells and sipping out the contents. That leaves thousands of tiny pale dots called stippling. Indoors, houseplants often show obvious webbing quickly because the air is still and the plant is close to you. Outdoors, wind, rain, and predators can make infestations look more patchy and confusing.
- Outdoor pattern: Damage often starts on one side of a shrub, one branch of a tree, or the sunniest edge of a bed. Hot spots can pop up after a heat wave.
- Indoor pattern: Damage tends to spread steadily through the whole plant in stable conditions, often with heavy webbing on new growth and leaf joints.
- Outdoor look-alikes: Drought stress, herbicide drift, leafhoppers, lace bugs, thrips, and some fungal leaf issues can mimic the “speckled and faded” look.
Think of spider mites as opportunists. If a plant is stressed by heat, dusty leaves, reflected pavement heat, or inconsistent watering, mites move in like they own the place.
One nuance: while many common spider mites explode in hot, dry weather, some species (especially spruce spider mite on conifers) are more active in cool spring and fall conditions. So do not rule out mites just because it is not midsummer.
Signs of spider mites outdoors
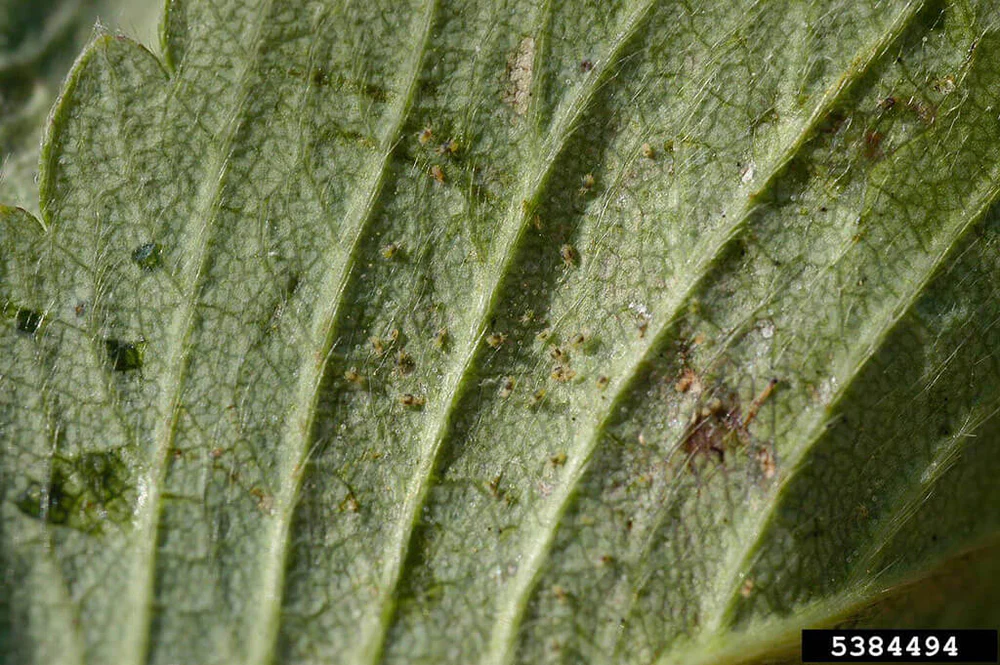
1) Stippling and bronzing
Look for tiny pale dots that merge into a dull, gray-green or bronze cast. On many ornamentals, leaves take on a dry, sandblasted look. On evergreens like spruce, needles can look faded and dusty.
2) Fine webbing (usually on undersides and tips)
Webbing outdoors can be subtle at first. You are more likely to see it on tender new growth, between leaf stems, or on the underside of leaves where the wind does not tear it away.
3) Leaves that look thirsty even when soil is moist
Mite damage reduces the plant’s ability to photosynthesize and regulate water. That can look like heat stress: dull leaves, drooping in afternoon sun, and slow growth.
4) Tiny moving dots (the paper test)
My favorite low-tech check: hold a sheet of white paper under a suspect branch, then tap the foliage firmly. If you see pepper-like specks crawling, you likely have mites.
If the specks jump, it is likely not mites. Jumping or quick, darting specks are more often thrips, leafhoppers, or flea beetles. (Springtails are usually around soil and mulch, not living on leaves.)
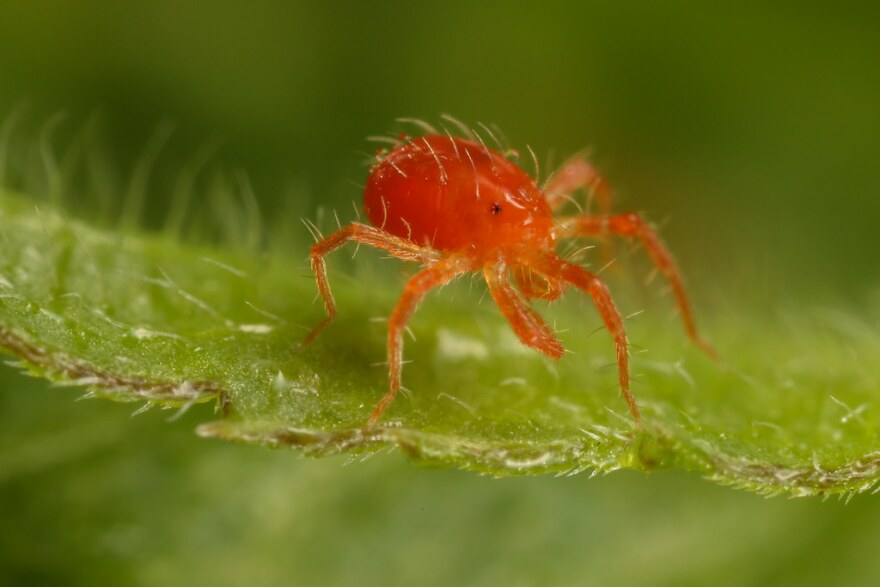
5) Confirm with a hand lens (fast and satisfying)
If you have a 10x to 20x hand lens, use it. Check the leaf undersides along the midrib and veins. You are looking for tiny oval mites (often pale green, yellow, or reddish), sometimes with dark spots, plus clear, round eggs tucked near veins and webbing.
Common outdoor problem spots
- Ornamentals: roses, marigolds, zinnias, dahlias, salvias, ivy, euonymus, juniper, arborvitae, spruce
- Vegetables: tomatoes, beans, cucumbers, eggplant, melons
- Small fruits: strawberries, raspberries, blackberries, blueberries (especially during hot, dry stretches)
- Containers and balcony planters: potting mix dries fast, and mites adore that stress
They also love dusty conditions. Plants along driveways, gravel paths, and busy roads can be more vulnerable.
Before you treat
Flip leaves and check multiple spots. Spider mites hide on undersides, and outbreaks can be localized.
- Mild: stippling on a few leaves, mites found in one area, little to no webbing
- Moderate: stippling spreading, leaves losing color, light webbing on tips
- Severe: heavy webbing, significant leaf drop, bronzing across much of the plant, growth stalling
At severe levels, you may need to prune hard, accept some cosmetic damage for the season, and focus on keeping the plant alive and less stressed.
Outdoor treatments that work
Step 1: Hose them off
A strong spray of water physically knocks mites off and can dramatically reduce numbers and slow their buildup. Outdoors, this is often enough for mild infestations, and it is still a great first move for moderate ones.
- Use a hose nozzle set to a firm spray, not a needle jet.
- Aim at leaf undersides and inner foliage where mites shelter.
- Repeat every 2 to 4 days during active outbreaks, then adjust based on what you see when you scout. Hot, dry weather usually means you need to be more persistent.
- Morning is ideal so foliage dries faster.
If you are treating small fruits or vegetables, this also helps reduce dust, which mites love.

Step 2: Prune the worst hot spots
If one branch is heavily webbed, remove it. Bag it and toss it in the trash, not the compost, if mites are thick. This reduces the population fast and helps sprays reach the remaining foliage.
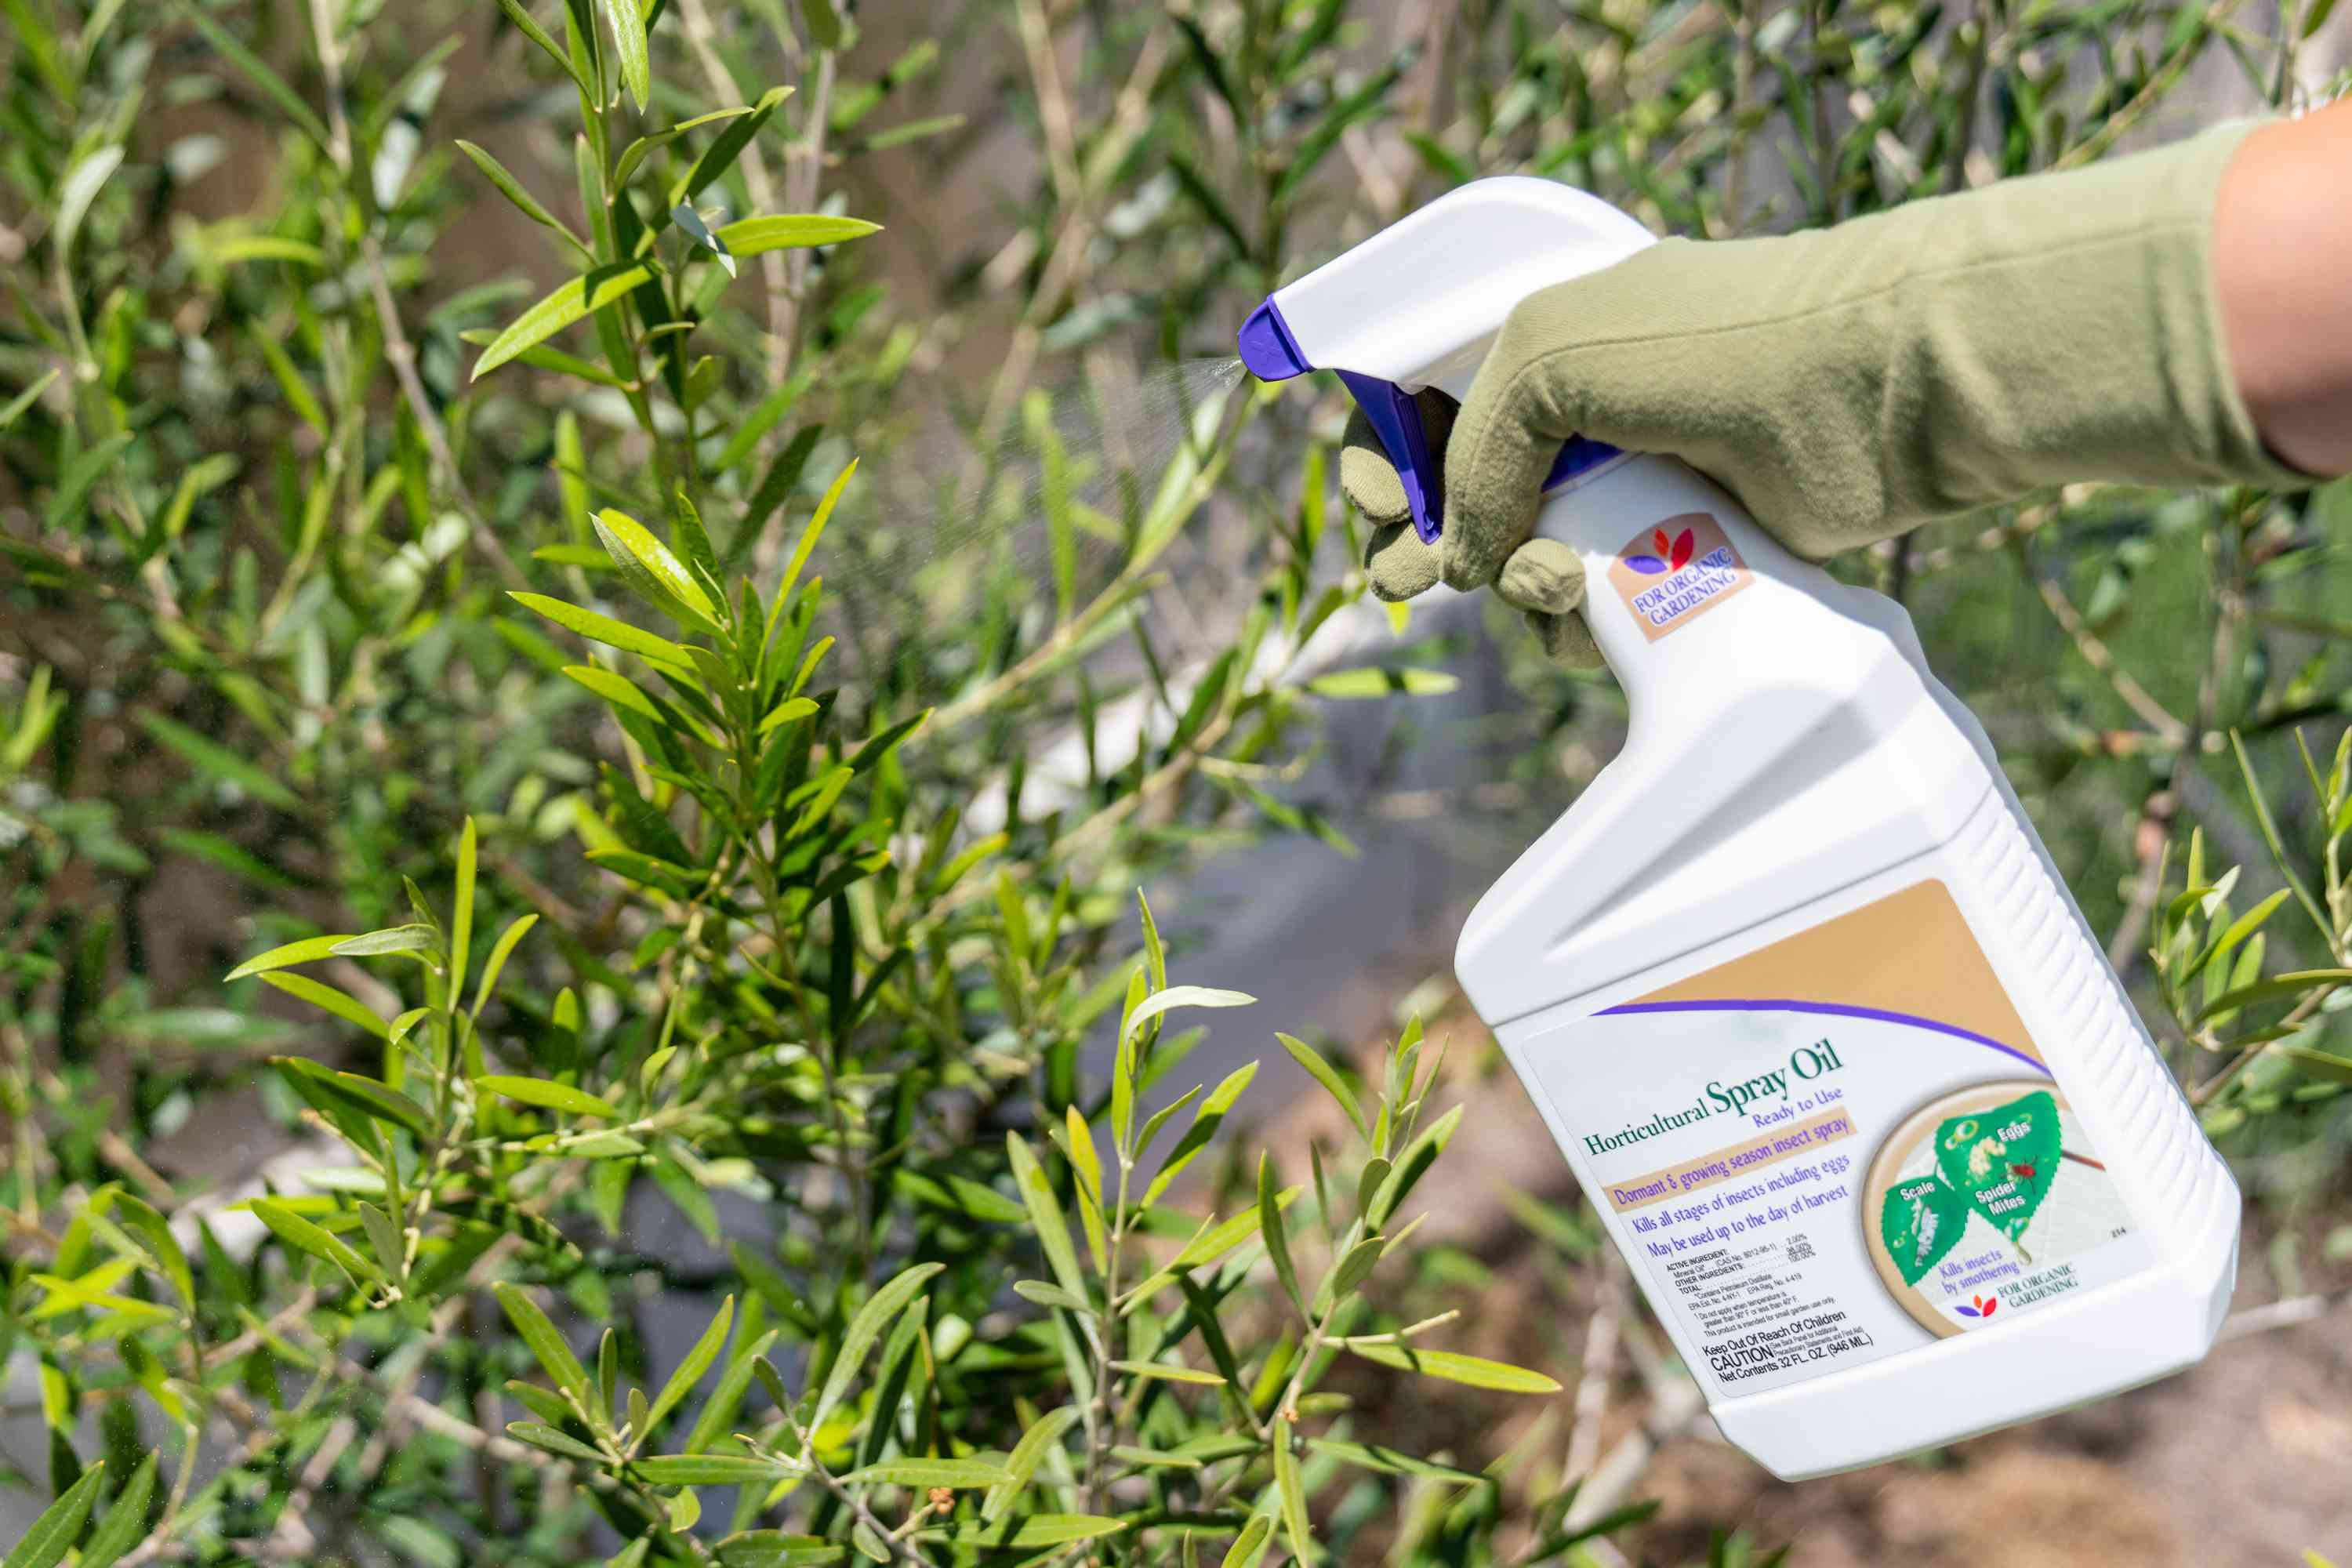
Step 3: Use horticultural oils or insecticidal soap
When hosing alone is not enough, I reach for horticultural oil (including neem-based oils) or insecticidal soap. These work by smothering mites or disrupting their outer layers. They must contact the mites to work, so coverage matters more than brand.
- Spray timing: early morning or evening. Avoid spraying in full sun.
- Heat and drought caution: follow label guidance, but in general avoid oil sprays during very hot days. Also avoid spraying drought-stressed plants. Water first, let the plant recover, then treat.
- Coverage: coat leaf undersides, stems, and tight joints. Stop short of runoff.
- Repeat: every 7 days for 2 to 3 rounds, or per label, because eggs can hatch after the first treatment.
- Test first: spray a small area and wait 24 hours on sensitive ornamentals.
Neem note: neem products vary a lot by formulation and concentration. Some work mainly by contact as an oil, others behave more like growth regulators on insects. For spider mites, choose a product labeled for mites and focus on thorough coverage.
Also important: soaps and oils are generally lower-tox options, but they can still harm soft-bodied beneficials (including predatory mites) on contact. Spray only what you need to spray, and avoid blasting entire beds “just in case.”
Important: many “all-purpose” insect sprays do not control mites well and can actually make outbreaks worse by killing predatory insects. When you treat, choose products specifically labeled for spider mites.
Step 4: Consider beneficial predators
Outdoors, nature already employs an army of mite predators: lady beetles, lacewings, predatory mites, minute pirate bugs, and more. Your job is to avoid wiping them out.
- Skip broad-spectrum insecticides whenever possible.
- Provide habitat: small flowering plants nearby, mulch, and a pesticide-light garden helps predators stick around.
- If you buy predatory mites, follow supplier instructions closely and release during mild weather with adequate humidity.
Step 5: When to escalate (miticides, not just “insect spray”)
If an infestation is severe, keeps rebounding, or is hitting a valuable plant (especially evergreens and prized ornamentals), it may be time to step up to a miticide labeled for spider mites. Insecticides are not automatically miticides, and many do little to mites.
- Use products specifically labeled for spider mites and your plant type.
- Follow label directions for interval, coverage, and resistance management.
- When in doubt, bring clear photos or a sample to a local nursery or extension office for help choosing the right option.
Protect pollinators and beneficials
This is where outdoor spider mite control differs most from indoor houseplant care. In the garden, you are treating a living neighborhood. A few habits keep your helpful insects safe:
- Spray at dusk or early morning when pollinators are less active.
- Avoid spraying open flowers. Target foliage, especially undersides.
- Use the least disruptive option first: water sprays, then soap or oil only if needed.
- Do not “preventively” spray oils or soaps weekly all season. Treat based on scouting.
- Read labels carefully for bee cautions and plant sensitivity notes.
If you have to treat a plant that is covered in blooms, consider deadheading spent flowers first, or focus on hosing and pruning until bloom slows.
Prevention outdoors
Reduce plant stress
- Water deeply and consistently, especially during heat waves.
- Use mulch to cool roots and stabilize moisture.
- In containers, check moisture daily during hot spells.
Keep leaves cleaner
Dust is a spider mite welcome mat. If plants are near a road, driveway, or construction area, occasionally rinse foliage during dry periods.
Go easy on high-nitrogen fertilizer
Excess nitrogen pushes soft, lush growth that mites love. Feed plants steadily and appropriately, focusing on soil health and compost rather than big jolts of quick-release nitrogen.
Scout in the right weather
Hot, dry, windy conditions are prime time for many species. Check susceptible plants weekly in summer, especially the sunniest edges and any spot that looked “off” last year. For conifers, also scout in spring and fall for cool-season mites.
Ornamentals vs. small fruits
Ornamentals
- Prioritize plant vigor: hose, prune hot spots, then oil or soap if needed.
- On dense shrubs, thinning a little can improve airflow and spray coverage.
- On evergreens, check interior needles and branches, not just outer tips.
Small fruits
- Focus on leaf undersides where mites cluster, especially during fruiting heat.
- Use water sprays and targeted products labeled for edible crops.
- Always follow the label for crop listing, PHI (pre-harvest interval), and REI (restricted-entry interval) when applicable.
- Keep plants evenly watered to prevent stress that invites mites.
When it is not spider mites
If you are not seeing mites on the paper test or under a hand lens, consider these common outdoor imposters:
- Thrips: silvery streaking, distorted buds, tiny slender insects
- Lace bugs: stippling plus dark tar-like spots on leaf undersides
- Leafhoppers: stippling and hopping insects, often on beans and roses
- Drought or heat stress: uniform wilting pattern tied to sun and soil dryness
- Herbicide drift: twisted new growth and cupped leaves, often on one side facing a neighbor or road
If you are unsure, take a close-up photo of the underside of the leaf in good light and zoom in. Mites often reveal themselves when you can enlarge the image.
Quick outdoor spider mite plan
- Confirm with leaf inspection, the white paper tap test, and ideally a 10x to 20x hand lens.
- Hose leaf undersides every few days during outbreaks, then adjust based on scouting and weather.
- Prune heavily webbed tips or branches and discard.
- Spray horticultural oil or insecticidal soap weekly for 2 to 3 rounds if needed, targeting the infestation and avoiding heat and drought-stressed foliage.
- Escalate to a labeled miticide for stubborn or severe cases on valuable plants, and protect beneficials.
- Prevent by reducing stress, managing dust, and scouting regularly.
If you try these steps and a plant still declines rapidly, it may be dealing with more than one issue. In that case, I would slow down, reassess watering and heat exposure, and consider bringing a sample or photos to a local nursery or extension office for confirmation.