Rose Winter Protection in Cold Climates
If you garden where winter bites hard, roses can feel like the divas of the yard. But winter protection is less about building a fortress and more about preventing the worst damage: deep freezes, drying winds, and repeated freeze-thaw cycles that heave roots and split canes.
I like to think of winterizing as tucking your roses in for a long nap. Not too early, not too smothered, and definitely not in anything airtight. Let’s walk through the timing and the simple, reliable methods that actually work in cold climates.
Quick note on expectations: your USDA zone (or local hardiness rating) and microclimate matter a lot. A sheltered zone 6 foundation bed is a different world than an exposed zone 3 yard. Use the steps below as a baseline, then adjust to what your winters actually do.

What you are protecting against
Cold is only part of the story. A lot of winter rose trouble comes from a few repeat offenders:
- Freeze-thaw swings that crack canes and push roots up (winter heaving).
- Desiccation, which is a fancy word for “drying out.” Winter wind and sun pull moisture from canes when the ground is frozen and roots cannot replace it.
- Dieback from cold damage on tender varieties, especially hybrid teas and grandifloras in zones colder than they prefer.
- Rodents nesting under cozy covers and nibbling bark near the crown.
Your goal is steady temperatures around the crown and lower canes, plus wind protection for anything tall or exposed.
Fall timing
Stop fertilizing at the right moment
In cold climates, the big timing mistake is pushing fresh, tender growth too late in the season.
- As a rule of thumb, stop nitrogen fertilizer about 6 to 8 weeks before your average first frost. This varies by region, rose type, and feeding program, but the idea is the same: avoid encouraging soft growth that gets zapped by early cold.
- If you fertilize in late summer, keep it light and avoid “high N” lawn style blends near roses.
- Do not fertilize in fall to “help them recover.” Let them slow down naturally.
When to stop deadheading
About 4 to 6 weeks before first frost, I usually stop deadheading heavily. Some gardeners find that letting the last flush form hips may help nudge the plant toward dormancy. It is not guaranteed, but it supports the seasonal slowdown.
Watering before the ground freezes
Keep watering during dry autumn weather. A rose going into winter well hydrated handles cold and wind better. Once the ground freezes, you cannot fix drought stress.
- Water deeply right up until hard freeze, especially in windy sites.
- Avoid soggy soil. Good drainage is still the number one “winter protection” you cannot wrap around a plant.
How much protection?
Not all roses need the same level of fuss.
- Hybrid tea, grandiflora, and many floribunda roses often benefit from more protection in cold climates because their canes can die back significantly. In very cold zones, you are mainly trying to keep the crown and bud union alive.
- Shrub roses (including many landscape and hardy shrub types) are generally tougher and may only need a good mulch mound, especially if they are rated hardy for your zone.
- Own root roses can regrow true to variety even if the top dies back, while grafted roses need extra attention at the bud union so they do not die back below the graft.
One big cold-climate best practice: if you grow grafted roses, many northern growers aim to have the bud union a bit below soil level (often 1 to 2 inches or more, depending on local guidance) to improve winter survival. If yours is above the soil line, a winter mulch mound becomes even more important.
If you are unsure what you have, treat it like a tender rose the first winter and take notes. Your garden will teach you quickly.
Step 1: Smart cleanup
Think “tidy enough to reduce disease, not so tidy you expose roots.”
- Remove fallen leaves around the base, especially if you had black spot. This reduces overwintering spores.
- Remove diseased leaves still on the plant once they start dropping. Toss them in the trash, not your compost pile, if disease was heavy.
- Do not do hard pruning in fall. Save major pruning for spring. In fall, you can shorten very tall canes slightly to prevent wind whip, but keep cuts minimal.
If you do any cutting and you suspect disease, wipe or disinfect pruner blades between plants (and between clearly diseased and healthy wood) to avoid spreading problems.

Step 2: Protect after dormancy
The best time to winterize is after the rose has started to shut down.
- Wait until after 1 to 3 hard frosts and the plant is clearly going dormant.
- A “hard frost” is defined a little differently depending on where you live, but think around 25°F (-4°C) or colder for several hours.
- Winterizing too early can trap warmth and moisture, encouraging rot and keeping rodents comfy.
If your weather swings wildly, I aim for the point when the ground surface is starting to firm up and the rose is no longer pushing new growth.
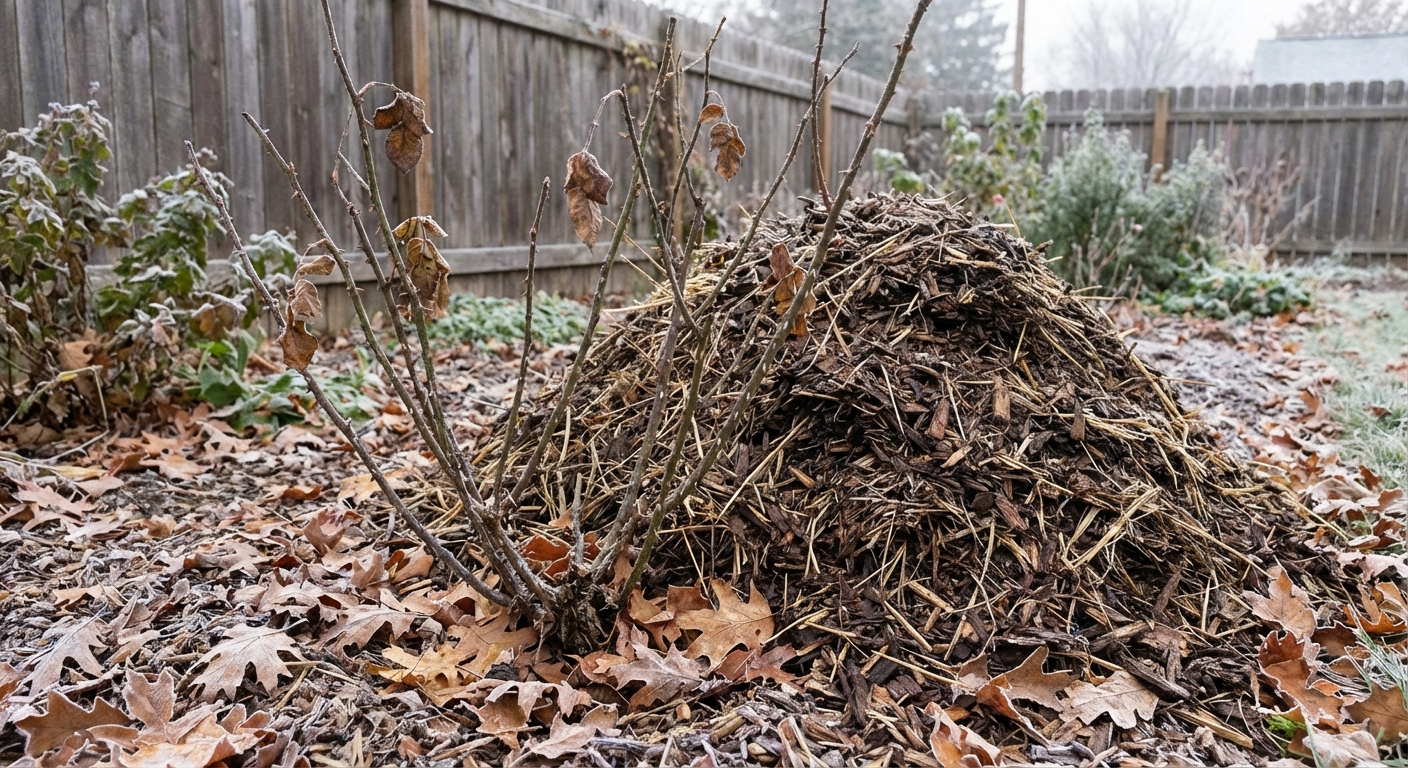
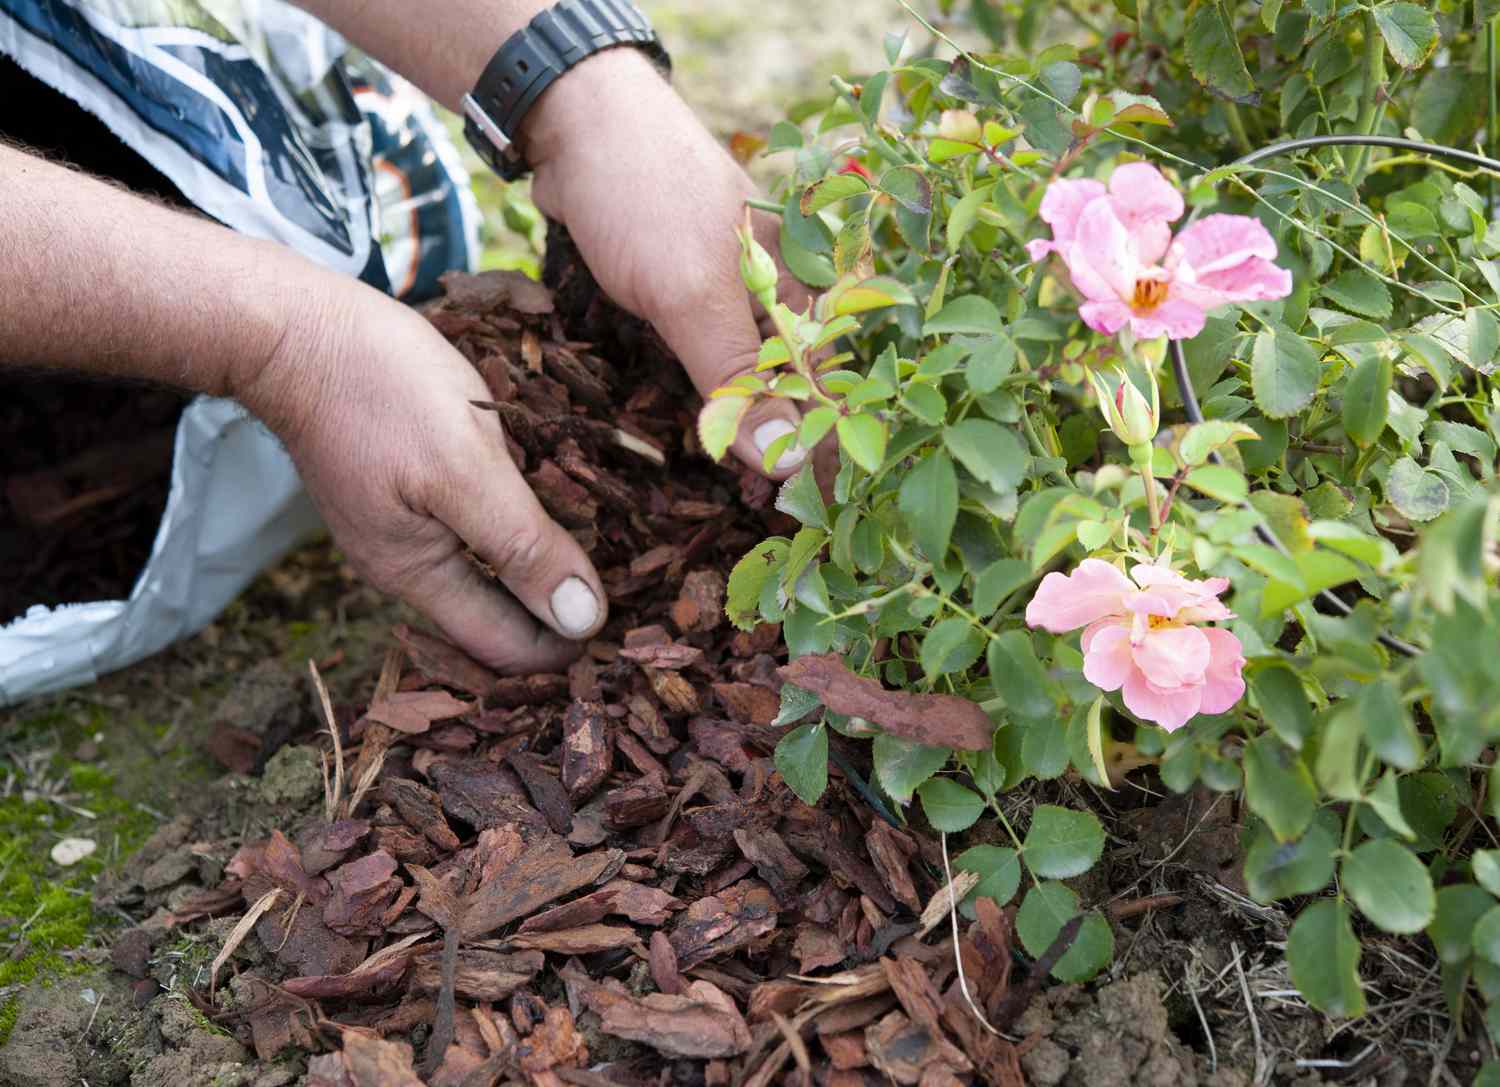
Mulch mounding
If I could pick only one technique, this would be it. A mulch mound insulates the crown and bud union, which is where winter survival matters most.
What to mound with
- Shredded leaves (my favorite, free and effective)
- Compost mixed with leaves
- Straw (not hay, which carries seeds)
- Pine needles for a lighter, airy mound
Avoid packing heavy, wet materials that matt down into a soggy plug.
How high to mound
- In many cold climates: 8 to 12 inches over the crown.
- In very cold, windy sites: 12 to 18 inches can be appropriate for tender roses.
Make the mound wide, not just tall. Think of a cozy skirt around the base.
Rodent reality check
Before you mound, clear weeds and debris that make hiding spots. If rodents are a known problem, avoid building a dense, warm tunnel system right against the canes. A simple physical deterrent is a short ring of hardware cloth around the base before you mound, especially if voles are common in your area.
Cones and collars
Rose cones can work, but only if you treat them like a wind shield, not a sealed container. Local practices vary, so consider this the safest general approach.
How to use a cone
- Ventilation is essential. If your cone has vents, keep them open through the earlier part of winter, then adjust once you have sustained cold and the ground is frozen. If it does not, prop it slightly or add ventilation holes.
- Fill the cone with dry leaves or straw for insulation. An empty cone is mostly just air and can swing warm and cold quickly.
- Anchor it well with soil, landscape pins, or bricks so it does not sail into the neighbor’s yard.
A simple alternative: a wire collar
Many gardeners prefer a quick DIY collar.
- Wrap a cylinder of hardware cloth or sturdy wire fencing around the rose base.
- Fill with shredded leaves.
- Top with something that stays breathable if needed to keep leaves from blowing away.
Protecting climbers
Climbing roses are a special case because the canes are long, exposed, and often the source of next year’s best blooms. You have three main options, depending on your climate and how flexible the canes are.
Option 1: Tie canes
In moderately cold climates, the biggest problem is canes whipping in winter wind and snapping at the base.
- Remove canes from the trellis only if necessary.
- Gather canes into a bundle and tie them with soft ties or garden twine at several points.
- Make sure ties do not cut into the cane. I like stretchy tie tape or old soft fabric strips.
Option 2: Wrap canes
For colder and windier sites, wrap after canes are tied. Use materials that allow airflow.
- Burlap (classic, easy)
- Frost cloth designed for plants
- Evergreen boughs tucked around canes for wind buffering
Avoid plastic sheeting. It traps moisture and can create ice and rot issues during thaws.
Option 3: Lay them down and cover
In very cold zones, many gardeners get the best survival by bringing the canes closer to the ground where snow cover insulates (often called the Minnesota tip method).
- After dormancy, carefully loosen canes from supports.
- Gently bend them down in stages if stiff. Do not force it in one go.
- Pin canes to the ground with landscape staples or bent wire.
- Cover with 3 to 6 inches of leaves or straw, then secure with evergreen boughs to reduce blowing.

Extra help for windy sites
If your roses sit in an open, windy area, you can add a little microclimate support.
- Burlap windbreak: Wrap burlap around stakes placed around the rose bed, leaving the top open for airflow.
- Snow fencing: A short section can reduce wind and help snow settle as insulation.
- Mulch wider: Extending mulch over the root zone helps reduce freeze-thaw stress.
And if you can improve one thing long term, make it soil structure and drainage. Healthy, well drained soil is winter armor you do not have to reinstall every year.
Spring uncovering
Uncovering is where a lot of well-meaning gardeners accidentally cause damage. Roses hate being yanked from warm to cold overnight just like we do. Pull protection too early and you can also trigger tender new growth that gets zapped by late freezes.
When to start
- Wait until the worst deep freezes are passing and daytime temperatures are consistently above freezing.
- A good cue is when forsythia begins to bloom in many regions, or when you see buds swelling on the rose and the soil is thawing.
How to uncover slowly
- Stage it over 7 to 14 days. Pull mulch back a few inches at a time.
- If a hard freeze is forecast, you can push mulch back temporarily like tucking the blanket back up.
- Once the ground is workable, level the remaining mound into a normal mulch layer.
What to do next
- After uncovering, do your main pruning when you can see what is alive.
- Clean up remaining winter debris around the base.
- Resume feeding only once growth is underway and your rose is actively leafing out.
Quick checklist
- Stop nitrogen fertilizer 6 to 8 weeks before first frost (rule of thumb, adjust locally).
- Keep watering through dry fall weather until the ground freezes.
- Clean up diseased leaves and debris near the base.
- After a few hard frosts, mound 8 to 12 inches of loose mulch over the crown (more in very cold, windy sites).
- Use cones or collars only with ventilation and dry fill.
- Tie climbers and wrap with airflow-friendly materials, or lay down and cover in very cold zones.
- Uncover gradually in spring to avoid shock, premature growth, and freeze damage.
A gentle reminder
Roses are tougher than their reputation, and you do not need perfection for them to survive winter. If you get the timing mostly right and protect the crown from temperature whiplash, you are doing the most important part.
And if a cane dies back, that is not failure. It is information. Spring will show you exactly what your winter strategy accomplished, and you can adjust one small thing next year. That is gardening. We learn, we tweak, we grow.