Rose Rosette Disease: What It Looks Like and What to Do
Rose Rosette Disease (RRD) is one of those diagnoses no rose lover wants, but it is also one where a clear plan helps you act calmly and protect the rest of your garden. If your rose suddenly looks “possessed” with wild, tangled growth, extra thorns, and distorted blooms, this guide will help you confirm what you are seeing and take the safest next steps.
I’m going to be direct but not alarmist: there is no cure once a rose is infected. The goal is to remove the source quickly and avoid spreading the tiny mite that carries it to other roses.

What Rose Rosette Disease looks like
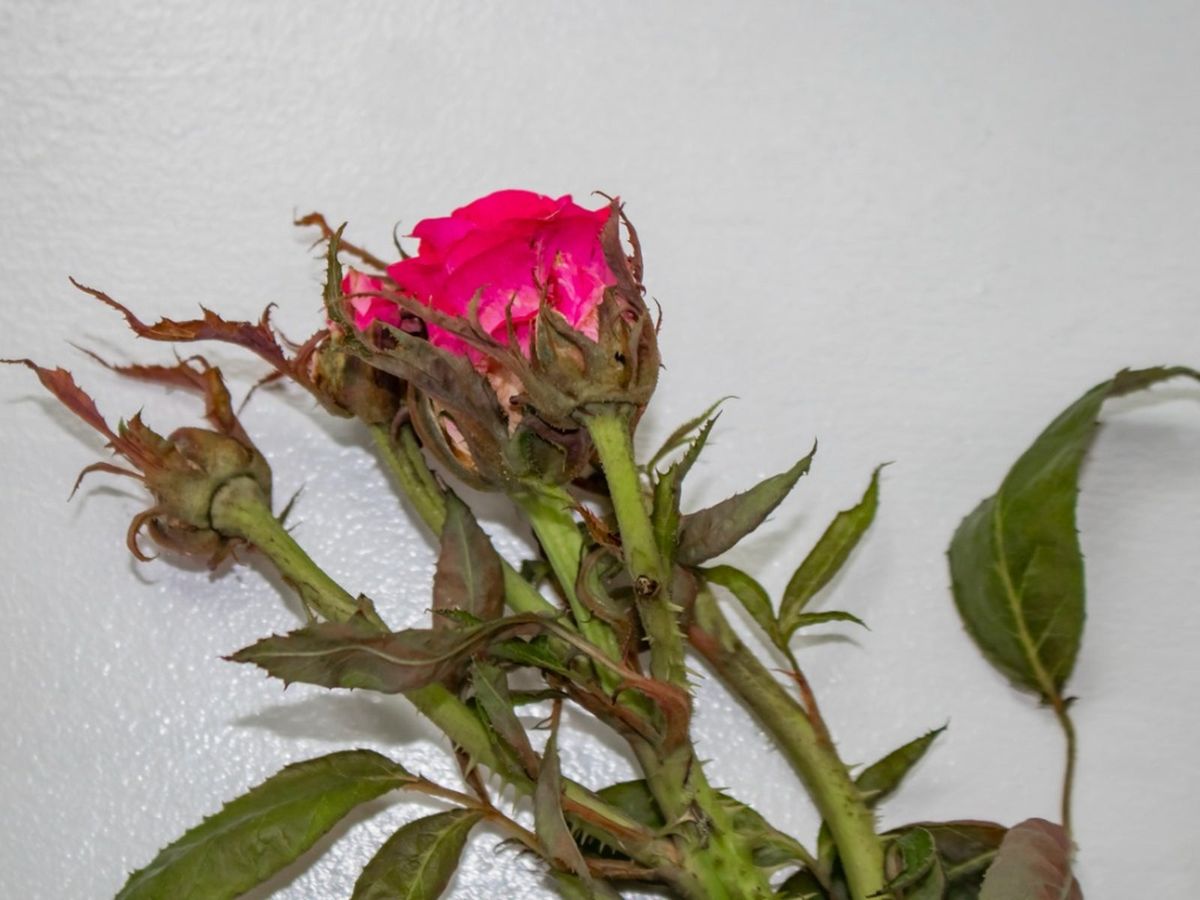
RRD can mimic normal spring flush or stress, especially because some roses naturally push red new growth. The difference is that RRD growth looks abnormally intense, distorted, and crowded, and the plant often declines over time instead of settling into normal leaves and blooms.
Common symptoms you can spot
- Witches’ broom growth: tight clusters of many small shoots erupting from one point, creating a broom-like tangle.
- Unusually red or purple new growth that stays red and does not mature to green normally.
- Twisted, narrow, or strap-like leaves, often curled and misshapen.
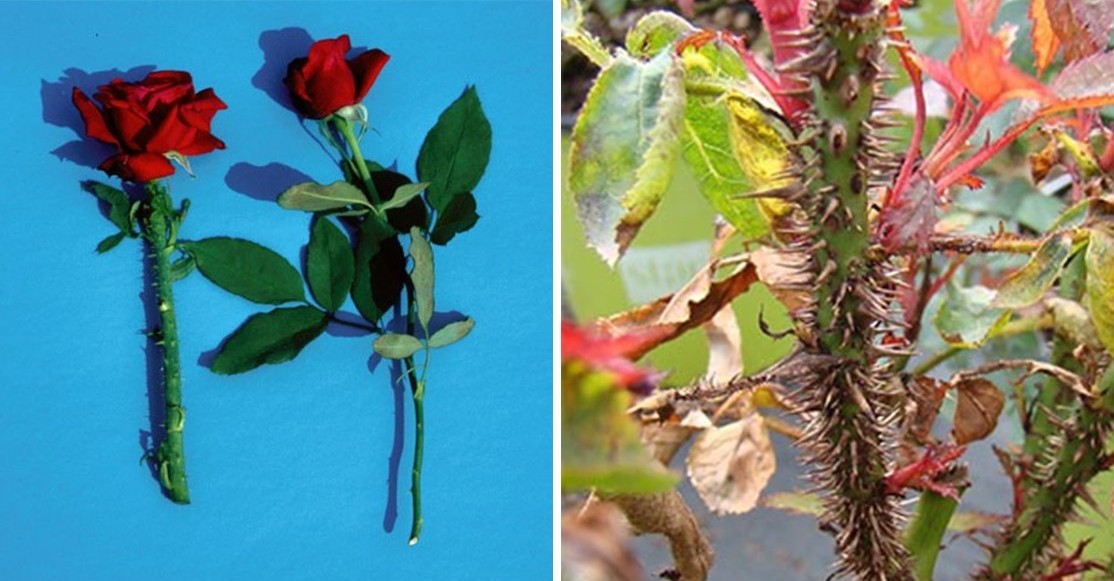
- Thickened canes or odd swelling on stems.
- Excessive thorns or unusually soft, bristly prickles on new growth.
- Deformed buds and flowers, or flowers that fail to open properly.
- Overall decline: reduced vigor, fewer normal leaves, and eventual dieback.
Symptoms can begin on just one cane and later spread through the whole plant. If you only see one suspicious shoot, treat it as a red flag and inspect closely.
What it is not
- Normal red new growth: many roses start red and then green up as leaves expand and toughen.
- Herbicide drift injury: can also twist growth, but it often affects multiple plant species nearby and may show more uniform distortion across the plant.
- Rose mosaic virus: typically shows mottled, patterned yellowing rather than dense witches’ broom clusters.
- Heavy pruning response: can cause vigorous shoots, but the leaves should look normal and the growth should not stay grotesquely clustered.
If you are unsure, take clear photos of the whole shrub and close-ups of the affected tips and contact your local extension office or Master Gardener helpline for help confirming. In some areas, you can also submit a sample for diagnostic testing through an extension lab or plant clinic.
Why it spreads
Rose Rosette Disease is caused by a virus called Rose rosette virus (RRV). It moves through roses systemically. It is most commonly spread by a microscopic eriophyid mite, Phyllocoptes fructiphilus.
How the mite moves
- Wind: mites are tiny enough to drift on air currents from plant to plant.
- Physical contact: roses touching each other give mites an easy bridge.
- People and tools: mites can potentially hitch a ride on gloves, sleeves, pruners, or tied canes, especially if you are handling infested growth and then moving straight to another rose.
- New plants: bringing home an infected rose, even with subtle symptoms, can introduce RRD.
This is why acting quickly matters. One infected rose can become a mite hot spot, creating more opportunities for spread to nearby roses.
Why pruning does not cure it
I know the instinct: “If I cut out the weird cane, I’ll save the plant.” With RRD, pruning almost never works as a cure because the virus moves through the plant’s vascular system. By the time you can see symptoms on one cane, the infection may already be present in other canes and in the roots.
Pruning can make things worse
- It can move mites around as you handle and shift infested growth.
- It stimulates fresh new growth that mites love, potentially increasing mite activity.
- It delays removal, giving more time for mites to disperse to other roses.
If your rose is strongly symptomatic, the most responsible choice for the rest of your garden is full removal.
What to do right away
Think of this as “contain, remove, sanitize.” You are not just removing a sick plant. You are reducing the chance of mites moving on to the next rose.
Step 1: Confirm you have a strong suspicion
- Look for multiple symptoms together, especially witches’ broom plus distorted leaves and excessive thorns.
- Check nearby roses, especially downwind.
- If you can, get a second opinion from your local extension service, Master Gardener helpline, or a regional plant clinic.
Step 2: Stop handling the rose
Avoid deadheading, tying canes, or brushing past it. If it is in a high-traffic area, consider loosely placing a large plastic bag over the most symptomatic growth temporarily to reduce disturbance while you prepare for removal.
Safe removal, bagging, and disposal
This is the part that feels emotionally hard, so I’ll walk you through it like we are standing in the garden together. Choose a calm day if you can, with little wind.
What you need
- Heavy-duty contractor trash bags, or double-bagged yard bags
- Gloves and long sleeves
- Pruners and a shovel or spade
- Disinfectant for tools (details below)
- Twist ties or tape to seal bags
Step-by-step removal
- Bag the top first. Slide a large bag over the rose from the top down as much as possible, then cinch it around the base of the plant. This may help reduce disturbance and mite dispersal as you cut.
- Cut the canes inside the bag. Make cuts to collapse the shrub into the bag. Work slowly.
- Dig out the plant. Remove the crown and as much of the root system as you reasonably can. The virus is in the plant, so leaving large living roots can allow regrowth.
- Bag everything. Put all canes, leaves, and roots into the bag(s). Seal tightly.
- Clean up debris. Pick up fallen leaves and small stem bits. Bag them too.
Disposal rules that matter
- Do not compost infected roses. The bigger risk is moving mites and living infested tissue around during cutting and turning, not “killing the virus” with compost heat.
- Do not chip or shred infected material for mulch.
- Do not leave it at the curb unbagged. Loose canes can drop debris and be handled by others.
- Follow local rules. Many areas recommend sending bagged material to the landfill via household trash. Some municipalities have specific guidance for diseased plants. When in doubt, call your local waste authority and describe it as “bagged diseased rose material.”
This is the practical community-safety framing in plain language: you are trying to prevent accidental spread to your neighbors’ roses and to public plantings. Bagging and secure disposal is simply good plant citizenship.

Tool and glove sanitation
Tool sanitation is not about perfection. It is about reducing risk. Clean tools also make cleaner cuts and keep your gardening life simpler.
Best practice: clean, then disinfect
- Remove sap and debris with a rag and soapy water first. Disinfectants work better on clean surfaces.
- Disinfect the blades between plants, and ideally between major cuts on a highly symptomatic rose.
What to use
- 70% isopropyl alcohol: wipe or dip, fast and convenient, no rinse needed, works quickly.
- Disinfectant spray or wipes labeled for tools: follow the contact time on the label.
- Diluted bleach solution can work but may corrode tools and requires careful handling and rinsing. If you use it, mix fresh and never combine with other cleaners.
Also wash gloves, or use disposable gloves and discard them. If your sleeves brushed the plant, toss clothes straight into the laundry.
Do you need to replace the soil?
This is a big worry, so let’s ease it with facts. RRV is not considered soilborne, and it is not known to persist in soil the way some fungal diseases can. The main problem is infected living rose tissue and the mites that live and feed on roses, then move from rose to rose.
Usually, no soil replacement is needed
In most home gardens, you do not need to remove or replace soil after taking out an infected rose. Focus on thorough plant removal, careful disposal, and sanitation.
When soil replacement can make sense
- You plan to replant a rose immediately in the same hole and you struggled to remove a lot of roots. Removing extra root bits and refreshing soil can reduce the chance of vigorous regrowth from missed pieces.
- The site had poor drainage or exhausted soil. Improving soil structure and adding finished compost (from healthy materials) helps the next plant thrive, rose or not.
- You have repeated RRD issues in a tight bed with roses crowded together. In that case, the bigger fix is spacing and reducing rose-to-rose contact, not soil sterilization.
If you are replanting a rose, I like to wait a bit, watch for any volunteer rose shoots from leftover roots, and remove them promptly.
What to plant next
After removing an infected rose, you have options, and none of them are “give up gardening forever.”
If you want a break from roses
Plant something that supports pollinators and soil life without being a host for the same disease cycle. Perennials like salvia, catmint, coneflower, yarrow, or ornamental grasses can keep the bed beautiful while you monitor nearby roses.
If you want to replant roses
- Wait and observe: give it some time to ensure no rose regrowth is popping up from missed roots. Specific timing advice varies by region and local pressure, so your extension office may have a preferred waiting window.
- Increase spacing: airflow and less cane contact reduces mite “bridges.”
- Avoid planting downwind of an area with known infections, if possible.
No rose is guaranteed immune, but healthy plants in healthy soil cope better with all stressors. Think of soil health as your garden’s steady heartbeat.
Preventing Rose Rosette Disease
You cannot control every mite on the breeze, but you can make your garden less inviting to spread.
- Inspect new roses carefully before buying and again before planting. Avoid plants with crowded, distorted tips.
- Quarantine new additions for a couple of weeks if you can, especially if you already have many roses.
- Space roses well and prune for airflow, so canes are less likely to rub and touch.
- Control wild multiflora rose nearby if it is present in your area, since it can serve as a reservoir host. Follow local guidance for removal.
- Keep a simple cleanup habit: pick up prunings, sanitize tools, and avoid moving from a suspicious plant to a healthy one without washing up.
Quick checklist
- If symptoms strongly suggest RRD, assume it is not curable and plan removal.
- Do not compost, chip, or shred infected material.
- Bag the plant securely, remove roots, and dispose according to local waste rules.
- Sanitize tools and wash gloves and clothes.
- Soil replacement is usually unnecessary, but improve soil health and watch for regrowth.
When to ask for local help
If you are uncertain, or if you manage a shared landscape (HOA beds, community gardens, public-facing plantings), it is worth contacting your local extension office for confirmation and region-specific recommendations. That is not about panic. It is about being a good steward and protecting the roses beyond your fence line.
If you’d like, you can also take a few clear photos before removal: one of the whole shrub, one of the worst tip growth, and one of a normal cane for comparison. The more context, the easier it is for an expert to help.