Root Rot in Houseplants

Root rot is the heartbreak you do not see coming. One day your plant looks a little “off,” and the next it is droopy, yellowing, and somehow both wet and thirsty at the same time. The good news is that root rot is often fixable if you catch it early, and very preventable once you understand what causes it.
Let’s walk through what root rot looks like, how to confirm it (without panicking), and exactly how to rescue your plant with the least amount of drama and the most amount of clean, healthy new roots.
What root rot is
Root rot is a breakdown of the root system caused by roots staying wet for too long. Without enough air, roots suffocate and die back, and then opportunistic fungi and water molds (commonly Pythium, Phytophthora, and friends) move in.
In plain Leafy Zen language: it is not “too much water” in one day. It is too much water for too long combined with not enough oxygen.
One helpful distinction: some plants start with simple oxygen deprivation (waterlogged soil). If it stays that way, damaged roots become an easy target for pathogens, which is when it turns into true rot and spreads.
Common causes
- Overwatering frequency: watering again before the mix has dried to the plant’s comfort zone.
- Poor drainage: pots without drainage holes, or saucers that stay full.
- Heavy, compacted soil: dense mixes that hold water and collapse air pockets.
- Oversized pots: extra soil stays wet much longer than the roots can use it.
- Low light and cool temperatures: the plant drinks slowly, so soil stays wet longer.
Signs of root rot
Root rot symptoms can look like a dozen other issues, so think of these as a pattern, not a single smoking gun.
Above-soil clues
- Yellowing leaves, especially older leaves first, often paired with soft, limp growth.
- Wilting even when the soil is wet (roots cannot uptake water when they are damaged).
- Slow growth or new leaves that emerge small and weak.
- Leaf drop that feels sudden and out of season.
- Brown or black leaf tips that spread despite watering changes.
Soil-level clues
- Foul soil smell: sour, swampy, or “something died in there.” Healthy soil smells earthy, not funky.
- Soil stays wet for many days and feels heavy, not just moist.
- Fungus gnats hovering around the pot (they love damp media).
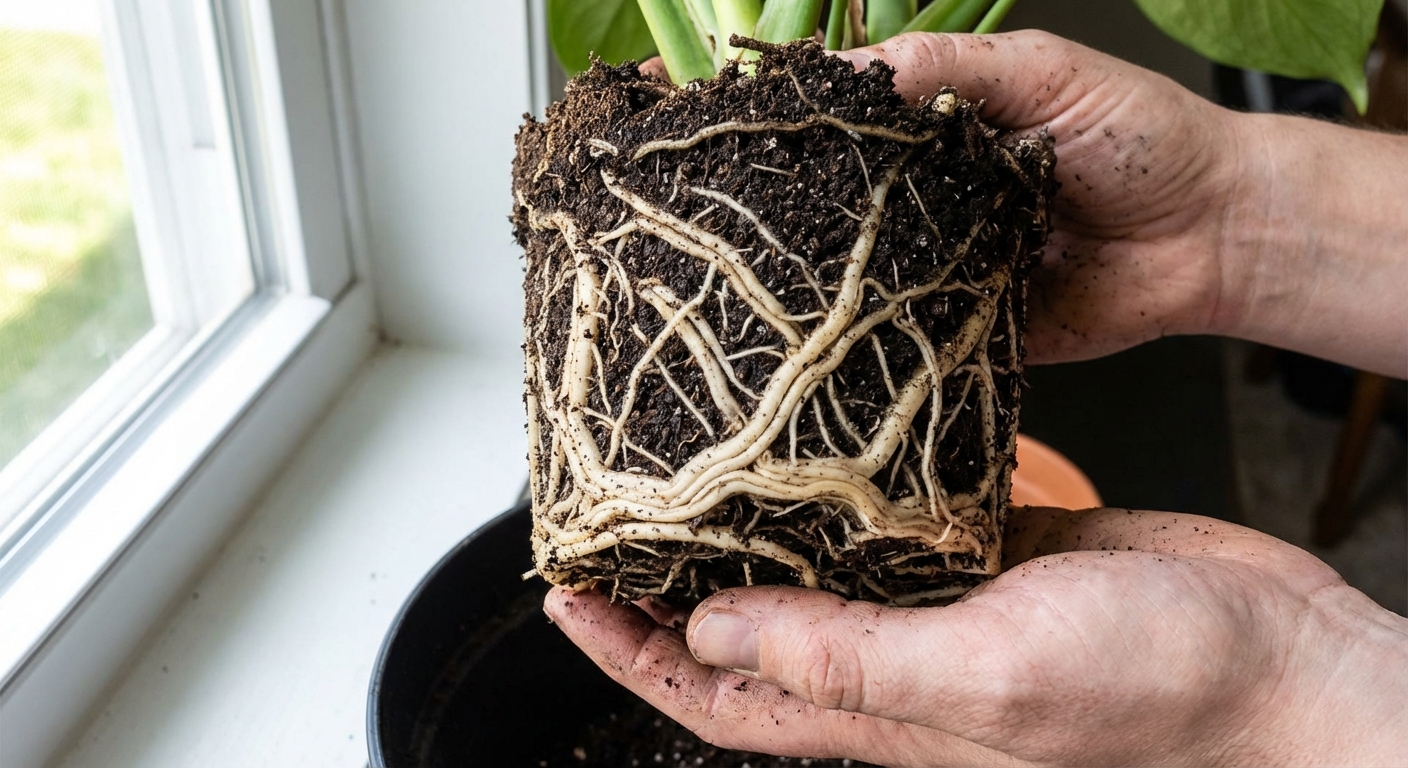
The definitive sign: the roots
Healthy roots are usually firm and light colored (white, cream, tan, or light orange depending on the plant). Rotted roots are often brown to black, mushy, and may slough off their outer layer when you touch them.
Healthy vs rotted roots
If you are a visual learner, this is the moment. When you unpot a plant, you want to see roots that look like they have structure and spring. Root rot looks like strings that have given up.
How to confirm root rot
Step 1: Smell and moisture check
Stick your finger about 2 inches into the mix (or deeper for larger pots). If it is wet and has a sour odor days after watering, root rot moves up the suspect list.
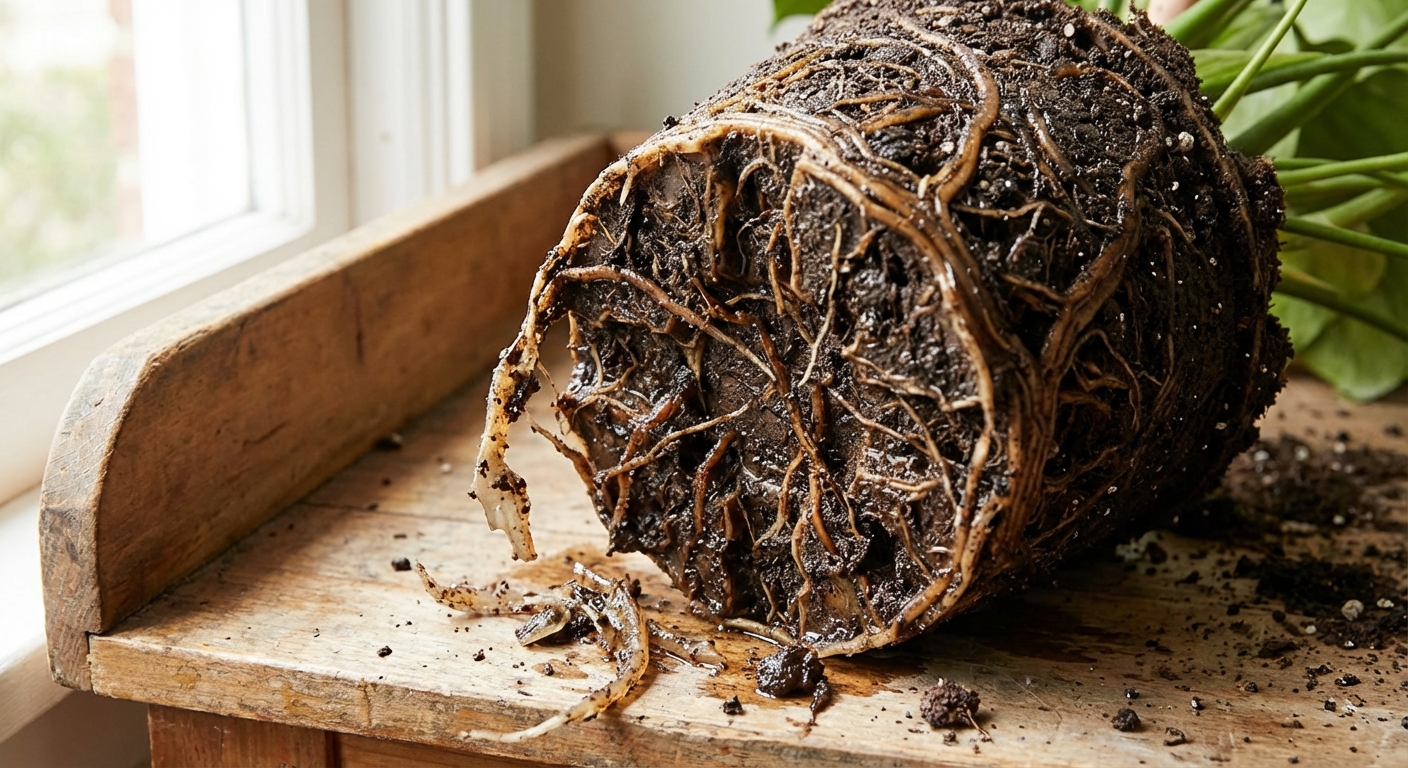
Step 2: Slide the plant out
Support the plant at the soil line, tip the pot, and ease it out. If it is stuck, squeeze a plastic nursery pot or tap the sides. Try not to pull from the stems.
Step 3: Inspect the root zone
Healthy roots hold the soil together in a lightly springy mass. With rot, the bottom may be sludge-like, with blackened roots and a smell you will remember.
How to treat root rot
Take a breath. Plants are tougher than they look, and you do not need fancy supplies to do a solid rescue.
What you need
- Clean scissors or pruning snips
- Fresh potting mix (more on choosing it below)
- A pot with drainage holes (same size or slightly smaller)
- Paper towels or a towel you do not mind getting dirty
- Optional: 3% hydrogen peroxide, gloves
Step 1: Unpot and remove soggy soil
Gently tease away as much wet soil as you can with your fingers. If the mix is muddy, you can rinse roots under lukewarm water to get a clear view of what needs to go. Keep this quick and repot promptly so roots are not sitting wet for long.
Step 2: Trim mushy roots
With clean snips, cut away anything that is brown, black, hollow, or squishy. You are looking for firm tissue. If the outer root sheath slides off leaving a thin string, that section is gone.
How much can you remove? Often more than you think. A plant can regrow roots, but it cannot regrow rotten ones. Keep at least some healthy roots and a stable crown (the base where stems meet roots). If the crown itself is soft or collapsing, recovery becomes much less likely.
Step 3: Sanitize and reset
Discard the old mix. Do not reuse it, especially after a smelly or advanced case.
Clean your tools with rubbing alcohol or hot soapy water.
Wash the pot with hot soapy water. For recurring or severe rot, disinfect with a diluted bleach solution (about 1 part bleach to 9 parts water), then rinse well and let it dry.
Optional: A careful peroxide rinse
If you want an extra step, you can do a single quick rinse of the remaining roots with diluted 3% hydrogen peroxide (roughly 1 part peroxide to 2 parts water). Do not soak. Avoid repeated use, and skip it for plants you know are sensitive. Peroxide can also disrupt helpful microbes, so think of it as a one-time “reset,” not a routine.
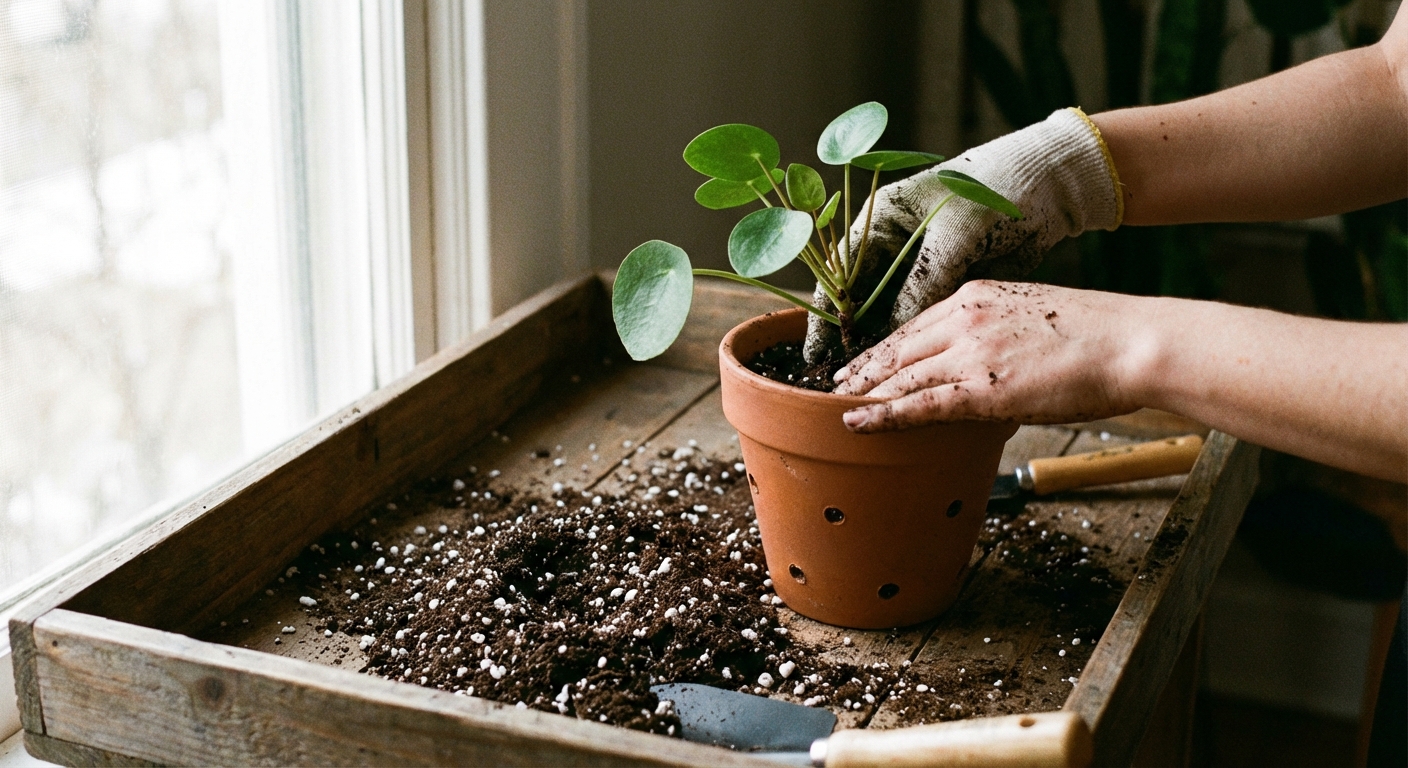
Step 4: Choose the right pot and soil
Pot: Use a pot with drainage holes. If you love a decorative cachepot with no hole, keep the plant in a nursery pot inside it and lift it out to water.
Soil: Avoid heavy, peat-packed mixes that stay wet forever. Most houseplants do well with a quality indoor potting mix amended for air. A simple starter blend:
- 2 parts indoor potting mix
- 1 part perlite or pumice
- Optional: 1 part orchid bark for chunkier aeration (great for aroids like pothos, philodendron, monstera)
Quick plant-type note: succulents and cacti generally want the mix to dry much more between waterings, while many tropical leafy plants prefer a slightly more even cycle. Adjust the “comfort zone” to your plant category.
Step 5: Repot and settle
Add a small layer of mix, place the plant so it sits at the same height as before, then fill around the roots. Press lightly to stabilize, but do not compact it like you are packing a suitcase. Roots want air.
Step 6: Water lightly after surgery
After a major root trim, the plant has fewer roots to drink with. Water lightly, just enough to settle the soil. Then wait until the mix dries to the appropriate level for that plant before watering again.
Step 7: Gentle aftercare
- Light: bright, indirect light (avoid hot direct sun while it is stressed).
- Airflow: good ventilation helps the soil cycle moisture properly.
- Humidity: moderate is fine, but do not “humidify” by keeping soil wet.
- No fertilizer for 3 to 4 weeks: fertilizing a stressed root system can burn it.
- Timeline: recovery can take weeks to a couple of months. Expect some leaf loss while roots regrow. The first win is usually a slightly perkier posture, then fresh leaves.
When it is too far gone
Sometimes the roots are mostly gone, and you are left with a plant that cannot support itself. You still have options, but it is also okay if the outcome is not a miracle.
Try propagation
If the stems are healthy, take cuttings and root them in water, perlite, or fresh mix. Many popular houseplants propagate easily, including pothos, philodendron, monstera, tradescantia, and some begonias.
Look for a healthy crown
For plants like snake plant, ZZ plant, and some succulents, you may be able to save sections or division pieces that still have firm tissue.
If everything at the base is mushy and smells foul, compost what you can (if you compost) and take the lesson forward. That is gardening too.
Preventing root rot
Prevention is mostly about making sure roots get what they crave: oxygen, predictable moisture cycles, and the right container.
Water by soil dryness
- Check the soil with your finger or a wooden skewer.
- Water thoroughly, then let excess drain completely.
- Empty the saucer after 10 to 20 minutes.
Match pot size to root size
A pot that is too big can hold moisture longer than your plant can use it. When repotting, go up 1 to 2 inches in diameter at most for most houseplants.
Use a well-aerated mix
If your mix looks like fine black dust when dry and sludge when wet, add perlite, pumice, or bark. Think fluffy, not packed.
Drainage holes matter
If you love a decorative cachepot with no hole, keep the plant in a nursery pot inside it and lift it out to water. It is the simplest way to get the look without trapping water around the roots.
Adjust for seasons and light
In winter or low light, most houseplants slow down. That means watering needs drop, sometimes dramatically. If your plant is not growing, it is not drinking much.
Be careful with “helpful” habits
- Misting does not cause root rot, but it can distract you from the real problem, which is soil staying wet.
- Self-watering pots can be wonderful, and they tend to work best when the setup allows some air exchange and the reservoir occasionally runs low so the mix can re-oxygenate (depending on the system and media).
- Rocks in the bottom of a pot do not improve drainage the way people hope. They do not increase drainage capacity. They reduce usable soil depth and can keep the saturated zone higher in the remaining soil, which means less air where roots are.
Quick troubleshooting
Not every yellow leaf is root rot. Here are a few common mix-ups.
- Underwatering: soil is dry all the way through, pot feels light, leaves crisp or papery.
- Too much sun: bleached patches, scorched areas on the side facing the window.
- Natural leaf drop: one or two older leaves yellow while new growth looks normal.
- Cold stress: droop and yellowing after a chill, especially near windows in winter.
When in doubt, check the roots. They tell the truth.
Root rot FAQ
Can a plant recover?
Often, yes. If you remove the rotten roots, repot into a well-draining mix, and correct watering habits, many plants rebound. That said, some plants will not recover, even with early intervention, especially if the crown is compromised or the infection is advanced.
Should I water after repotting?
Water lightly to settle soil, then wait. The goal is a moist start, not a soaked one. Let the mix dry to the right level for your plant before the next watering.
Is hydrogen peroxide necessary?
No. It can reduce pathogens temporarily, but it is not a substitute for trimming rot and improving oxygen in the root zone. Focus on drainage, soil structure, and watering rhythm.
Why does my plant wilt when the soil is wet?
Damaged roots cannot take up water properly. The plant behaves thirsty even though it is sitting in moisture.
A gentle pep talk
If you have ever loved a plant a little too enthusiastically with the watering can, you are in very good company. Root rot is common because caring people want to care. Once you learn to let soil breathe and dry a bit between drinks, your plants will reward you with that quiet, steady kind of thriving.
If you are troubleshooting a stubborn case, it can help to jot down your plant type, pot size, light level, and how long the soil stays wet. Patterns make diagnosis so much easier.