Ranunculus Planting and Care for Spring Blooms
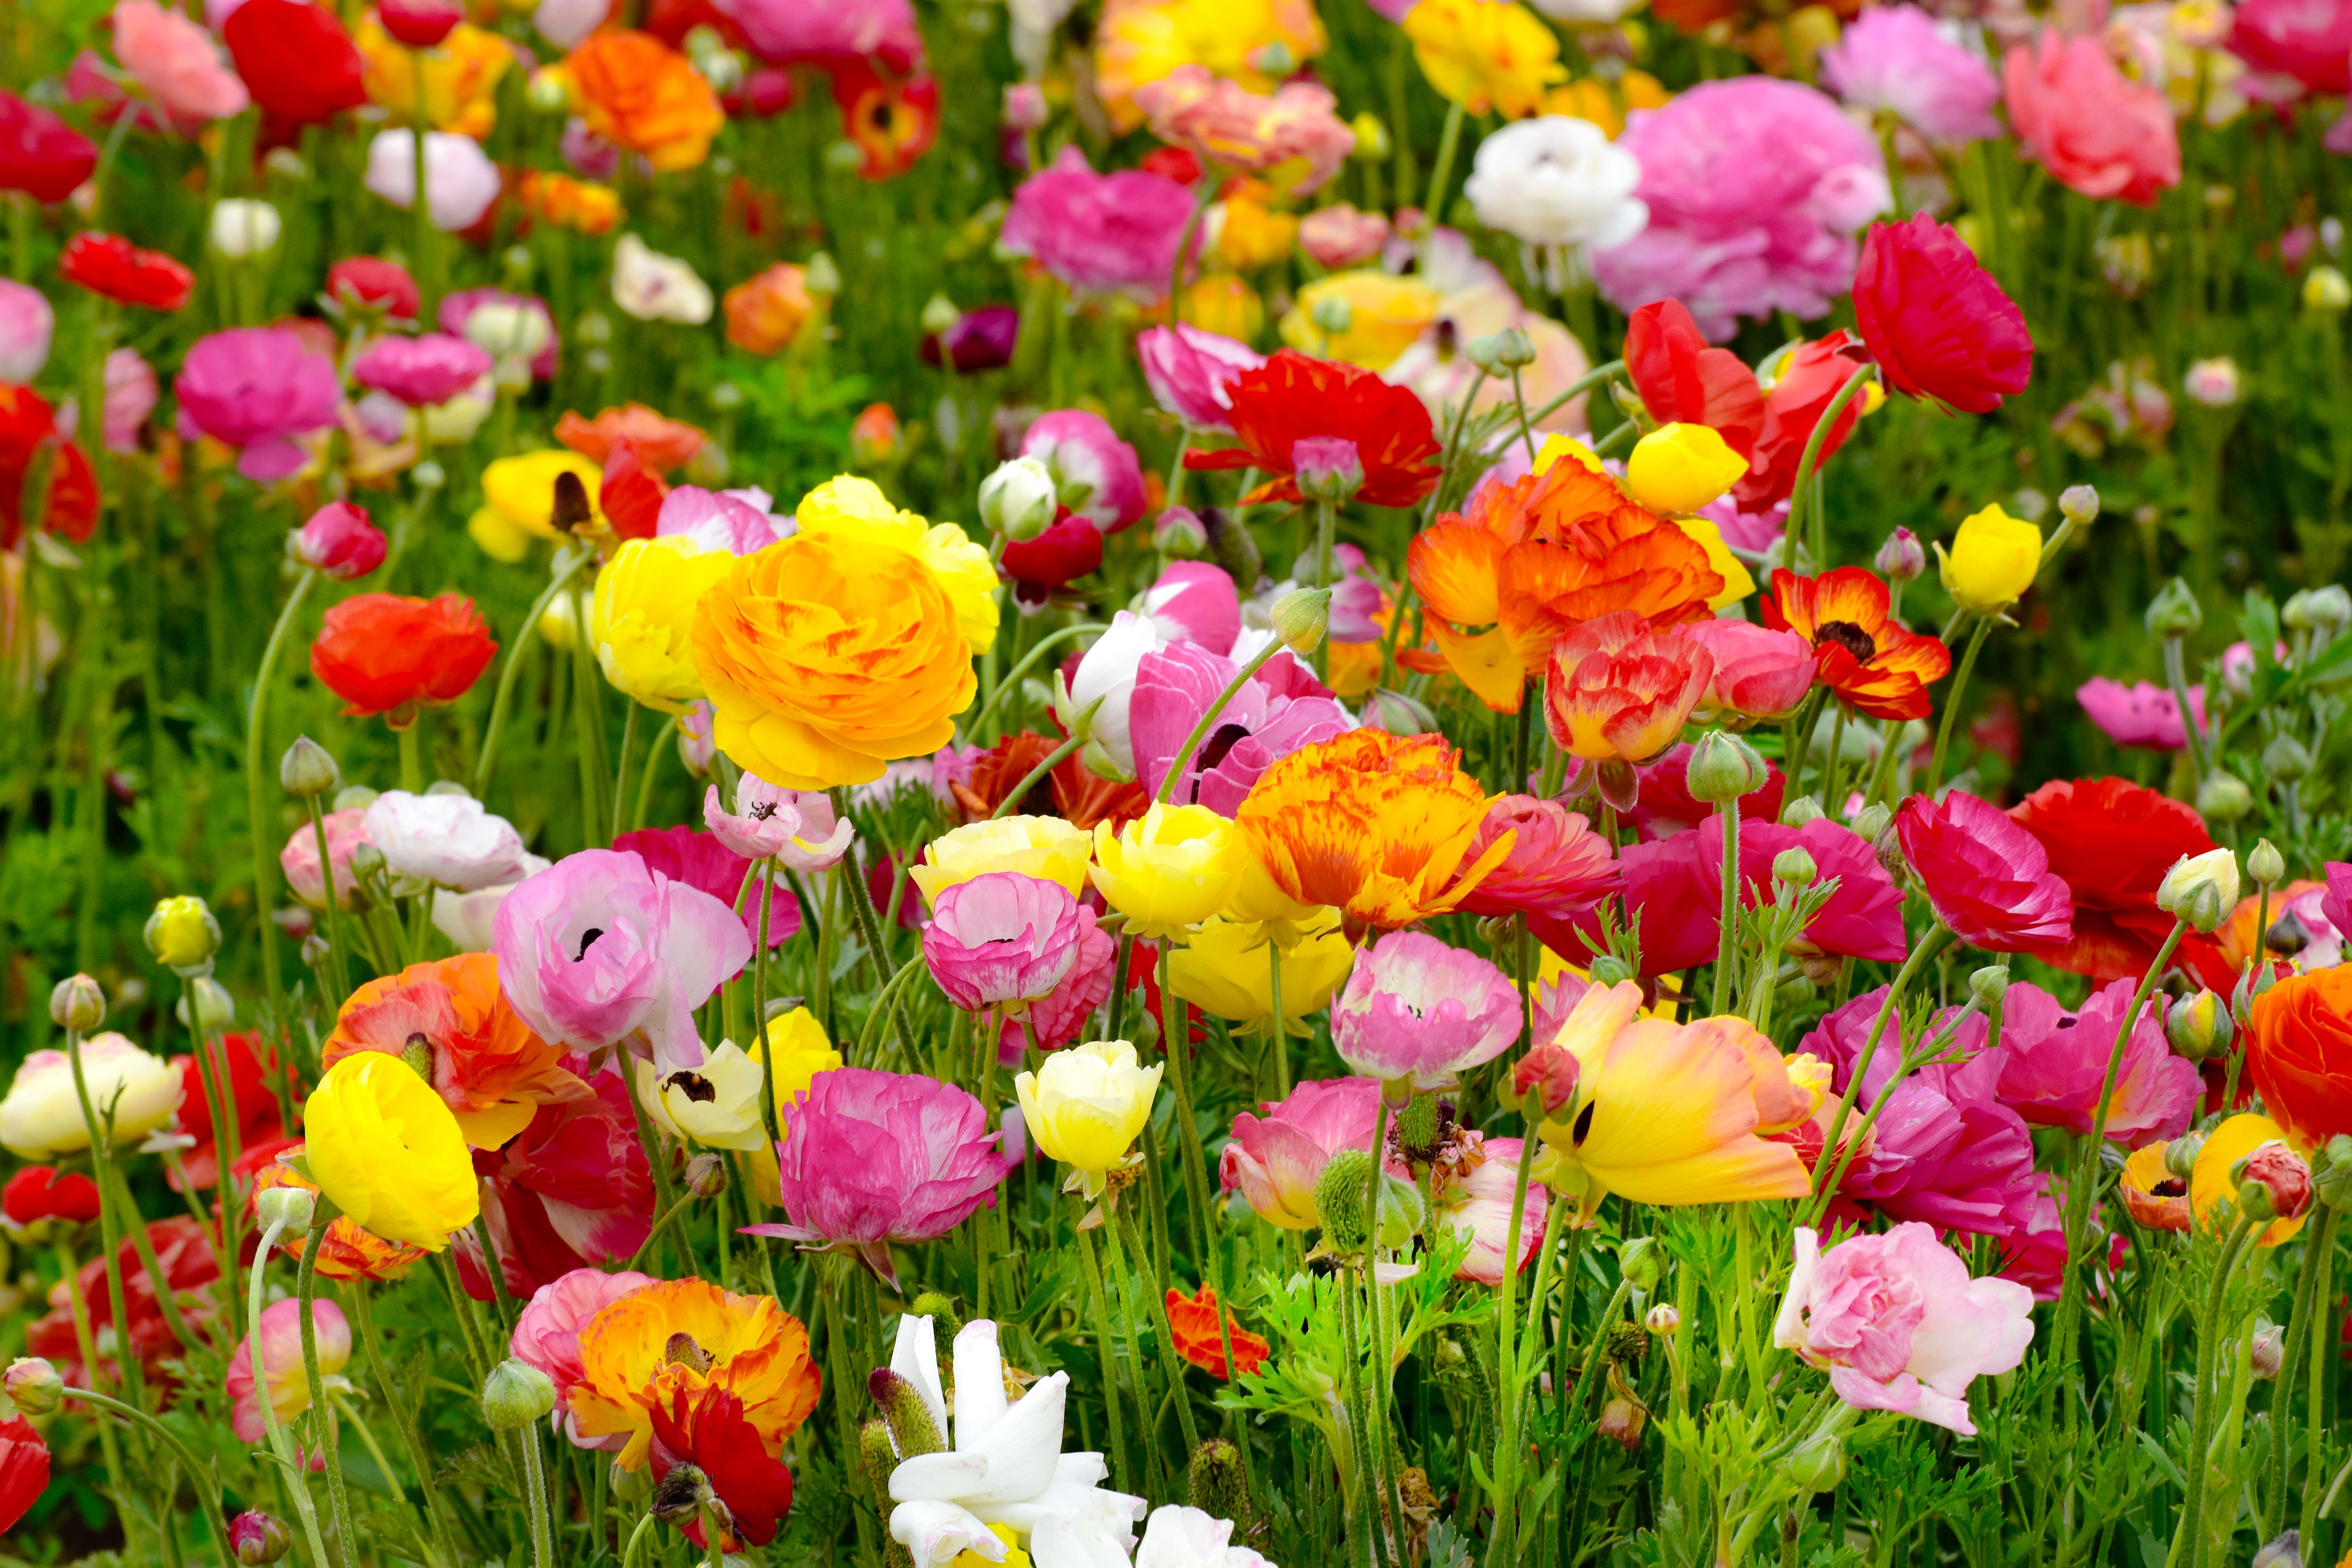
Ranunculus are the kind of spring flower that make you stop mid-walk and lean in. Layered petals like tissue paper. Colors that look almost painted on. And the best part is that they aren’t fussy once you understand their one big requirement: excellent drainage.
Let’s walk through ranunculus from “what on earth is a corm?” to bouquets on your kitchen counter, with a few gentle shortcuts and fixes for the most common hiccups.

Corms vs bulbs: what you’re planting
Ranunculus grow from corms, not bulbs. People often lump them together, so you’re not alone if you’ve heard them called “bulbs” at the store.
- Bulbs (like tulips) are layered, like an onion, and they usually feel smooth and plump.
- Corms (like ranunculus) are a solid storage organ. Ranunculus corms look like tiny brown octopuses, with little “claws” or fingers.
Those claws matter when you plant. You want the claws facing down, and the flatter, slightly indented side facing up.
When to plant for spring blooms
Ranunculus are cool-season bloomers. They grow best when days are mild and nights are cool.
In mild winter climates
If your winters are gentle and your ground doesn’t stay frozen, you can often plant in fall for late winter to spring blooms. Many gardeners in zones 7 to 10 (especially 8 to 10) treat ranunculus like a winter annual, though it depends on your winter lows and how quickly your soil drains.
In cold winter climates
If your ground freezes hard, plant in late winter to early spring after the worst deep-freeze weather has passed. Ranunculus can handle light frosts, but they don’t love prolonged hard freezes.
If you’re unsure, aim for cool soil and workable ground. A helpful target is roughly 50 to 60°F soil temperature, with daytime highs often around 50 to 65°F and cool nights.
How long it takes
- Sprouts: typically 2 to 4 weeks after planting (sometimes longer if it’s very cold).
- Blooms: often 10 to 14 weeks from planting in cool conditions, faster for pre-sprouted corms and slower if spring stays chilly.
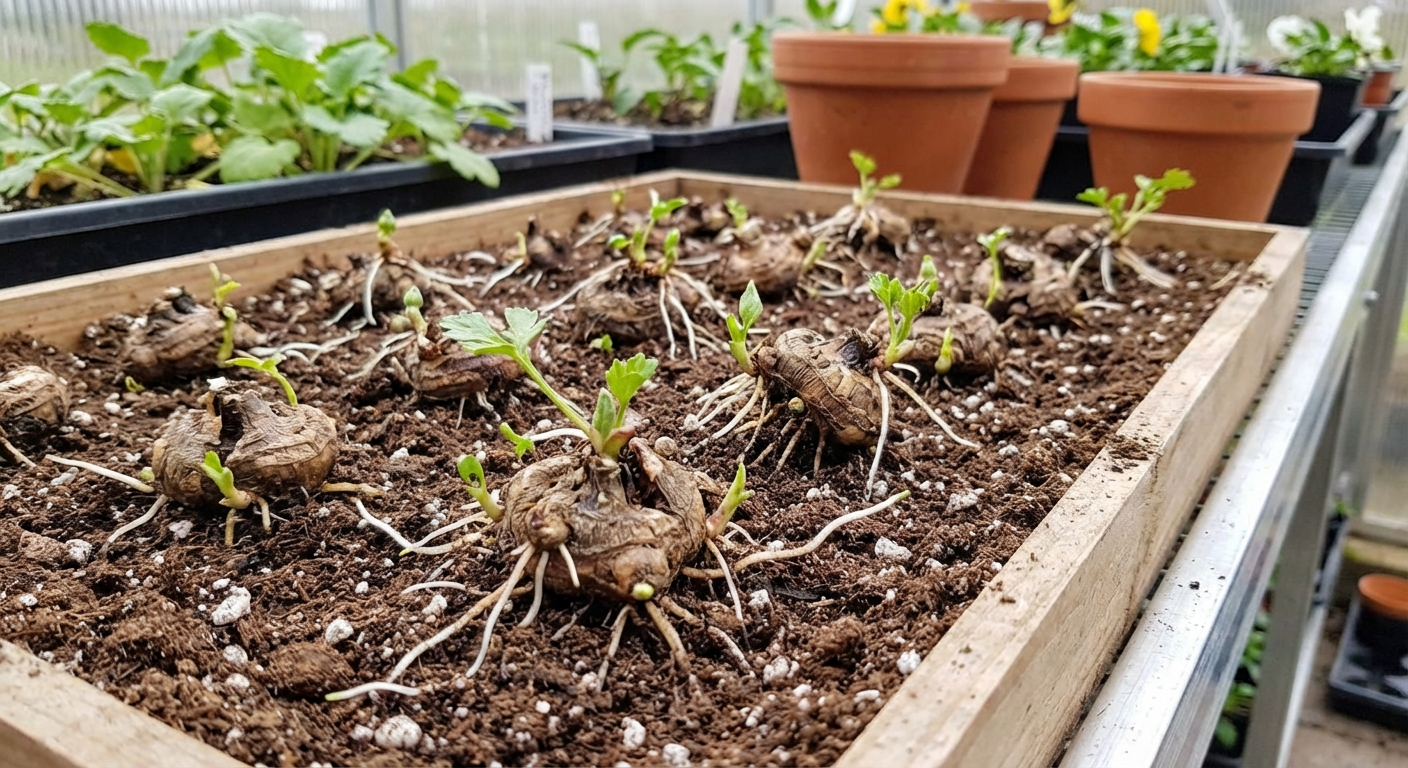
Pre-sprouting: optional, but great
You’ll see two common approaches: planting corms dry directly in the soil, or waking them up first. Both can work. If you want more predictable sprouting and a head start, pre-sprouting is a cozy little ritual that I swear by.
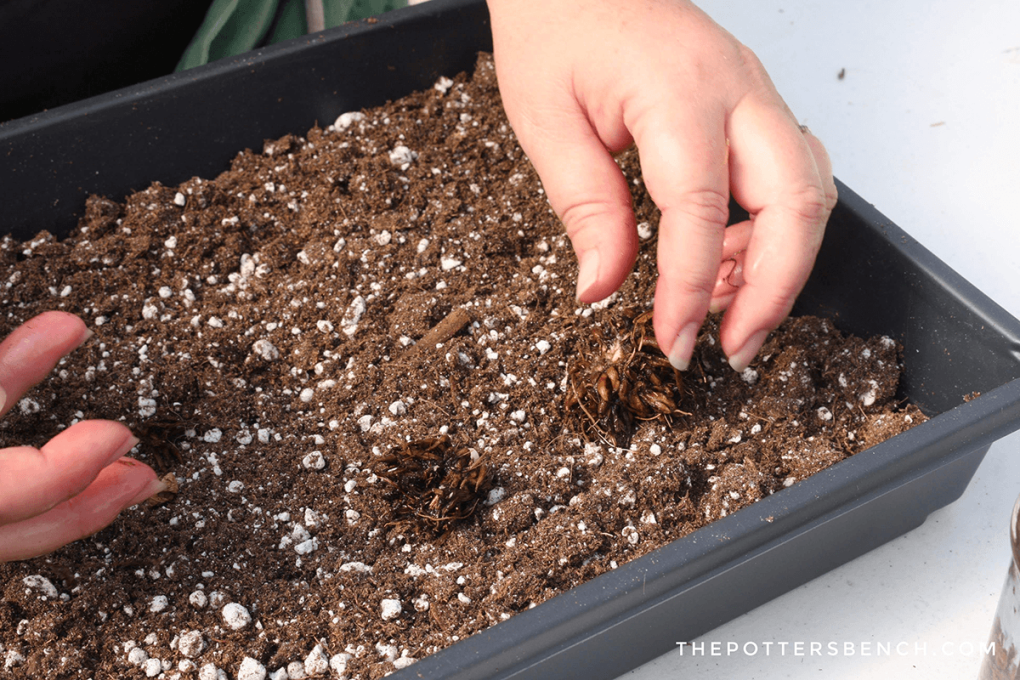
Step 1: Soak briefly
Soak corms in cool water for 3 to 4 hours. They’ll plump up slightly. Don’t soak overnight, since that can invite rot.
Step 2: Pre-sprout in a cool spot
Fill a tray or small pots with barely damp potting mix. Nestle corms in, claws down, and cover lightly. Keep them in a cool, dark place around 45 to 55°F for about 10 to 14 days. Consider these as typical ranges, not a strict recipe.
- Check moisture with your fingertip. It should feel like a wrung-out sponge, not wet.
- Once you see little white roots and a nub of green growth, they’re ready.
Step 3: Plant outside
Move sprouted corms into the garden or containers. Handle gently by the sides, not by the delicate sprouts.
Cold snap note: if you’ve pre-sprouted and a hard frost is coming, cover plants with frost cloth or use a low tunnel for the night. A little protection goes a long way.
If pre-sprouting feels like too much, skip it. Planting dry corms works fine, especially in containers where you can control moisture.
Site: sun and drainage
Sun
Give ranunculus full sun for the best stems and the most flowers. In warmer areas, they appreciate morning sun and a little afternoon protection as spring heats up.
Drainage
If ranunculus have a nemesis, it’s soggy soil. Corms can rot quickly in heavy, waterlogged ground.
Pick one or more of these drainage boosters:
- Raised beds, even 6 to 12 inches high, make a huge difference.
- Amend clay soil with compost to improve structure. If your soil is very dense, consider adding fine pine bark or planting in containers instead.
- Choose a slope or a spot that doesn’t collect water.
A quick test: dig a small hole and fill it with water. If it still has water sitting in it after 2 to 4 hours, ranunculus will be happier in a raised bed or pot.
How to plant ranunculus corms
Whether you pre-sprout or not, the planting basics are the same.
- Depth: 1.5 to 2 inches deep.
- Spacing: 4 to 6 inches apart for full beds, a bit closer in cutting gardens for lots of stems.
- Orientation: claws down, flat side up.
After planting, water thoroughly once to settle soil. After that, your watering strategy depends on your weather and soil, which we’ll cover next.
Quick reminder you can keep in your head: cool temps, bright sun, fast drainage.
Watering: steady, never soggy
Think of ranunculus like this: they want consistent moisture while growing, but they never want to sit in a swamp.
Right after planting
- Water once to settle the soil.
- Then, in cool conditions, don’t keep watering on autopilot. Check about once a week and water only when the top inch feels dry.
Once leaves are up
Water when the top inch of soil feels dry. In sandy soil or containers, that might be every few days. In rich garden beds with cool temperatures, it might be weekly.
When buds form and blooming begins
This is when they’re thirstiest. Keep moisture steady so flowers don’t stall or stems don’t flop. Water at the base to keep foliage drier, especially if your spring is rainy.
Container tip: pots dry out faster, but they also drain faster. Check containers often, and water deeply until you see it flow out the drainage holes.
Feeding: keep it sensible
Ranunculus aren’t heavy feeders like some annuals, but a little nutrition at the right time makes a noticeable difference in stem length and flower count.
Before planting
Mix in compost, or use a light hand with an organic, balanced granular fertilizer. You’re building a buffet, not dumping a salt lick.
During growth
Once plants have several inches of growth, feed every 2 to 3 weeks with a balanced fertilizer, or a bloom-leaning fertilizer if your soil is already sufficient in phosphorus. The main thing to avoid is too much nitrogen, which can mean lots of leaves and fewer flowers.
If you like to be precise, a simple soil test can tell you whether you actually need extra phosphorus.
If you prefer simple: a diluted liquid fertilizer works well in containers.
Containers: my favorite method
If your soil is heavy or your spring is unpredictable, containers can give you the most dependable results.
Choose the right pot
- Depth: at least 8 to 10 inches.
- Drainage holes: non-negotiable.
- Material: terracotta breathes and helps prevent staying too wet, but dries faster.
Use the right mix
Use a quality potting mix and add a handful of perlite or fine bark for extra drainage. Avoid garden soil in pots, since it compacts and holds water.
How many corms per pot
For a lush look, plant corms about 3 to 4 inches apart. A 12-inch pot can often hold 6 to 8 corms comfortably, depending on variety.
Set containers where they get sun, and protect them from long, cold hard freezes by moving them against the house or into an unheated garage during the worst nights.

Varieties: choose your vibe
Not all ranunculus behave exactly the same, so it’s worth checking what you bought.
- Italian types (often sold as cutting varieties) tend to have longer stems and are a favorite for bouquets.
- Tecolote types are widely available, bold, and reliable for home gardens, often with slightly shorter stems.
Your variety can nudge bloom timing, stem length, and overall performance, so if one type disappoints, it may be worth trying another before you give up.
Support and deadheading
Some ranunculus varieties have wonderfully sturdy stems, and some benefit from a little help.
- Support: in windy spots, use small plant supports or a low grid support early so stems grow through it.
- Deadhead: snip spent flowers down to the next set of leaves to encourage more buds.
- Cutting flowers: harvest when buds are colored and feel like a soft marshmallow. You’ll get longer vase life and more blooms as the plant keeps producing.
Common problems and quick fixes
Corms rotted before sprouting
- Cause: soil stayed too wet, or corms were soaked too long.
- Fix: improve drainage, plant shallower in heavy soil, water less until growth appears, or switch to containers.
Lots of leaves, few flowers
- Cause: too much nitrogen, too much shade, or warm temperatures arrived early.
- Fix: move to a sunnier spot next season, use gentler nitrogen, and plant earlier in cool-season windows.
Floppy stems
- Cause: low light, uneven watering, or heat.
- Fix: full sun, steady moisture, and light support. Harvest stems early for arrangements.
Aphids on new growth
- Fix: a strong spray of water, or insecticidal soap in the evening. Encourage ladybugs by avoiding broad-spectrum pesticides.
Gray mold or leaf spots
- Cause: cool, damp weather plus crowded foliage (botrytis and other fungal issues love that combo).
- Fix: give plants a bit more spacing, water at the soil line, and remove damaged leaves. Good airflow is quiet magic here.
After blooming: what to do next
Once ranunculus finish flowering, the foliage isn’t just “extra.” It’s recharging the corm for next time.
Let foliage yellow naturally
Keep watering lightly until leaves begin to yellow and die back. Don’t tie or braid the foliage. Let it do its solar-panel job.
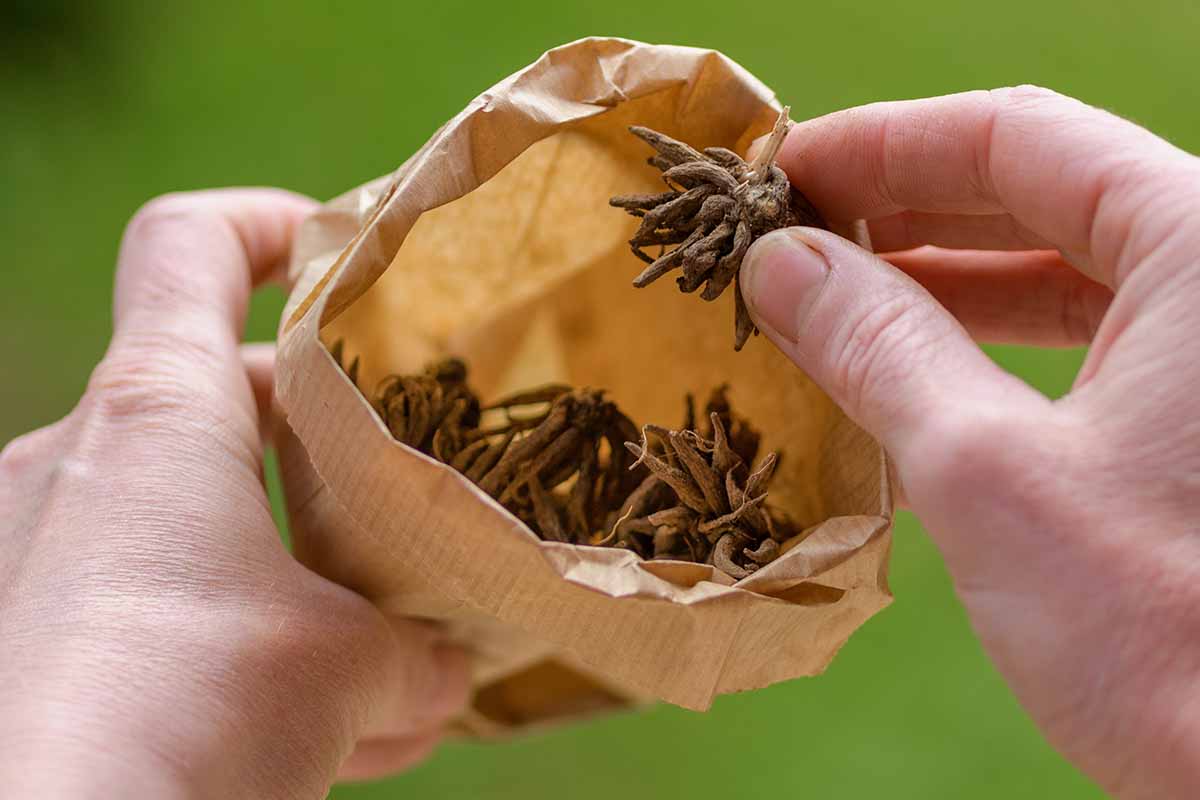
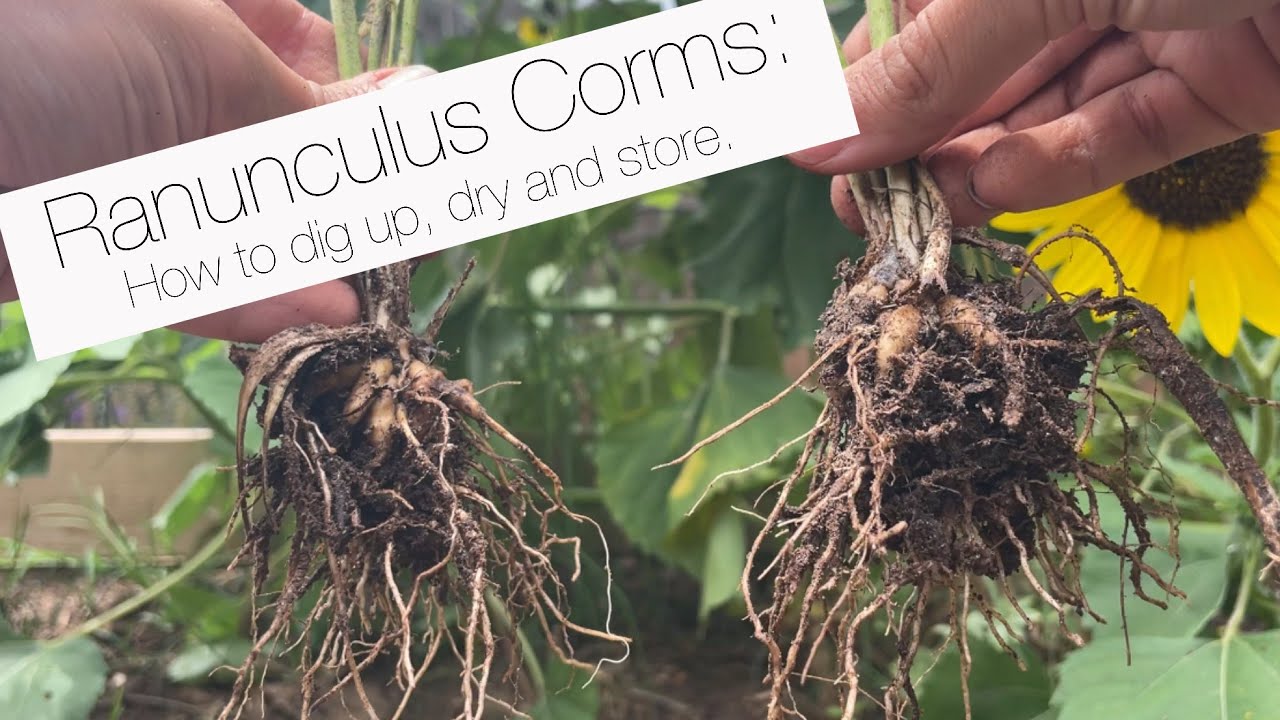
Dig and store (best for hot summers)
In warm climates where summers are hot and irrigation is frequent, corms can struggle or rot if left in the ground. Digging and storing is often the safest choice.
- When foliage is fully yellow, gently dig up corms.
- Brush off soil and let them dry in a shaded, airy place for about a week.
- Store in a paper bag, mesh bag, or box in a cool, dry spot. If you like a packing material, consider dry wood shavings, vermiculite, or coco coir. Peat works, but many gardeners skip it for environmental reasons.
Label the variety or color if you grow more than one. Future-you will be grateful.
Leaving them in the ground (sometimes works)
If your summer soil stays relatively dry and drains well, you may be able to leave corms in place. The risk is summer moisture and heat. If you try this, avoid overwatering that area once plants go dormant.
Quick ranunculus checklist
- Plant: cool season, fall in mild winters or late winter to early spring in colder areas.
- Pre-sprout: optional, soak 3 to 4 hours, then sprout cool and dark for 10 to 14 days.
- Sun: full sun, with afternoon protection in hot springs.
- Soil: fast-draining, raised beds or containers if needed.
- Water: settle in after planting, then steady moisture without sogginess.
- Feed: compost plus light, balanced feeding. Avoid heavy nitrogen.
- Protect: frost cloth or a low tunnel helps during surprise hard frosts, especially with pre-sprouted plants.
- After bloom: let foliage yellow, then dig and store in warm climates for best results.
If you try ranunculus once and they don’t perform, please don’t assume you’ve got a black thumb. Nearly every “failure” I’ve seen with ranunculus comes down to drainage and timing, both of which are easy to improve next season.