Propagate Christmas Cactus from Cuttings
Christmas cactus is one of those generous houseplants that seems to say, “Go ahead, take a little piece. I’ll make more.” If you’ve got a healthy plant and a bright window, you can turn a few segments into brand-new plants with very little fuss. The secret is not rushing the early steps, especially the short “dry and callus” pause that keeps cuttings from turning mushy.

First, which holiday cactus is it?
Most people say “Christmas cactus,” but a few closely related holiday cacti get lumped under the same name. They propagate the same way, so do not stress about having the label perfect.
- Thanksgiving cactus (Schlumbergera truncata): more pointed, claw-like segment edges. This is often what is sold as “Christmas cactus.”
- Christmas cactus (Schlumbergera × buckleyi): more rounded segment edges and a softer look overall. The true Christmas cactus is a bit less common in stores.
- Easter cactus (Rhipsalidopsis, also sold as Hatiora): different genus, but still easy to root from segments.
Good news: the cutting and rooting steps below work beautifully for all of them. We’ll keep the focus on propagation rather than full bloom care.
Best time to take cuttings
You can root cuttings almost any time the plant is actively growing, but you’ll usually get the fastest results when the plant is not in bud or bloom.
- Ideal: late winter through summer, after flowering is finished.
- Okay: early fall if your plant is still pushing new growth.
- Skip if you can: when buds are forming or the plant is in full bloom, since it’s already spending energy elsewhere.
What you need
- A healthy holiday cactus with firm, plump segments
- Clean scissors or pruners (optional if you twist)
- Small pots with drainage holes (2 to 4 inches is perfect)
- Rooting medium (details below)
- A bright spot with indirect light
If you want to be extra tidy, wipe blades with rubbing alcohol before you start. It’s a small habit that prevents a lot of plant heartbreak.
Take cuttings: twist or cut
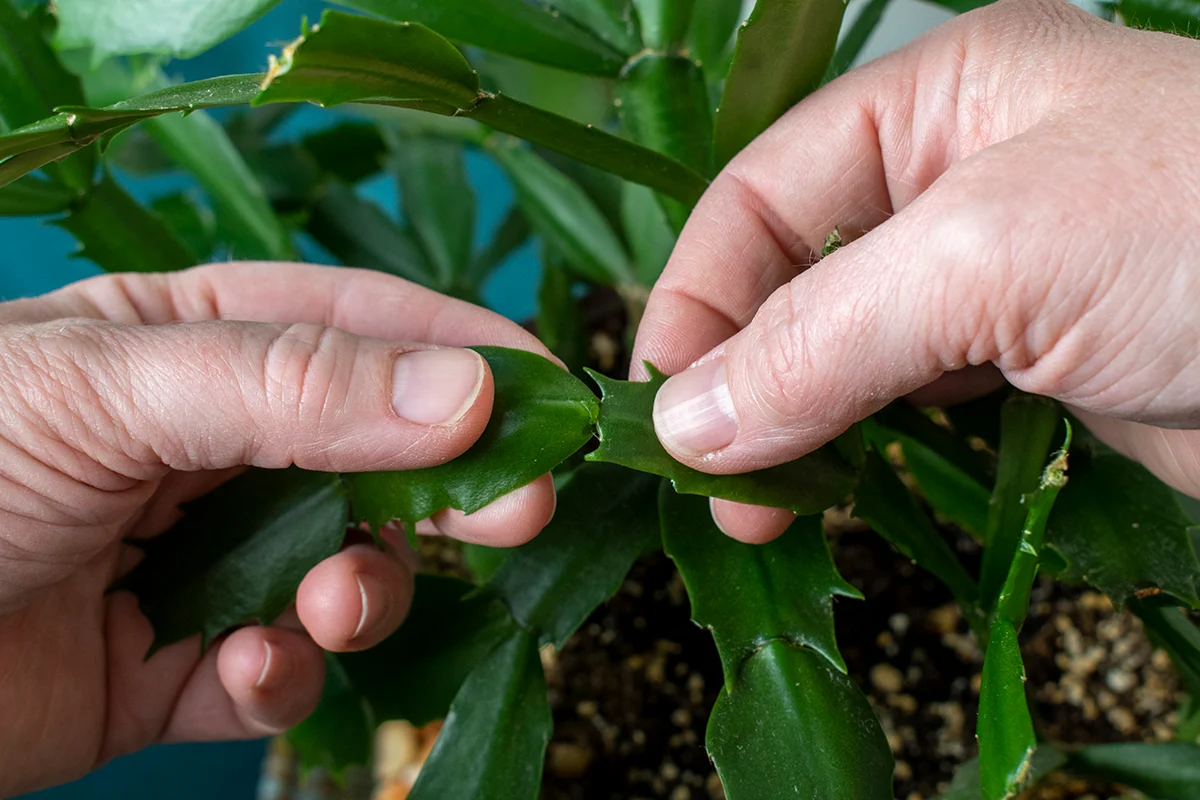
Method 1: Twist off segments (my favorite)
Hold the “stem” just below where you want to take the cutting. With your other hand, gently twist the top portion until it snaps cleanly at the joint. This usually gives you a neat break right where the plant naturally wants to separate.
- Choose a piece with 2 to 5 segments. Three segments is a sweet spot for beginners.
- Pick non-flowering tips if you can.
- Avoid thin, floppy, or wrinkled segments. Start with plump tissue.
Method 2: Cut a segment chain
If twisting feels scary or you want very specific lengths, use clean scissors to cut at a joint. Aim for one clean snip rather than crushing the tissue.
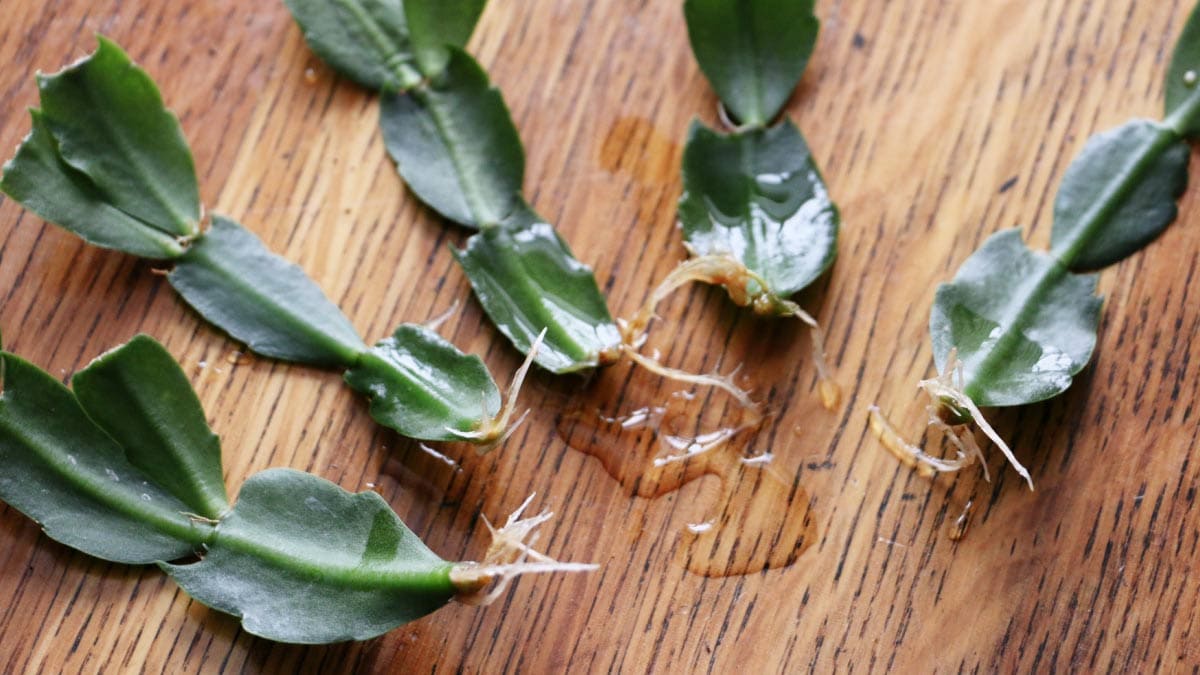
Do not skip this: let it callus
Holiday cactus segments are succulent-like. They hold water, which is wonderful, but it also means a fresh wound can rot if it goes straight into wet mix. Letting the cut end dry slightly creates a protective callus.
- Place cuttings on a plate or paper towel in a warm, dry spot out of harsh sun.
- Callus timing: overnight to 1 to 3 days, depending on humidity and how thick the segments are.
- They should feel dry at the very end, not sticky or wet.
If your home is very humid, lean toward the longer end. If your air is very dry and your segments start to look limp, do not push it. Pot them up sooner.
Root in soil (most reliable)
If you want the simplest path with the least chance of transplant shock, root your cuttings directly in a light, fast-draining mix.
Pick the right mix
A holiday cactus wants air around its roots. Use a mix that drains quickly, such as:
- 2 parts cactus or succulent mix
- 1 part perlite or pumice
- Optional: a small handful of fine orchid bark for extra airflow
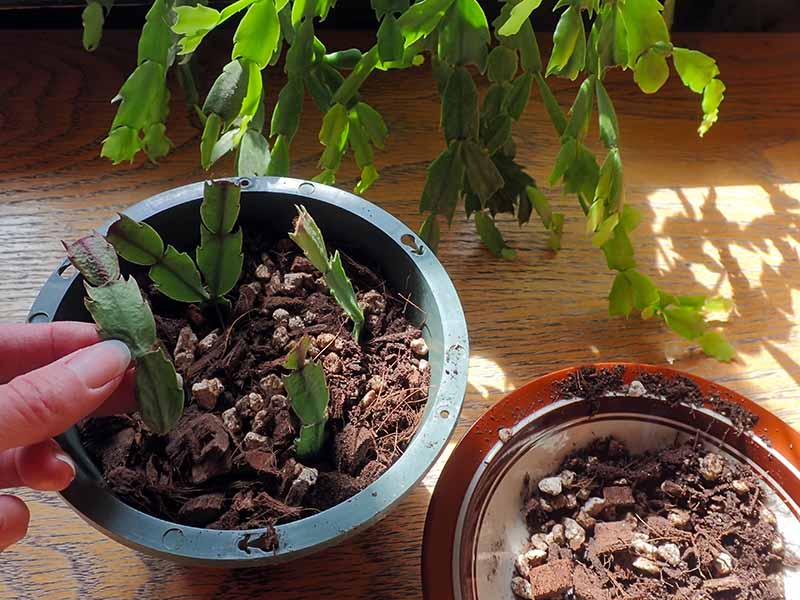
Plant the cutting
- Fill a small pot with slightly damp mix, not wet.
- Check orientation: plant the cutting with the callused end down. It is easy to flip segments by accident.
- Insert the callused end about 1/2 to 1 inch deep, just enough to stand up.
- Firm the mix gently around it. No need to pack it hard.
- Place in bright, indirect light. Think “reading a book comfortably,” not “sunbathing.”
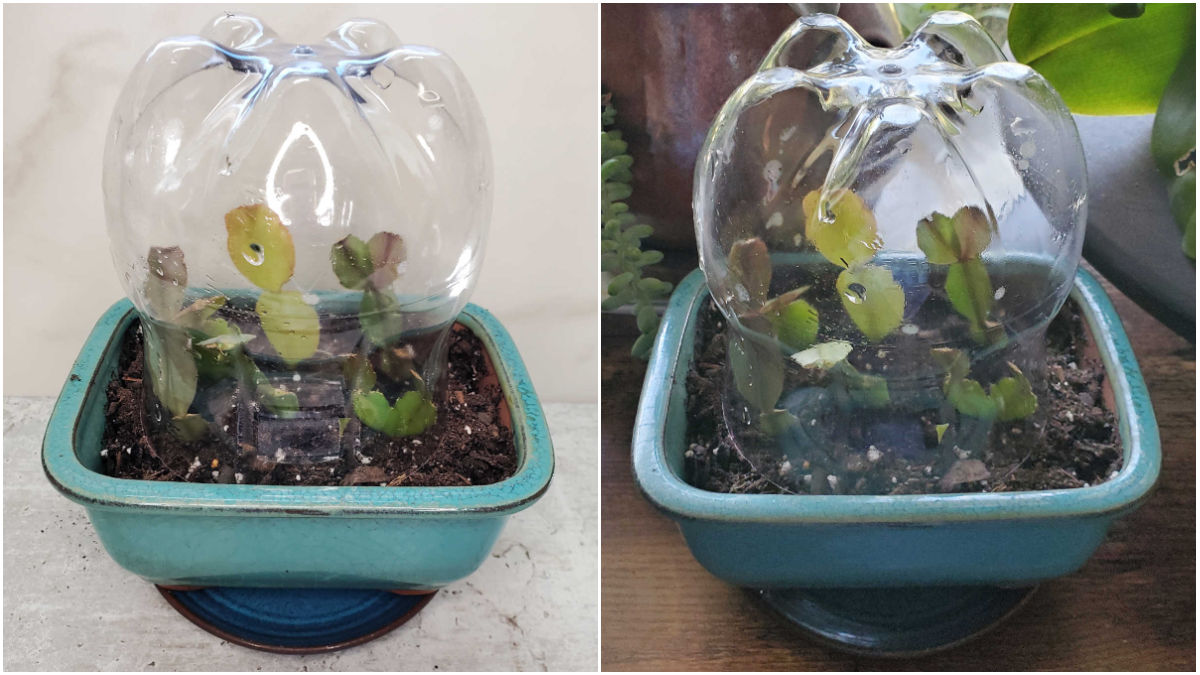
Want faster rooting? If your home air is very dry, you can tent the pot with a clear plastic bag or a humidity dome for 1 to 2 weeks. Keep the plastic from touching the cutting (chopsticks work), and open it daily or leave a small gap for airflow. Stale, wet air invites mold, and nobody needs that kind of drama.
Rooting hormone? Totally optional. These usually root just fine without it, but a light dusting will not hurt if you already have some.
One pot or many? You can root several cuttings in one small pot for a fuller plant later. Just give each cutting a little breathing room.
Root in water (fun to watch)
Water rooting works, and it’s satisfying because you can see progress. It just takes a bit more care when you move the cutting into soil later.
- Use a small glass or jar with room for the cutting to hang without submerging too much.
- Add enough water to cover only the very bottom of the cutting.
- Keep it in bright, indirect light.
- Change the water every few days, or sooner if it looks cloudy.
When you see roots that are about 1 to 2 inches long, pot the cutting into a fast-draining mix. For the first week after potting, keep the mix a touch more evenly moist than you normally would, then taper down.
How long does rooting take?
Most cuttings root in 2 to 8 weeks, depending on temperature, light, and the size of the cutting.
- Warmer room (around 70 to 75°F / 21 to 24°C): usually faster
- Low light or cool room: slower, but still possible
A gentle tug test helps. If you feel resistance, roots are forming. No need to yank. We are gardeners, not dentists.
Watering while it roots
This is where most propagation goes sideways. The goal is a balance: enough moisture to encourage roots, not so much that the cutting rots.
For soil-rooted cuttings
- Start with slightly damp mix at planting time.
- Then water sparingly. Let the top inch of mix dry before re-wetting.
- If your home is very dry, water a small ring at the soil line instead of soaking the whole pot. If you mist, mist the air around the plant, not the cutting base.
Transition to normal watering
Once you see new growth at the tips, you can begin watering more like a mature plant:
- Water thoroughly, then let excess drain.
- Allow the mix to dry partway between waterings. Holiday cacti like consistent moisture, but they do not like constant wet feet.
Light and temperature
- Light: bright, indirect light. A sheer curtain in a sunny window is perfect.
- Temperature: normal indoor temps are fine. Avoid cold drafts and heat vents.
- Humidity: average home humidity works. If your air is desert-dry, a humidity tray or a short-term dome can help.
Potting up and early care
When your cutting is rooted and starting to grow, let it settle before you “upgrade” its home.
- Keep it in the small pot until roots fill it out. Holiday cacti like to be slightly snug.
- When you do repot, go just one size up and keep the mix airy and fast-draining.
- Hold off on fertilizer until you see steady new growth. Then feed lightly during the growing season.
Patience here pays off. A cutting that’s babied too hard with a big pot and lots of water is the one that tends to rot.
Troubleshooting
Cutting turns soft or black at the base
- Cause: too wet, not enough callus time, or dense potting mix.
- Fix: remove it, trim back to healthy tissue, let it callus again, and restart in drier, airier mix.
Cutting shrivels
- Cause: mix is bone dry for too long, very low humidity, or the cutting is in hot sun.
- Fix: move to bright shade and lightly moisten at the soil line. Do not drown it to compensate. A short-term humidity tent can help if your air is extremely dry.
No roots after several weeks
- Cause: low light, cool temps, or a cutting that’s too small.
- Fix: increase indirect light, warm the spot slightly, and try a 3- to 5-segment cutting next time.
Quick plan for today
- Take a 3-segment cutting by twisting at a joint.
- Let it callus overnight to 3 days.
- Root it in a small pot with airy mix, callused end down.
- Keep it in bright, indirect light.
- Water lightly until you feel resistance when you gently tug.
- After new growth appears, transition to normal watering.
If your first attempt is not perfect, you’re in excellent company. Propagation is a little conversation between you and the plant. Sometimes it takes a few tries before you both get the rhythm.