Propagate Aloe Vera from Pups and Offsets
Aloe vera is generous like that friend who always sends you home with leftovers. Once it is happy, it starts making little “pups” (also called offsets) around the base. Those pups are your easiest path to a brand-new aloe that looks just like the parent.
In this guide, I will walk you through when to remove aloe pups, the tools that make it clean and safe, how to dry and callus cut surfaces (this is the secret handshake for avoiding rot), and exactly how to pot, water, and light your baby aloe into independence. We will also talk about mother plant recovery so your original aloe keeps thriving.

Pups vs. leaf cuttings: why offsets win
If you have ever heard that you can propagate aloe from a leaf cutting, you are not alone. Here is the honest version for Aloe vera: leaf cuttings almost never produce a new plant. A leaf may callus, and it might even make some roots, but it typically fails to form a new growing point (a new rosette). More often, it simply rots before it goes anywhere.
Pups are the reliable method. They are already tiny plants with their own growth point, and many have starter roots tucked under the soil. When you separate them correctly, success is very high.
When to remove aloe pups
Timing matters, mostly for one reason: you want the pup to have enough stored energy to handle the move.
The sweet spot
- Size: Aim for pups that are about 4 to 6 inches tall or roughly one-fifth to one-third the size of the mother plant.
- Structure: The pup should have a clear rosette shape and feel firm, not floppy.
- Roots (ideal but not required): If you can see small roots when you peek at the base, even better.
Best season
Separate pups during active growth when possible: spring through early fall. You can do it in winter indoors, but rooting is slower and overwatering risk is higher because the plant uses less moisture.
Temperature note
Warm, steady indoor temperatures help pups root faster. Aim for a comfortable room range (roughly 65 to 80°F) and avoid cold windowsills, cold drafts, and chilly nights right after separation.
A quick “do not separate yet” checklist
- Pups are tiny nubs under 3 inches.
- The mother plant is stressed, sunburned, or recently repotted.
- The potting mix is staying wet for a long time (address drainage first).
Tools and supplies
You do not need fancy gear, but you do need clean and sharp. Aloe sap and soil microbes can turn a rough cut into a rot party.
- Clean sharp knife or pruning knife (a narrow blade helps)
- Rubbing alcohol (70% is great) to sterilize the blade
- Gloves (optional, but aloe sap can be irritating for some)
- Small pots with drainage holes (3 to 4 inch for most pups)
- Gritty potting mix (recipe below)
- Dry paper towel or clean tray for callusing
Tip: Sterilize the blade before you start and again between pups if you are making multiple cuts. It is a tiny step that prevents a lot of heartbreak.
Quick hygiene check: Before you begin, scan the plant for mealybugs or scale around the leaf bases and in tight crevices. If you spot pests, treat first so you do not spread them into fresh pots.
Step-by-step: how to separate aloe pups
1) Let the soil dry a bit
Plan your separation for a day when the potting mix is mostly dry. Dry soil falls away from roots more easily and reduces the chance of snapping them.
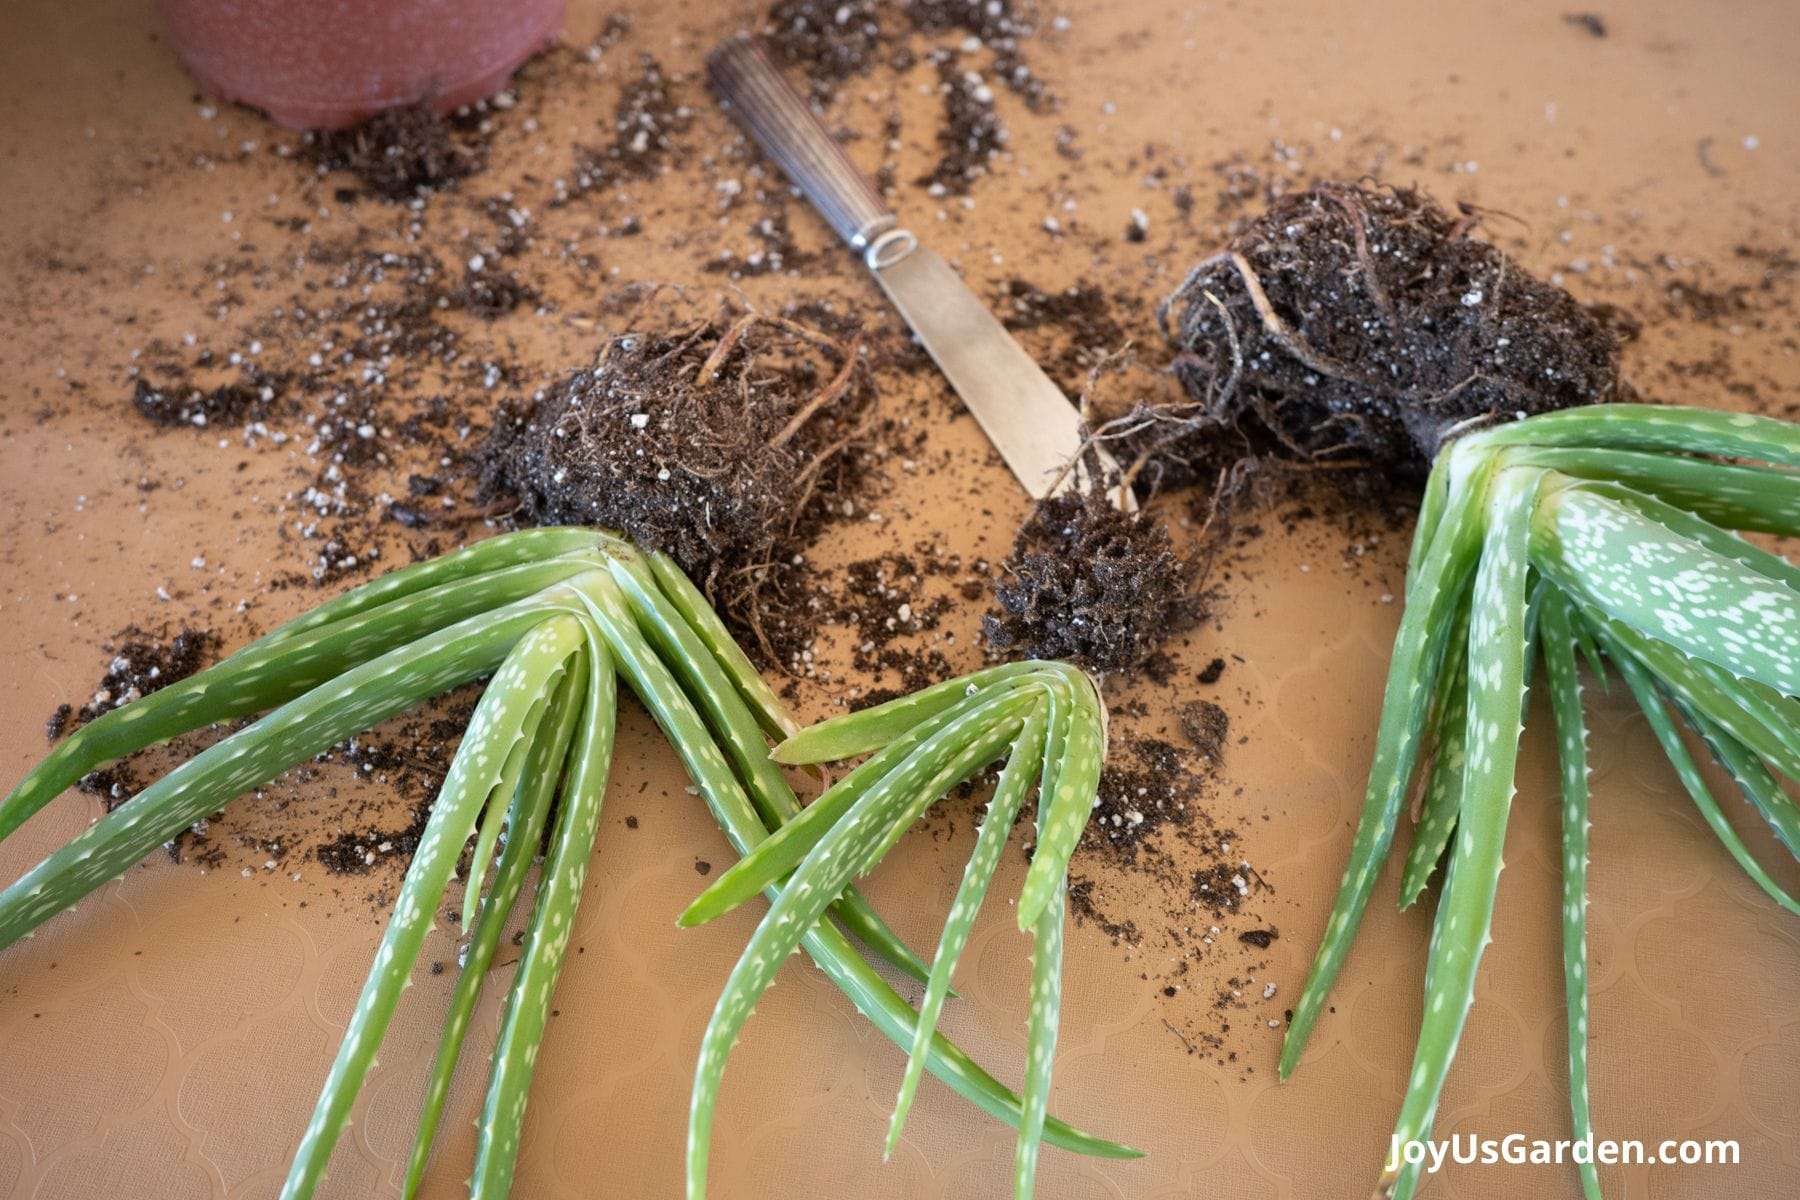
2) Unpot the whole plant (best method)
You can sometimes wiggle a pup free at the surface, but the highest success comes from lifting the whole clump.
- Lay the pot on its side and gently slide the aloe out.
- Brush or shake away loose soil so you can see where pups connect to the mother.
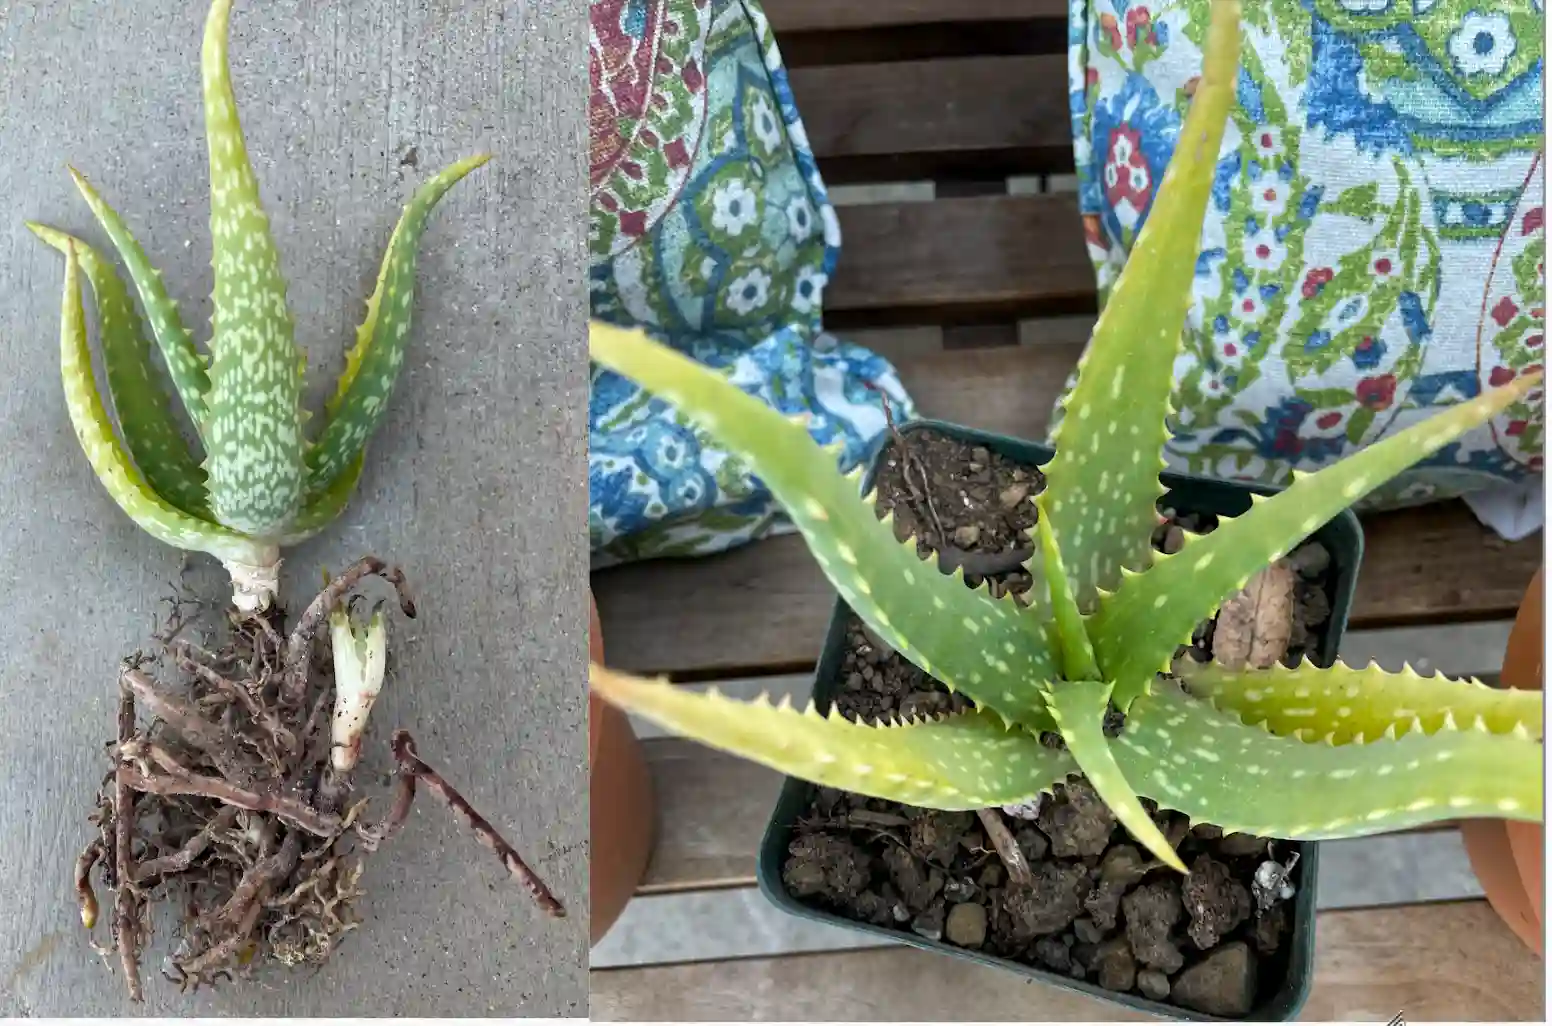
3) Find the connection point
Most pups are attached by a short “stem” or thick base tissue. Your goal is to separate the pup with as many of its own roots as possible, but do not panic if the pup has few or none. Aloe can grow new roots when treated right.
4) Make a clean cut (or gentle twist)
- If the pup separates easily with a gentle twist, that is fine.
- If it resists, use your sterilized knife to cut the connecting tissue cleanly.
- Try to avoid tearing. Tears heal slower and invite rot.
5) Inspect and tidy
Remove any mushy or damaged tissue at the pup’s base. Healthy aloe tissue is firm and pale green to whitish inside when freshly cut.
Drying cut surfaces: callus time
Succulents like aloe do best when their cuts are allowed to dry and form a protective callus. This step is especially helpful if you made a cut through thick tissue.
How long to let aloe pups dry
- Minimum: Let cuts dry for at least 24 hours.
- Typical range: 24 to 72 hours, especially for juicy cuts, humid homes, or pups with few or no roots.
The best indicator is not the clock. It is the cut itself. You want it to feel dry, slightly sealed, and no longer glossy or wet.
Set pups on a clean tray in a warm, dry spot with bright indirect light. Avoid direct sun while they are callusing, since fresh tissue can scorch.
Skip the cinnamon? You will see cinnamon recommended as a “natural fungicide.” It can be fine lightly dusted, but it is not required. The callus and a gritty mix do most of the heavy lifting.
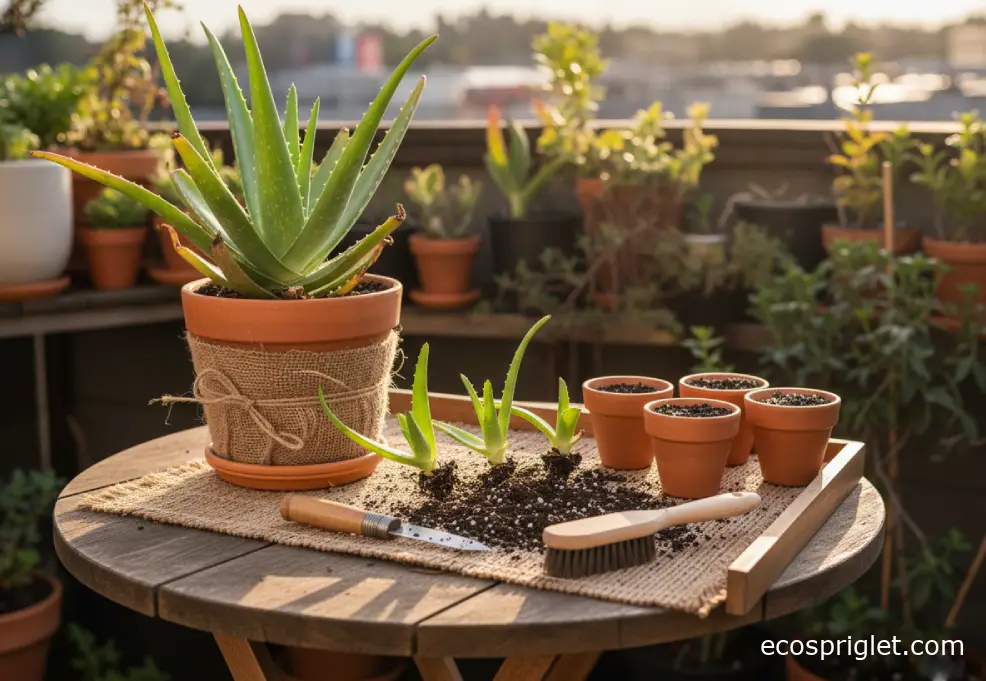
The best potting mix for aloe pups
For aloe, drainage is not a preference. It is survival. Most pup failures come from potting mix that stays wet too long.
Easy mix options
- Fast option: Cactus and succulent mix, plus extra grit. Mix in 25 to 40% perlite, pumice, or coarse sand.
- DIY option: 2 parts cactus mix or regular potting soil + 1 part pumice or perlite + 1 part coarse sand or fine gravel.
Pot choice: Terra cotta is forgiving because it breathes and dries faster. Plastic works too if your mix is gritty and you water carefully.
Planting the pup
1) Use a small pot
Aloe pups do better slightly snug. A pot that is too large holds extra moisture and slows root growth.
2) Plant at the right depth
You want the roots and basal stem in contact with the mix, and the pup stable, but you do not want moisture trapped against leaf bases.
- Set the pup so the basal plate and any roots are lightly covered and anchored.
- Keep the crown and leaf bases above the soil line. Buried leaf bases are a common rot starting point.
3) Firm gently
Press the mix around the base just enough to keep the pup upright. If your pup wobbles, you can use a few small stones on the soil surface to brace it temporarily.
Watering ramp: how to water new aloe pups
This is where most people accidentally love their aloe to death. New pups need moisture to root, but they also need air around the base.
Right after potting
- If the pup has roots and the cut is callused: Wait 2 to 3 days, then water the soil lightly.
- If the pup has no roots or a bigger cut: Wait 5 to 7 days before the first light watering.
Important: Water the mix, not the rosette. Avoid water sitting in the crown (the center) or pooled against leaf bases.
Weeks 1 to 3
Water lightly, then let the mix dry out fully. In many homes, that is about every 7 to 14 days, but your light, pot, and humidity change the schedule.
After you see new growth (usually 3 to 8 weeks)
Gradually water a bit deeper, still letting the mix dry between waterings. A well-rooted aloe likes a soak and dry rhythm, not frequent sips.
How to tell if it is time to water
- Pot feels noticeably lighter when lifted.
- In small pots, most of the mix feels dry (not just the top).
- Leaves are a touch less plump (slight, not shriveled).
Red flag: Soft, translucent leaves or a mushy base usually means too much water or too little light.
Light for newly separated pups
Light helps aloe root and stay compact, but a freshly separated pup needs a gentle transition.
Best light to start
Give pups bright, indirect light for the first week or two. Think: a sunny room, but not pressed against hot glass all day.
Then gradually increase sun
- Move toward morning sun or filtered light.
- Increase exposure over 1 to 2 weeks.
Once established, many aloes do best with several hours of bright light and can handle some direct sun, especially morning sun. If the leaves turn reddish or bronze, that can be normal “sun stress,” but bleaching or crispy patches mean it is too intense too fast.
Mother plant recovery
The mother aloe just went through a minor surgery. A little aftercare helps it bounce back and keep producing healthy pups.
- Let the soil dry a bit: If you disturbed roots, wait a few days before watering.
- Top off with fresh gritty mix: If you removed pups and soil level dropped, add mix but keep the crown above the soil line.
- Hold fertilizer: Skip feeding for about 4 to 6 weeks. A stressed aloe does not need extra salts in the soil.
- Give stable light: Keep it in its usual bright spot, but avoid sudden intense sun changes right after separation.
If the mother plant looks slightly deflated for a week or two, that can be normal after root disturbance. It should firm back up as roots reestablish.
Troubleshooting
Pup is wrinkled but the soil is dry
- Likely cause: Not rooted yet, or roots were damaged.
- What to do: Keep in bright indirect light. Water lightly only when fully dry. Do not up-pot too soon.
Pup is soft at the base
- Likely cause: Rot from moisture sitting at the cut.
- What to do: Unpot, cut away mushy tissue back to firm flesh, let callus 2 to 3 days, repot in drier gritty mix, and delay watering.
Pup tips are browning
- Likely cause: Sun or heat stress, or inconsistent watering.
- What to do: Shift to gentler light and stabilize your soak-and-dry rhythm.
Pup will not stand up
- Likely cause: Shallow roots and a top-heavy rosette.
- What to do: Brace with small stones and keep the mix lightly firmed. Avoid burying leaf bases.
How to know it rooted
- Gentle tug test: A light pull meets resistance.
- New center growth: Fresh leaves emerging from the middle is a great sign.
Once you see steady new growth and roots are starting to fill the pot (or the plant dries out much faster than before), that is a good time to up-pot one size.
Quick checklist
- Choose pups 4 to 6 inches tall when possible.
- Work with dry-ish soil, unpot the clump, and separate with a clean blade.
- Let cut surfaces callus at least 24 hours, longer if it is humid.
- Pot into a small container with a gritty, fast-draining mix.
- Wait to water, then start with light watering and let it dry fully each time.
- Bright indirect light first, then gradually increase sun.
- Give the mother plant a quiet recovery window.
If you want, tell me what kind of light your aloe gets (south window, grow light, balcony sun, etc.) and what your potting mix is made of, and I will help you dial in the watering schedule for your exact setup.