Propagate African Violets from Leaf Cuttings

African violets have a sweet little secret: one healthy leaf can turn into a whole new plant. It feels like garden magic, but it’s really just patient, steady biology. If you’ve ever looked at your violet and thought, “I want another one just like you,” leaf propagation is the simplest way to get there.
Below I’ll walk you through two easy methods, water and soil, plus how to divide mature plants. I’ll also tell you what to do when a cutting flops, because sometimes they do, and it doesn’t mean you have a black thumb. It just means you’re learning the plant’s preferences.
Before you start
What you will need
- A healthy African violet plant
- Clean scissors or a sharp knife
- Small containers or 2 to 3 inch pots
- Clear cup or jar (for water method)
- Light, airy propagation mix (for soil method)
- Plastic bag or humidity dome (optional but helpful)
- Plant labels (you’ll forget which is which, I promise)
Best time to propagate
African violets can be propagated year-round indoors, but they root fastest when they’re actively growing. For most homes, that means spring through early fall when light levels are naturally higher.
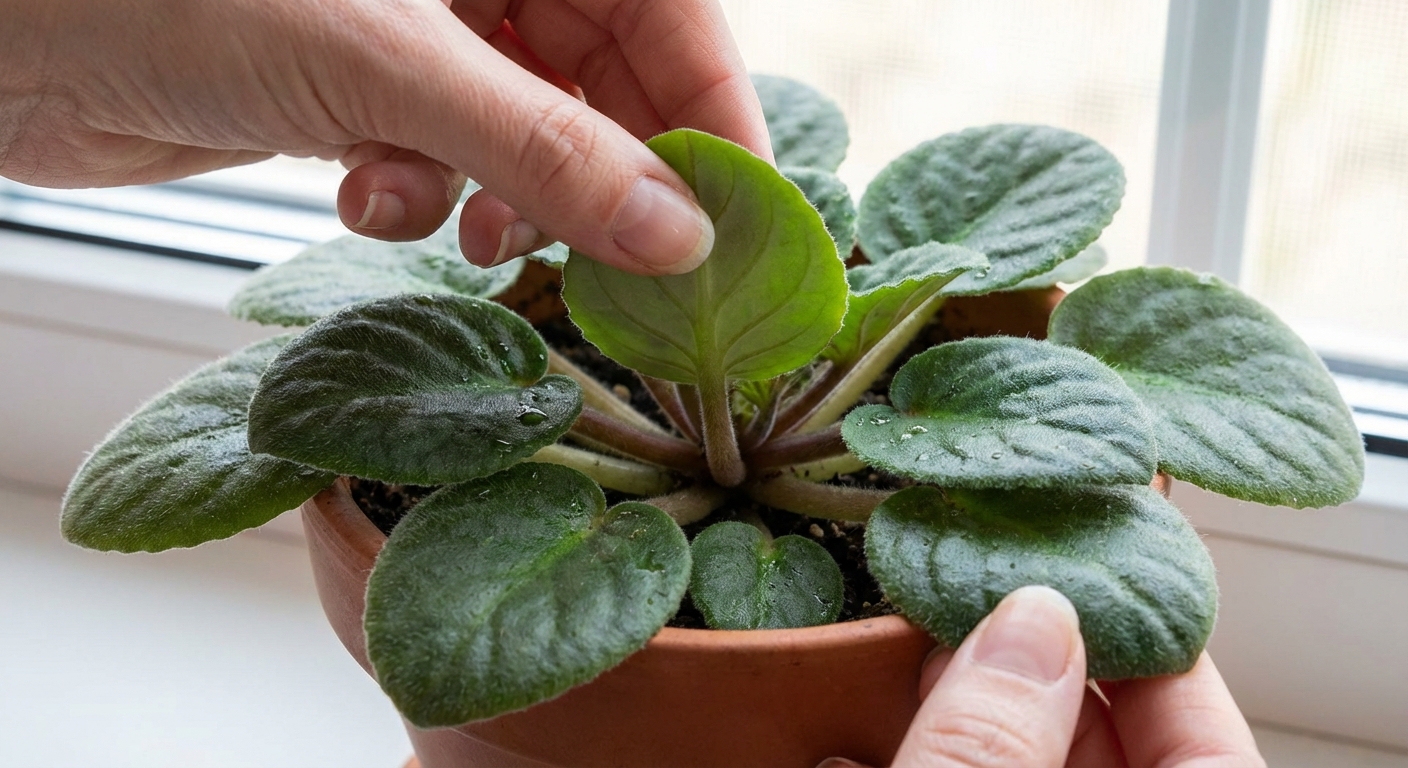
Pick the right leaf
Your success starts with leaf selection. Not the biggest leaf. Not the tiniest leaf. You want the “just right” leaf.
- Choose a healthy, firm leaf with no spots, mushy areas, or damage.
- Pick from the middle ring of leaves, not the oldest outer leaves and not the baby leaves in the center crown.
- Know what you’re cloning: leaf propagation usually creates a clone of the parent plant, which is great for named varieties. But some cultivars don’t come true from leaf, especially chimera types, and occasionally some unstable or variegated types can throw surprises.
If your violet is struggling, propagate later. Weak plants give weak cuttings, and you deserve better odds.
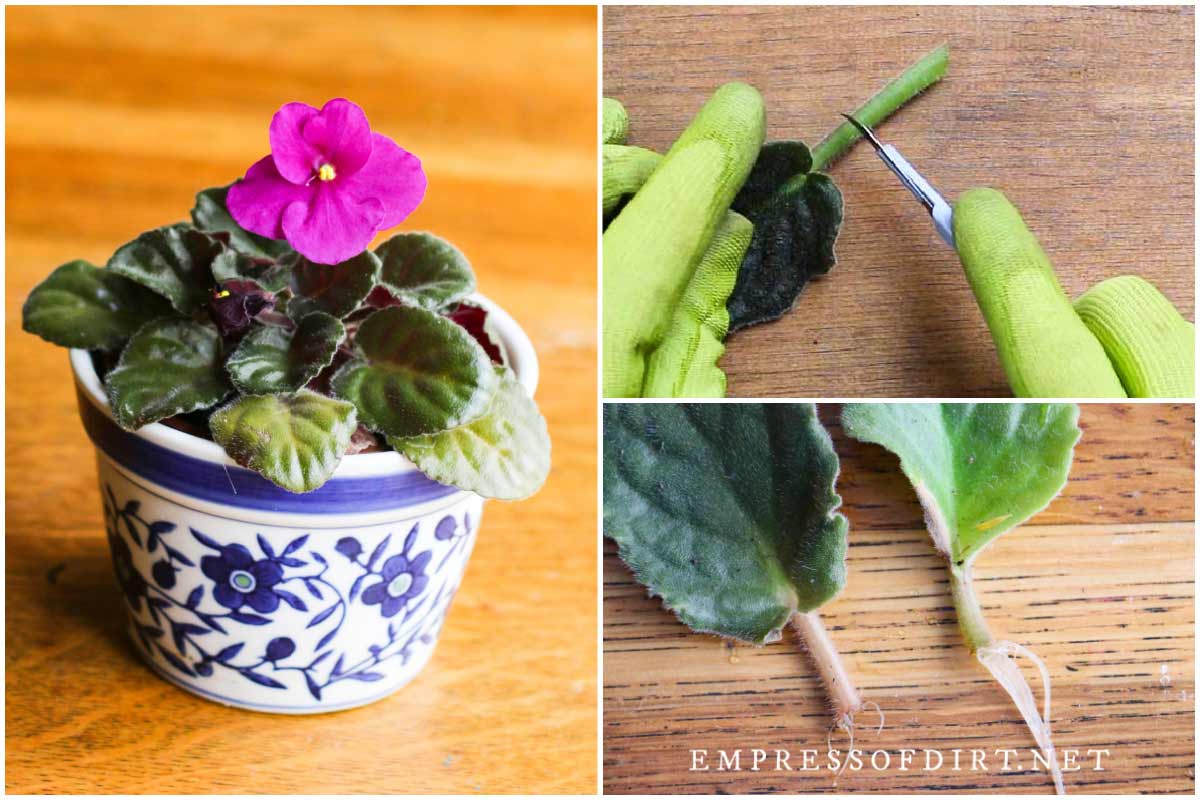
How to take the cutting
Clean cuts matter. Ragged cuts rot faster and root slower.
- Sanitize your tool with rubbing alcohol or hot soapy water and dry it.
- Cut the leaf stem where it meets the main plant, taking as much of the stem (petiole) as you can without gouging the crown.
- Trim the stem to length: aim for about 1 to 1.5 inches (2.5 to 4 cm) of stem.
- Make a fresh angled cut on the bottom of the stem, about 45 degrees. This increases surface area and helps it sit nicely in media.
Optional but helpful: let the cutting rest for 10 to 20 minutes so the cut end can dry slightly. This can reduce rot if you’ve had that issue, but in very dry homes it can also increase wilting, so don’t feel like you have to do it.
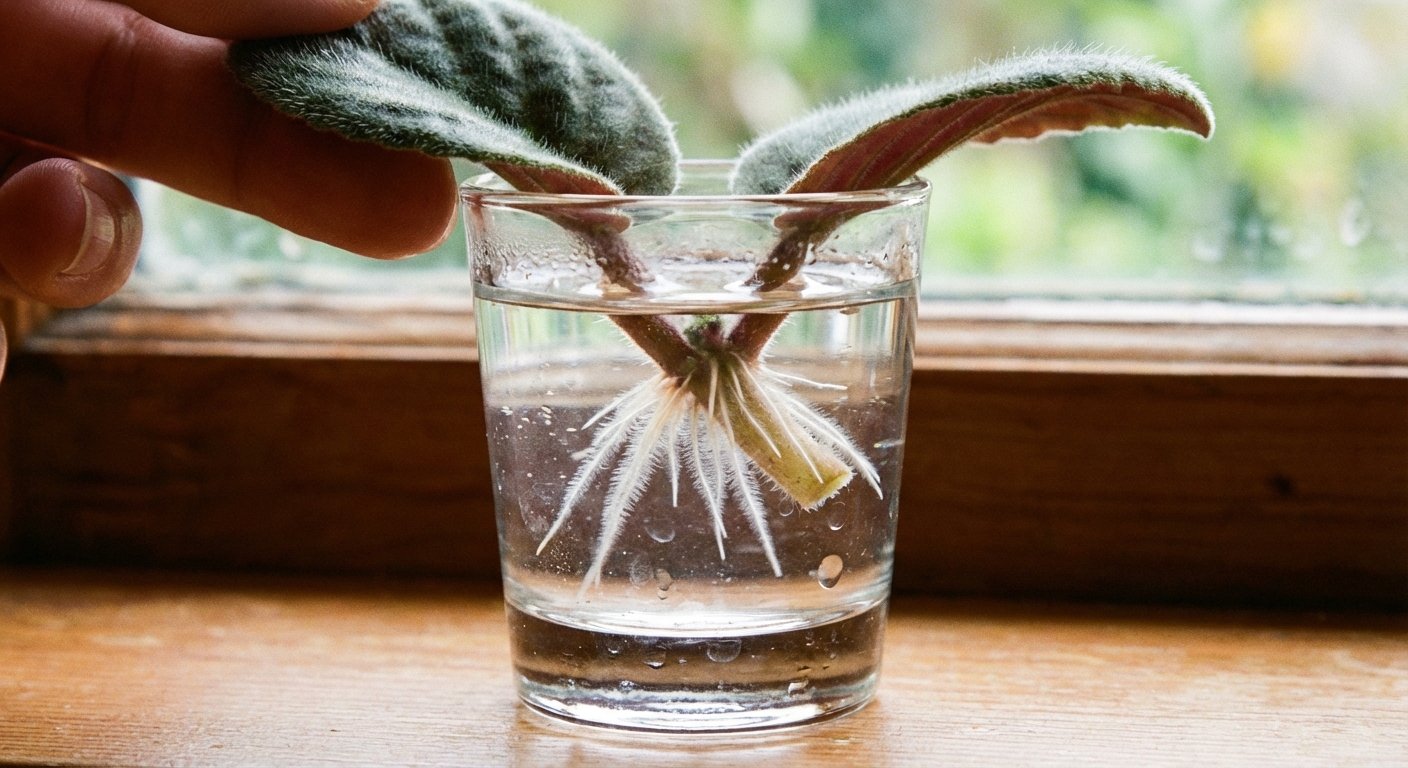
Method 1: Root in water
Water propagation is satisfying because you can watch roots form. It’s also great if you’re nervous about overwatering soil.
Step-by-step
- Choose a small container like a shot glass or small jar.
- Add room-temperature water. If your tap water is chlorinated, letting it sit out overnight can help. If your city uses chloramine (common in many modern water systems), it won’t off-gas, so use filtered water, rainwater, or another dechlorinated option.
- Keep the leaf blade out of the water. Only the stem should be submerged. If the leaf sits in water, it often rots.
- Support the cutting by covering the container with plastic wrap and poking a small hole for the stem, or by using a narrow-neck bottle.
- Place in bright, indirect light. No hot sun on the glass.
- Refresh the water every 5 to 7 days, or sooner if it looks cloudy. (Some people just top it off. Either way, keep it clean.)
Rooting timeline (water)
- Weeks 2 to 4: tiny roots often appear
- Weeks 4 to 8: stronger root system develops
- Weeks 8 to 12: small plantlets may begin forming near the base of the stem
Timelines can vary a lot by variety, temperature, and light, so slower doesn’t automatically mean failure.
When to move to soil
Move the cutting to soil when roots are about 1 inch long and you see the start of plantlets, or when you’ve got a small cluster of roots that can handle careful potting.
Water roots can be delicate. Be gentle when potting, and expect a short settling-in phase as the cutting adapts to soil.
Method 2: Root in soil
Soil propagation is my go-to because the cutting doesn’t have to transition from water roots to soil roots. It’s also less maintenance once it’s set up correctly.
Choose the right mix
African violet cuttings need air around the stem. Heavy potting soil holds too much moisture and invites rot.
- Best simple option: African violet potting mix cut with extra perlite (about 50:50)
- Also works: straight perlite, or a perlite and peat mix
Moisten the mix so it feels like a wrung-out sponge, not muddy.
Step-by-step
- Fill a small pot (2 to 3 inch) with your pre-moistened mix.
- Make a pilot hole with a pencil or chopstick. This prevents scraping the stem as you insert it.
- Insert the stem about 1/2 to 3/4 inch deep, keeping the leaf blade above the surface.
- Firm gently so the stem has good contact with the mix.
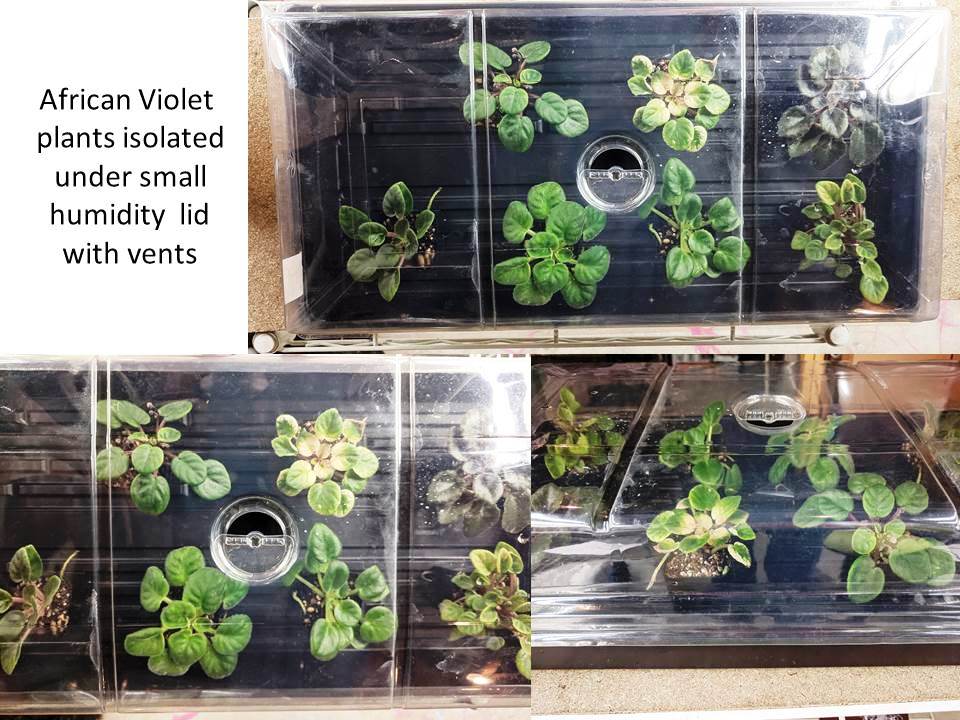
- Create humidity by placing the pot in a clear plastic bag or under a dome. Keep plastic from touching the leaf if possible.
- Set in bright, indirect light and warm temperatures (around 70 to 75°F if you can).
If the leaf droops and touches the mix, prop it up with a toothpick, a bent paperclip, or the rim of the pot. You want the leaf mostly off wet soil to avoid rot.
Rooting timeline (soil)
- Weeks 3 to 6: roots form (you won’t see them, but the cutting stays firm)
- Weeks 6 to 12: plantlets emerge at the base near the soil line
- Weeks 12 to 20: plantlets grow large enough to separate and pot up
Leaf cuttings don’t rush. The leaf often looks the same for weeks, and then one day you spot a tiny ruffled baby leaf like a little green surprise.
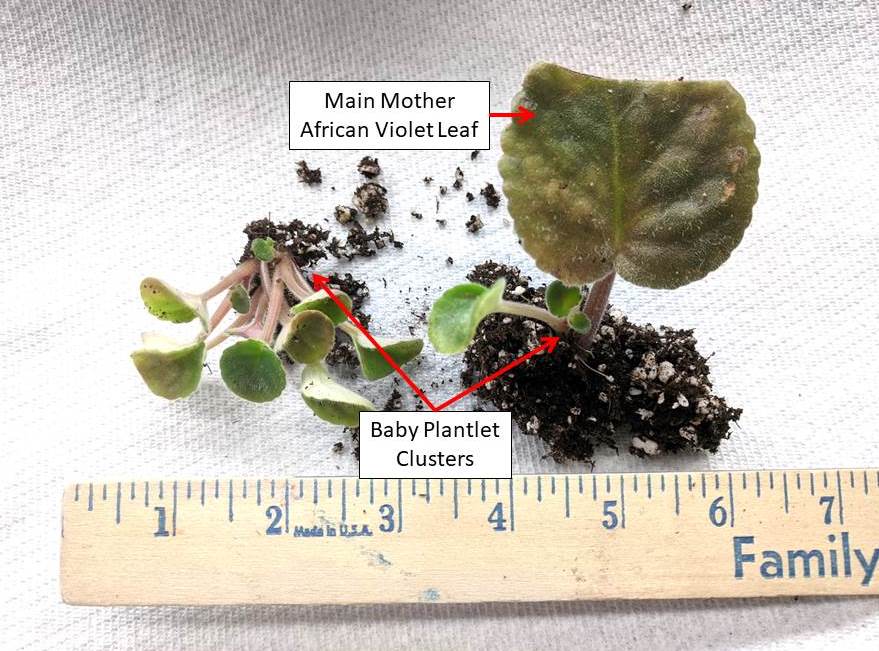
Pot up plantlets
Those baby plants are called plantlets, and they usually pop up as a small cluster. Your job is to give each one its own space once it’s sturdy enough.
When to separate
- Each plantlet has at least 3 to 4 leaves of its own
- Plantlets are about 1 to 2 inches across
- You can tease them apart without turning everything into mush
How to separate
- Water lightly the day before separation so the mix is slightly damp and cooperative.
- Slide the whole clump out of the pot.
- Gently tease apart plantlets with your fingers. If roots tangle, separate slowly. A clean toothpick can help.
- Pot each plantlet into a small pot (often 2 inch works well) with African violet mix.
- Keep humidity a bit higher for 1 to 2 weeks while they recover, then gradually open the bag or dome.
Pot size matters with African violets. They like snug shoes. A good rule of thumb is a pot about one-third the diameter of the plant’s leaf rosette, which helps prevent soggy soil and slow growth.
What to do with the original leaf
If the mother leaf is still green and firm, you can leave it attached until the plantlets are established. If it’s yellowing or mushy, remove it once the babies have their own roots.
Aftercare
New plantlets are tender. Think steady, not intense.
- Light: Bright, indirect light. An east window or a grow light works beautifully. For grow lights, many home setups do well with 10 to 14 hours a day, with the light roughly 8 to 12 inches above the leaves (adjust if you see stretching or bleaching).
- Water: Keep evenly moist, never soggy. Bottom watering is great once roots are established. Use room-temperature water, and try not to splash water into the crown (the center), which can cause rot.
- Temperature: Aim for 65 to 75°F. Avoid cold drafts.
- Fertilizer: Wait 3 to 4 weeks after potting up, then feed lightly with a balanced African violet fertilizer at diluted strength.
Most baby violets bloom 6 to 12 months after propagation, depending on light, warmth, and variety.
Troubleshooting
If a cutting fails, it’s usually one of a few fixable issues. Here’s what to look for and what to change next time.
The leaf rotted at the base
- Most common causes: mix too wet, leaf blade touching water or soil, low airflow, dirty tools
- Try this: use a lighter mix with more perlite, water less, keep the leaf above the surface, and sanitize tools
The leaf stays green but nothing happens
- Most common causes: not enough light, cool temperatures, very old leaf
- Try this: move to brighter indirect light or add a grow light, keep warmer, and use a mid-aged leaf
The cutting wilts
- Most common causes: low humidity, stem not in good contact with media, heat stress
- Try this: bag it for humidity, firm the mix gently, keep out of direct sun
Plantlets appear but then stall
- Most common causes: overcrowding, low nutrients after many months, inconsistent moisture
- Try this: separate plantlets once they have several leaves, keep watering consistent, and begin light feeding after potting up
White fuzz or mold on the soil
- Most common causes: too much humidity with no air exchange
- Try this: open the bag for 10 to 15 minutes daily, let the surface dry slightly between waterings, and remove any obviously moldy debris
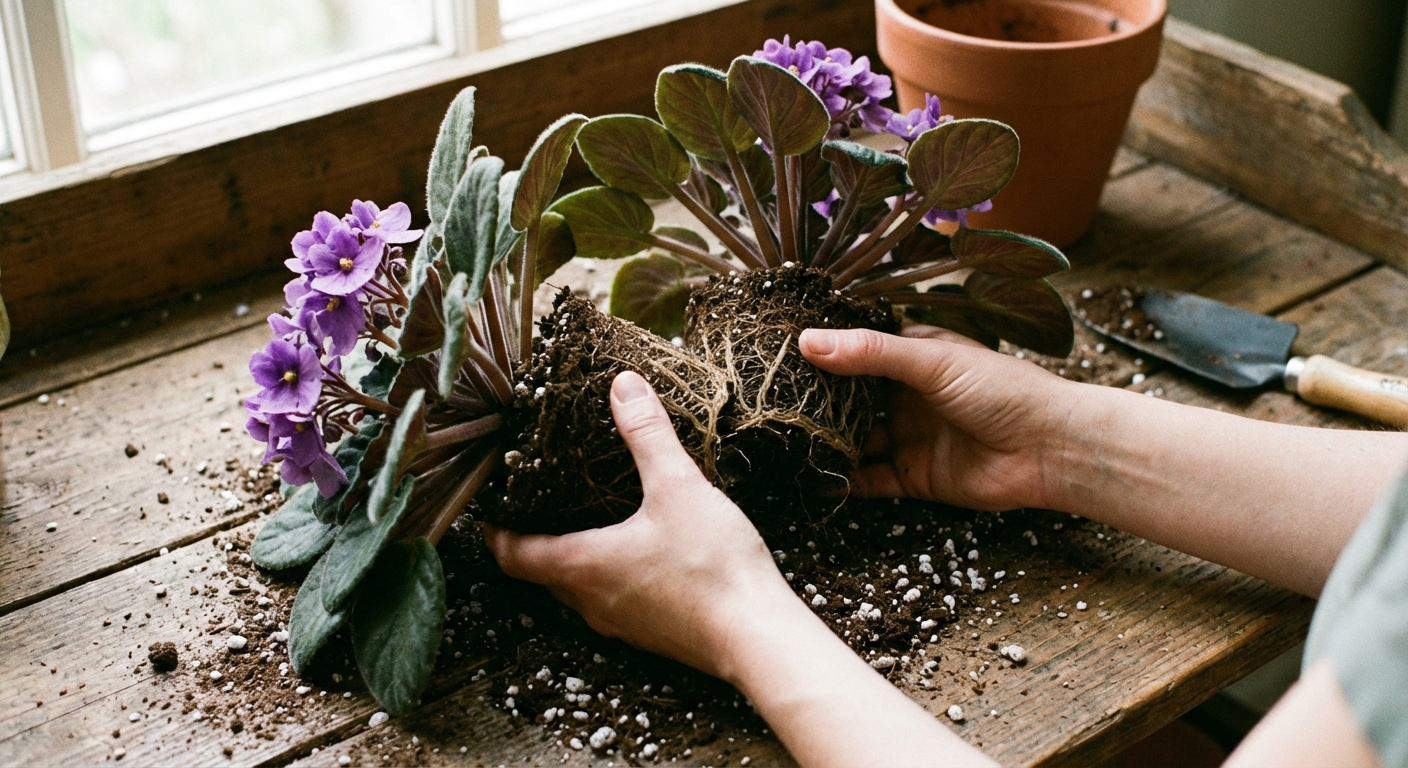
Division for mature plants
If your violet has become a crowded clump, has multiple crowns, or is producing lots of suckers, division is faster than leaf propagation. It’s also the best method when you want an instant, blooming-size plant rather than babies.
When division makes sense
- The plant has multiple crowns (separate growing centers)
- You see suckers growing from the base
- The plant is lopsided or overcrowded
How to divide
- Remove the plant from the pot and gently loosen soil.
- Identify natural separations between crowns or suckers.
- Separate by hand where possible. If you need a blade, use a clean, sharp knife.
- Make sure each division has roots. If a sucker has no roots, treat it like a cutting and keep humidity higher until it establishes.
- Repot each section into an appropriately small pot with fresh African violet mix.
After division, keep the plants in bright, indirect light and slightly higher humidity for a week or two. They may sulk a bit. That’s normal. Talk to them if it helps. I do.
Quick checklist
- Mid-aged healthy leaf, not the oldest or newest
- Clean tool, fresh angled cut
- Leaf blade stays out of water and mostly off wet soil
- Airy mix and light moisture, not wet
- Bright, indirect light and warm temperatures
- Patience for 6 to 12 weeks before you see babies (sometimes longer)
If you want, tell me which method you’re leaning toward, water or soil, and what your light situation is like. I can help you pick the setup that fits your home best.