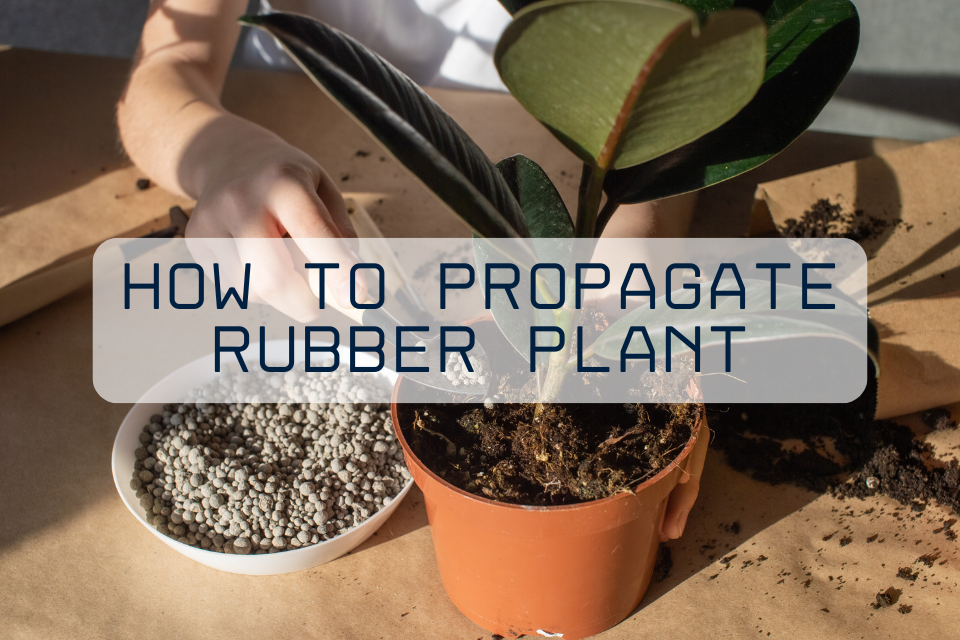
Propagate a Rubber Plant From Cuttings
Rubber plants (Ficus elastica) have a way of looking confidently unbothered, even when we are second-guessing every gardening choice we have ever made. The good news is that propagating a rubber plant from a stem cutting is genuinely doable at home. If you can make a clean cut and keep a little patience in your pocket, you can turn one plant into two.
In this guide, I will walk you through picking the right cutting, rooting it in water or soil, optional rooting hormone, the warmth and light that make roots happen faster, and exactly when to transplant. We will also touch on that milky latex sap, because yes, it is a thing.
Before you start: quick safety notes
When you cut a rubber plant, it releases a white, milky latex sap. For many people it is just mildly irritating, but it can cause skin redness or itchiness. Wear gloves if you are sensitive, and keep it away from eyes and fabrics.
Rubber plants are also considered toxic if chewed by pets. The ASPCA lists Ficus species as toxic to cats and dogs, and reactions can range from mild mouth irritation and drooling to stomach upset. If you share your home with nibblers (or small humans with big curiosity), root your cutting somewhere they cannot access.
- Protect your skin: gloves help, and wash up after.
- Protect surfaces: sap can stain; set down paper towels.
- Protect pets: place cuttings up high or behind a door.
Choose the right stem cutting
Rubber plant propagation is all about choosing a stem that has enough stored energy to make roots, but is not so old and woody that it sulks. You want a healthy, firm stem from an actively growing plant.
What to look for
- Length: about 4 to 8 inches is perfect.
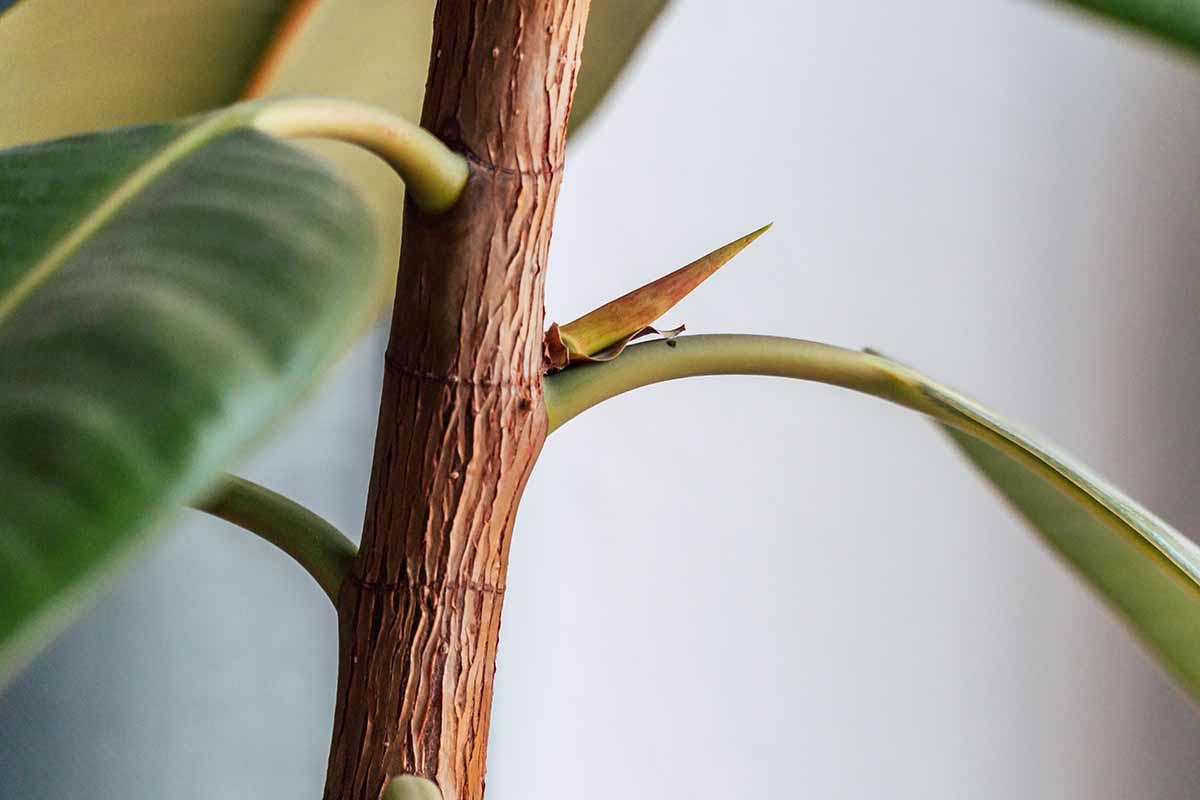
- Nodes: include at least 1 node, ideally 2. Nodes are the little bumps or rings where leaves attach and where roots can form.
- Leaves: 1 to 2 leaves is plenty. Too many leaves can increase moisture loss before roots exist.
- Health: avoid stems with pests, soft spots, or blackened areas.
A quick note on nodes
You cannot propagate a rubber plant from a leaf alone. You need at least one viable node on the cutting for roots (and new growth) to form.
Best time to take cuttings
Spring through early summer is prime time because the plant is naturally in growth mode. You can still succeed other times of year, but rooting is usually slower in low-light seasons.
Tools and supplies
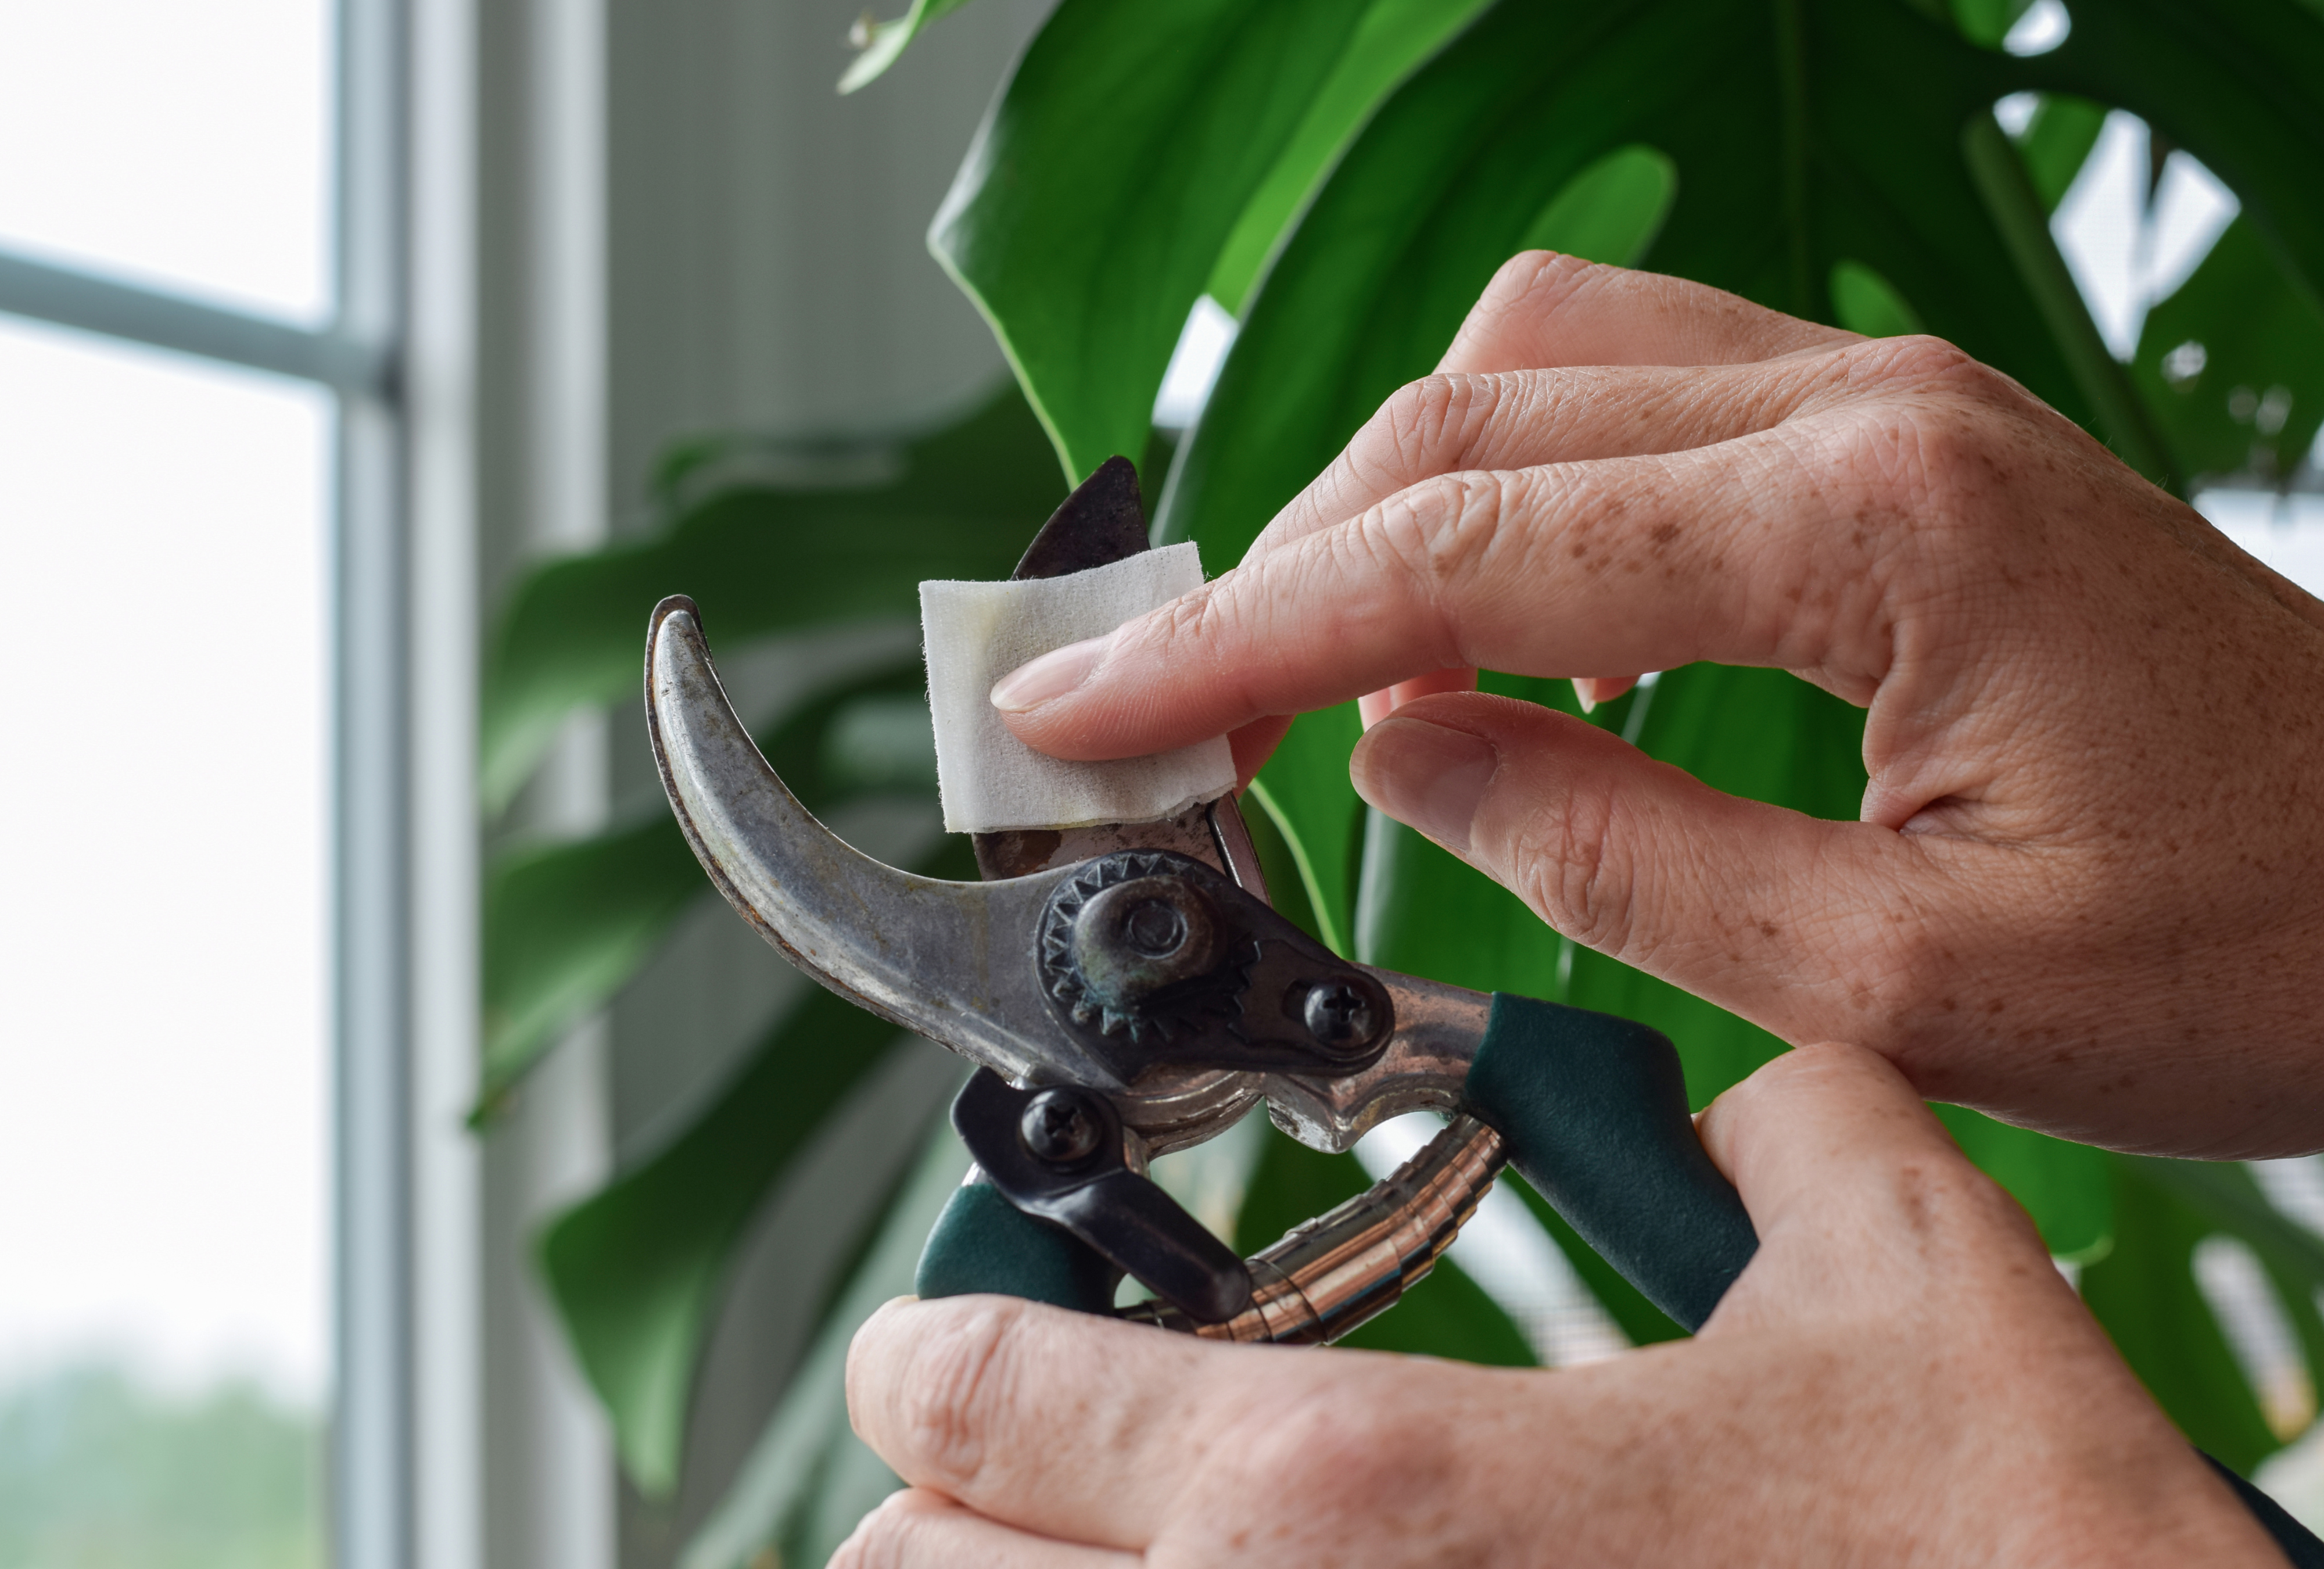
You do not need a lab, just clean basics. If you give me one non-negotiable, it is clean cutting tools. A messy cut invites rot.
- Sharp pruning shears or a clean knife
- Rubbing alcohol for sanitizing blades
- Paper towels or a damp cloth for sap
- A small jar or glass (for water rooting) or a small pot with drainage (for soil rooting)
- Fresh potting mix (more on the best mix below)
- Optional: rooting hormone (powder or gel)
- Optional but helpful: a clear plastic bag or humidity dome
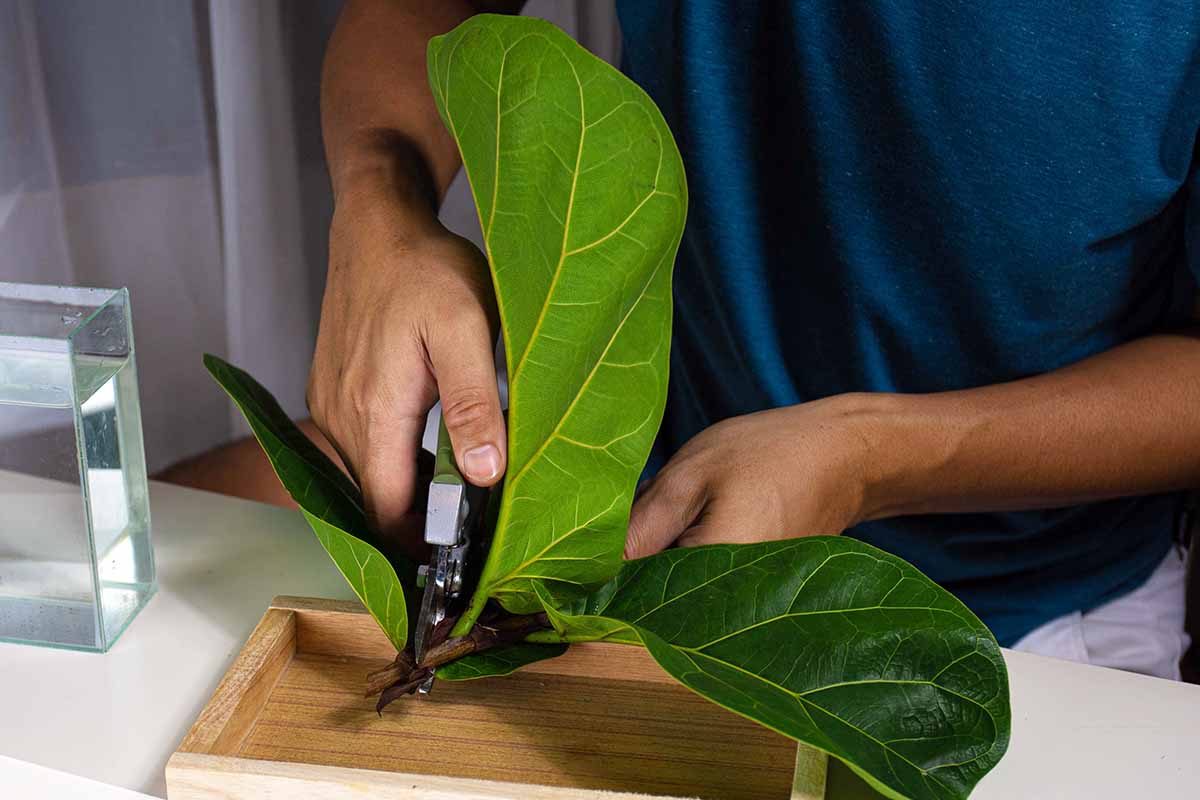
Step-by-step: take the cutting
- Sanitize your tool. Wipe blades with rubbing alcohol and let them dry.
- Locate a node. Choose a section with at least one obvious node.
- Make a clean cut. Cut just below a node. A slightly angled cut can help keep the end from sitting flat against the bottom of a container.
- Manage the sap. Gently blot the cut end with a paper towel. You can also rinse the end briefly under lukewarm water, then blot dry. The main goal is to let the latex bleed and slow down before you root it.
- Remove any leaf that would sit in water or soil. Leaves below the waterline or buried in mix are rot magnets.
- Reduce leaf load. If you have two large leaves, consider removing one, or trimming large leaves in half to reduce transpiration.
Some growers like to let the cutting sit for 30 to 60 minutes so the cut surface dries a bit before rooting, especially for soil rooting. It is optional, but it can reduce the chance of rot if your conditions run damp.
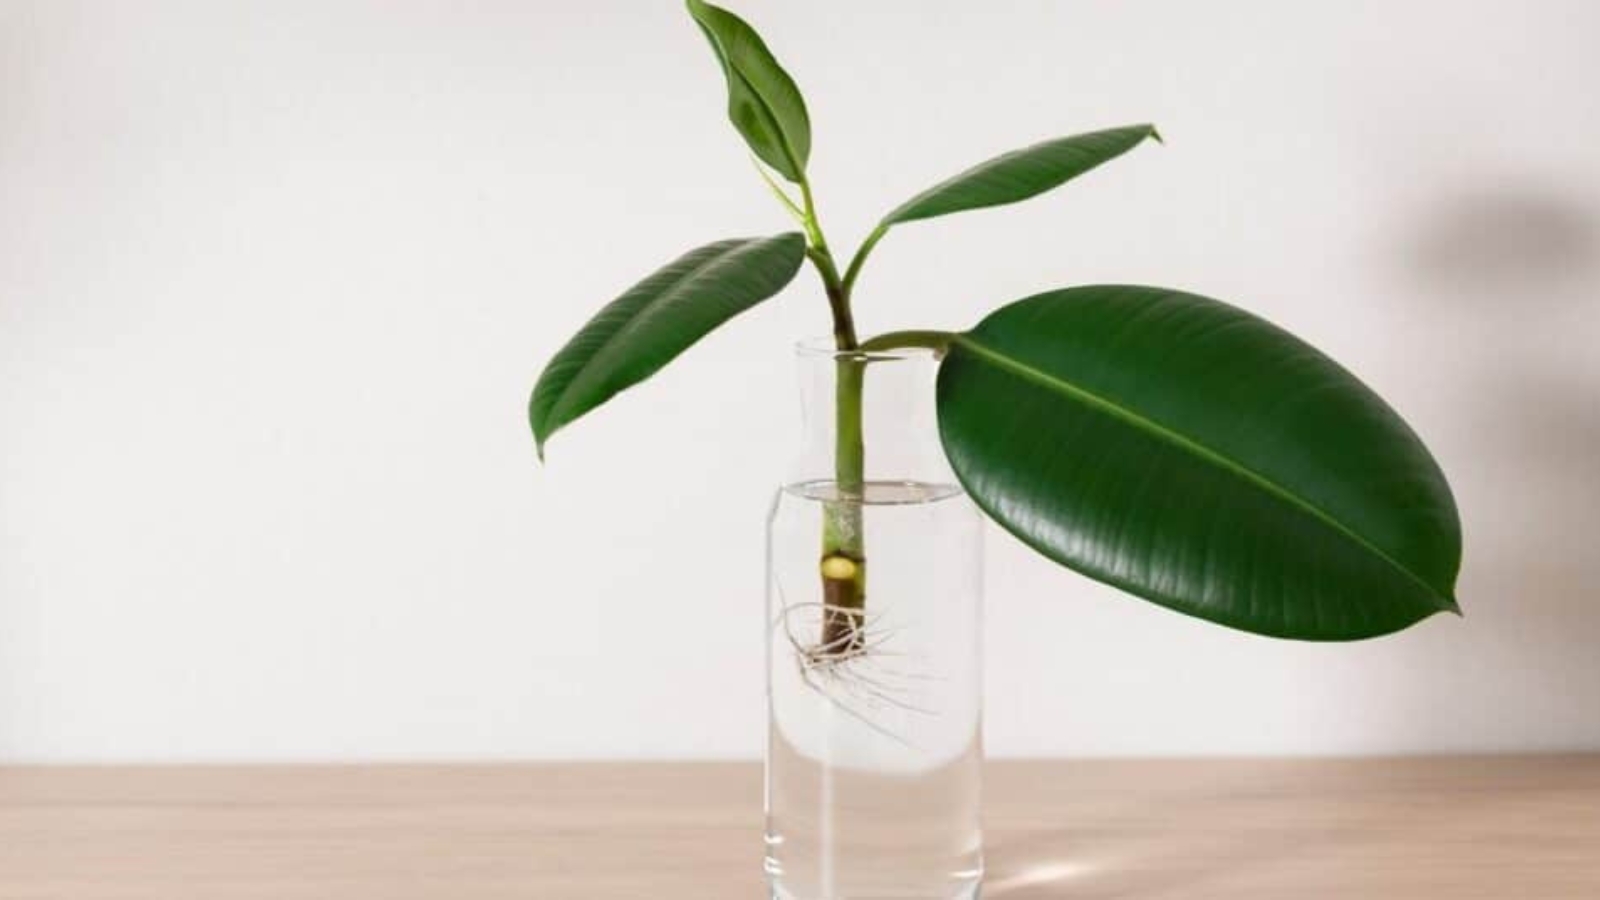
Rooting in water
Water propagation is wonderfully reassuring because you can actually see roots forming. It can be slower than soil for some rubber plant cuttings, and the transition to soil can take a bit of care. Still, if you are nervous, this is a friendly place to start.
How to do it
- Fill a clean jar with room-temperature water.
- Place the cutting so that at least one node is submerged, but leaves stay above the waterline.
- Use a narrow-neck container (or support the stem) so the cutting stays upright and the node stays put.
- Set the jar in bright, indirect light. Think near a window, not in a sunbeam.
- Top up the water as needed, and fully change it every 5 to 7 days, or sooner if it turns cloudy.
Warmth and light for water rooting
- Temperature: aim for 70 to 80°F. Warmer usually means faster rooting.
- Light: bright indirect light. Low light often leads to slow rooting and mushy stems.
When is it ready to pot up?
Transplant once you have several roots that are about 2 to 4 inches long. If you pot too early, the cutting can stall. If you wait too long, water roots can be extra delicate during the transition.
Rooting in soil
Soil propagation is my go-to when I want a sturdier start. Roots formed in potting mix are already adapted to life in soil, so transplant shock is usually lower. The tradeoff is you cannot peek at roots whenever you feel impatient. I get it. I truly do.
Pick a rooting mix that breathes
Rubber plants hate sitting in soggy media, especially when they do not have roots yet. Use a light, airy mix that drains fast.
- Simple option: 2 parts indoor potting mix + 1 part perlite
- Chunkier option: potting mix + orchid bark + perlite (great if your home runs humid)
How to do it
- Fill a small pot with drainage holes and lightly moisten the mix.
- Optional: dip the cut end in rooting hormone, then tap off excess.
- Poke a hole with a pencil or chopstick so you do not rub off hormone while planting.
- Insert the cutting so at least one node is below the surface, and no leaves are buried.
- Firm the mix gently around the stem so it stands upright.
- Cover loosely with a clear plastic bag to hold humidity, keeping plastic from touching the leaf. Vent once a day. Go easy on misting. Too much moisture under a bag can backfire fast.
Where to place it
- Light: bright, indirect light
- Warmth: 70 to 80°F is ideal
- Moisture: keep the mix lightly damp, not wet. Let the top inch dry slightly before rewatering.
If you have a heat mat, low gentle bottom heat can speed things up, especially in cooler homes.
How to tell it is rooting
- Tug test: a gentle tug meets resistance.
- Bud activity: a dormant bud starts to swell, or you see a tiny new growth point.
- Leaf behavior: the leaf stays reasonably firm instead of collapsing day by day.
What about air layering?
If your rubber plant is older, tall, or has a thicker woody stem that does not want to root from a standard cutting, air layering is a very reliable option. It lets the stem grow roots while it is still attached to the mother plant, which stacks the odds in your favor.
In short: you make a small wound on the stem, pack it with damp sphagnum moss, wrap it, and wait for roots to fill in before cutting below the new root ball and potting it up. If you have ever wanted propagation with a safety net, this is it.
Do you need rooting hormone?
Rooting hormone is optional for rubber plants, but it can help, particularly for thicker stems or when rooting in soil. Think of it as a small nudge, not magic dust.
- Use it if: you have struggled with rot before, your home is cool, or you want to speed up soil rooting.
- Skip it if: you are rooting in water and already have good warmth and light.
How to use: dip the cut end lightly, then tap off extra. Overapplying can gum up the stem end, and combined with overly wet media it can increase the chance of rot.
How long does rooting take?
Most rubber plant cuttings root in 3 to 8 weeks, depending on light, warmth, cultivar, and the maturity of the stem.
- Faster: warm room, bright indirect light, healthy stem, consistent moisture
- Slower: winter light, cool windowsills, overwatering, very woody stems, some variegated types
In low light seasons, it can take 8 to 12 weeks. In soil, a gentle tug after a few weeks can tell you a lot. If you feel resistance, roots are forming. If the cutting slides out easily, tuck it back in and give it more time.
Transplant timing and how to pot it up
From water to soil
When water roots are 2 to 4 inches long, pot into a small container with drainage. Choose a pot only slightly larger than the root mass. Oversized pots stay wet too long.
- Fill the pot partway with a well-draining mix.
- Set the cutting in place and gently spread roots if possible.
- Backfill and firm lightly.
- Water thoroughly, then let excess drain.
For the first couple of weeks, keep the soil evenly moist but not soggy. This helps water roots transition to soil living.
From soil propagation to a larger pot
If you rooted in soil, transplant once you see clear new growth and the cutting feels anchored. That often lines up with 6 to 10 weeks, but your plant sets the schedule.
Aftercare for your new baby rubber plant
Once rooted, treat your cutting like a small, slightly tender houseplant that wants consistency.
- Light: bright, indirect light for best growth
- Water: let the top 1 to 2 inches of soil dry, then water deeply
- Humidity: average home humidity is fine, but avoid hot, dry vents
- Fertilizer: wait 4 to 6 weeks after potting, then feed lightly during the growing season
If your cutting drops a leaf or pauses after transplanting, do not panic. It is often just redirecting energy into roots. Quiet progress is still progress.
Troubleshooting common propagation problems
My cutting is turning black or mushy
- Cause: rot from too much moisture, cold conditions, or a dirty cut
- Fix: recut above the damaged area with sterilized tools, let it dry briefly, and restart in fresh water or fresh airy mix
The leaf is drooping
- Cause: normal moisture loss before roots form, or too much sun heat
- Fix: move to bright indirect light, add a humidity bag, and reduce leaf size if it is very large
No roots after several weeks
- Cause: low light, cool temperature, or a cutting without a viable node
- Fix: increase warmth, move closer to a bright window, confirm a node is submerged or buried, and be patient a bit longer
White sap keeps oozing
A little sap is normal right after cutting. Blot it, rinse briefly if needed, and avoid repeatedly recutting unless you are removing rot. Constant recutting restarts the healing process.
Propagation checklist
- Choose a healthy 4 to 8 inch stem with at least 1 to 2 nodes
- Make a clean cut below a node with sanitized tools
- Blot latex sap and keep cuttings away from pets
- Remove any leaf that would sit below the waterline or soil line
- Root in water (top up and change weekly) or airy soil (lightly moist)
- Provide bright indirect light and warmth around 70 to 80°F
- Transplant when water roots are 2 to 4 inches long or when soil cuttings show new growth and resist a gentle tug
If you talk to your plants while you do all this, I will not judge you. I will probably join in.