Propagate a Christmas Cactus from Cuttings
There is something quietly magical about making a whole new holiday cactus from a few little segments. Christmas cactus propagation is also one of the kindest confidence-boosters in houseplant care because it is forgiving, slow-paced, and very doable on a kitchen counter.
Quick note before we start: in this article, “holiday cactus” means the popular flat-segment plants sold as Christmas, Thanksgiving, or Easter cactus. They are close cousins with very similar propagation steps.
Below I will walk you through two easy ways to take cuttings (twist or cut), how long to let them dry and callus, and two rooting options: soil and water. We will finish with the gentle transition back to normal watering so your new plant does not flop from too much love.
Know your holiday cactus
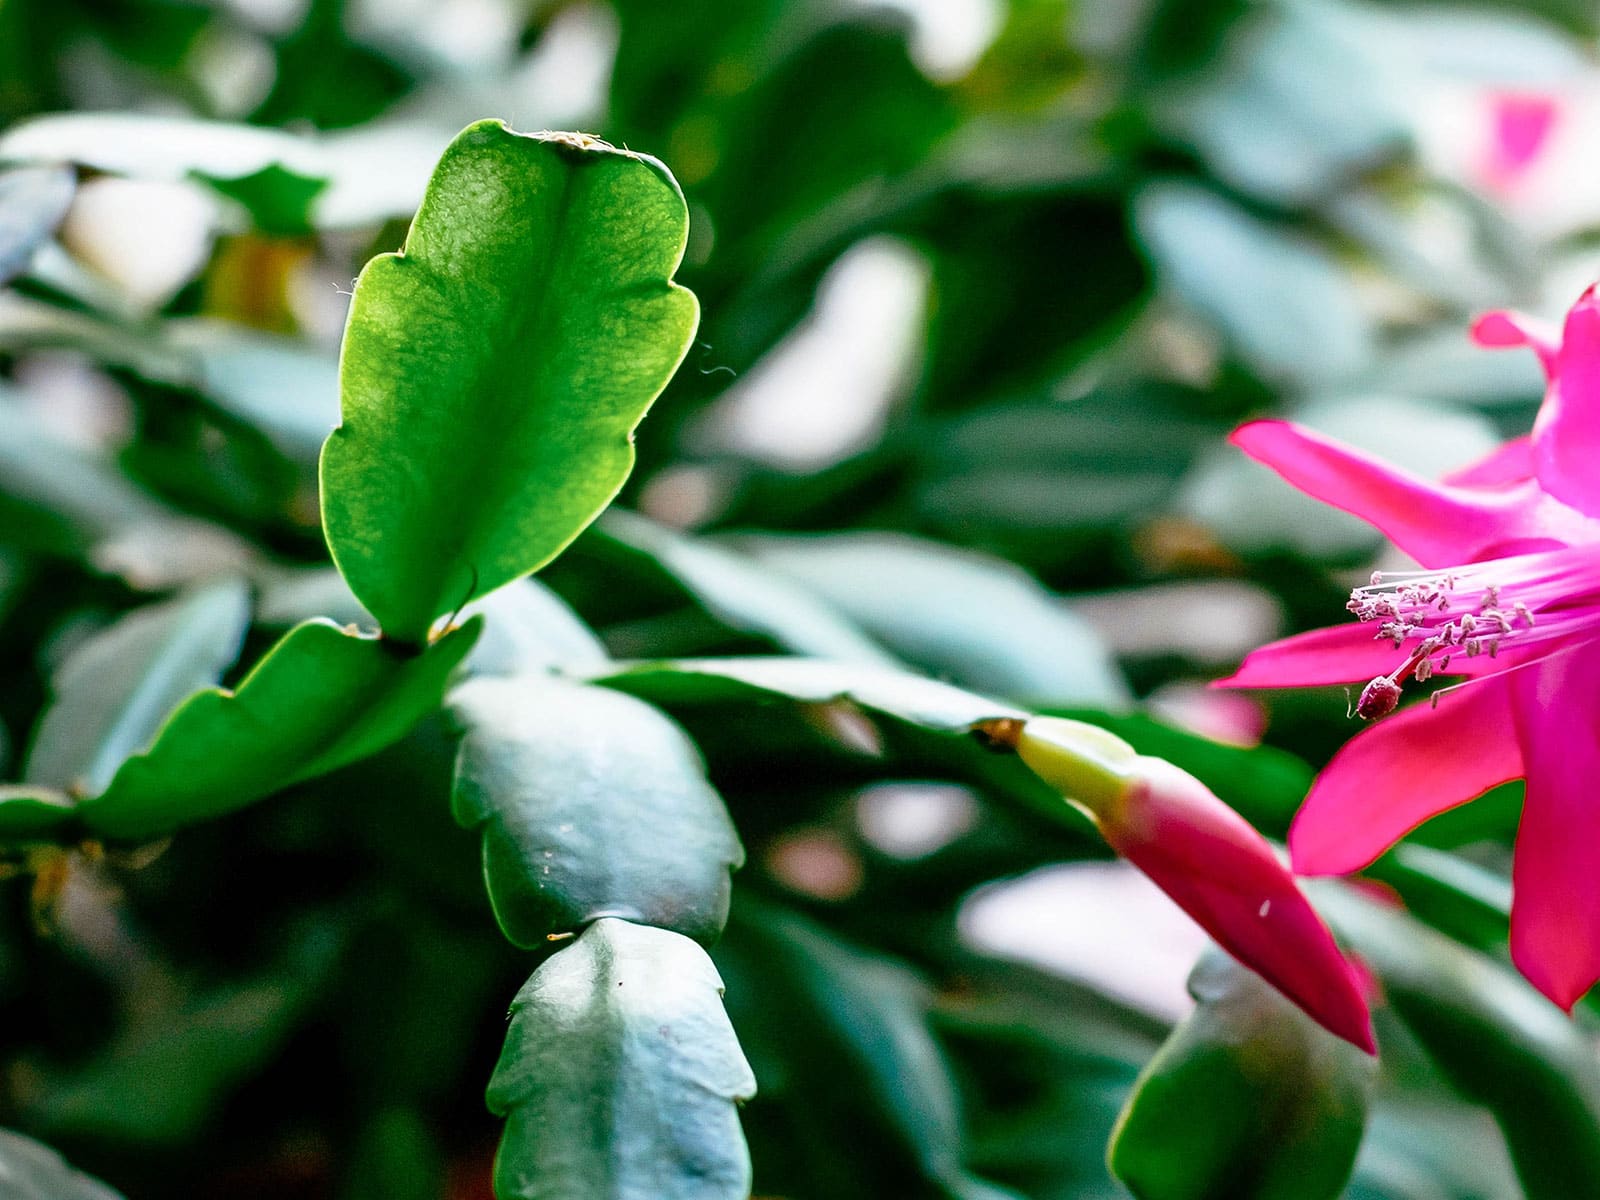
Most people use “Christmas cactus” as a catch-all for a few closely related plants in the Schlumbergera group. You might also see:
- Thanksgiving cactus (often sold as Christmas cactus): pointier segment edges and it often blooms earlier.
- Christmas cactus: smoother, rounded segment edges, typically later blooms.
- Easter cactus (a close cousin, often Hatiora/Rhipsalidopsis): slightly different segments and bloom timing, and it can be a bit fussier.
A small reality check: these labels are commonly mixed up in stores, and bloom timing can shift with home conditions. The good news is that propagation is very similar for all of them. If it has those flat, jointed segments, you are in the right place.
When to take cuttings
The easiest time is when the plant is not actively blooming and is in a steady growth phase. For many homes, that is late winter through summer. You can still take cuttings at other times, but rooting may take longer.
If your plant just finished flowering, give it a short breather, then propagate. Post-bloom plants are often ready to branch, and cuttings encourage a fuller shape over time.
What you need
- A healthy holiday cactus
- Clean scissors or pruners (optional, if you prefer cutting)
- Small pot with drainage holes
- Rooting medium (see soil recipes below)
- Optional: small glass for water rooting
- Optional: rooting hormone (not required, but fine to use)
Quick sanitation note: If you are using blades, wipe them with isopropyl alcohol before you start. Holiday cactus tissue can bruise easily, and clean cuts heal better. If you have had rot issues before, using fresh, sterile medium helps a lot.
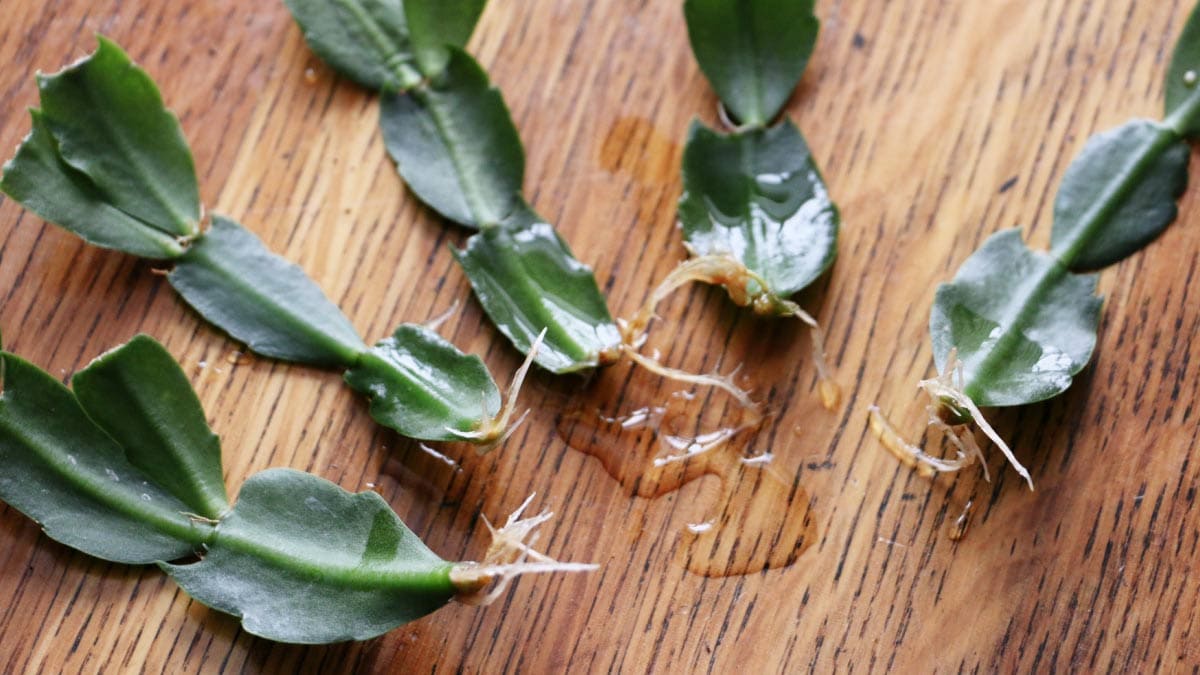
Pick a good cutting
A good cutting is made of multiple segments. Each segment is a fleshy, water-storing pad, and the “joints” between them are where new roots and growth can emerge.
- Best size: 2 to 4 segments per cutting. If you have struggled with rooting before, try 3 to 5 segments for a little extra stored energy.
- Take from: healthy, firm, green growth. Avoid thin, limp, or heavily scarred segments.
- How many: you can root a single cutting, but rooting 3 to 5 cuttings in one pot makes a fuller plant faster.
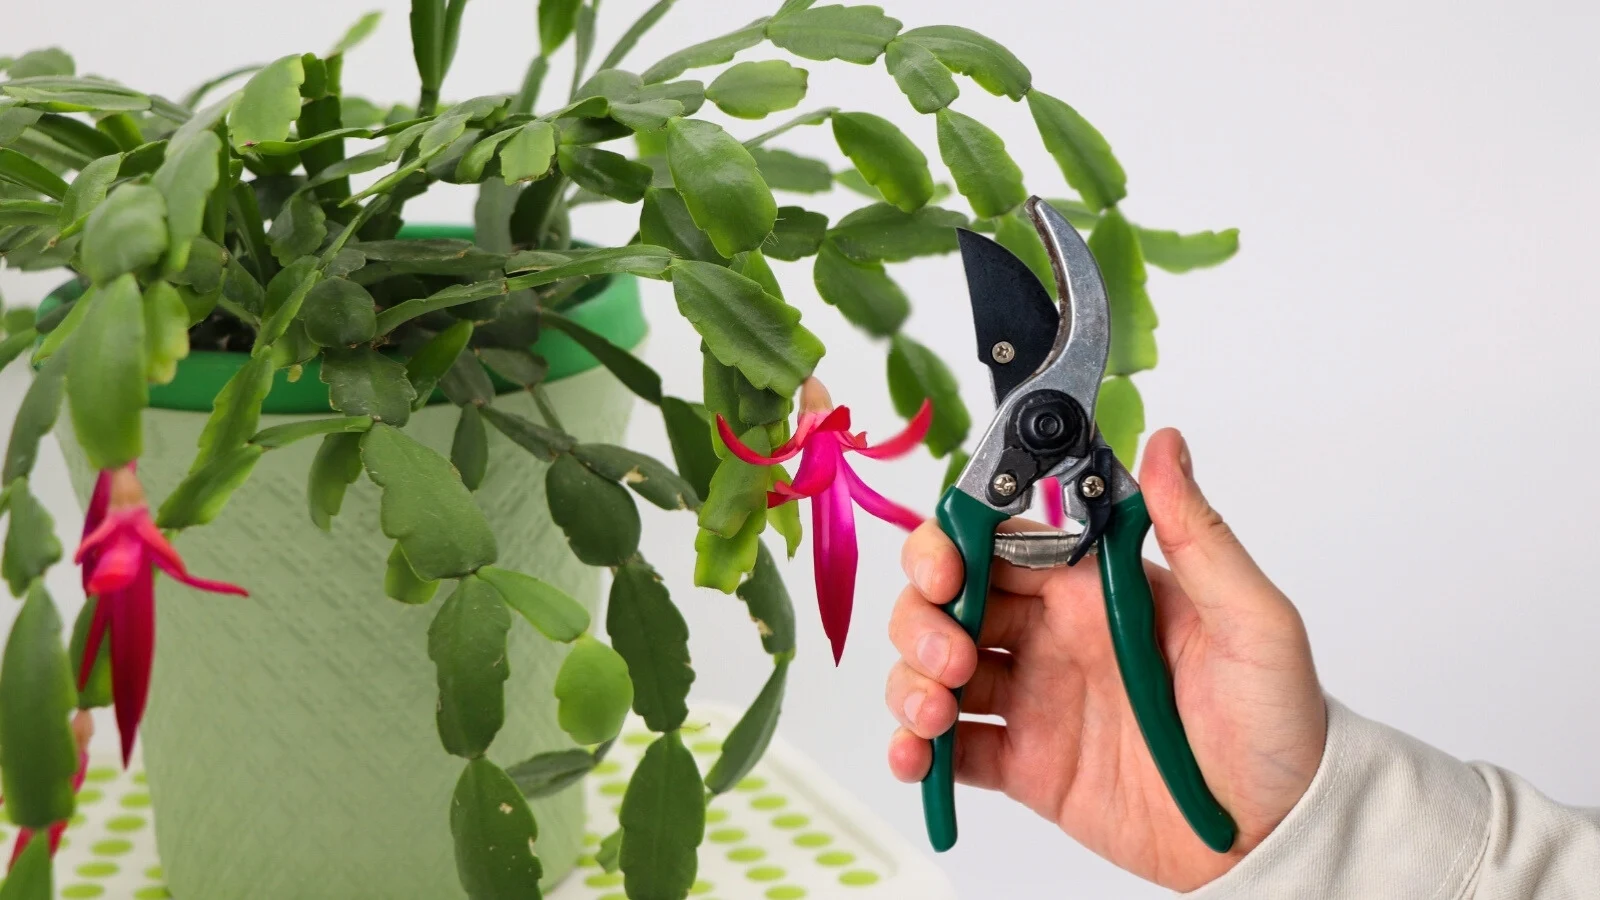
Twist or cut
Method 1: Twist at the joint
This is my favorite because it naturally separates where the plant wants to break.
- Hold the main stem gently with one hand.
- With the other hand, grasp the segment you want to remove.
- Twist slowly until it releases at the joint.
If it does not release easily, do not wrestle it. Switch to cutting. Your plant should not look like it lost a fight with a squirrel.
Method 2: Cut cleanly
This is great for precision, especially if you are shaping the plant.
- Find the joint between segments.
- Make one clean snip through the narrow connection.
- Aim for a smooth cut, not a crushed one.
Let it callus
Holiday cacti are epiphytic cacti with fleshy segments. In most home conditions, the cut end benefits from drying a bit before it meets moisture, which helps reduce rot, especially if your home runs cool, humid, or you tend to overwater.
Callus timing:
- Minimum: 12 to 24 hours
- Sweet spot: 1 to 3 days
- Longer is okay: up to about a week, as long as the cutting stays firm
Set cuttings on a dry paper towel or plate in bright, indirect indoor light. Avoid harsh sun and avoid humid, enclosed spots.
Option A: Root in soil
Soil rooting is typically the most reliable because you can keep moisture even instead of swinging from wet to dry.
Use a light mix
These plants like oxygen around their future roots. Heavy potting soil alone can stay too wet in small pots.
- Easy mix: 2 parts potting mix + 1 part perlite or pumice
- Extra airy mix: 1 part potting mix + 1 part perlite + 1 part fine orchid bark
Use a small pot with drainage. Oversized pots hold too much moisture and invite rot. Also, do not let the pot sit in standing water in a saucer.
Plant the cutting
- Fill the pot and lightly moisten the mix so it is damp, not soggy.
- Insert the cutting so only the bottom segment or one joint is buried, about 1/2 to 1 inch. Avoid burying multiple segments. That is where rot likes to start.
- Firm the mix gently around it so it stands up.
- If you are planting multiple cuttings, space them around the pot edge like a little circle.
Optional humidity boost: If your home is very dry, you can loosely tent the pot with a clear bag for a week or two. Keep it slightly open for airflow. Remove the tent once the cuttings stay plump and you feel a bit of resistance with a gentle tug, or as soon as you see new growth starting. Stagnant humidity plus wet soil is where rot throws a party.
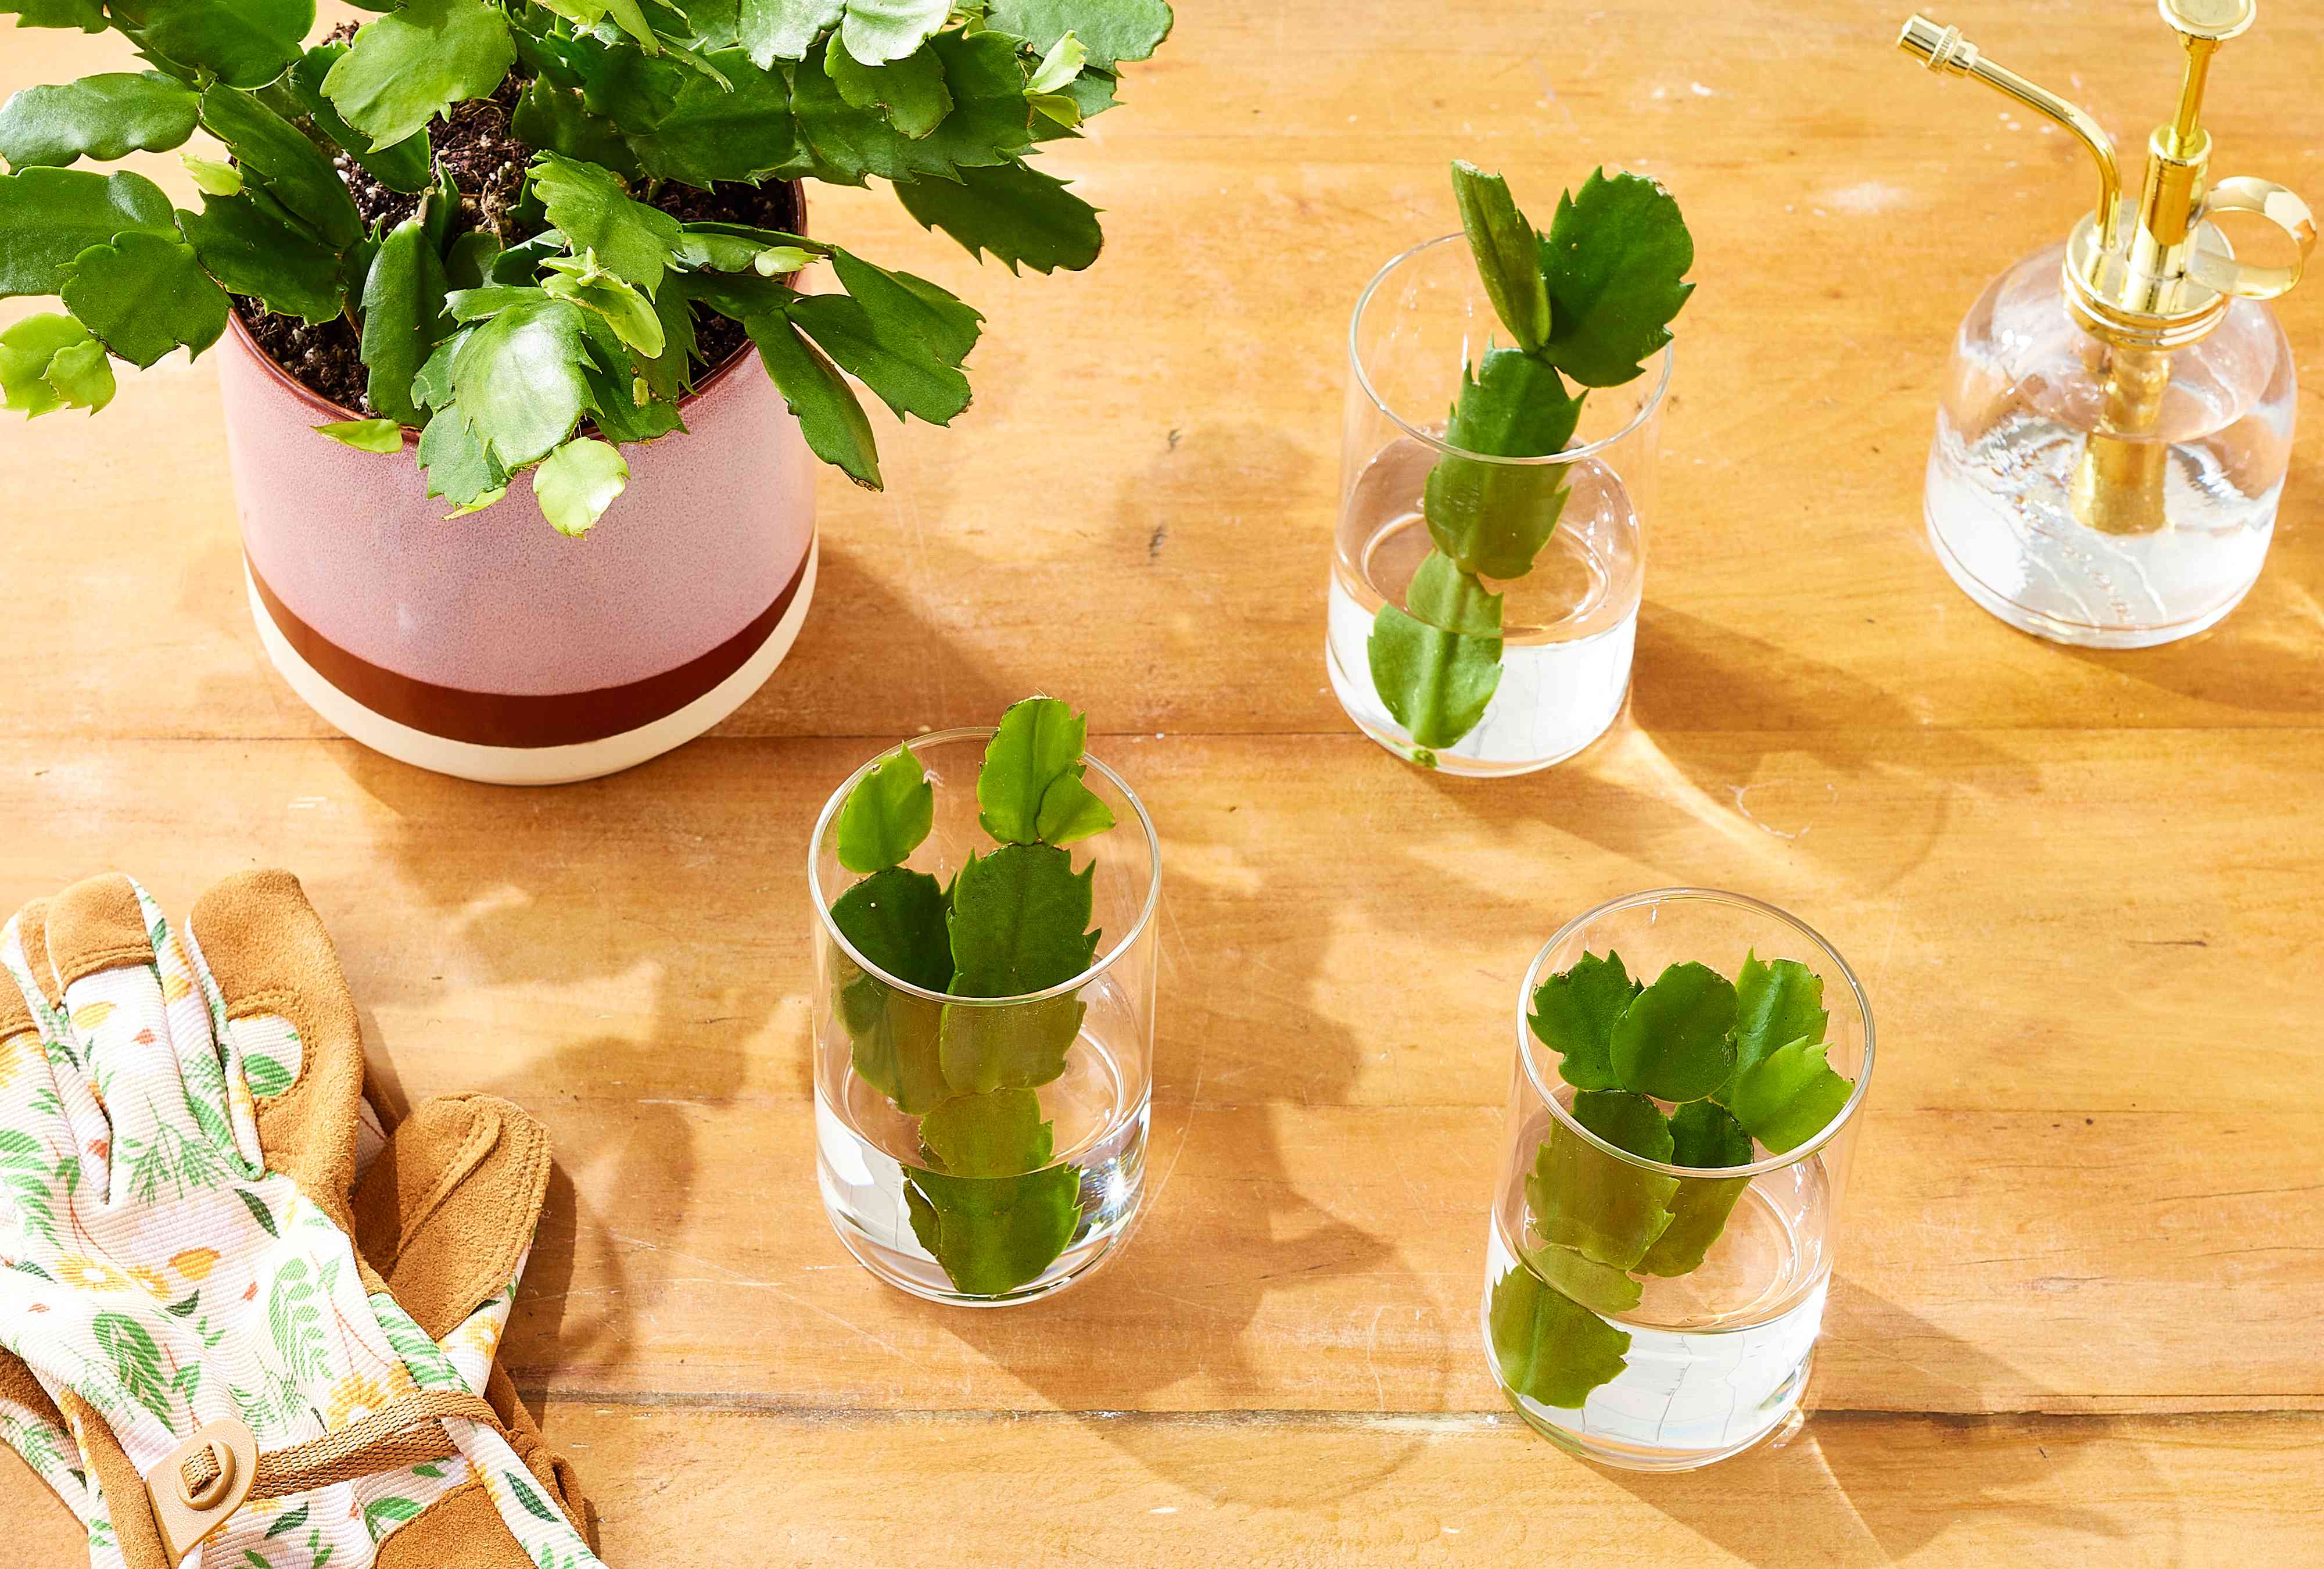
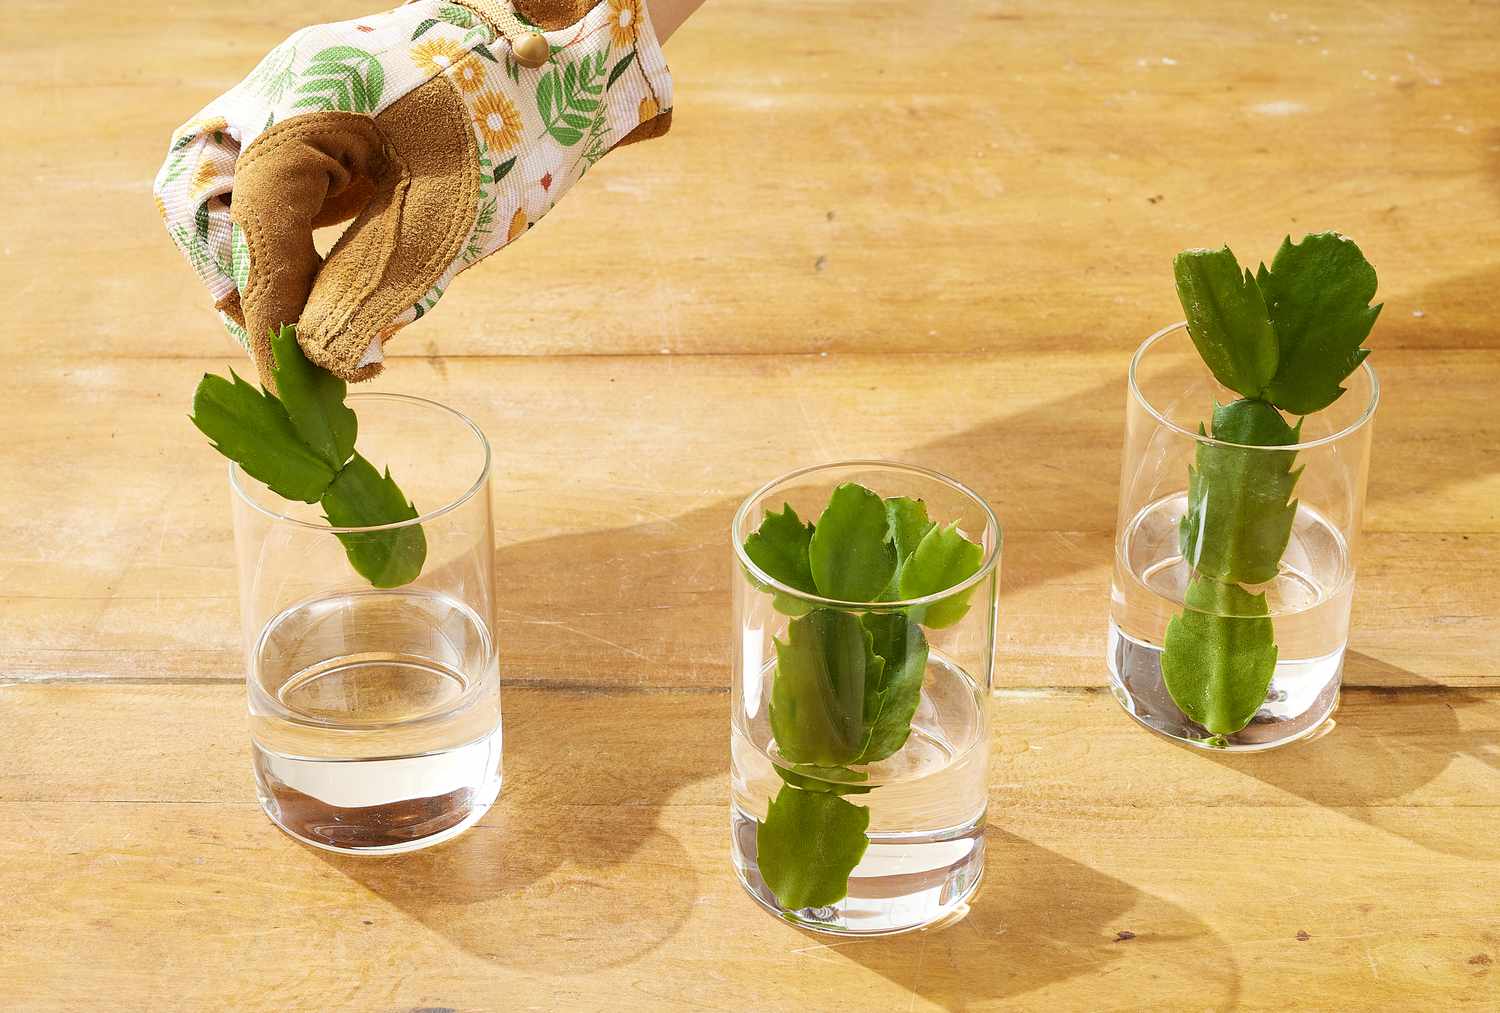
Option B: Root in water
Water rooting can work, and it is fun to watch. The main trick is keeping only the very bottom in contact with water. If multiple segments sit underwater, mush happens.
How to do it
- Use a small glass or jar and add a little water.
- Position the cutting so only the callused end is barely in the water, about 1 to 2 mm, or just touching the water surface. You can suspend it with toothpicks, a narrow-neck bottle, or a couple of clean pebbles in the bottom of the glass.
- Place in bright, indirect indoor light.
- Change the water every few days, or whenever it looks cloudy.
When to pot up: Once you see roots that are roughly 1/2 to 1 inch long, move the cutting into an airy soil mix. Water roots are delicate and need time to adapt, so keep the soil lightly moist at first.
Light and temperature
- Light: bright, indirect light is ideal. Think “near a window,” not “baking on the sill.”
- Temperature: 65 to 75 F (18 to 24 C) is a happy range.
- Avoid: cold drafts, heat vents, and direct hot sun.
Watering after planting
This is where most well-meaning plant parents overdo it. Newly callused cuttings do not need constant wetness. They need slightly damp, airy conditions and time.
Weeks 1 to 2
- Keep the mix lightly moist, not wet.
- Water small amounts around the cutting, then let the surface dry and the pot get lighter before watering again.
Weeks 3 to 6
- You can begin watering a little more deeply, but still let the top portion of the mix dry between waterings.
- Watch for signs of rooting: the cutting stays plump, resists a gentle tug, and may start new growth at the tip.
After it is rooted
Transition to your normal holiday cactus routine: water thoroughly, let excess drain, and then water again when the pot feels noticeably lighter and the top portion of the mix has dried. In small pots, “a couple inches” can be most of the pot, so use touch and weight as your guide. These plants like consistency, but they hate sitting in water.
How long it takes
Rooting speed depends on your home conditions, but here is a realistic range:
- Callusing: 1 to 3 days
- First roots: 2 to 6 weeks
- Noticeable new growth: 4 to 10 weeks
If it feels slow, you are not doing it wrong. Holiday cacti are steady, not speedy.
Troubleshooting
Mushy base
- Cause: too wet, not callused long enough, cool conditions, or heavy soil.
- Fix: remove it, trim back to firm tissue, re-callus 1 to 2 days, and restart in a drier, airier mix. Make sure only one joint is buried.
Shriveling
- Cause: too dry, too much sun, or very low humidity.
- Fix: move to brighter indirect indoor light, water lightly, and consider a loose humidity tent for a short period.
No roots after 6 to 8 weeks
- Cause: cool temps, low light, or the cutting was stressed.
- Fix: warm it up a little, increase indirect light, and keep moisture even. Patience is genuinely part of the method.
Segments drop
- Cause: handling stress, sudden temperature shifts, or rot starting at the base.
- Fix: stabilize conditions, reduce watering, and try again with fresh, firm segments.
Potting and long-term care
Once your cuttings are rooted and putting out new growth, you can keep them in the same pot until the plant looks crowded. Holiday cacti actually prefer being slightly snug.
- Soil: keep it well-draining and airy.
- Light: bright, indirect.
- Feeding: a gentle, diluted houseplant fertilizer during active growth is plenty. Skip fertilizing while it is rooting.
If your goal is blooms later, that is a separate conversation involving light cues and cool nights. For now, think roots first, flowers later. One calm step at a time.
A small pep talk
If you have ever felt like you have a black thumb, propagating a Christmas cactus is a lovely way to rewrite that story. You are not “failing” if one cutting rots. You are learning the moisture balance, and plants are generous teachers.
Start with a few extra segments, let them callus, give them bright, indirect indoor light and light moisture, then step back. Sometimes the best thing you can do for a cutting is to stop checking on it every hour. I say that with love, and also experience.