Peace Lily Repotting
Peace lilies are the kind of houseplants that quietly put up with a lot, until one day they start looking offended and dramatic. If your Spathiphyllum is wilting faster than usual, drying out constantly, or pushing itself up out of the pot, it might not be “being picky.” It might be begging for a little more root room.
This page will help you choose the right moment, the right pot size, and the right aftercare so repotting feels calm and doable, not like plant surgery on your kitchen floor.

When to repot a peace lily
The best time to repot a peace lily is when it is ready to grow new roots and leaves, and that usually lines up with brighter days.
Best season cues
- Spring through early summer: Longer daylight hours help the plant recover quickly and grow into fresh soil.
- After a growth spurt: If you notice lots of new leaves and the plant is drinking water faster than normal, it is often nearing pot-bound territory.
- After flowering slows: Peace lilies often bloom in cycles. A plant that is otherwise healthy but suddenly blooms less can benefit from refreshed soil and space, if root-bound signs are present.
Can you repot in fall or winter?
Yes, if the plant is struggling. Ideally, repotting waits until spring, but do not force a root-bound peace lily to suffer for months. If you are repotting in low-light seasons, keep expectations gentle: growth will be slower, and overwatering risk is higher because the plant drinks less.
How often do peace lilies need repotting?
Most peace lilies appreciate repotting every 12 to 24 months, depending on pot size, light levels, and how fast yours grows. Fast growers in bright indirect light often need it closer to yearly. Slower growers may be fine for two years.
Root-bound signs (the peace lily SOS list)
A peace lily can look “fine” right up until it is truly root-bound. Here are the most reliable clues to watch for.
Classic above-soil symptoms
- Wilts quickly after watering, then perks up fast, then wilts again a day or two later.
- Soil dries out unusually fast because there is more root than soil holding moisture.
- Stalled growth even in decent light and with normal feeding.
- Leaves yellowing from stress and inconsistent moisture.
- Plant feels top-heavy or looks like it is lifting itself out of the pot.
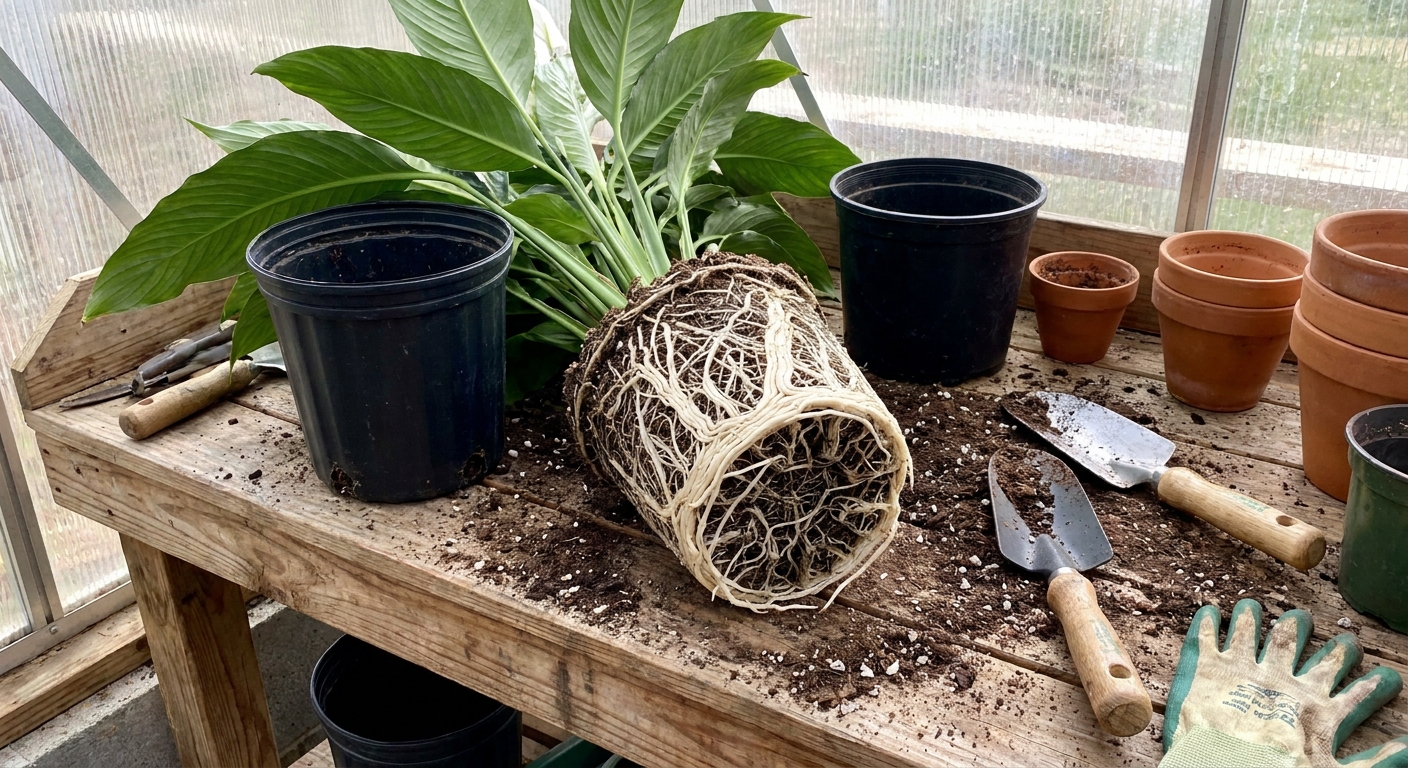
The honest truth: you often need to peek at the roots
If you can, lift the plant out of its pot for a quick look. A peace lily is likely root-bound if you see:
- Roots circling the pot along the sides or bottom like a tight coil.
- A dense “root mat” on the bottom where roots have formed a thick pad.
- Very little potting mix left, with roots taking up most of the volume.
- Roots coming out of drainage holes in multiple places.
Choosing the right pot size and depth
Peace lilies like to be a little snug, not squeezed. The goal is a pot that gives fresh room for roots without creating a giant wet bowl of soil that stays soggy.
How much bigger should the new pot be?
- Go up 1 to 2 inches in diameter for most repots.
- If the plant is extremely root-bound, you can go up 2 to 3 inches, but only if your potting mix is airy and you are careful with watering.
Pot depth matters (more than people think)
Peace lilies have fairly chunky roots that like consistent moisture, but they do not want to sit in water. A pot that is slightly deeper than the old one is fine, but avoid jumping into an extra-tall pot “just because.” Extra depth often means extra damp soil in the bottom, which can invite root rot.
Drainage is non-negotiable
Choose a pot with at least one drainage hole. If you love decorative cachepots, keep the peace lily in a nursery pot inside the cover pot, and always empty excess water after watering.
Terra cotta vs plastic vs ceramic
- Terra cotta: Breathable and forgiving if you tend to overwater, but dries faster.
- Plastic: Holds moisture longer and is lightweight, great for thirsty peace lilies, but requires a lighter watering hand.
- Glazed ceramic: Similar to plastic for moisture retention, usually heavier and more stable for big plants.
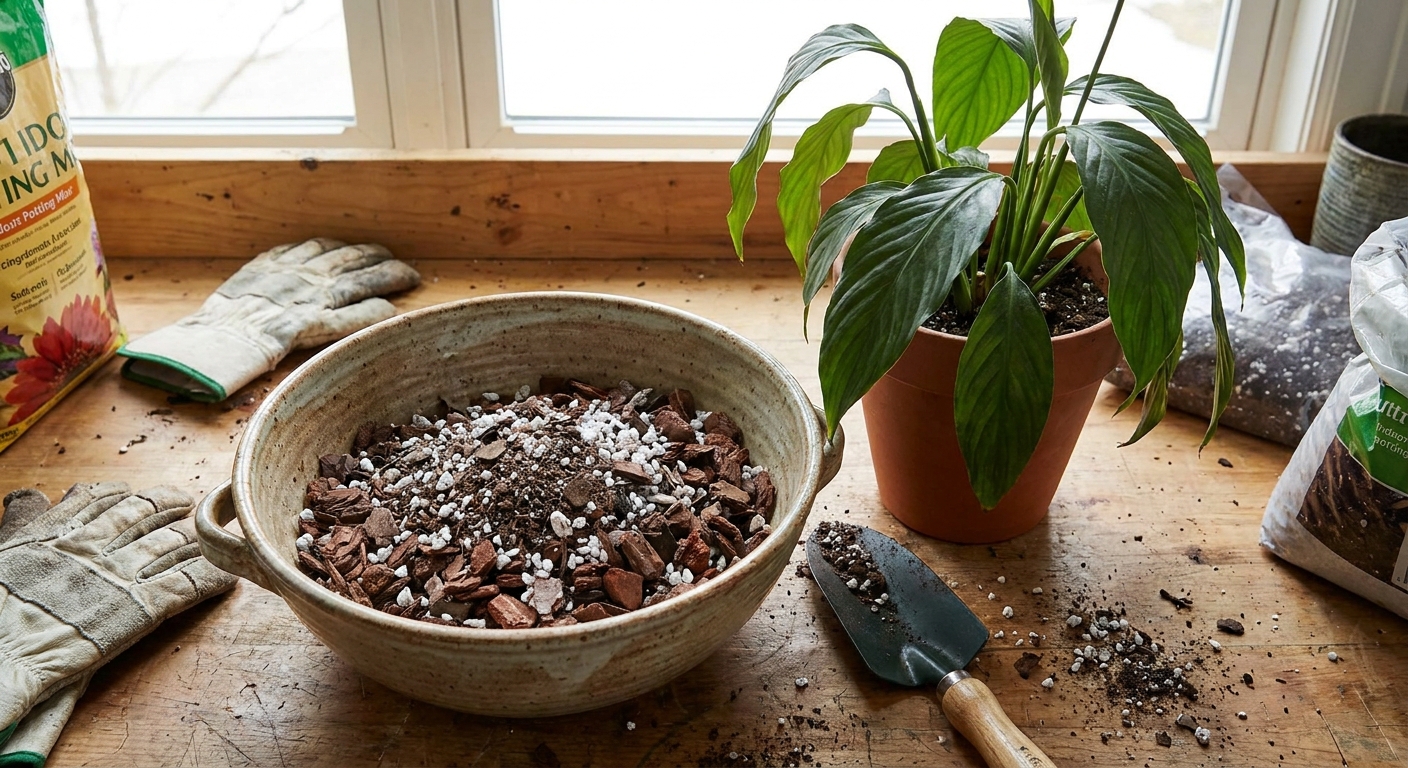
Soil mix for peace lilies (the sweet spot)
Peace lilies like soil that holds moisture but still has plenty of air pockets. Think “fluffy brownie,” not “mud pie.”
A reliable DIY mix
- 2 parts quality indoor potting mix (peat or coco coir based)
- 1 part perlite or pumice for airflow
- 1 part fine orchid bark for structure and drainage
If you prefer store-bought, look for an indoor aroid mix or a potting soil amended with perlite and bark. Avoid heavy garden soil. It compacts and suffocates roots indoors.
How to repot a peace lily (step by step)
Set yourself up for an easy repot by doing it when you have time to go slow. Peace lilies are tough, but they appreciate gentleness.
What you will need
- A new pot with drainage
- Fresh potting mix
- Clean scissors or pruners
- A towel or tray (repotting is gloriously messy)
1) Water lightly the day before (optional but helpful)
Slightly moist soil slides out more easily than bone-dry soil, but avoid repotting in soggy conditions.
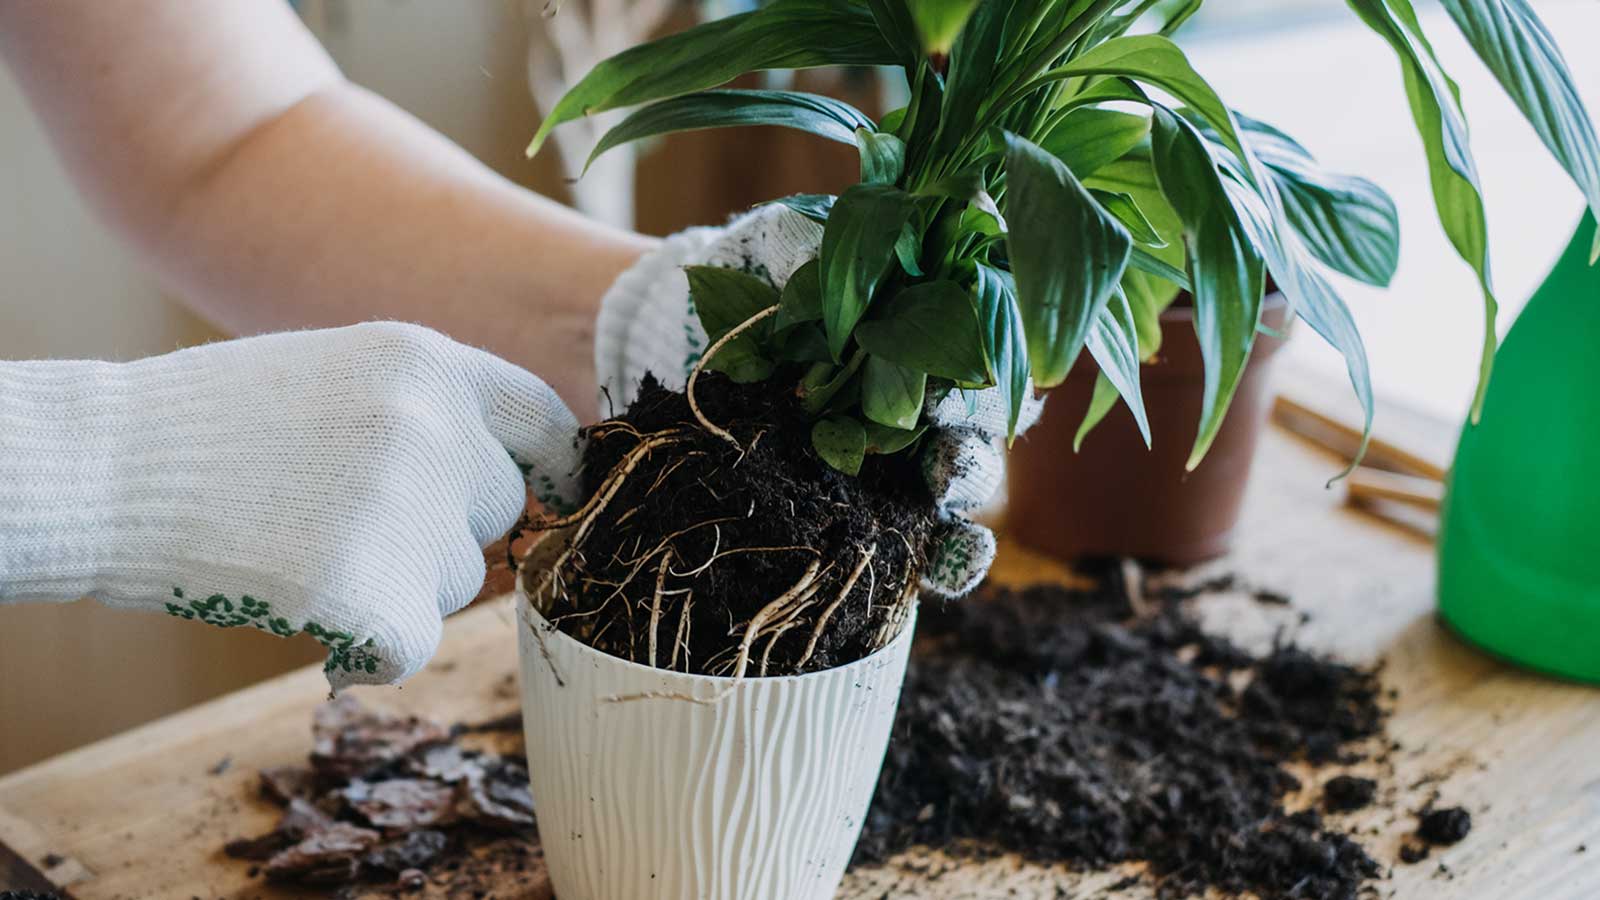
2) Remove the plant
Tip the pot sideways, support the base of the plant, and ease it out. If it is stuck, squeeze the nursery pot or run a butter knife around the inside edge.
3) Check and loosen the root ball
Gently tease apart the outer roots with your fingers. For very tight circling roots, you can loosen the bottom “pad” a bit. You are encouraging roots to grow outward into the new soil.
4) Trim only what needs trimming
Snip off any roots that are mushy, brown, or hollow. Healthy peace lily roots are typically firm and pale (white to light tan). Do not go overboard with root pruning. A little cleanup is plenty.
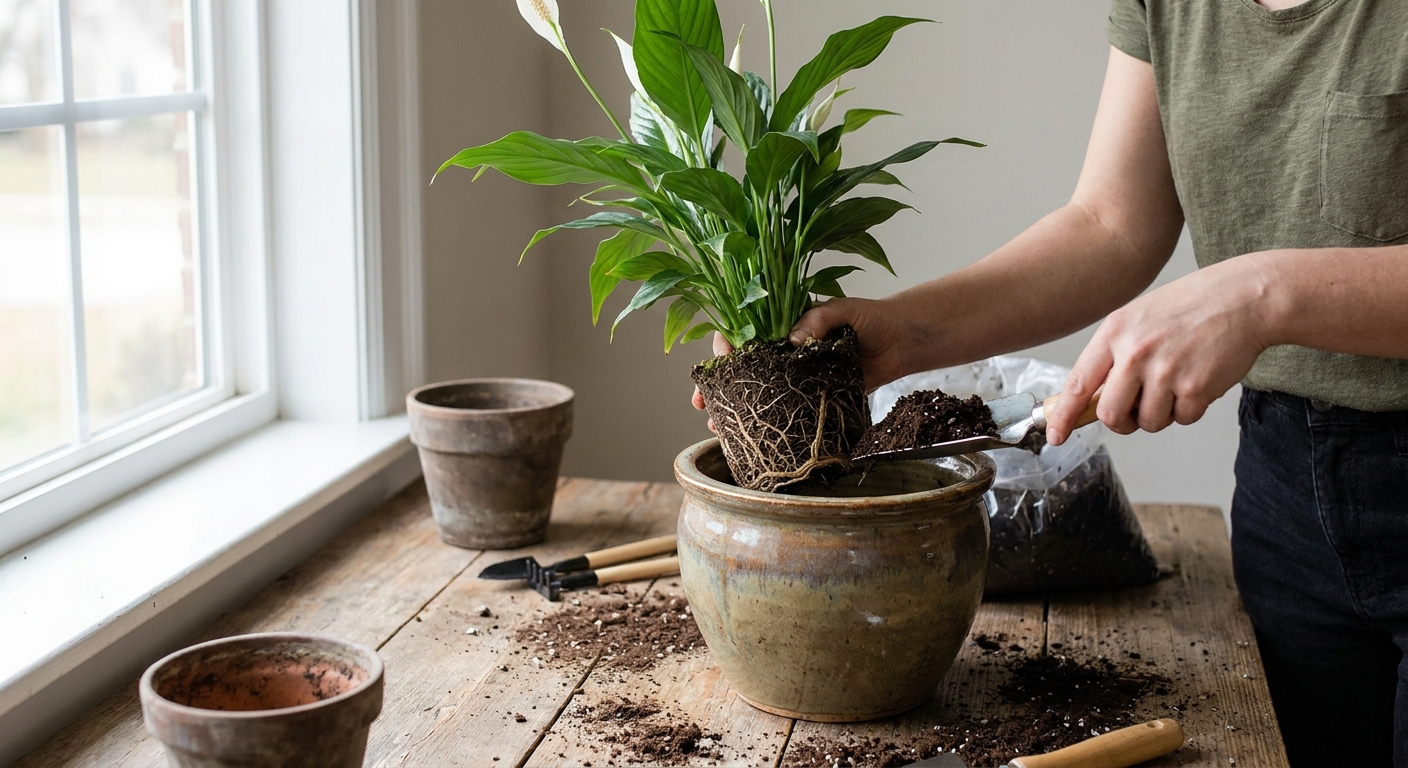
5) Add soil, set the height, then backfill
- Add a layer of soil to the bottom of the new pot.
- Set the peace lily in so the crown (where stems emerge) sits at the same height it did before.
- Fill around the sides with fresh mix, gently tapping the pot to settle soil into gaps.
Avoid packing the soil down hard. Roots need oxygen.
6) Water in, then let it drain fully
Water thoroughly until you see water run out of the drainage holes. This settles the soil and reduces dry pockets. Then let the pot drain completely. No standing water.
Watering adjustments after repotting
This is the part that trips people up. After repotting, your peace lily often needs less frequent watering for a bit, because there is more fresh soil holding moisture.
The first 2 weeks
- Check moisture with your finger 1 to 2 inches down. Water when that top layer feels dry.
- Expect a little droop for a day or two. Repotting is stressful. Most peace lilies rebound quickly.
- Hold off on fertilizer for about 4 to 6 weeks. Fresh mix can have nutrients, and tender roots can burn easily.
Light and placement after repot
Keep your plant in bright, indirect light. Skip harsh direct sun for a week or two. If your home is dry, a small humidity boost helps, like grouping plants together or using a pebble tray.
How to tell if you are overwatering after repotting
- Soil stays wet for many days
- Leaves turn yellow and feel soft (not crisp)
- A musty smell coming from the pot
If that happens, give the soil time to dry, increase airflow, and confirm you have drainage. Most “post-repot issues” are actually water timing issues, not the repot itself.
Common repotting mistakes (and how to avoid them)
- Jumping to a huge pot: Too much soil stays wet and can rot roots. Size up gradually.
- No drainage holes: A peace lily will forgive many things, but not swamp feet.
- Using dense soil: Compacted mixes suffocate roots indoors. Add perlite and bark.
- Fertilizing immediately: Let the plant settle first.
- Packing soil down hard: Roots need oxygen. Gentle settling beats firm tamping.
What about dividing a peace lily while repotting?
If your peace lily has multiple crowns and is bursting out of its pot, repotting is also a natural moment to consider division. That said, division is its own little project, and I like to keep the steps clear and separate so you do not accidentally turn “quick repot” into “all-day plant overhaul.”
If you are curious, head over to our full guide here: How to Divide a Peace Lily.
Quick repot checklist
- Repot in spring to early summer when possible
- Confirm root-bound signs by checking the root ball
- Choose a pot 1 to 2 inches wider with drainage
- Use an airy, moisture-friendly mix (potting soil + perlite + bark)
- Water in well, then water less often while the plant settles
If your peace lily has been sulking for months, repotting can feel like giving it a fresh apartment with clean sheets. And yes, I absolutely tell mine, “You are going to feel so much better,” while I do it.