Parlor Palm Care for Beginners
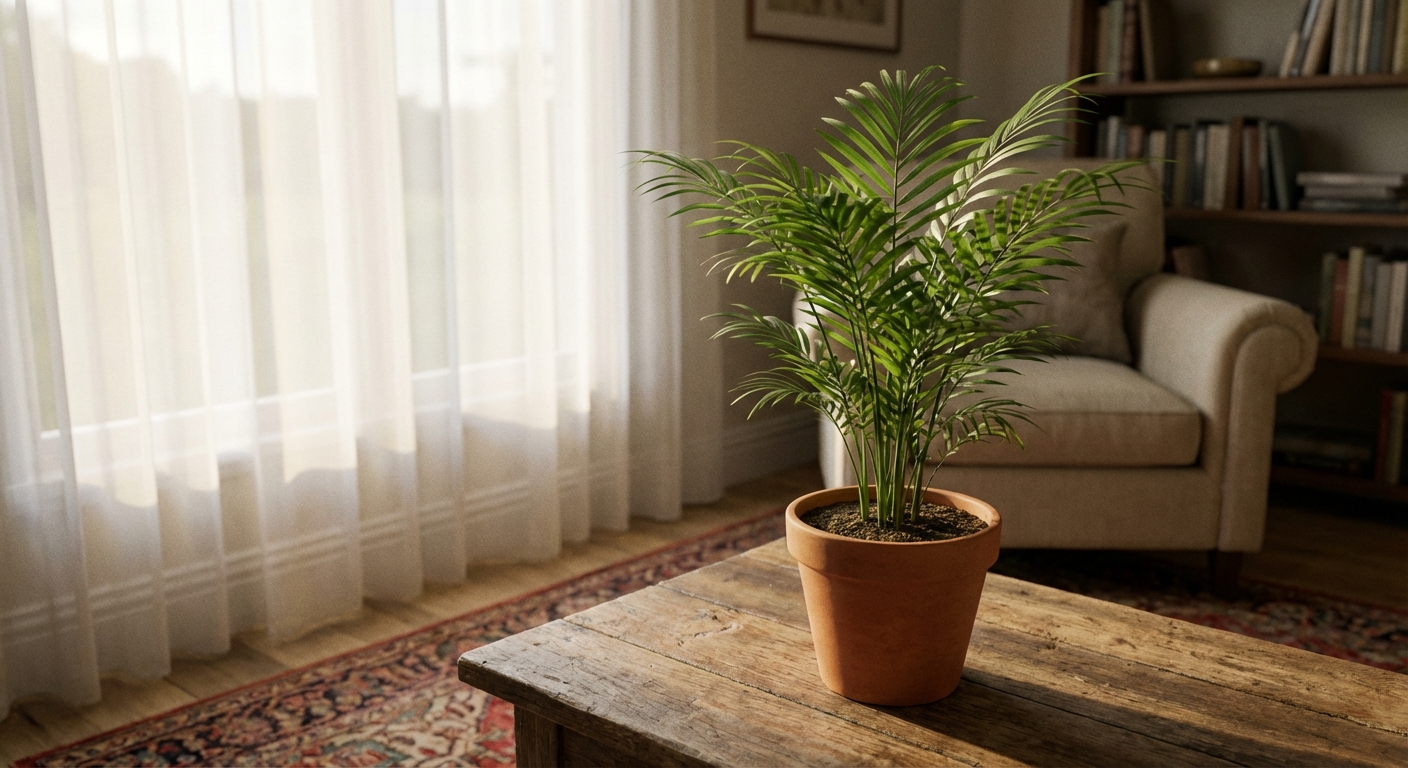
The parlor palm (Chamaedorea elegans) is the houseplant I hand to friends who swear they have a black thumb. It is forgiving, it handles lower light better than most “palm-looking” plants, and it brings that soft, feathery green vibe without demanding a greenhouse routine.
If you can remember two things, remember these: keep it out of harsh sun, and do not drown it. The rest is just small, steady habits that let this slow grower quietly settle in and thrive.
Why parlor palms work indoors
Parlor palms are often said to have been popular in Victorian-era parlors for a reason. They are built for indoor life.
- They tolerate lower light than many palms, so they can live a little farther from the window.
- They stay manageable in a pot, with a graceful, upright shape that does not swallow your room.
- They are more tolerant of average home humidity than many tropicals, though dry air can still show up as brown tips.
- They grow slowly, which means fewer emergencies, fewer repots, and fewer “what do I do with this now?” moments.
- They are typically considered pet-safe and are widely listed as non-toxic to cats and dogs, which is a huge plus if your roommates have paws.
Light
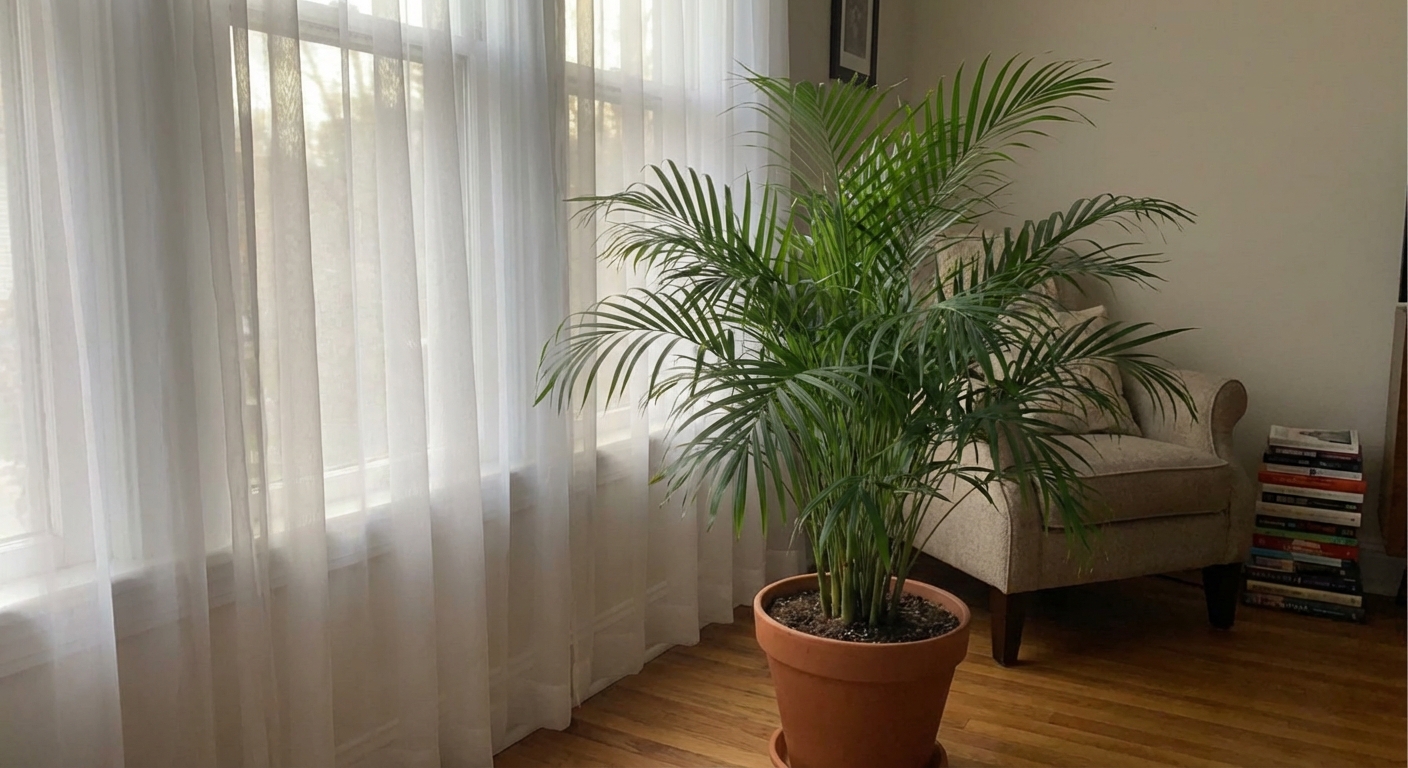
Parlor palms do best in medium to bright indirect light, but they tolerate low indirect light if you are patient with slower growth. Think: bright enough to read a book comfortably, but with no hot sunbeams landing on the leaves for hours.
Best spots
- Near an east-facing window for gentle morning light.
- A few feet back from a south or west window, especially if you get strong afternoon sun.
- North-facing light can work, but growth may be extra slow and more leggy.
Signs the light is off
- Too much light: faded fronds, scorched or crispy patches, especially on the side facing the window.
- Too little light: very slow growth (some is normal), stretched stems, smaller new fronds, and overall dullness.
If you are unsure, err on the side of slightly less light rather than direct sun. Direct sun is where parlor palms tend to complain first.
Watering (the beginner method)
Overwatering is the fastest way to stress a parlor palm. Their roots like moisture, but they also need air in the potting mix.
How often
Instead of watering on a strict schedule, use a simple check:
- Stick your finger into the soil. When the top 1 to 2 inches feel dry, it is time to water. If your pot is small, aim closer to the top 1 inch so you are not accidentally waiting until the whole root zone is dry.
- In many homes, that works out to about every 7 to 14 days, depending on light, season, pot size, and your indoor climate.
How to water correctly
- Water slowly until you see water come out of the drainage holes.
- Let it drain fully. Do not let the pot sit in a saucer of water.
- If the soil has pulled away from the pot edges and water rushes through, bottom-water once to rehydrate, then return to normal watering.
Common mistakes
- Keeping soil constantly wet: invites root rot and fungus gnats.
- Letting it go bone dry repeatedly: encourages browning tips and crispy fronds.
- No drainage holes: a parlor palm can survive a lot, but it cannot survive a swampy pot.
Humidity and temperature
Parlor palms prefer moderate humidity, but they usually cope well with average home conditions. That said, dry indoor air can show up as brown tips, especially in winter when heaters run nonstop.
Easy humidity boosts
- Group plants together so they share a slightly more humid microclimate.
- Use a small humidifier nearby, especially during heating season.
- Place the pot on a pebble tray with water below the pot bottom (the pot should not sit in the water).
If you are wondering about misting: it is fine as an occasional rinse, but it is usually a short-lived humidity boost. A humidifier does more, and a shower rinse does more for dust.
Temperature-wise, keep your palm comfortable like you are comfortable: roughly 65 to 80°F is perfect. Avoid cold drafts, keep it away from heating vents, and try not to let it sit in sustained temperatures below 55 to 60°F. Also, do not let fronds press against icy window glass in winter.
Soil and pot
Your goal is a mix that holds some moisture but still drains well.
- Soil: a quality indoor potting mix with a little extra perlite mixed in works beautifully.
- Pot: choose a pot with drainage holes. A slightly snug pot is fine. Parlor palms do not mind being a bit root-bound.
If you are repotting, do it gently. These palms can sulk after rough handling. I talk to mine while I work, which I fully admit might be for my own nerves more than theirs.
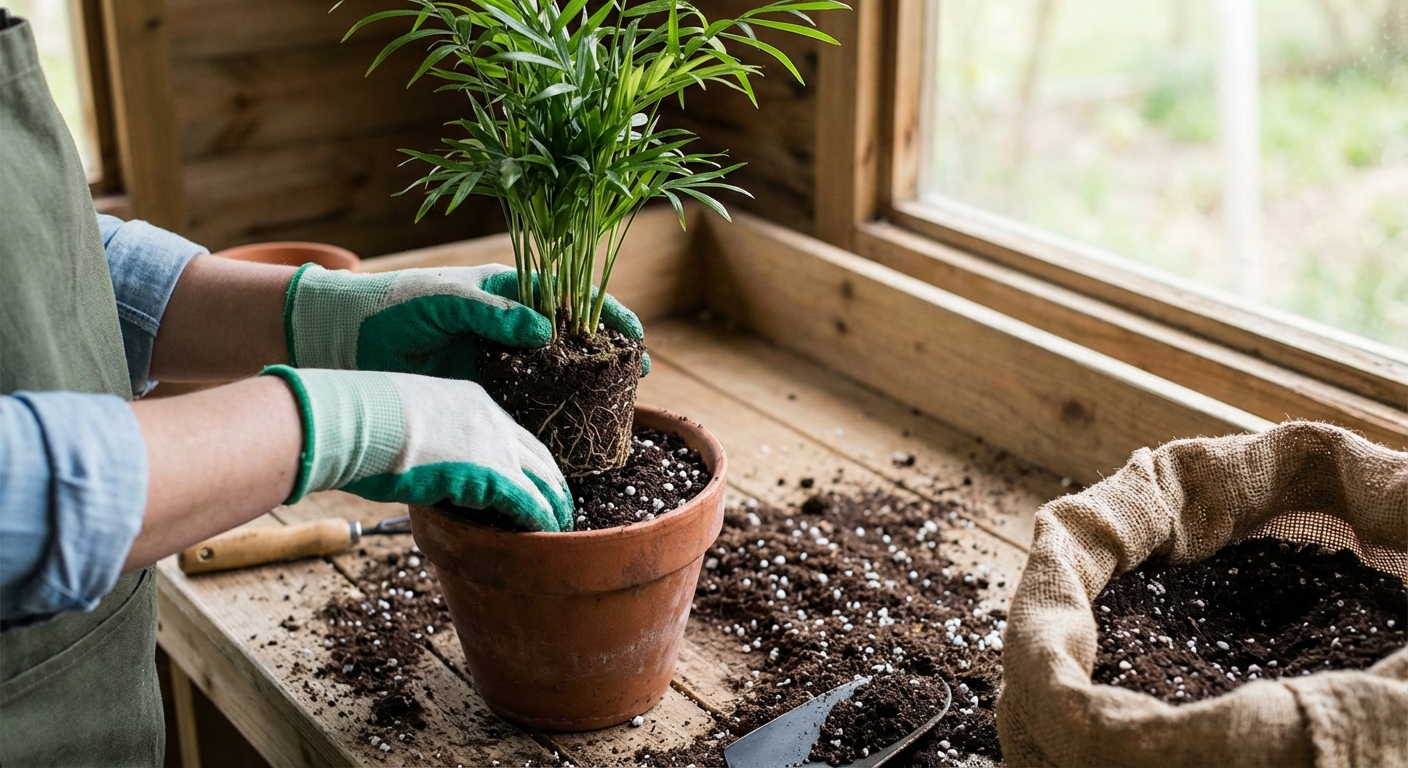
Repotting
Parlor palms like stability, so repotting is an occasional task, not a yearly ritual.
- When: about every 2 to 3 years, or when you see roots crowding the pot and drying out faster than usual.
- Best time: spring or early summer.
- How much bigger: go up one pot size, not a giant jump. Too much extra soil can stay wet too long.
Fertilizing
Parlor palms are light feeders. Too much fertilizer can burn roots and worsen brown tips.
- When: spring through early fall.
- How often: about once a month at half strength, or use a gentle slow-release fertilizer according to label directions.
- When to skip: in winter, or when the plant is stressed from a move, repot, or pest issue.
Growth expectations
Parlor palms are slow growers. That is not a problem, it is part of their charm. In average indoor conditions, you may only see a handful of new fronds in a year.
New growth often appears as a slender spear that slowly unfurls into a frond. Be patient with that process. If it is green and gradually moving along, it is doing its job.
If you want slightly faster growth, your best tools are brighter indirect light and consistent watering, not extra fertilizer.
Pruning
Think of pruning as cleanup, not styling.
- Brown tips will not turn green again, so trimming is mainly for looks. Use clean scissors and follow the natural shape of the leaflet. Leave a tiny brown edge instead of cutting into green tissue.
- Remove fully yellow or brown fronds by cutting the stem near the base of the plant. Do not cut healthy green stems just to “make it fuller.”
Common problems
Brown leaf tips
Brown tips are the number one beginner panic point. The good news is that a few brown tips are common and not a plant emergency.
Most common causes:
- Dry indoor air
- Inconsistent watering, especially letting the soil dry out too far
- Mineral buildup from hard tap water or excess fertilizer
- Too much direct sun
What to do:
- Trim tips with clean scissors, following the natural shape of the leaf. Leave a tiny brown edge instead of cutting into green tissue.
- Water when the top layer is dry, and avoid extremes.
- If your water is very hard, try using filtered water occasionally, and flush the soil every couple of months by watering thoroughly until it drains freely.
- Move the plant out of direct sun.
Yellowing fronds
One older frond yellowing now and then can be normal. Multiple fronds yellowing quickly is usually a care clue.
- Most often: overwatering or poor drainage.
- Also possible: too much sun, cold stress, or underwatering if the soil is frequently bone dry.
Check the soil moisture and make sure the pot drains freely. If the mix stays wet for many days, consider repotting into a better-draining soil.
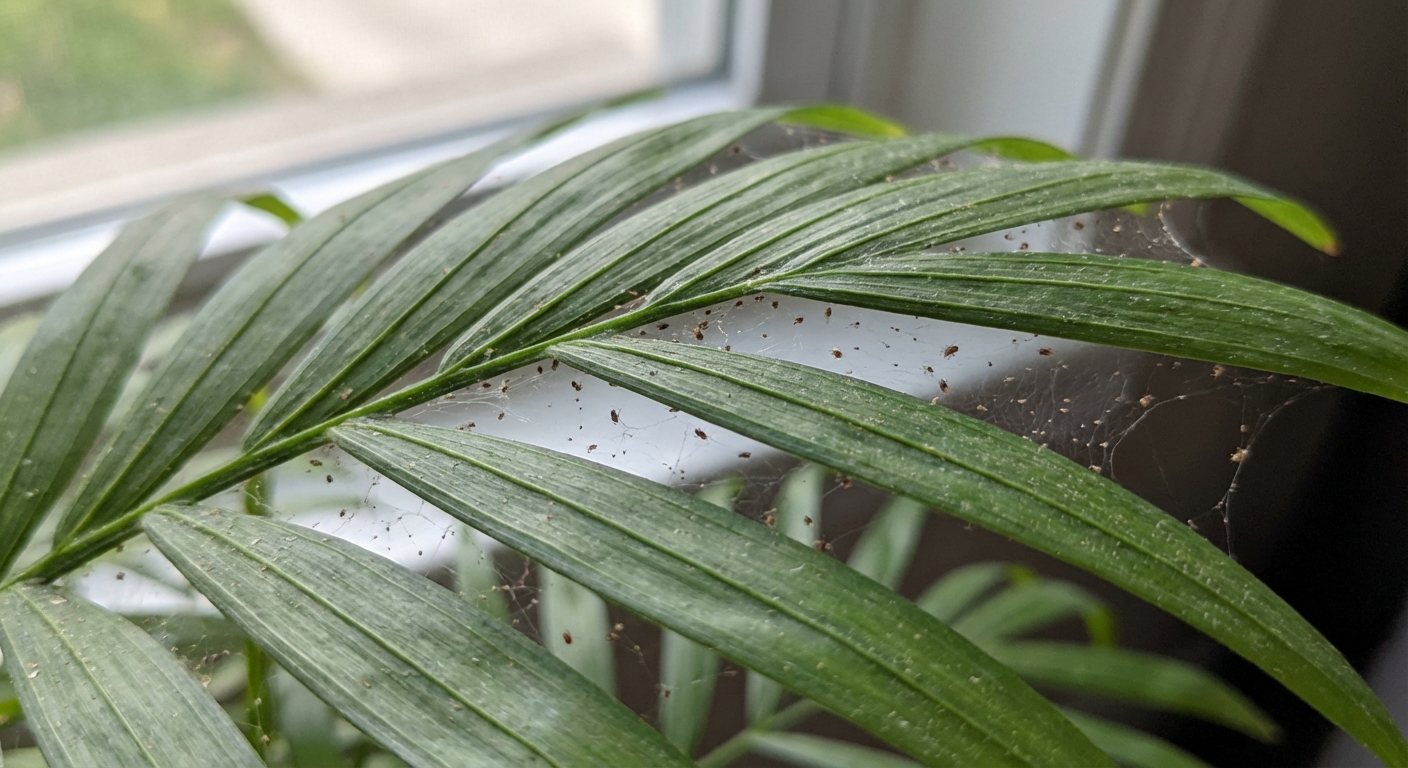
Spider mites
Spider mites love dry indoor air and dusty leaves. They are tiny, but the damage shows up as stippling or a dull, speckled look on fronds, plus fine webbing when an infestation is strong.
How to confirm: Hold a white paper under a frond and gently tap. If you see tiny moving dots, you likely have mites.
What to do:
- Rinse the plant in the shower or sink, focusing on the undersides of fronds.
- Wipe leaves gently to remove dust and pests.
- Treat with insecticidal soap or horticultural oil, repeating every 5 to 7 days for a few rounds to catch new hatchlings.
- Increase humidity a bit and keep the plant out of hot, dry drafts.
Mealybugs and scale
If your palm has sticky residue, cottony clumps, or little brown bumps along the stems, you may be dealing with mealybugs or scale.
- First step: isolate the plant and wipe what you can with a cotton swab dipped in rubbing alcohol (test a small spot first).
- Then: follow up with insecticidal soap or horticultural oil, repeating weekly for a few rounds.
Simple routine
If you like a calm, low-effort rhythm, here is what I recommend:
- Once a week: check soil moisture with your finger and water only if the top layer is dry.
- Every 2 weeks: rotate the pot a quarter turn for even growth.
- Once a month: wipe dust from fronds with a damp cloth and do a quick pest check (undersides, stems, and where fronds meet the base).
- Spring to early fall: fertilize lightly once a month, if the plant is actively growing.
And if you forget for a bit, do not spiral. Parlor palms are steady little companions. Give it a drink, adjust the light if needed, and let it recover at its own pace.