Overwintering Geraniums
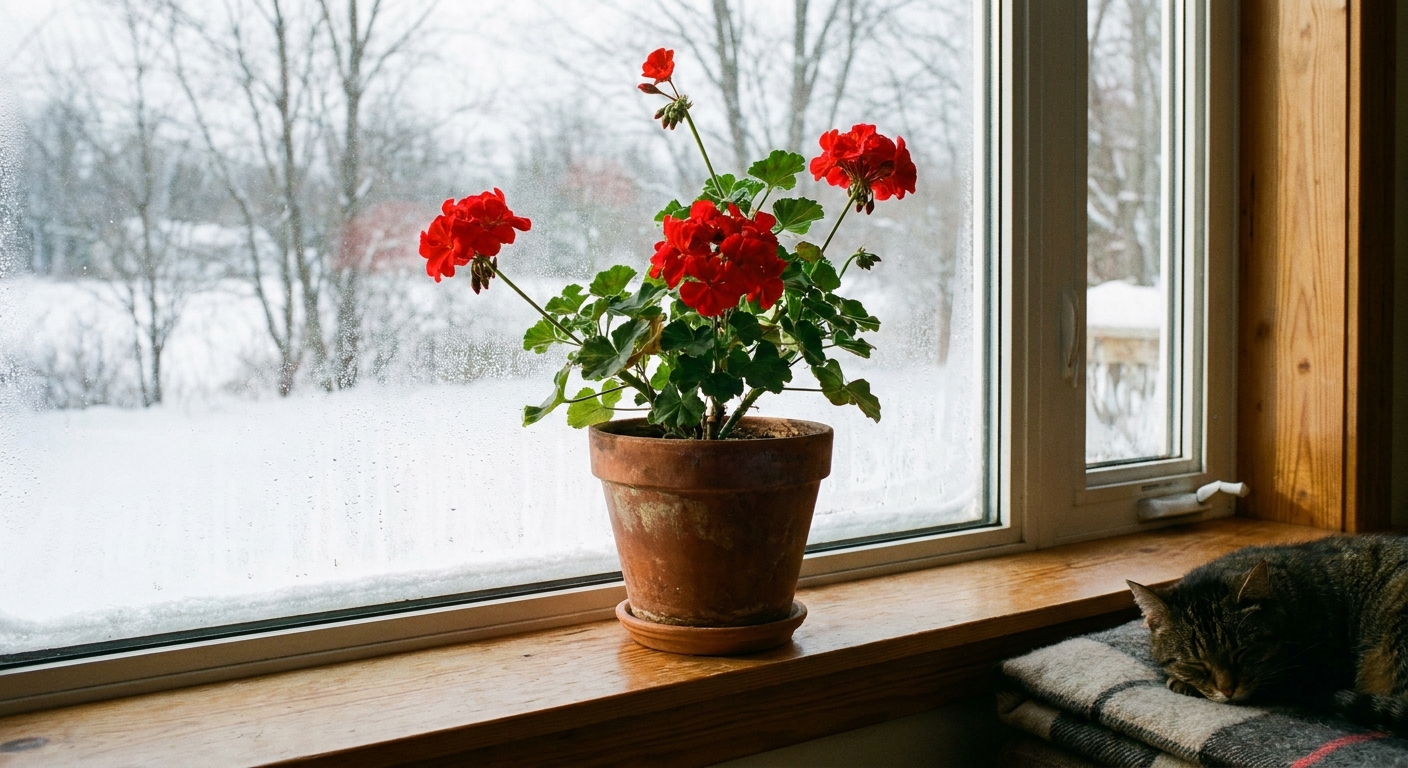
Geraniums are the chatty, generous friends of the summer garden, blooming their hearts out until the very night frost finally shows up uninvited. The catch is that most “geraniums” we grow in pots and beds are actually Pelargoniums, which are tender perennials. (True hardy geraniums are in the genus Geranium, and they’re a different, cold-tough group entirely.) In many climates, pelargoniums won’t survive winter outdoors.
The good news is you can absolutely save them, and you don’t need a greenhouse. Over the years, I’ve overwintered geraniums three different ways depending on my space, my mood, and how much I wanted to baby them. Below are the methods that work, what each one asks of you, and how to wake plants up in spring without panic.

Before you start: timing, zones, and what you’re saving
When to act: Start your overwintering plan before a hard freeze. Light frost might nip leaves, but once the stems freeze solid, the game’s over. I aim to bring plants in when nights consistently dip into the low 40s °F (4 to 6 °C), and I keep an eye on the first frost date like it’s a calendar appointment.
Zone reality check:
- USDA Zones 3 to 7: Plan to bring geraniums in. Outdoor survival is unlikely.
- Zones 8 to 10: Pelargoniums may overwinter outdoors in protected spots in the warmer parts of these zones, but freezes can still kill them. Containers, especially, benefit from shelter during cold snaps.
- Zone 11: You’re basically living in geranium heaven. Your winter job is mostly pruning and pest control.
What types work best: Zonal and ivy geraniums overwinter easily. Regal (Martha Washington) types can be fussier indoors because they want brighter light and cooler temps. Scented geraniums often do great inside if you can give them sun.
Quick chooser: pick a method that fits your space
- Method 1: Bare-root, cool dark storage is best if you have cool space (35 to 50 °F) and want the lowest maintenance.
- Method 2: Active indoor plants is best if you have a very bright window or grow lights and you want blooms or lush greenery all winter.
- Method 3: Dormant pots with minimal water is best if you can keep pots cool with some light and want a middle ground with less fuss than full indoor growing.
If you have a lot of plants, you can mix methods. I often keep one “favorite” actively growing for winter cheer, and I store the rest dormant so I’m not running a full indoor jungle operation.
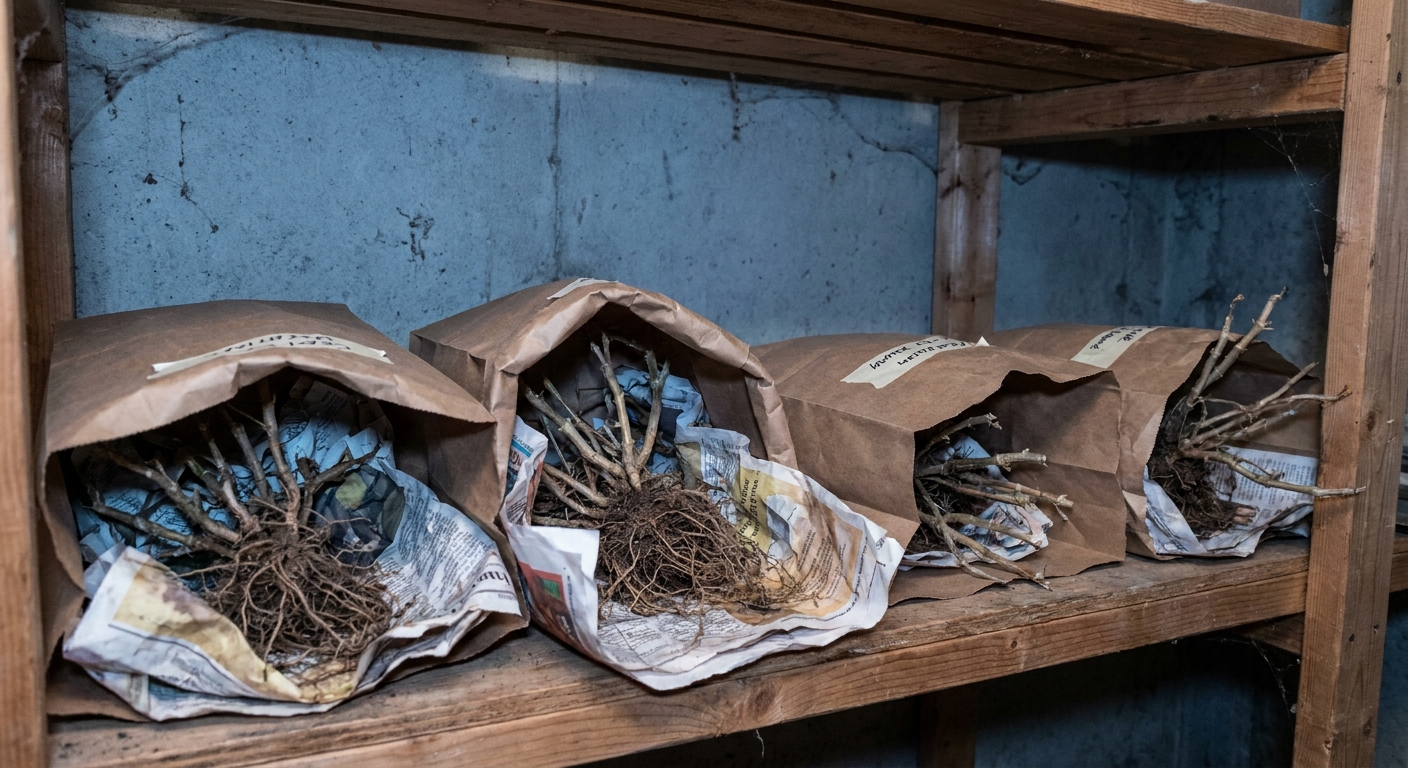
Method 1: Bare-root storage in cool, dark conditions
This is the classic old-school approach, and it’s shockingly effective. The plant basically naps through winter with no soil. It also sidesteps a lot of indoor pest issues because you’re not bringing pots of soil inside.
What you need
- A cool, dark spot: 35 to 50 °F is ideal (unheated basement, cellar, attached garage that stays above freezing)
- Paper bags, cardboard box, or newspaper
- Pruners and rubbing alcohol for disinfecting
Step-by-step
- Dig before the hard freeze. Lift the plant with a generous root ball.
- Shake off most soil. Gently remove soil from the roots. You don’t need to scrub them spotless, just get the clumps off.
- Trim the plant back. Cut stems to about 6 to 8 inches. Remove leaves and any soft, damaged growth.
- Let roots dry briefly. Lay plants out for a few hours so the surface dries. Keep them out of direct sun. This helps reduce rot.
- Store. Place plants upside down in paper bags or wrap loosely in newspaper, then set them in a box in the cool dark area. Good air circulation matters. Avoid sealed plastic.
Monthly checks
Once a month, do a quick “plant wellness check.”
- Look for rot: blackened stems, mushy tissue, sour smell. Trim back to firm green tissue, and discard seriously rotten plants.
- Look for excessive shriveling: if stems are wrinkled like raisins, mist roots lightly. Only if the plant is severely shriveled, soak roots for 30 to 60 minutes, then let them dry again before returning to storage.
Tradeoffs
- Pros: minimal space, minimal light needed, low pest risk
- Cons: plants can look rough in spring, some loss is normal, not great if your only storage area is warm
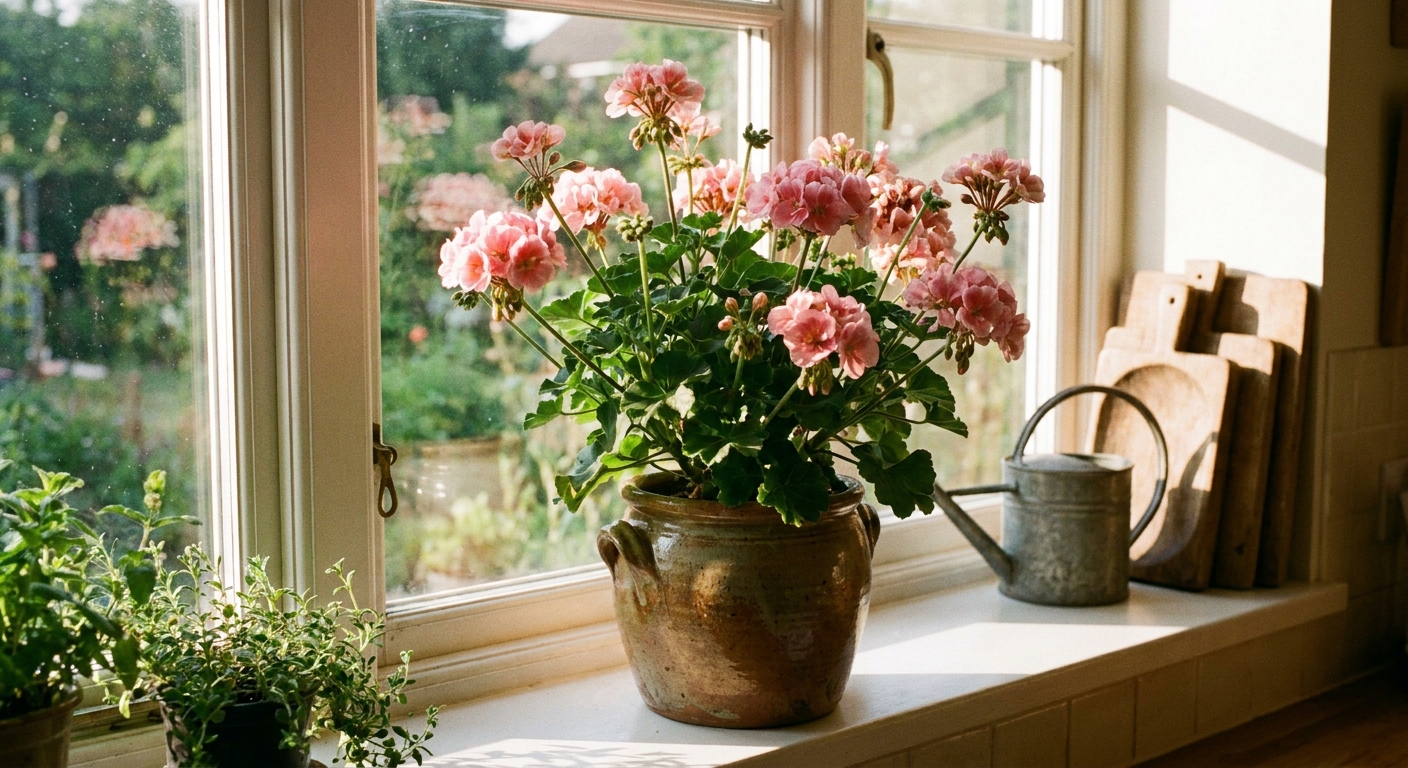
Method 2: Grow them indoors as houseplants
If you love seeing green in January and you can offer bright light, this method is wonderfully satisfying. You’re basically converting your patio plant into a temporary houseplant.
What you need
- A sunny south or west window, or grow lights (12 to 14 hours per day works beautifully)
- Clean pots with drainage holes
- Fresh potting mix (not garden soil)
Step-by-step
- Inspect outside first. Check stems and leaf undersides for aphids, whiteflies, spider mites, and mealybugs. Also check for hitchhikers like caterpillars or budworms, especially if you’ve had chewed buds or leaves.
- Rinse and isolate. A firm shower spray helps knock pests off. Then quarantine the plant away from other houseplants for 10 to 14 days.
- Prune lightly. Trim leggy growth by about one third. You want a compact shape that can fit near the window.
- Repot if needed. If the pot is crowded with roots, size up by 1 to 2 inches. Use fresh potting mix to reduce fungus gnat headaches. If you’re keeping the same pot, it also helps to scrape off and replace the top inch of old soil.
- Give maximum light. Rotate the pot weekly so it doesn’t lean.
Winter care tips
- Water: Let the top inch of soil dry, then water thoroughly, and empty the saucer. Overwatering is the fastest way to invite root rot.
- Temperature: Aim for comfortable indoor temps, but don’t be afraid of cooler. Roughly 60 to 70 °F days are fine, and if you can manage 50s to 60s with strong light, you’ll often get sturdier growth and fewer pests.
- Feeding: Go easy. If growth is slow, skip fertilizer until late winter. If it’s actively growing under lights, a diluted balanced fertilizer once a month is plenty.
- Pinching: Pinch soft tips occasionally to encourage branching.
Tradeoffs
- Pros: attractive all winter, easiest spring transition, you can take cuttings anytime
- Cons: needs strong light, higher pest risk indoors, takes up prime windowsill real estate
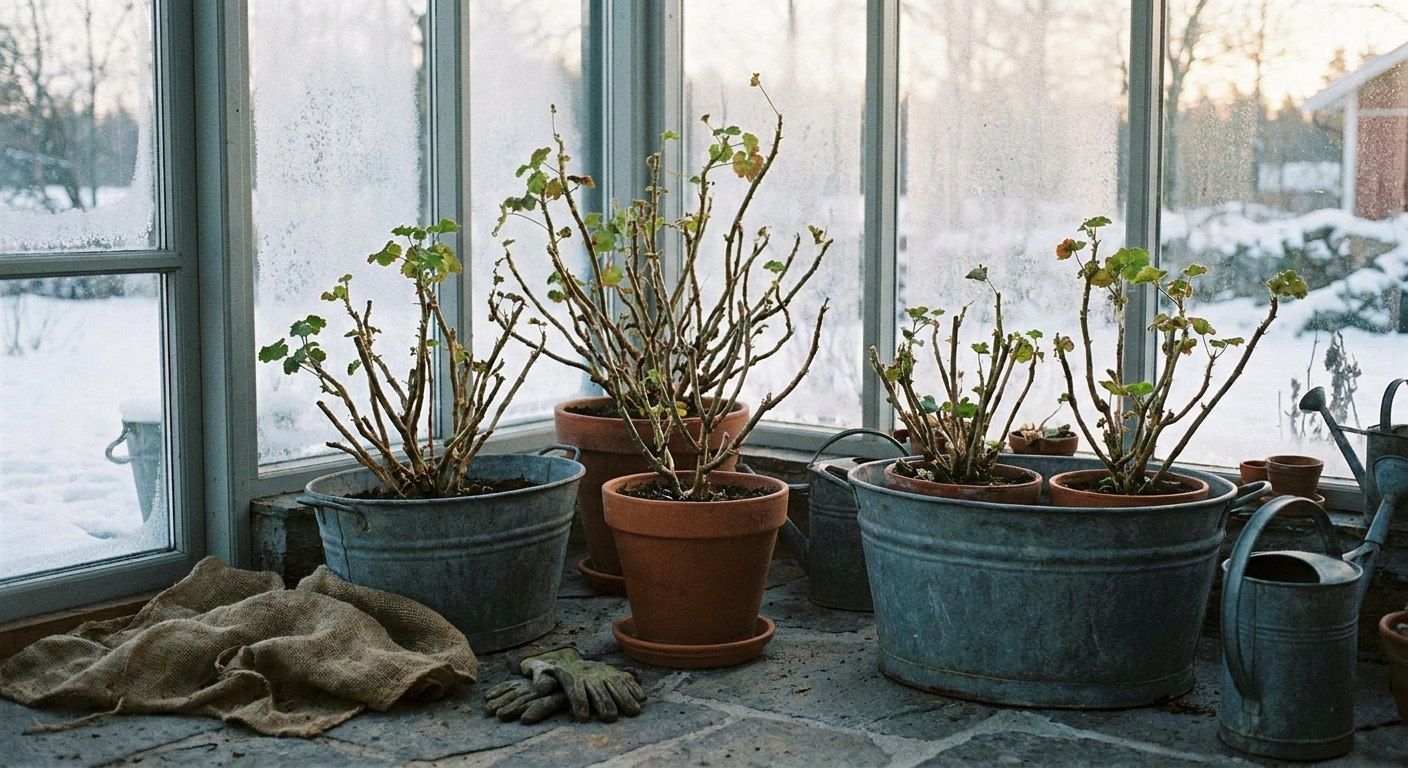
Method 3: Keep pots cool and mostly dormant
This is my practical compromise method. You keep the plant in its pot, cut it back, and tuck it somewhere cool where it can rest. It’s not pitch-black storage like bare-root. It’s more like a quiet corner nap.
Where this works best
- An unheated guest room with a bright window
- A cool enclosed porch that stays above freezing
- A basement window area with daylight
Ideal temperature is 45 to 60 °F. Warmer than that and the plant will try to grow, which means it’ll also demand light.
Step-by-step
- Cut back. Reduce the plant by about one half. Remove flowers and any weak, skinny stems.
- Clean up. Remove fallen leaves from the soil surface. This is a big disease prevention step.
- Move to cool storage. Place pots where they get a bright window or bright, indirect light, and keep them cool.
- Water very sparingly. Give a small drink only when the soil is bone dry. For a lot of homes, that’s every 4 to 6 weeks.
Tradeoffs
- Pros: simplest setup, no digging, less light needed than active growth
- Cons: too much water causes rot, too much warmth causes weak growth, you can still bring pests indoors with the soil
Disease and pest checks
Overwintering is less about luck and more about not inviting trouble to move in for the season.
Common issues to watch for
- Botrytis (gray mold): fuzzy gray growth on leaves or stems, often in humid stagnant air. Remove affected parts, improve airflow, and avoid misting foliage indoors.
- Rust: orange or brown spots, often on the undersides of leaves. Remove infected leaves, and keep plants less crowded.
- Root rot: droopy plant with wet soil, dark mushy roots. Let soil dry more between waterings, and use a well-draining mix.
- Whiteflies and aphids: sticky residue, tiny insects on new growth. Rinse plants, use insecticidal soap as needed, and quarantine.
- Spider mites: stippled leaves and fine webbing, often in dry indoor air. Rinse foliage, improve airflow, and repeat rinsing or soap treatments. A little extra humidity can help, but don’t turn the room into a damp, stagnant cave.
My golden rule: If a plant is heavily infested, it’s okay to let it go. Overwintering should feel like saving friends, not running a hospital ward.
How to wake them up in spring
The biggest spring mistake is rushing. Your plants have been resting, and they need a gentle on-ramp back to sunshine and normal watering.
Spring timeline
- 8 to 10 weeks before last frost: wake up bare-root plants, or start increasing light and water for dormant potted plants
- 2 to 4 weeks before last frost: begin hardening off active indoor plants on mild days
- After danger of frost: move outside for good
Waking bare-root plants
- Soak roots in room-temperature water for 30 to 60 minutes.
- Pot up in fresh potting mix. Plant at the same depth as before, and water thoroughly.
- Cut back to healthy tissue if tips are dry. Green inside the stem is your sign of life.
- Bright light, not blazing heat. A sunny window or lights are perfect.
- Pinch once new growth reaches a few inches to encourage branching.
Waking dormant potted plants
- Increase watering gradually. Start with a modest drink, then return to normal watering as growth resumes.
- Refresh the soil. Top-dress with fresh potting mix, or repot if roots are dense.
- Prune for shape. Remove weak stems, and aim for an open, airy structure.
Hardening off
Indoor leaves are tender. Give plants 7 to 10 days to adjust.
- Day 1 to 3: bright shade outdoors for a few hours, then bring back in
- Day 4 to 7: morning sun, then shade
- After: longer sun exposure as temps stay mild
For the happiest growth, I also like to wait until night temps are reliably above about 50 °F. They’ll survive cooler, but they don’t exactly thrive in a cold sulk.

Frequently asked questions
Can I overwinter geraniums by taking cuttings?
Yes, and it’s a fantastic backup plan. If you’re short on space, take a few 3 to 4 inch cuttings before frost, let the cut ends callus for 12 to 24 hours, then root them in a light mix. Keep the mix barely moist (not soggy), and grow them on a bright windowsill. You may not save the mother plant, but you’ll save the genetics and the color you loved.
Do I have to wash the roots for bare-root storage?
Nope. Just shake off the excess soil. The goal is to reduce moisture and prevent rot, not to make the roots spotless.
Why are my overwintered geraniums leggy?
Legginess is almost always a light issue. Move it closer to a bright window, add a grow light, and pinch tips to encourage branching.
A gentle final nudge
If you’ve ever felt nervous about “getting it right,” let me reassure you: overwintering geraniums is forgiving. Choose the method that fits your home, expect a little cosmetic ugliness, and celebrate the moment you spot that first fresh green bud in late winter. That’s the plant telling you, quietly and confidently, “I made it.”