Overwintering Elephant Ears
Elephant ears are the drama queens of the garden in the very best way. Those huge, velvety leaves make everything feel tropical, even if your zip code is more “frost warning” than “rainforest.” The good news is you do not have to treat them like expensive annuals. With a little fall timing and a calm, methodical storage routine, you can overwinter elephant ears and bring them back even bigger next year.
Quick safety note: Elephant ear sap can irritate skin (and eyes). Gloves are a good idea when cutting and digging, and wash up after.

Colocasia vs. Alocasia
Garden centers often label everything as “elephant ear,” but the genus affects how the plant behaves and how you overwinter it.
Quick ID clues
- Colocasia (taro types): leaves often point downward or outward; many varieties love wet feet and can handle boggier soil in summer. They grow from a corm (often called a tuber) and usually produce little side corms called cormels.
- Alocasia: leaves often point more upward; stems can look a bit more upright and “architectural.” Many prefer evenly moist soil, not soggy. Some types form corms and offsets, and some behave more like houseplants than true outdoor bulbs.
Hardiness basics
Most elephant ears are not reliably hardy in freezing winters. In broad terms, many colocasias are only root-hardy in roughly USDA Zone 7 or 8 and warmer (often with protection), while alocasias are generally less cold-tolerant.
If you live in a warm zone where the ground barely freezes, you might overwinter some types in place with thick mulch. For everyone else, digging and storing is the safest path to repeat performances.
Important Alocasia note
Some alocasias are more chill-sensitive in storage. If yours has acted like a houseplant all summer (or you are unsure what you have), consider overwintering it as a growing plant indoors instead of storing it bone-dry. There is a simple option for that later in this guide.
When to dig
For the easiest overwintering, let the plant tell you when it is ready.
- After the first light frost: The leaves may blacken or collapse. That is your cue that top growth is done for the season.
- Before a hard freeze: Try to dig before the ground freezes solid. Frozen soil makes digging rough and can injure the corm.
I aim for a day when the foliage has been nipped, but the soil is still workable and not waterlogged. If you get a surprise early freeze, you can dig earlier. Just expect the plant to be greener and a bit juicier, so curing becomes even more important.
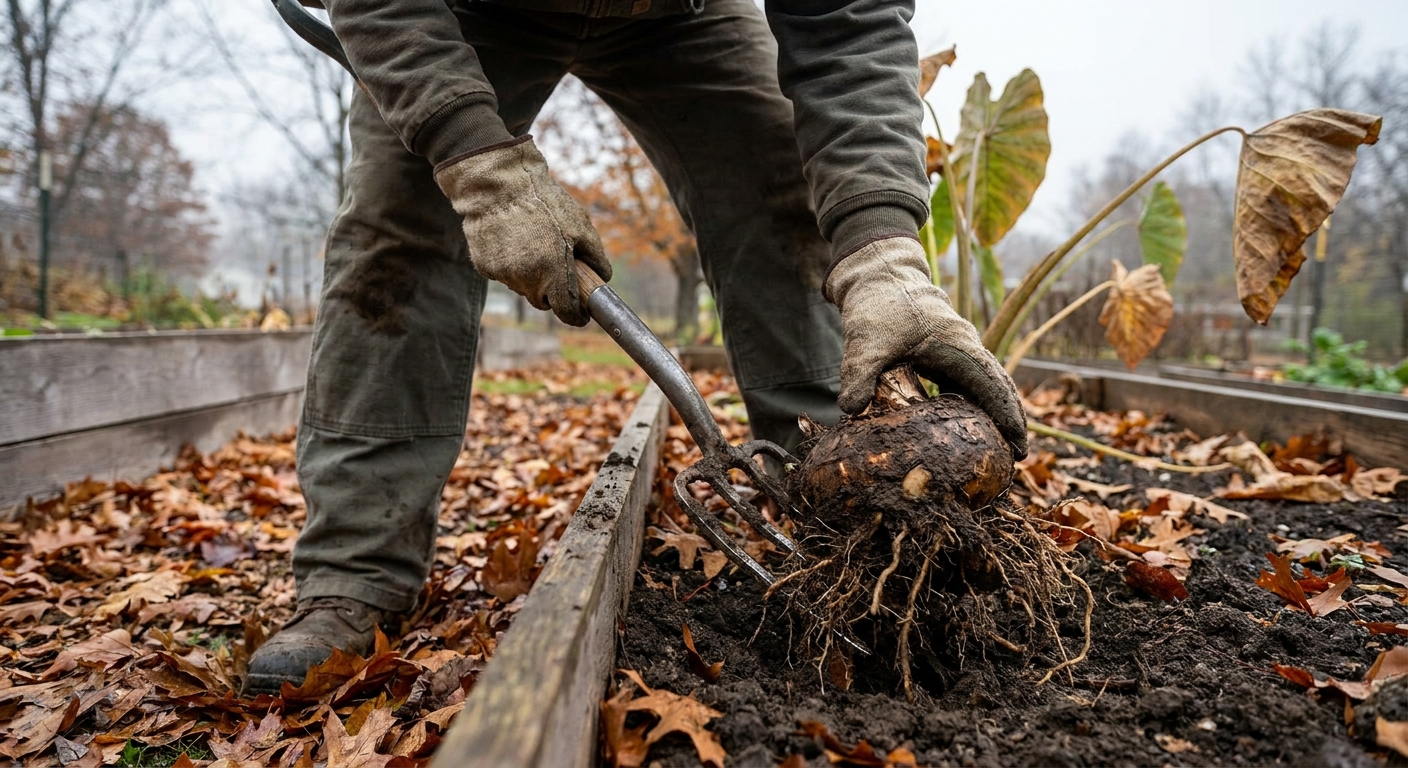
How to dig corms
Elephant ear corms are tough, but nicks and cuts invite rot in storage. Slow and steady wins here.
Step-by-step
- Cut back foliage: After frost, trim stems to about 2 to 6 inches above the corm. If the plant is still green and you are digging early, you can cut foliage back anyway to reduce mess and moisture.
- Loosen the soil wide: Start 8 to 12 inches away from the base. Use a garden fork if you have one. It is gentler than a shovel.
- Lift from underneath: Pry up the root ball and lift the clump out. Expect a hefty, muddy football.
- Shake and brush: Knock off loose soil. Avoid washing if possible because wet corms take longer to cure. If you must rinse clay-packed soil, do it quickly and plan on extra drying time.
- Save the babies: Look for small cormels attached to the mother corm. Those are your “free plants” for next year.
- Label: If you grow more than one variety, add a tag now (name, color, where it was planted). In spring, you will thank your past self.
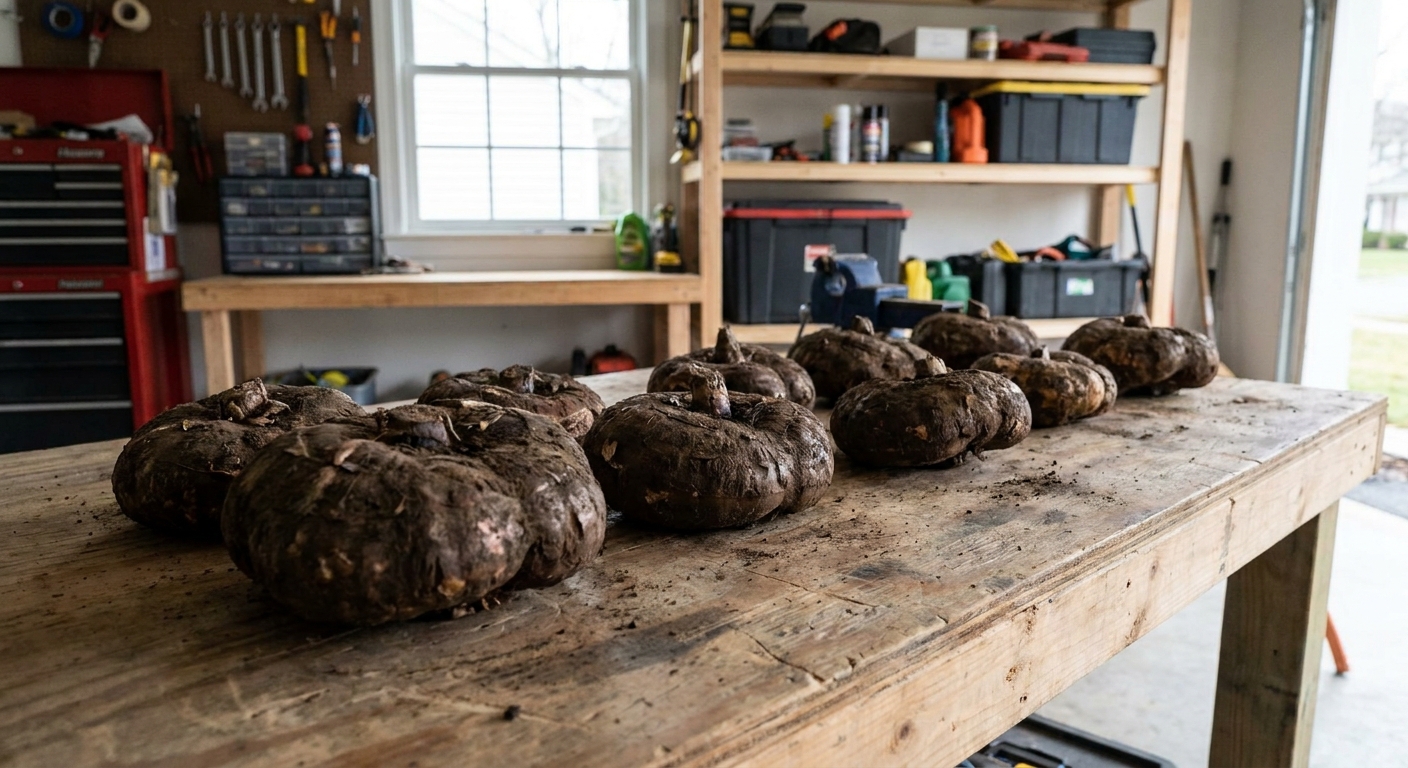
Curing
Curing is simply drying the outer surface so it can form a protective skin. Skip this step and you are basically tucking a damp potato into a box and hoping for the best.
How to cure
- Location: a dry, airy spot out of direct sun, like a garage, shed, covered porch, or basement with a fan.
- Temperature: roughly 60 to 75°F is ideal.
- Time: usually 3 to 7 days. Very large corms can take a bit longer.
- How to set them: single layer on newspaper or cardboard so air can circulate.
You will know they are ready when the outside feels dry and papery, not cool and damp. If the cut stem top still looks wet, give it another day.
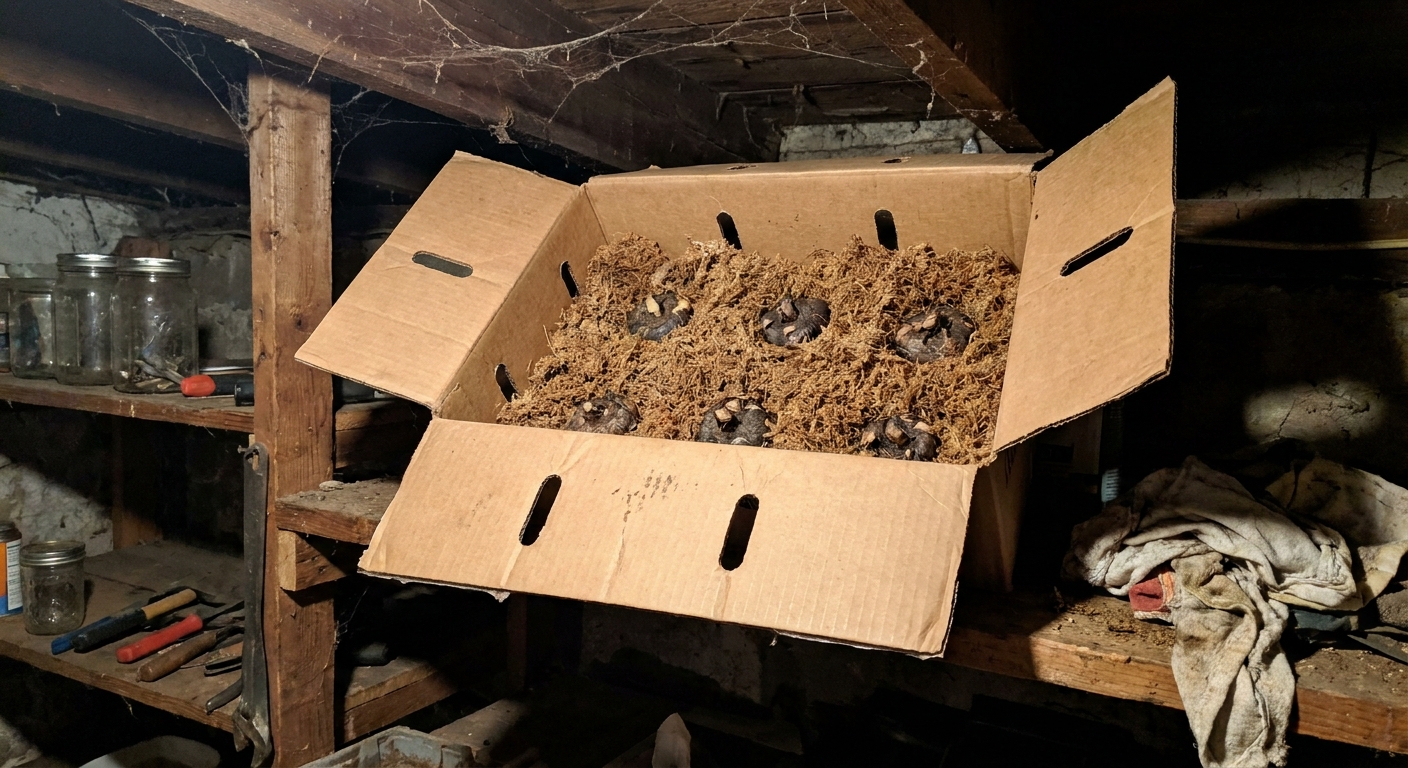
Storage basics
Your goal is simple: keep corms cool, dark, and barely dry. Too wet invites rot. Too dry can shrivel them beyond recovery.
Best packing media
- Dry peat moss: classic choice, lightweight, helps buffer moisture.
- Coco coir : a more sustainable alternative to peat; use it dry and fluffy.
- Vermiculite: holds a little humidity without staying soggy.
- Sawdust: works if it is dry and clean, but avoid aromatic cedar and anything treated.
Containers that work
- Cardboard boxes with ventilation holes
- Milk crates lined with paper
- Paper bags set inside a larger bin to keep things tidy
What to avoid
- Sealed plastic bins: they trap moisture and encourage mold.
- Wet packing material: it is almost always a rot problem waiting to happen.
- Warm closets: too warm can trigger early sprouting and weak growth.
Ideal temp and humidity
Elephant ear corms store best in a cool, stable place, but exact comfort zones can vary by species and cultivar.
- Colocasia storage temperature: aim for 45 to 55°F.
- Alocasia storage temperature: some handle similar temps, but many do better a bit warmer, around 50 to 60°F, to avoid chill damage.
- Humidity: moderate. You want the corms to stay firm but not damp.
If your storage space runs warmer, it can still work, but you will need to check more often for sprouting and moisture issues.
Monthly checks
Think of winter storage like checking on pantry potatoes. You are not cooking dinner, you are just making sure nothing is turning into a science project.
Once a month, do this
- Open the box and sniff. A musty smell is your first warning sign.
- Inspect each corm: it should feel firm and solid.
- Remove problems immediately: one rotten corm can spread trouble fast.
If you find mold
- Brush it off gently and let the corm air-dry for a day.
- If a spot is soft, cut it out with a clean knife.
- Dust the cut with sulfur powder (standard), or if you are a “use what you have” gardener, a light sprinkle of cinnamon as an optional home remedy. Then re-cure briefly before re-packing.
If corms are shriveling
Shriveling means your environment is too dry. Add a tiny bit of humidity by mixing in a small amount of barely damp coir or peat, or place a loosely folded paper towel nearby that is just barely moist. You are aiming for “barely,” not “wet.”
Spring wake-up
You have two good routes in spring. Choose based on your growing season and how soon you want those big leaves back.
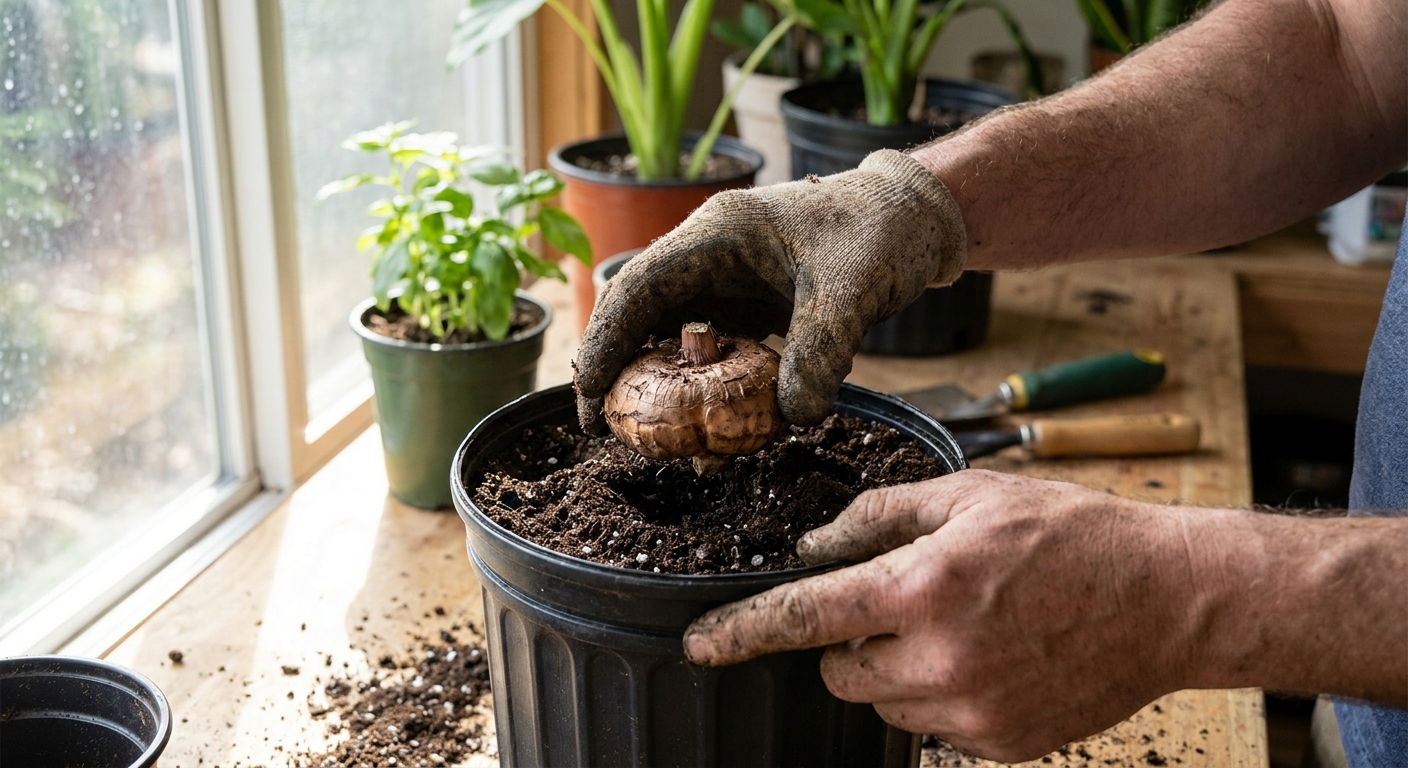
Option 1: Pot up early
This is my favorite for short growing seasons. Start 4 to 8 weeks before your last expected frost .
- Inspect stored corms and discard any that are soft, hollow, or smell off.
- Find the growing point: look for a bumpy “eye” or a stem scar on top. If you cannot tell, plant the corm on its side. It will sort itself out.
- Choose a pot with drainage holes. A 1 to 3 gallon pot is usually fine to start.
- Use a light potting mix, not heavy garden soil.
- Plant depth: set the corm with the growing point up, and cover with about 2 to 4 inches of mix.
- Water lightly to settle the mix, then wait until you see growth before watering more regularly.
- Give warmth and light: 70°F-ish and bright light. A sunny window works, but a grow light helps prevent leggy stems.
- Pest check: if you are starting indoors, keep an eye out for hitchhikers like spider mites or mealybugs, especially on alocasias.
Once nights are reliably warm and frost is truly done, harden them off and move them outside gradually.
Option 2: Plant outdoors
If you have a longer season or do not want to fuss with indoor pots, you can plant corms once the soil is warm. Elephant ears hate cold soil.
- Wait until nighttime temperatures stay above about 50°F.
- Soil warmth: if the soil still feels chilly to your hand, hold off another week.
- Plant depth: 2 to 4 inches deep for most corms, deeper for very large ones.
Option 3: Keep Alocasia growing
If your alocasia hates going fully dormant (or you simply want to keep it as a houseplant), bring it inside before frost and let it coast through winter.
- Light: bright light near a window or under a grow light.
- Water: reduce watering, but do not let it sit bone-dry for long stretches.
- Temperature: keep it comfortably warm, away from cold drafts.
- Pests: inspect and treat before it joins your other plants indoors.
Even with good care, it might slow down or drop a leaf or two. That is normal.
Where to plant
Elephant ears are generous plants. Give them what they love and they repay you in sheer leaf size.
- Light: many varieties prefer morning sun and afternoon shade, or bright shade. Some take full sun with consistent water.
- Soil: rich, moisture-retentive, and well-draining. Compost is your best friend here.
- Water: steady moisture, especially in heat. Colocasia generally tolerates wetter conditions than alocasia.
- Feeding: a balanced organic fertilizer or compost top-dress during active growth helps keep leaves lush.
Troubleshooting
My corm is firm but will not sprout
Be patient. Some elephant ears wake slowly. Warmth is often the missing piece. Move potted corms to a warmer spot and keep soil barely moist.
It sprouted in storage
No panic. Pot it up. Handle the sprout gently, give it bright light, and treat it like an early start.
Soft spots keep appearing
Storage is too wet or too warm. Improve airflow, switch to drier packing media, and lower the temperature if possible.
I forgot to dig before a hard freeze
If the ground thawed and you can dig, try anyway. Sometimes corms survive brief cold snaps, especially with mulch, but rot risk is higher. Cure extra carefully and monitor often.
Rule of thumb
If you remember only one thing, let it be this: dry before you store, and check once a month. That simple rhythm prevents most winter losses.
And if you do lose a corm or two, do not take it personally. Gardening is a long conversation with the seasons. Some years, the winter answers back a little louder. Next spring, you try again, and your elephant ears will forgive you by unfurling fresh green flags like nothing ever happened.