Orchid Root Rot: Causes and Recovery
If you’ve ever lifted an orchid out of its pot and found a sad tangle of brown, mushy roots, you’re not alone. Root rot is one of the most common orchid problems I see, and it’s usually fixable when you catch it early. The trick is learning what you’re looking at, because orchids naturally have roots that look a little strange compared to typical houseplants.
Quick note: This guide is written mainly for common home orchids like Phalaenopsis (moth orchids). The basics apply broadly, but some orchids have different rhythms and root habits.
In this guide, we’ll sort out root rot vs crown rot, decode aerial roots, and walk through a calm, practical recovery plan you can do on your kitchen counter.

What root rot is
Orchid root rot is the breakdown and death of roots, usually caused by a combination of too much moisture and not enough air around the roots. Orchids like Phalaenopsis are epiphytes in nature, meaning their roots cling to trees with lots of airflow. When we keep them wet in dense, decomposed potting mix, the roots can suffocate and opportunistic fungi and bacteria move in.
Root rot often starts quietly. With Phalaenopsis, the plant can look okay for a while because it stores some water in its thick leaves and tissues, and it may still have a few working roots. By the time the plant looks thirsty, it may already have lost a big portion of its root system.
Root rot vs crown rot vs aerial roots
This is where most orchid panic begins, so let’s slow down and get specific.
Healthy roots in the pot
- Color: Silvery white to pale gray when dry, turning green shortly after watering.
- Texture: Firm, springy, and plump. The outer layer (velamen) looks intact.
- Smell: Neutral, fresh, earthy bark smell.
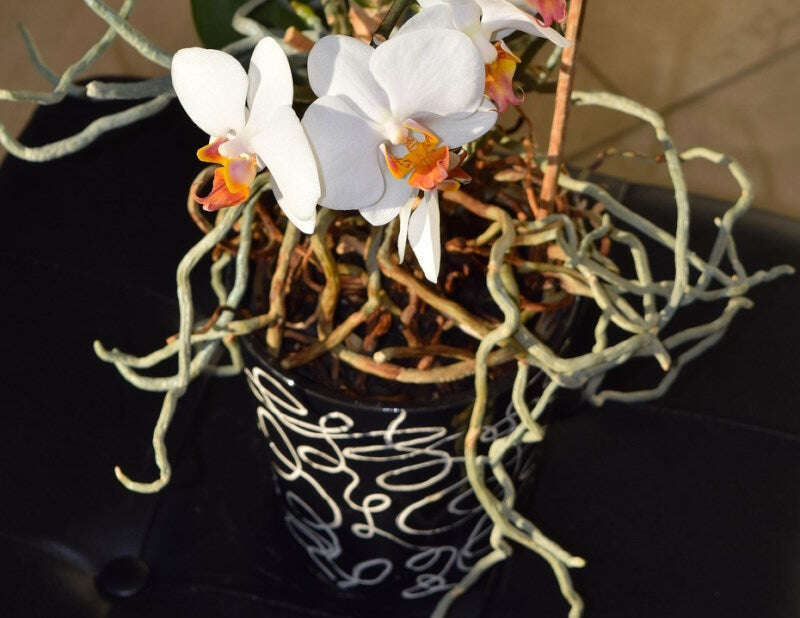
Healthy aerial roots (above the pot)
Aerial roots often look wrinkly or silvery and can twist in odd directions. That’s normal. They aren’t “escaping” because you’re a bad plant parent. They’re just doing orchid things.
- Color: Silvery, gray, or pale green. Green tips are a great sign of active growth.
- Texture: Firm. They may look dry but shouldn’t feel mushy.
- Important: Aerial roots can look rough or slightly flattened from low humidity, but they shouldn’t turn to goo.
Root rot (below the surface, most common)
- Color: Brown, tan, or blackened.
- Texture: Mushy, hollow, papery, or the velamen slips off leaving a thin stringy core.
- Smell: Sour, swampy, or “wet basement.”
- Plant symptoms: Limp, pleated, or wrinkled leaves; dehydration even right after watering; wobbling in the pot.
Crown rot (more urgent)
Crown rot starts at the center of the plant, where new leaves emerge. It’s often triggered when water sits in the crown, especially in cool or low-airflow conditions.
- Location: The crown and leaf bases, not primarily the roots.
- Signs: Black, soft tissue in the crown; leaves may pull out easily; a foul odor near the top of the plant.
- Why it matters: If the crown is compromised, the orchid may not be able to produce new leaves.
If you suspect crown rot, treat that as a separate emergency. Root rot and crown rot can happen together, but the fix and prognosis are different.
Why orchids get root rot
Root rot is rarely just one mistake. It’s usually a stack of small factors that keep roots wet too long.
- Overwatering: Watering on a schedule instead of watering based on dryness and root color.
- Old, broken-down potting media: Bark decomposes, holds more water, and reduces airflow.
- Poor drainage: No drainage holes or a cachepot that traps runoff water.
- Too large of a pot: Extra media stays wet longer, especially in cool seasons.
- Low airflow and cool temperatures: Media dries slowly, creating a rot-friendly environment.
- Hard water and fertilizer salt buildup: Roots get stressed and more vulnerable. You may see crusty white buildup on bark or pot edges.
- Buying an orchid already struggling: Many store orchids are packed tightly in moss and kept constantly moist for display.
My gentle rule of thumb: in many homes, if your orchid’s roots stay wet for longer than about a week, something likely needs adjusting. (Moss, cooler rooms, and oversized pots can stretch that timeline fast, while warm bright spots can dry a pot in just a few days.)
How to confirm root rot
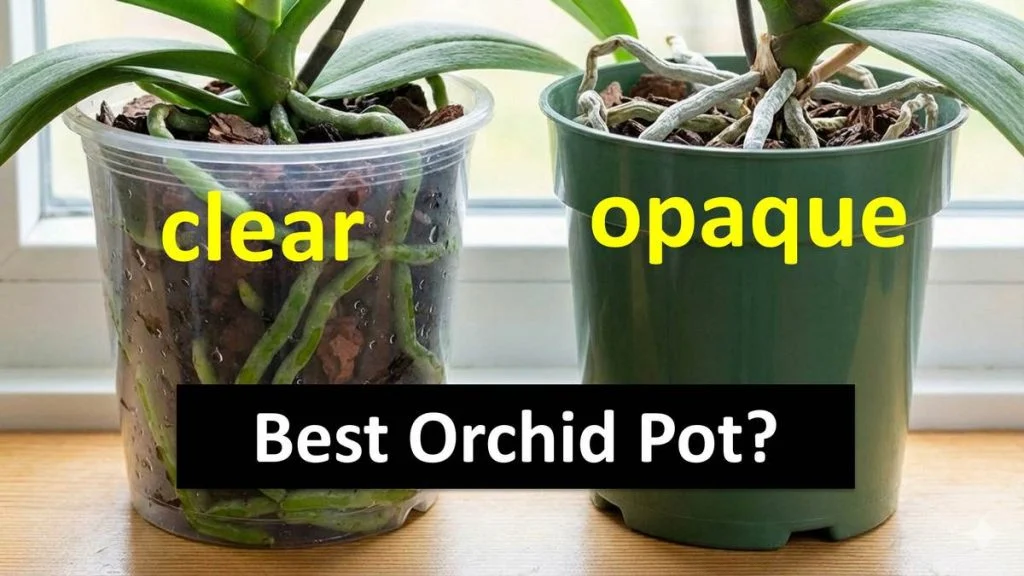
If you’re using a clear pot, you can often diagnose root issues before unpotting.
- Look through the pot: Healthy roots are firm and silvery or green. Rotting roots look dark, collapsed, or slimy.
- Check condensation: Constant foggy condensation inside the pot can mean the mix is staying too wet.
- Do the wobble test: A healthy orchid is anchored by roots and feels stable. A wobbly plant often has root loss.
- Smell the pot: If it smells sour or stagnant, trust your nose.
If you still aren’t sure, unpotting is the most reliable way to know what you’re dealing with, and it’s the first step to fixing it anyway.
Recovery plan
Set yourself up for success before you start. I like to do this in daylight, with a towel down, and a little bowl for trimmings. If your orchid could talk, it would probably ask for calm hands and clean tools.
1) Gather supplies
- Clean scissors, snips, or pruning shears
- Rubbing alcohol or soap and hot water for tool sanitation
- Fresh orchid medium (a bark mix is the most forgiving for beginners)
- A pot with plenty of drainage (clear plastic pots are great)
- Optional: a bamboo skewer to help position roots
- Optional: cinnamon (surface wounds only, use sparingly, and keep it out of the potting mix)
Tool hygiene (quick but important)
- Disinfect cutting tools before you start and between plants.
- Don’t reuse old, rotted media.
- If you’re dealing with a truly foul, spreading rot, wash the pot well and consider disinfecting it before reuse.
2) Unpot the orchid gently
Squeeze the sides of the pot to loosen roots. If roots are stuck, take your time. Ripping healthy roots sets recovery back.
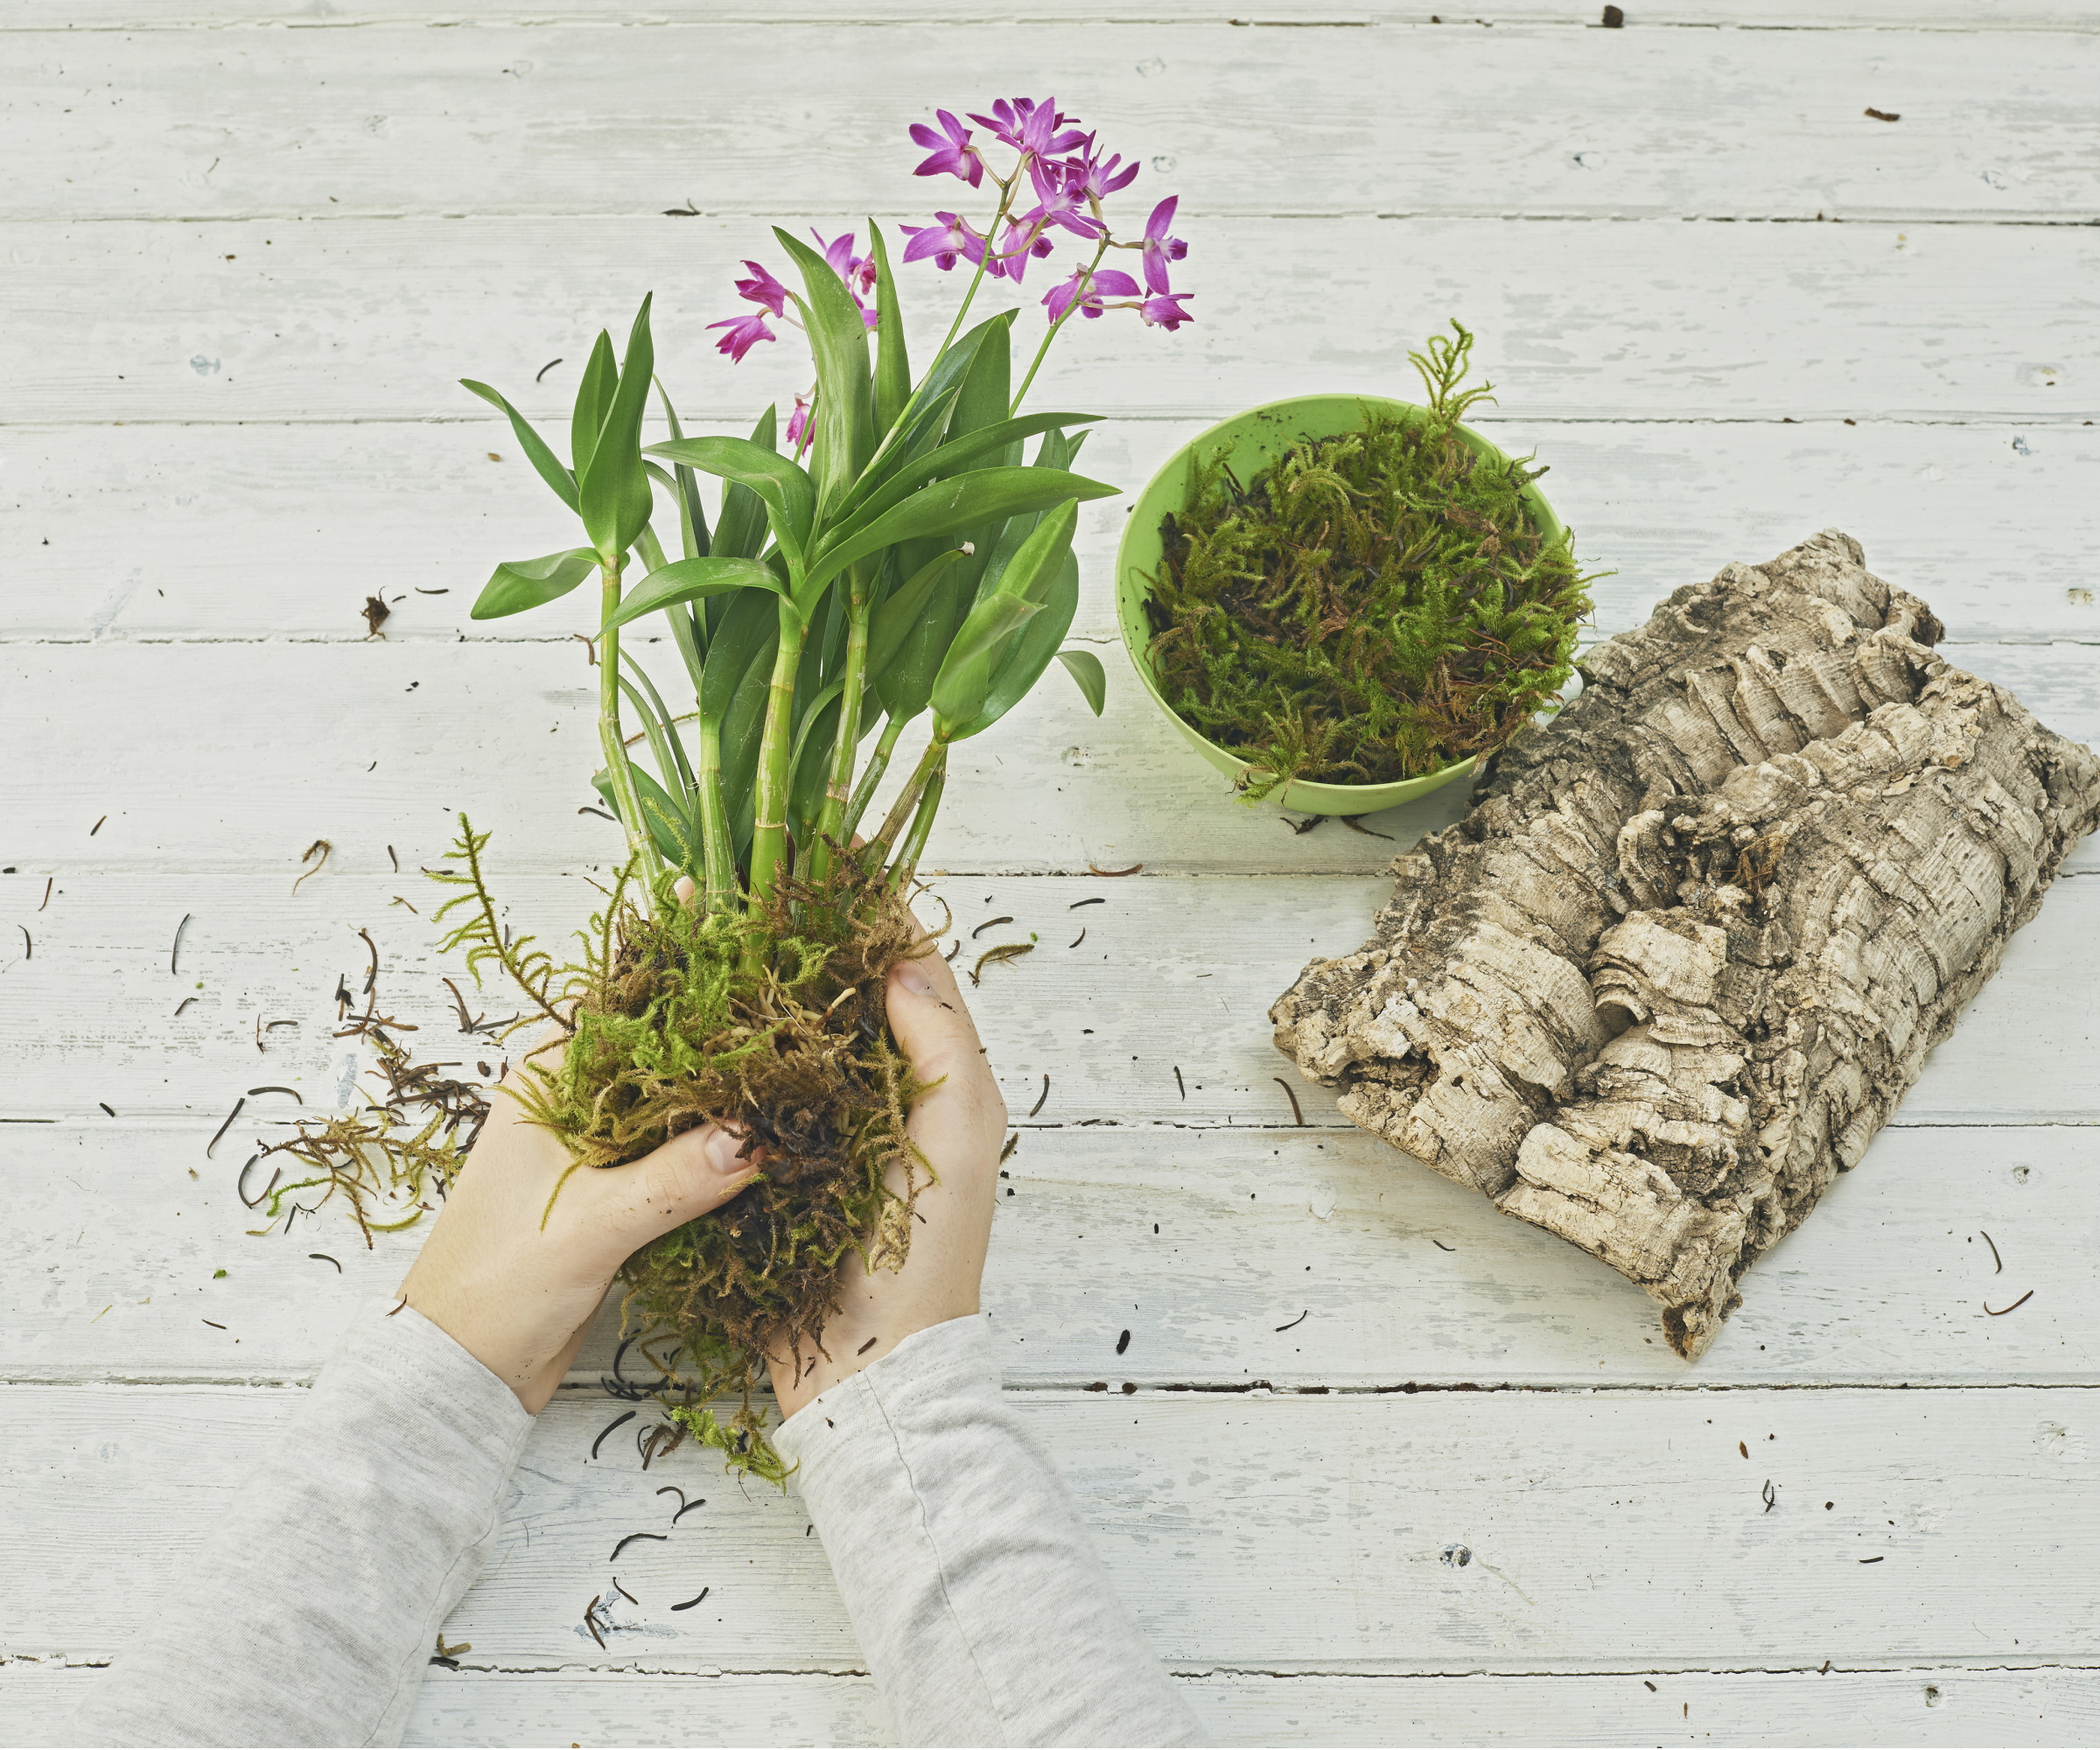
3) Remove old media and inspect roots
Tease away old bark or moss. If it’s packed tightly and soggy, that’s likely part of the problem. Rinse the roots under lukewarm water so you can see what’s firm and what isn’t.
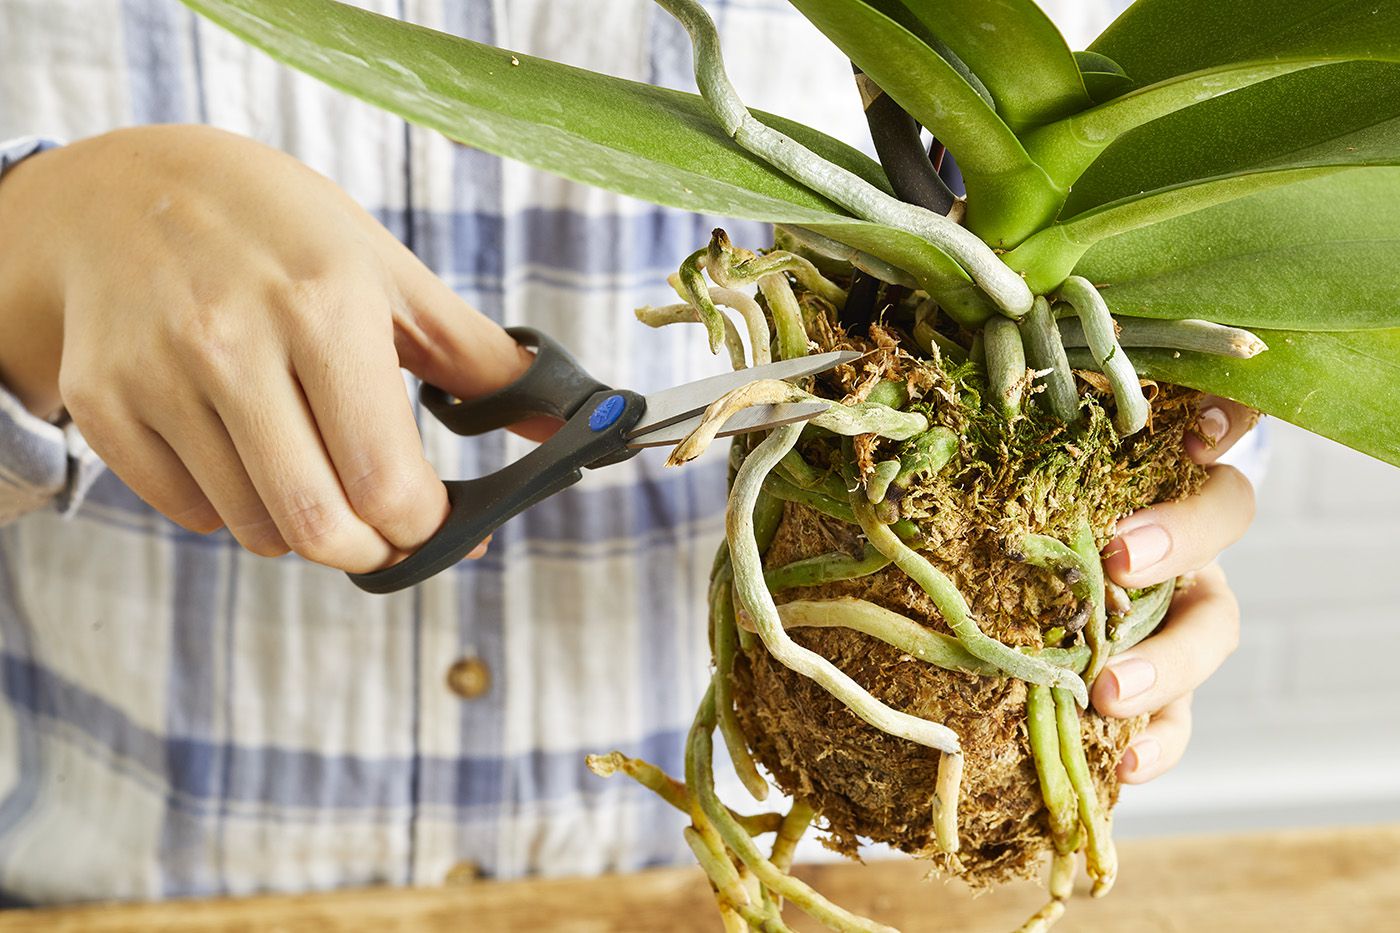
4) Trim away rotted roots
Sanitize your scissors first. Then trim anything that is:
- Mushy or slimy
- Hollow or papery
- Black and collapsing
- Velamen that slips off leaving a thin wire-like strand
What you keep: roots that are firm, even if they’re stained or not pretty. A root can look tan but still be functional if it’s firm.
5) Let the plant air-dry briefly
Set the orchid on a clean towel for 30 to 60 minutes so cut surfaces can dry. This simple pause can reduce the chance of fresh cuts staying wet and reinfecting.
6) Repot into fresh medium
Choose a pot that fits the remaining root mass. Orchids generally prefer to be snug rather than swimming in extra media.
- Hold the plant so the base sits just above the medium line.
- Gently work bark around the roots, tapping the pot to settle pieces.
- Avoid burying the crown. The crown should stay above the mix.
7) Watering after repotting
This depends on how many roots you had to trim and what your home is like.
- If you trimmed a lot of mushy roots: it often helps to wait about 2 to 3 days before watering so cuts can callus.
- If your home is hot and dry: don’t let the plant sit bone-dry for too long. You can water a little sooner, or lightly moisten the top layer, as long as the pot still drains fast.
- If trimming was minimal and roots are mostly healthy: you can water lightly the next day to help settle the medium.
When you do water, water thoroughly and let it drain completely. Orchids hate wet feet. They love a good drink followed by air.
If there are very few roots
If your orchid has only a couple of viable roots (or none, but the base is still firm), you can try a simple high-humidity reset. It’s slower, but it can work.
Simple “humidity tent” method
- Trim rot, then let the plant dry for a bit (as above).
- Put a small layer of barely damp sphagnum moss in a clear container or zip bag.
- Set the orchid above the moss so the base isn’t buried and isn’t sitting in wet moss.
- Close it most of the way to hold humidity, and open daily for fresh air.
- Keep it warm with bright, indirect light.
You’re aiming for humid air, not a wet plant. Check often. If you see new mush, back off moisture and increase airflow.
Adjust watering so rot doesn’t come back
Recovery isn’t just surgery and a fresh pot. It’s changing the conditions that caused the rot.
Use roots as your watering gauge
- Silvery roots: time to water soon.
- Green roots: hold off.
A watering method that works for most homes
- Take the inner pot to the sink.
- Run room-temperature water through the medium for 20 to 30 seconds.
- Let it drain for at least a minute.
- Return it to its spot only after dripping stops.
Cachepots (decorative outer pots)
If you use a decorative pot, make sure the orchid’s inner pot never sits in water at the bottom. Empty the cachepot after watering so roots aren’t soaking in runoff.
Dial in the environment
- Light: Bright, indirect light helps the plant use water appropriately.
- Airflow: Gentle airflow from a fan across the room helps media dry evenly.
- Temperature: Cooler homes need less frequent watering.
- Humidity: Aim for moderate humidity, but don’t compensate by keeping the potting mix constantly wet.
If you love moss, use it thoughtfully. Tightly packed sphagnum can stay wet for a long time. In many homes, a chunky bark mix is easier to manage and more forgiving.
What to expect
After root rot, orchids move at orchid speed. That means slow, but steady if conditions are right.
- Leaves may stay wrinkled for a while: they don’t always plump back up quickly, even after new roots grow.
- New root tips are your best sign: look for bright green root tips emerging in the pot or at the base.
- Blooms may drop: if the orchid is blooming, it may sacrifice flowers to focus on survival. That’s normal.
- Fertilizer: wait 3 to 4 weeks after repotting, then feed lightly at a diluted dose if the plant is growing.
Talk to your orchid if you want. Mine seem to appreciate the attention, and honestly, it helps me slow down and notice small improvements.
When it may be beyond saving
I’m all for plant triage, but I’m also a big believer in honest odds. An orchid can sometimes rebound from a surprising amount of root loss, but there are limits.
Recovery is unlikely if:
- The orchid has no firm roots left at all and the base tissue is soft and spreading.
- The crown is rotted (soft, black, collapsing center) and new leaves can’t form.
- The plant has a persistent foul odor even after trimming and drying.
- Rot has moved into the stem base and continues progressing upward.
If you’re on the fence, look at the base: if it’s firm and you have at least a couple of viable roots or visible new root nubs, it’s usually worth trying. If everything is mush, sometimes the kindest choice is composting the media and sanitizing the pot for a fresh start with a healthier plant.
Quick do and don’t list
- Do repot every 1 to 2 years, or sooner if the medium smells sour or looks broken down.
- Do use a pot with drainage and empty any collected runoff.
- Do water when roots are silvery, not on a calendar.
- Do keep the crown dry when watering. If water gets in, blot it out with a paper towel.
- Don’t bury the crown in media.
- Don’t pack moss tight (especially for store-bought Phalaenopsis).
- Don’t reuse old, rotted media.
- Don’t rely on ice cubes as a watering method (it’s hard to control, and cold isn’t kind to tropical roots).
FAQ
Can I save an orchid with no roots?
Sometimes, but it’s a longer, higher-risk recovery. If the base of the plant is firm and not rotting, try a high-humidity method (like the simple humidity tent above) to encourage new roots. If the base is soft or the crown is compromised, the odds drop sharply.
Should I use hydrogen peroxide on rotting orchid roots?
I generally skip it for routine root rot. Some growers use low concentrations in specific situations, but results vary, and it’s not a substitute for fixing the real problem, which is excess moisture and low airflow. Clean trimming, fresh medium, and better drying cycles are usually enough.
Is it okay to cut aerial roots?
Only cut aerial roots if they’re truly dead, meaning hollow, mushy, or brittle and collapsing. Healthy aerial roots are valuable and help the orchid hydrate and anchor itself.
How long until I see new root growth?
In good conditions, you may see fresh green root tips within a few weeks, but some orchids take longer depending on season, light levels, and how much root mass remains.