Orchid Keiki: When to Remove It and How to Pot It
If you have ever looked at your orchid spike and thought, “Wait… is that a tiny baby plant?” congratulations. You have likely met a keiki (pronounced KAY-kee), one of the sweetest surprises in the orchid world. A keiki can be a free new plant, but timing matters. Separate too early and it struggles. Leave it too long and it can drain the mother plant or become awkward to pot.
Let’s walk through how to tell when a keiki is ready, how to remove it cleanly, how to pot it in sphagnum moss, and what to do week by week so it actually roots and grows instead of sulking.

What is a keiki?
A keiki is a baby orchid plant that forms on the mother plant instead of from seed. It is a clone, meaning it will grow up genetically identical to the parent orchid.
Keikis most commonly show up on:
- Phalaenopsis (moth orchids): usually on a flower spike node.
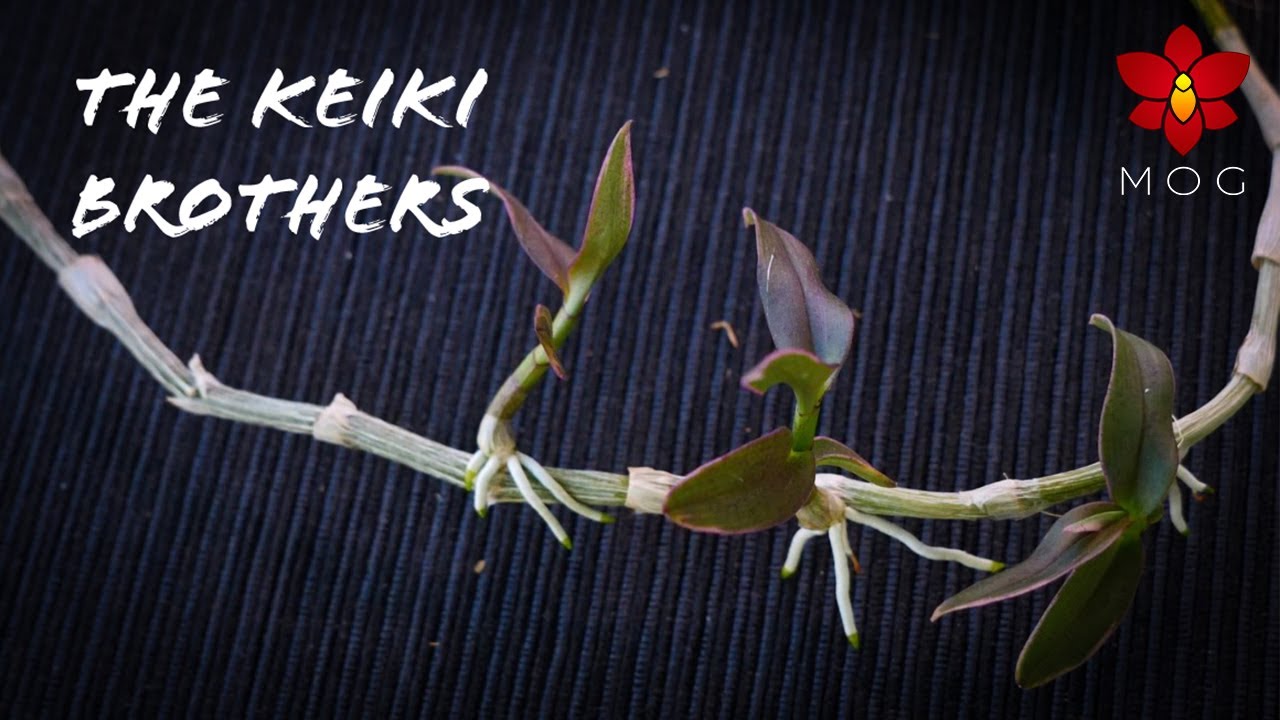
- Dendrobium: often along canes, sometimes in clusters.
- Oncidium and others: less common, but possible on spikes or at the base.
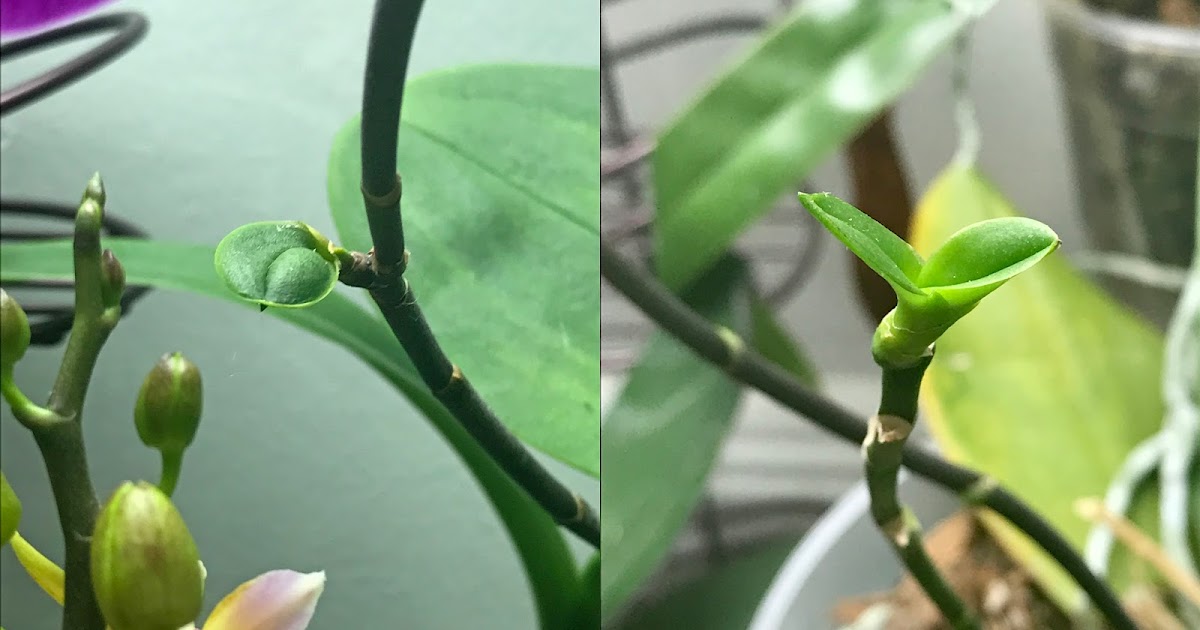
In Phalaenopsis, a keiki typically starts as a little nub at a node on the spike. Then it produces leaves first, followed by roots. Your job is to let it develop enough of a root system that it can live on its own.
Leave it on the spike or remove it?
I like to treat keikis like teenagers. They want independence, but they need some support before they move out.
When to leave a keiki attached
- Roots are short or absent: If there are no roots yet, keep it attached. Leaves alone are not enough.
- Roots are under 2 inches: Early roots dehydrate easily after separation.
- Mother plant is thriving: If the parent has firm leaves and healthy roots, it can “carry” the keiki a while.
- You are in a dry home: Low humidity makes freshly separated keikis struggle. Waiting helps.
When to remove a keiki
Use the classic, beginner-friendly guideline often called the “rule of three”:
- At least 3 roots
- Each root about 3 inches long
- At least 3 leaves (two can work if roots are excellent)
If your keiki has roots that are actively growing (green tips) and long enough to tuck gently into a pot, separation is usually safe.
When you might not remove it at all
- Basal keiki: A keiki growing from the base of a Phalaenopsis can be difficult and risky to separate. Many growers leave basal keikis attached and allow a “double plant” to form in one pot.
- Weak mother plant: If the parent orchid is declining, the keiki can be a survival strategy. You may still separate, but do it only when the keiki has real roots, and focus on stabilizing both plants afterward.
Supplies for potting a keiki (small pot + sphagnum)
Keikis do best in a setup that holds gentle moisture and lots of air. For most home growers, that means a small clear pot and lightly packed sphagnum moss.
What you will need
- Clean scissors or pruning snips (or a sterile razor blade)
- 70% isopropyl alcohol or flame for sterilizing tools
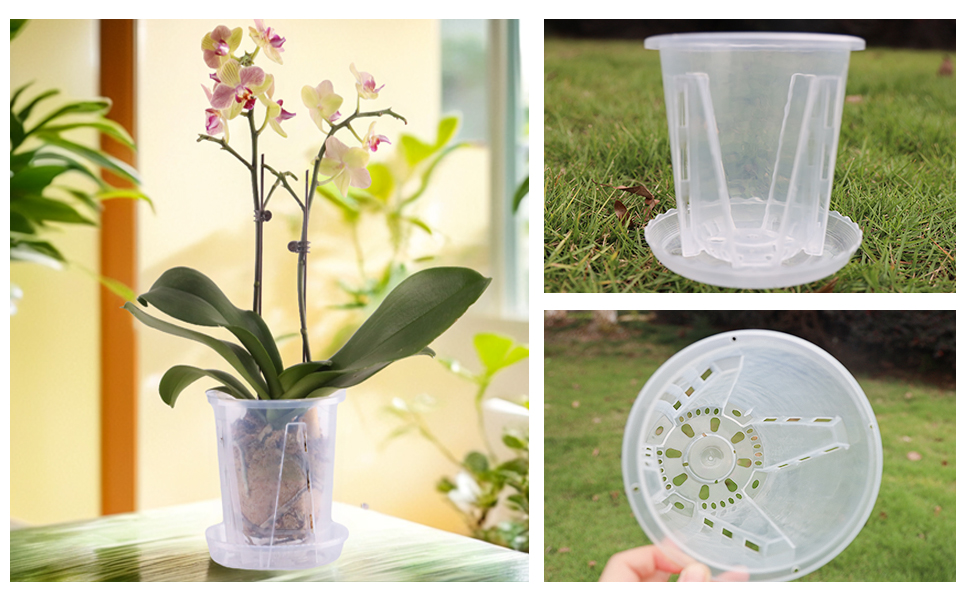
- Small clear orchid pot (2 to 3 inches wide for most keikis)
- Long-fiber sphagnum moss (high quality, not dusty or crumbled)
- Optional: a pinch of fine orchid bark or perlite to open the mix if you tend to overwater
- Optional: cinnamon (only for the cut on the spike, not on living roots)
- Plant label and date (future-you will be grateful)
Why clear pots help
Clear pots let you see moisture levels and root health. For a tiny plant that can go from “fine” to “crispy” quickly, that visibility is gold.
How to remove a keiki safely
Set yourself up like you are doing a tiny surgery. Clean tools and calm, steady hands make all the difference.
Step-by-step
- Water the orchid the day before. Hydrated roots bend more easily and crack less.
- Sterilize your cutting tool with alcohol and let it dry, or briefly flame and cool.
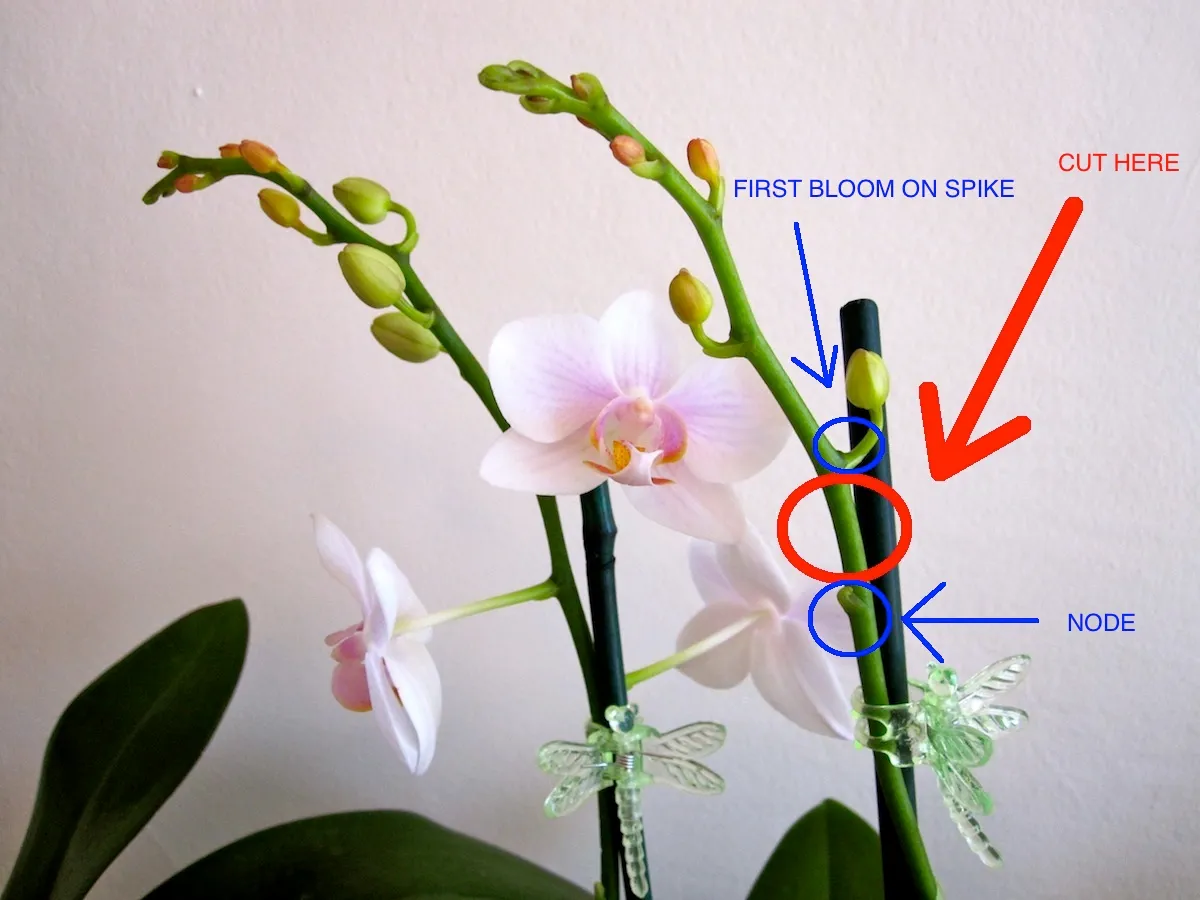
- Locate the attachment point. On Phalaenopsis, the keiki usually sits on a spike node.
- Cut with a little spike on both sides. Aim to remove the keiki with about 0.5 to 1 inch of spike above and below the keiki base. This reduces the chance of damaging the keiki itself.
- Let the cut ends dry for 30 to 60 minutes. If you like, dab a tiny bit of cinnamon on the mother plant spike cut only.
Gentle warning from someone who has learned the hard way: do not peel the keiki off the spike. If it does not detach with a clean cut, it is not ready for force.
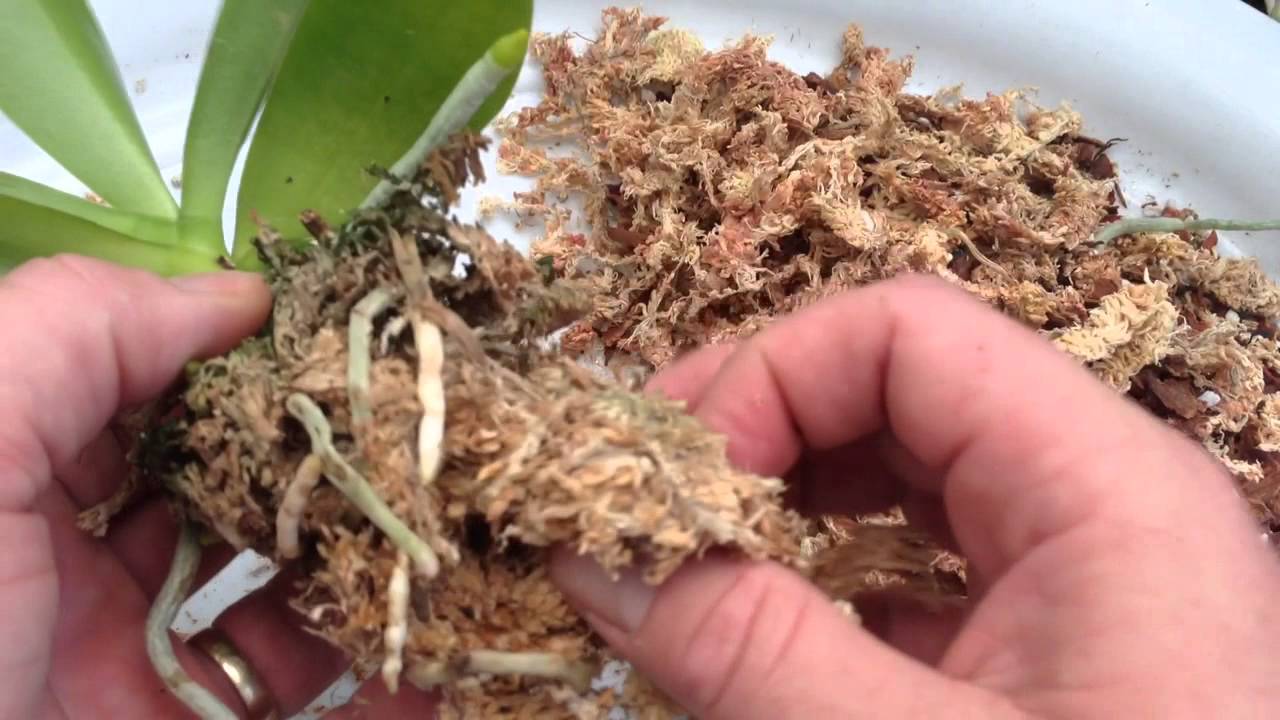
How to pot a keiki in sphagnum
Sphagnum works beautifully for keikis because it keeps a humid buffer around new roots without needing constant watering. The trick is to use it fluffy, not packed.
Step-by-step potting
- Moisten the sphagnum. Soak it, then squeeze until it is damp like a wrung-out sponge. No dripping.
- Add a loose base layer to the pot. Keep it airy.
- Position the keiki so the roots curve naturally into the pot. If roots are stiff, do not force them. You can set some on top of the moss and they will find their way.
- Support the plant. Keikis wobble. Use a small stake, or tuck moss around the base just enough to keep it upright.
- Keep the crown above the moss. The center of the leaves should not be buried or constantly wet.
- Finish with a light top layer. Think “nest,” not “compression.”
First watering after potting
If the moss was properly damp, you often do not need to water again for several days. I usually mist the surface lightly and focus more on humidity than soaking.
Week-by-week aftercare checklist (first 6 weeks)
Think of the first month as “root confidence building.” Your goal is stable moisture, warm temperatures, gentle light, and no big shocks.
Day 1 to 7
- Light: bright, indirect light. No hot sun on the baby.
- Temperature: ideally 70 to 80°F (21 to 27°C) days, not chilly nights.
- Humidity: 50 to 70% if possible. A humidity tray helps.
- Water: check moss every 2 to 3 days. Water only when it is just barely damp. Keikis rot in soggy moss.
- Do not fertilize yet.
- Stability: keep it upright. If it wobbles, add a stake.
Week 2
- Look for green root tips. That is the sign you want.
- Airflow: gentle airflow prevents fungus, but avoid a direct fan blast.
- Water: still light. If the pot stays wet for more than a week, your moss is too tight or your environment is too cool.
Week 3
- Start weak fertilizer: 1/4 strength balanced orchid fertilizer every other watering, if the keiki looks stable.
- Inspect the crown: keep water out of the leaf center.
Week 4
- Root check: you should see roots pressing the pot walls or anchoring into moss.
- Light: you can increase brightness slightly if leaves are a healthy medium green.
Week 5
- Water rhythm: settle into a consistent pattern. Many keikis in sphagnum need water about every 5 to 10 days, depending on your home.
- Watch for leaf growth: a new leaf is a good sign the plant feels secure.
Week 6
- Evaluate the medium: if moss is breaking down or staying wet too long, repot into fresh, fluffier sphagnum or a sphagnum plus bark blend.
- Continue gentle feeding: “weakly, weekly” is a safe approach.
Patience note: keikis can look unchanged for weeks, then suddenly push roots. Quiet progress is still progress.
Troubleshooting: if your keiki fails to root
Sometimes a keiki sits there like a stubborn little green statue. Before you panic, check these common issues. Almost every non-rooting problem comes down to humidity, moisture balance, light, or temperature.
Problem: Roots stop growing or shrivel
- Likely cause: too dry, or low humidity.
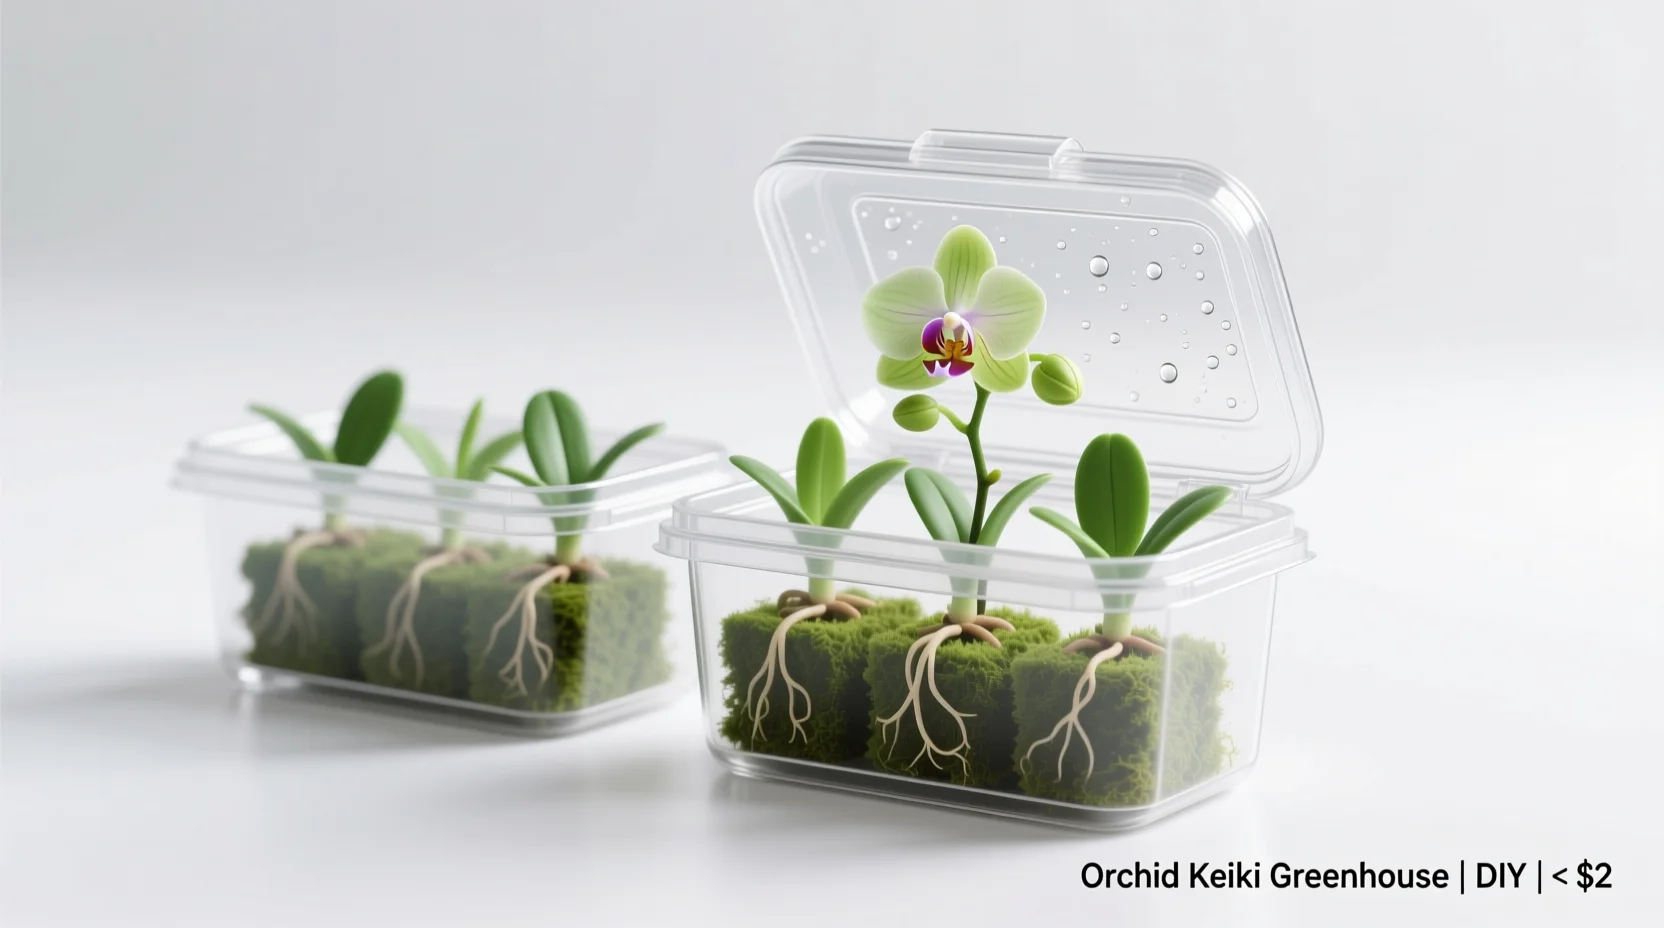
- Try this: increase humidity to 60 to 70% and keep moss lightly damp. Consider placing the pot in a ventilated clear container to create a mini greenhouse, opening it daily for fresh air.
Problem: Base turns mushy or roots rot
- Likely cause: moss packed too tightly, staying wet too long, or water sitting in the crown.
- Try this: remove the keiki, trim dead mushy roots with sterile scissors, and repot into fresh sphagnum that is fluffed and only slightly damp. Keep the crown dry. Increase airflow.
Problem: Keiki wrinkles or looks dehydrated even though moss is wet
- Likely cause: root damage, or the moss is wet but oxygen-poor.
- Try this: repot into looser moss, or a mix of sphagnum with chunky bark. Keep warm and humid, but not soggy.
Problem: Leaves yellow after separation
- Likely cause: transplant stress, too much light, or the keiki was removed early.
- Try this: move to slightly lower light, keep temperatures steady, and do not overwater. If the keiki has any viable roots, it can recover.
Problem: No roots at all, but you already separated it
This happens. If the keiki is leafed out but rootless, you can try “spagh and bag” style support without suffocating it:
- Set the keiki on top of barely damp sphagnum (do not bury the base).
- Place it in a clear container with a few air holes or open it daily.
- Keep warm (75 to 82°F is helpful) and in bright, indirect light.
- Wait for root nubs, then pot normally once roots are long enough to guide into a pot.
Problem: Keiki is flowering instead of rooting
- Likely cause: it is receiving signals to bloom (light, maturity cues) before it has a solid root system.
- Try this: you can snip the flower spike on the keiki to redirect energy toward roots. It feels mean, but it often helps long-term establishment.
Quick FAQ
Can I use keiki paste to make a keiki?
Keiki paste (usually a cytokinin hormone) can encourage growth at a node, but it is not guaranteed and can stress the plant. I recommend focusing on overall orchid health first. Strong plants do interesting things on their own.
Should I pot the keiki in bark instead of sphagnum?
If your home is humid and you water carefully, fine bark can work. For most beginners, sphagnum is more forgiving for tiny roots. If you tend to overwater, do a sphagnum plus bark blend for extra airflow.
When will my keiki bloom?
Commonly in 1 to 3 years, depending on orchid type, light, and how fast it builds roots and leaves. A keiki that roots well early tends to mature faster.
A gentle reminder before you go
Keikis teach the best gardening lesson: you cannot rush roots. If your baby orchid is not ready today, that is not failure. It is just biology. Keep the light bright, the moss airy, and your hands a little off the plant. More keikis are loved to death than neglected, I promise.
If you want, tell me what kind of orchid you have (Phalaenopsis, Dendrobium, something else) and roughly how long the keiki roots are. I can help you decide whether it is ready to pot.