Orchid Aerial Roots: What’s Normal and How to Manage Them
If your orchid has started growing roots up and out of the pot, you are not alone. The first time I saw a Phalaenopsis send silver noodles over the rim, I assumed it was crying for help. Turns out, it was just being an orchid.
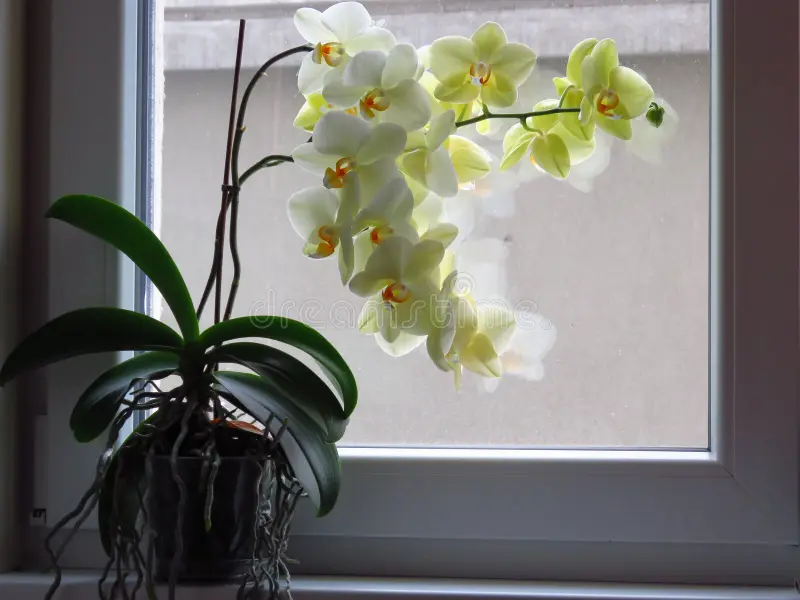
Orchid aerial roots are a normal adaptation, especially for epiphytic orchids like Phalaenopsis (the most common “grocery store” type). In the wild, many of these orchids grow on trees, not in soil. Their roots are designed to cling, breathe, and absorb moisture from humid air, fog, and dew (and from brief soakings of rain). Your job is not to force them back into a tidy little pot. Your job is to learn what “healthy and active” looks like, and what “dry and struggling” or “wet and rotting” looks like.
A quick scope note: This article focuses on epiphytes like Phalaenopsis and similar orchids that naturally grow on bark. Some mass market orchids are terrestrial or semi-terrestrial (for example Paphiopedilum) and may produce fewer aerial roots and prefer different media and watering rhythms.
What aerial roots are
Aerial roots are roots that grow outside the potting mix. They can look pale silver, green, tan, or slightly mottled depending on hydration and age.
Most common home orchids like Phalaenopsis are epiphytes. They naturally anchor to bark, stretch their roots into air pockets, and soak up brief bursts of moisture. That is why orchids are so fussy about soggy potting mix. Their roots want oxygen as much as they want water.
That silvery coating is a good thing
Orchid roots are wrapped in a spongy layer called velamen. When it is dry, it often looks silvery white. When it gets wet, it turns green because you are seeing the living tissue underneath. That color shift is one of the easiest ways to read your orchid’s hydration.
Bonus nerdy fact that is genuinely useful: roots exposed to light can photosynthesize a little, which is one reason clear pots and bright conditions can suit Phalaenopsis so well.
Normal vs red flags
Some aerial roots are basically your orchid saying, “I’m comfortable enough to grow.” Others are your orchid trying to escape a potting situation that is not working. Here is how to tell the difference.
Healthy aerial roots
- Firm and plump when gently squeezed
- Silvery when dry, then green after watering or misting
- Light tan tips on older roots, or bright green tips on actively growing roots
- Occasional branching and quirky directions, including straight up
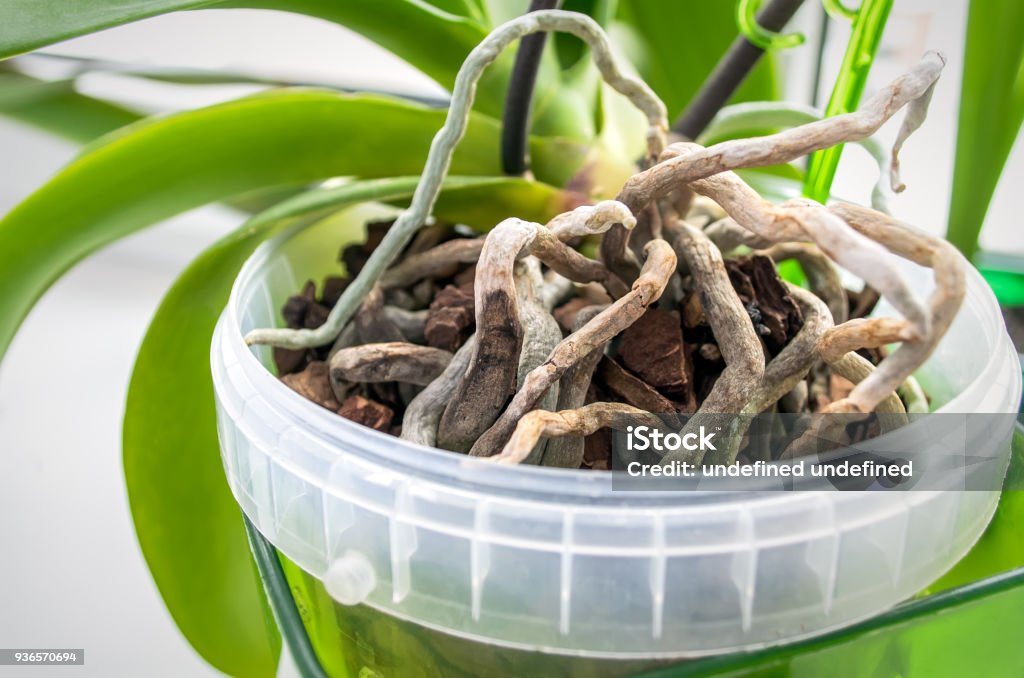
Signs roots are too dry
- Wrinkled, papery, or hollow velamen
- Stays dull gray and does not plump up after a thorough watering (healthy roots usually green up at least in patches)
- Root tips stall and stop extending
- Leaves look slightly limp even though you are watering
Signs roots are rotting
- Mushy, brown or black sections
- Velamen slipping off like a wet sleeve, leaving a thin stringy core
- Sour or swampy smell from the pot
- Yellowing leaves plus a wobbly plant at the base
If you are seeing rot, do not “fix it” with more misting. Root rot is usually driven by staying too wet with too little air, which then invites fungal or bacterial problems (and colder temperatures can make that spiral faster).
Why aerial roots show up indoors
Indoors, orchids live in a weird middle ground. Our homes are often drier than tropical forests, but we also keep orchids in pots, which is not how many of them live naturally. So the plant adapts.
Aerial roots can appear when:
- Humidity is moderate and the plant can benefit from extra moisture uptake and less drying
- The pot is crowded and new roots have nowhere easy to go
- The potting mix stays wet too long and the orchid seeks more oxygen outside the pot
- Light is strong and the orchid is in active growth mode
In other words, aerial roots are not automatically a cry for help. They are often a sign of vigor.
Misting and humidity
I am going to say this gently, because misting is such an appealing idea: misting is not a substitute for watering. It can help aerial roots in dry homes, but it is easy to do in a way that creates crown rot or fungal spotting.
If you mist aerial roots
- Mist in the morning so everything dries by night
- Aim for the roots, not the leaf crown (the center where new leaves emerge)
- Use a fine mist and stop before water drips and sits
- Increase airflow with a small fan across the room if your space is stagnant
Better humidity options than constant misting
- Group plants together to create a small humidity bubble
- Run a humidifier nearby and aim for about 40 to 60 percent as a realistic home target for Phalaenopsis (higher can be even better if airflow is good)
- Use a pebble tray correctly, with the pot sitting above the water line (works best in smaller, less drafty spaces, and the effect is usually modest in open rooms)
If your home is very dry and your orchid is mounted, misting becomes more useful because mounted roots dry fast. In a bark pot, over-misting can keep the surface too damp while the middle stays unpredictable.
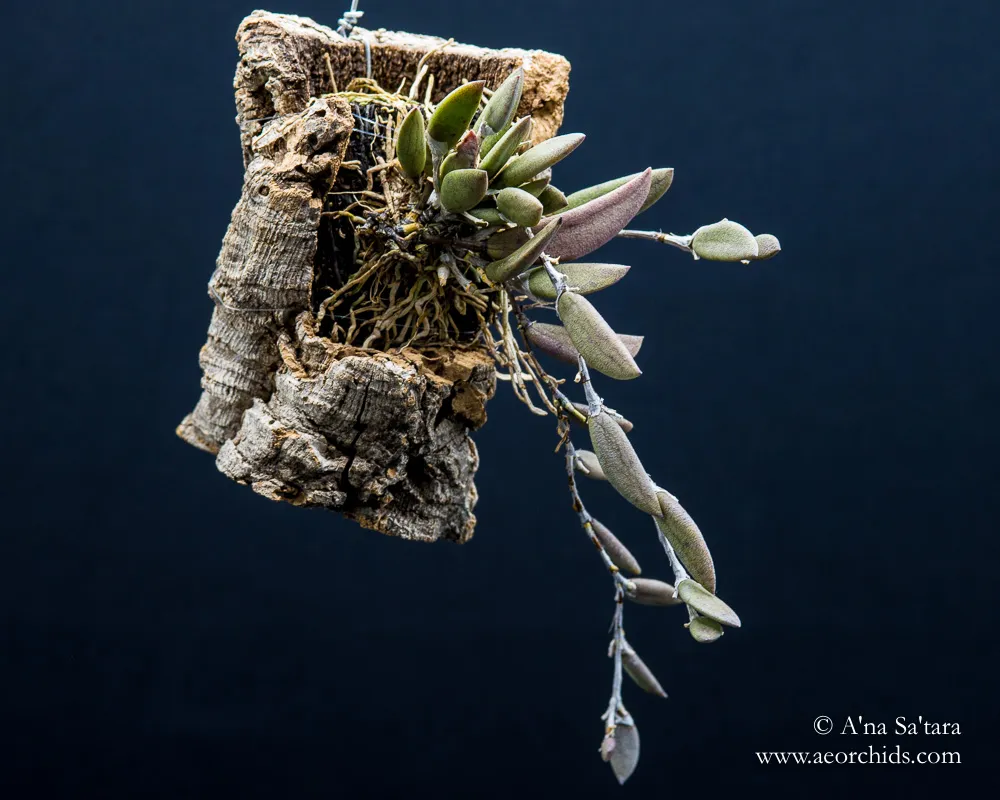
Mounted vs potted
Orchid care advice can sound contradictory because setups change everything. A mounted orchid and a potted orchid are living in two different worlds.
Mounted orchids
Mounted orchids are attached to cork or wood (most common), and sometimes other materials. Roots are exposed, airflow is excellent, and drying happens quickly.
- Pros: Less risk of suffocating roots, very natural growth habit
- Cons: Needs more frequent watering or misting, especially in dry homes
- Aerial roots: Often abundant and long, because that is the normal root environment
Bark pots
Most home orchids are potted in chunky bark or a bark blend. You are trying to balance moisture retention with oxygen.
- Pros: Easier daily maintenance, watering is less frequent than mounting
- Cons: Overwatering risk is higher, old mix can break down and smother roots
- Aerial roots: Common, especially when the pot is crowded or humidity is comfortable
Should you tuck roots in?
Most of the time, no. Think of aerial roots like your orchid’s snorkels. Forcing them down into mix can crack the velamen, and damaged roots can struggle to function.
When it is okay to guide a root
- The root is new and flexible and naturally heading toward the pot
- You are repotting and can position it gently without bending sharply
- You can place it just inside the top layer of bark without compacting
When to leave it alone
- The root is stiff and has already “set” its direction
- You would need to force a bend to make it fit
- The potting mix is already on the moist side and burying it would reduce airflow
It is completely fine for orchids to look a little wild. Honestly, I find it charming. Like the plant is reaching out to explore.
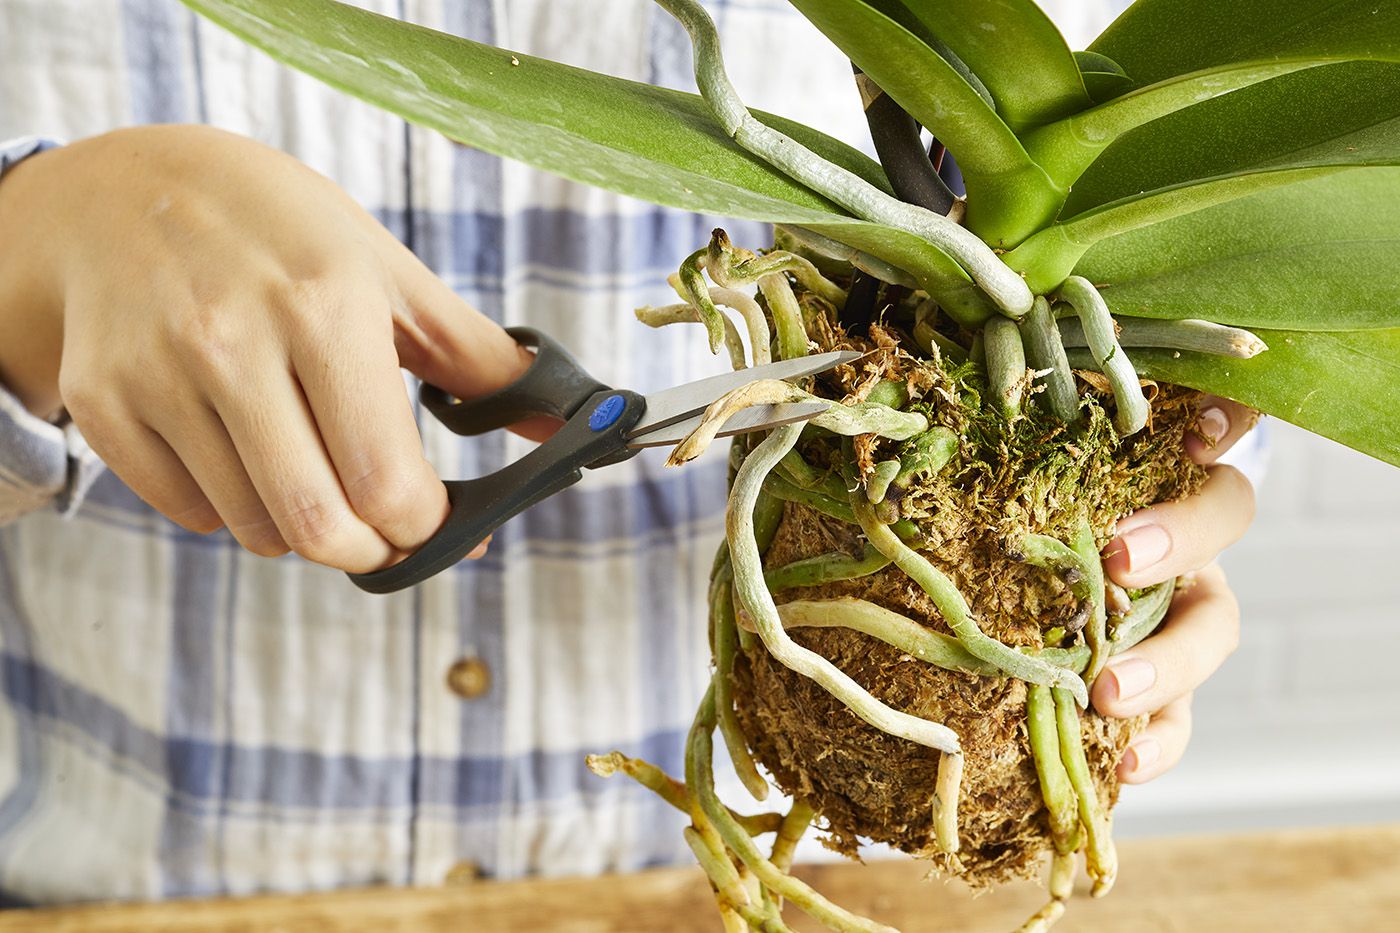
Repotting without snaps
Repotting is where most aerial roots get injured, not because people are careless, but because roots are brittle when dry. My biggest tip is simple: make roots pliable first.
Timing helps too. If you have a choice, repot after blooming or when you see new root tips starting. The plant rebounds faster.
Step by step
- Soak first. Water the orchid well, or soak the root mass for 10 to 15 minutes. This softens velamen and makes roots flexible.
- Loosen the pot. Squeeze a plastic pot or run a dull knife around the inside edge.
- Lift and support. Hold the plant at the base and support roots with your other hand.
- Remove old mix gently. Pick bark pieces out. Do not yank.
- Trim only what is truly dead. Cut mushy, black, or hollow roots with sterilized scissors. If you are doing multiple cuts, re-sterilize between cuts so you are not spreading problems.
- Pot at the right height. Keep the crown above the mix, and keep the top roots airy.
- Backfill with chunky medium. Tap the pot to settle bark, but do not pack it tight.
What not to bury
- Do not bury the crown. This is the fastest path to crown rot.
- Do not bury stiff aerial roots that are used to air unless they naturally sit into the pot without force.
- Do not bury the entire stem on Phalaenopsis. Aim for stability without suffocation.
If the plant is wobbly after repotting, use a stake or a rhizome clip to stabilize it. Stability helps new roots form. Packing mix tightly is tempting, but it steals oxygen from the roots you are trying to save.
Watering cues
Aerial roots are excellent little moisture meters.
- Silvery roots: the surface is dry, and the plant may be ready for watering depending on the pot’s moisture
- Green roots: recently wet, wait before watering again
- Wrinkled roots: chronically dry or inconsistent watering
If your orchid is in a clear pot, check roots inside the pot too. Sometimes aerial roots look dry while the pot core is still wet. That usually means airflow is low, the mix is old, or watering is too frequent.
A note on crusty white buildup
If aerial roots look dusty, crusty, or gritty white (and it does not wipe away like normal dry velamen), you might be seeing mineral or fertilizer salt buildup. The simple fix is an occasional deep flush with plain water, and going lighter on fertilizer rather than heavier.
Quick fixes
“Tons of aerial roots, barely any in the pot.”
This can happen after root loss from overwatering, or when the plant simply prefers growing outward. Check pot roots for rot. If the inside roots are healthy, it is just a vigorous plant. If inside roots are mushy, focus on airflow and a fresh chunky mix.
“The aerial roots look dry, but I water every week.”
Weekly can be too often or not often enough, depending on your home. Instead of the calendar, water when the bark is approaching dry and roots are turning silvery. In dry homes, consider a humidifier and deeper watering, not more frequent splashes.
“Can I cut aerial roots off to make it look nicer?”
I do not recommend it unless the root is clearly dead. Healthy aerial roots are working roots. Cutting them is like taking away drinking straws and anchors at the same time.
Your orchid is being an orchid
If you remember nothing else, remember this: aerial roots are not a failure. They are a normal, clever strategy. When you see firm roots with active green tips, your plant is growing confidence, not chaos.
Give it bright, gentle light, airy media, and a watering rhythm based on root color and pot dryness. Let the aerial roots do their quirky little job. I promise they are not judging your decorating.