Mealybugs on Houseplants
Mealybugs are the houseplant equivalent of finding lint in your pocket, except the lint is alive, hungry, and very committed to moving in. The good news: in many cases, you can evict them without harsh chemicals. With a little patience, a bright light, and a few pantry staples, you can turn a full-blown infestation into a “remember when?” story.
My promise: we will focus on plant-safe, people-safe methods that actually work. And if you miss a bug or two the first time, that is normal. Mealybugs are persistent, not magical.
What mealybugs look like
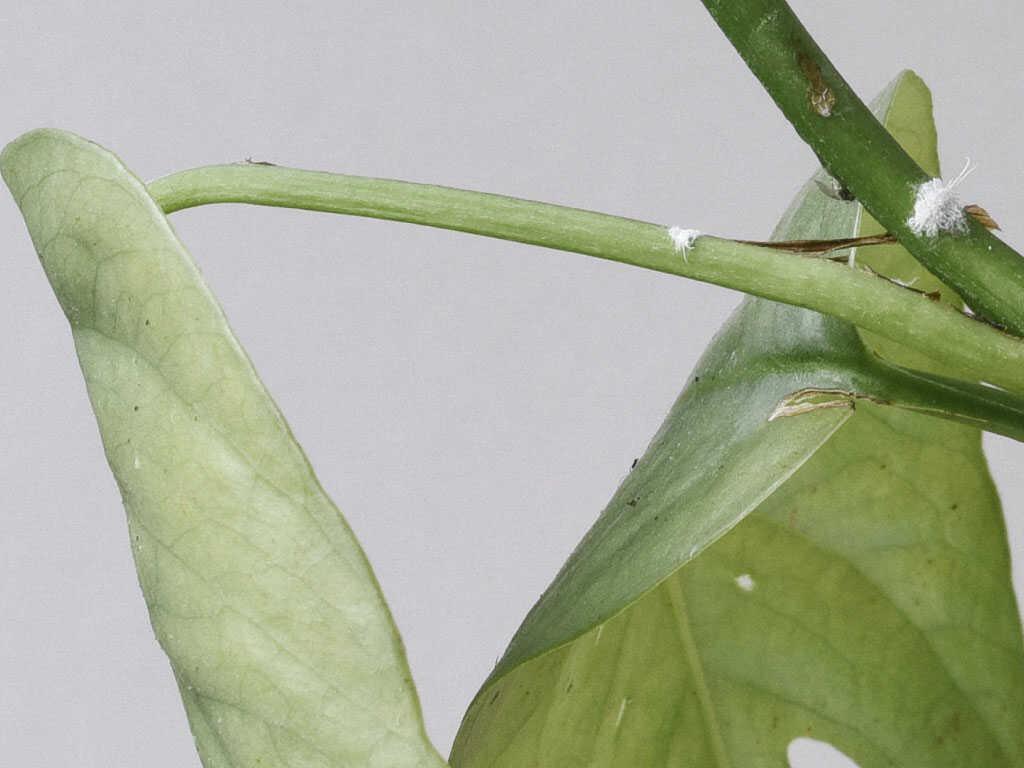
Mealybugs are small sap-sucking insects covered in a waxy coating that looks like white cotton or powdery fluff. They love protected nooks, especially where leaves join stems, along midribs, and down in tight new growth.
Quick ID
- White, cottony clumps on stems, leaf joints, or undersides of leaves
- Sticky residue on leaves or nearby surfaces (this is honeydew)
- Yellowing, curling, or drooping despite “normal” watering
- Stunted new growth or leaves that look a bit tired and dull
- Sooty mold (a black film) growing on the sticky honeydew
If you are unsure, do the gentle poke test: touch one white tuft with a toothpick or cotton swab. If it smears or reveals a little soft-bodied bug underneath, you have your culprit.
Where to check first
When mealybugs show up, they rarely hang out in plain sight. They are introverts with excellent taste in hiding.
- Leaf axils (the “armpits” where leaf meets stem)
- Undersides of leaves, especially along the midrib
- New growth and tightly furled leaves
- Stem creases and branching points
- Rim of the pot and the top couple inches of soil
Bring your plant to a bright window or use a flashlight. I like to rotate the pot slowly like I am inspecting a ripe melon at the market.
First move: isolate
Before you treat anything, quarantine the plant. Mealybugs spread by crawling and by hitchhiking on sleeves, watering cans, pruners, and plant-to-plant leaf contact.
Quarantine basics
- Best: move the plant to a separate room with good light.
- If you cannot: maximize distance, prevent leaf contact, and do not share tools, watering cans, or cloths between plants.
- Check neighboring plants anyway, especially those that touch.
- Wipe down the shelf, windowsill, or plant stand with warm soapy water.
- Wash your hands after handling the infested plant, and sanitize pruners (soap and water, then wipe with alcohol) before touching anything else.
If the infestation is heavy, take a quick photo for reference. It helps you notice improvements and spot returners.
Organic plan that works
Mealybugs have a waxy coating, which is why one-and-done sprays often disappoint. The winning strategy is physical removal plus repeat treatments that catch newly hatched bugs.
Step 1: Manual removal
Start by removing as many mealybugs as you can see. The fewer you leave behind, the easier everything else becomes.
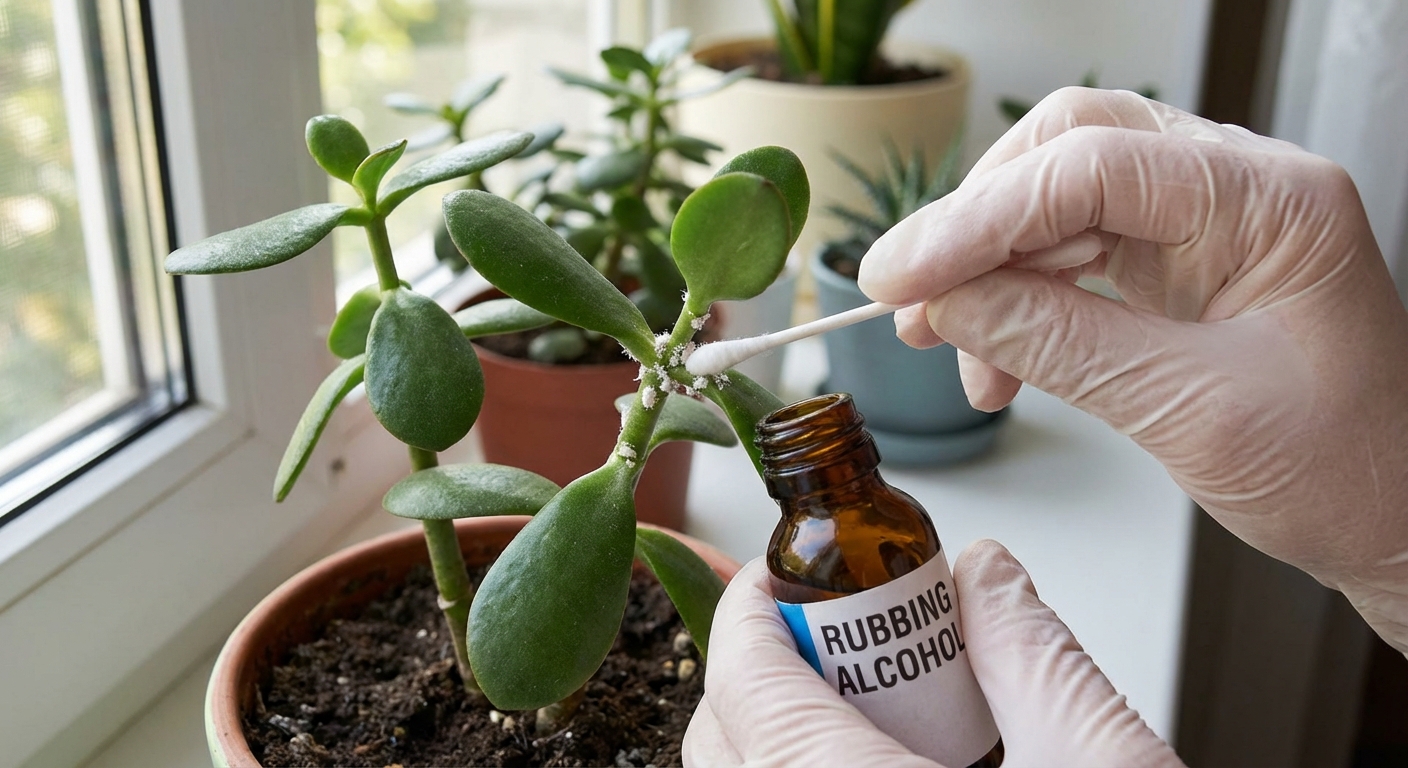
- Cotton swab + rubbing alcohol (70% is ideal) for spot-treating clusters
- Soft toothbrush for textured stems and tough creases
- Prune badly infested tips (bag the cuttings and discard, do not compost indoors)
How to use alcohol: Dip a cotton swab in 70% isopropyl alcohol and dab each bug until it is thoroughly wetted and you can wipe it away. Alcohol breaks down the waxy coating and dehydrates them fast.
Plant safety note: Test alcohol on one leaf first, wait 24 hours, and look for spotting. Most sturdy houseplants handle careful dabbing beautifully, but some tender varieties can be sensitive.
Step 2: Rinse (optional)
If your plant can handle it, give it a lukewarm shower to knock off stragglers and honeydew. Support the soil surface with your hand or a bit of plastic wrap so you do not wash potting mix everywhere.
- Use lukewarm water, not cold shock and not hot.
- Angle the spray to reach undersides of leaves and stem joints.
- Let the plant drip dry in bright, indirect light.
Step 3: Pick one spray
After manual removal, use a spray to reach the bugs you missed and the tiny crawlers you cannot easily see.
Use one spray method per treatment cycle unless the product label specifically says it can be combined with something else. When in doubt, keep it simple.
Option A: Insecticidal soap
Insecticidal soap works by disrupting soft-bodied pests on contact. It is effective and usually very plant-friendly when used correctly.
- Best choice: a ready-to-use insecticidal soap labeled for houseplants
- DIY backup: mix 1 teaspoon mild liquid castile soap (or a very gentle, fragrance-free dish soap) in 1 quart of water
DIY caution: Not all “dish soap” is created equal. Many formulas contain degreasers, dyes, or fragrances that can burn leaves. If you are unsure, skip DIY and buy a true insecticidal soap.
Spray thoroughly, including undersides and leaf joints. Soap must touch the bugs to work, so coverage is everything.
Option B: Neem (label matters)
Neem products can help disrupt feeding and growth, especially as part of a repeat schedule. Results vary by product (some contain more of the active compounds than others), so follow the label and expectations will stay realistic.
- Use a neem product labeled for indoor plants.
- Follow the label for dilution. Do not “eyeball it” with neem.
- Shake often while spraying, because oil and water separate.
Neem tip: Apply in the evening or out of direct sun to reduce the risk of leaf burn.
Quick safety notes
- Use good ventilation and avoid breathing in fine mist.
- Keep sprays and treated plants away from kids and pets until dry.
- Always spot-test first, especially with oils and DIY mixes.
Repeat schedule
Many mealybug species lay eggs in cottony sacs and hatch in waves. That means one treatment is rarely enough, even if it looks like you solved it.
My simple schedule
- Day 1: Isolate, swab with alcohol, prune if needed, then spray (soap or neem).
- Day 4 to 5: Inspect closely and spot-treat with alcohol. Spray again.
- Day 9 to 10: Inspect and repeat.
- Week 3 and 4: Weekly inspections, treat any stragglers.
Keep quarantining until you have gone at least two full weeks with zero sightings.
Mealybugs in the soil?
Most houseplant mealybugs hang out on stems and leaves, but some species can live around roots. If your plant keeps relapsing despite careful leaf treatments, consider a root zone check.
Signs they may be below
- Recurring mealybugs with no obvious source on foliage
- Plant looks thirsty and weak even with proper watering
- White cottony residue near the soil line or pot rim
Gentle options
- Unpot and rinse: Remove the plant, gently wash soil from roots, and repot into fresh mix in a cleaned pot.
- Soap rinse for the pot: Scrub the pot with warm soapy water. For extra caution, rinse and let it dry fully.
I avoid drenching indoor soil with oils. Over-application (especially in a dense or already-wet mix) can reduce airflow in the root zone and stress roots. A clean repot is usually the kinder solution if root mealybugs are suspected.
If you have repeated cycles with no improvement, it may be time to consider stronger interventions that fit your comfort level and local guidance.
Plants they love
Mealybugs are not picky, but they do have favorites. If you grow these indoors, inspect them a little more often:
- Hoyas and other waxy-leaved plants
- Jade plants and many succulents
- Ficus (rubber plant, fiddle leaf fig)
- Pothos, philodendron, and other aroids with lots of leaf joints
- Orchids (especially around leaf bases and flower spikes)
Mealybugs also love a stressed plant. The more consistent your light, watering, and nutrition are, the less inviting your plants become.
Prevention that helps
Prevention is mostly about habits, not fancy products. This is the part where future-you sends a thank-you note.
- Quarantine new plants for 3 to 4 weeks (21 to 30 days). Mealybugs can hatch in waves, and a longer window catches the sneaky ones.
- Wipe leaves monthly with a damp cloth to remove dust and spot pests early.
- Avoid over-fertilizing. Tender, lush growth can attract sap-suckers.
- Improve airflow between plants, especially on crowded shelves.
- Inspect after vacations. Plants often decline a bit when routines change.
- Clean tools between plants (pruners, supports, humidity trays, even cute little plant misters).

What not to do
- Do not spray in full sun (leaf burn is a heartbreak you can avoid).
- Do not increase concentrations “for extra strength.” More is usually just more damage.
- Do not mix soap and neem unless the label says it is compatible.
- Do not compost infested cuttings indoors.
- Do not treat one plant and ignore its neighbors. Mealybugs love a group project.
Troubleshooting
“I sprayed once and they came back.”
Very common. Add the repeat schedule. Mealybugs hatch in stages, and the tiny crawlers are easy to miss.
“My leaves look burned after neem or soap.”
Rinse the plant with lukewarm water, move it to bright indirect light, and reduce concentration next time. Always avoid spraying in strong sun and test on a small area first.
“They are deep in tight growth I cannot reach.”
Use an alcohol-dipped swab and a soft toothbrush, and consider pruning the worst tips. It feels dramatic, but it often saves the whole plant.
“There are ants around my plant.”
Ants sometimes farm honeydew-producing pests. Clean up the sticky residue, treat the mealybugs, and address the ant trail so they do not act like tiny bodyguards.
When to start fresh
I love a plant comeback story, but I also believe in protecting your collection and your sanity. Consider letting a plant go if:
- The infestation is severe and keeps spreading to other plants
- The plant is already struggling from rot, low light, or chronic stress
- You have repeated treatment cycles with no improvement
If you do discard, seal it in a bag so hitchhikers do not drop off along the way. Then give your nearby plants a careful inspection and a leaf wipe. Clean break, clean slate.
A calm last check
Mealybugs thrive when we are busy and not looking closely. You do not need to be perfect, you just need to be consistent. Put your plant in good light, take five minutes every few days to inspect the leaf joints, and swab any suspicious fluff the moment you see it.
And yes, I talk to my ferns while I do it. They do not talk back, but I swear they appreciate the attention.