Indoor Tropical Hibiscus Care
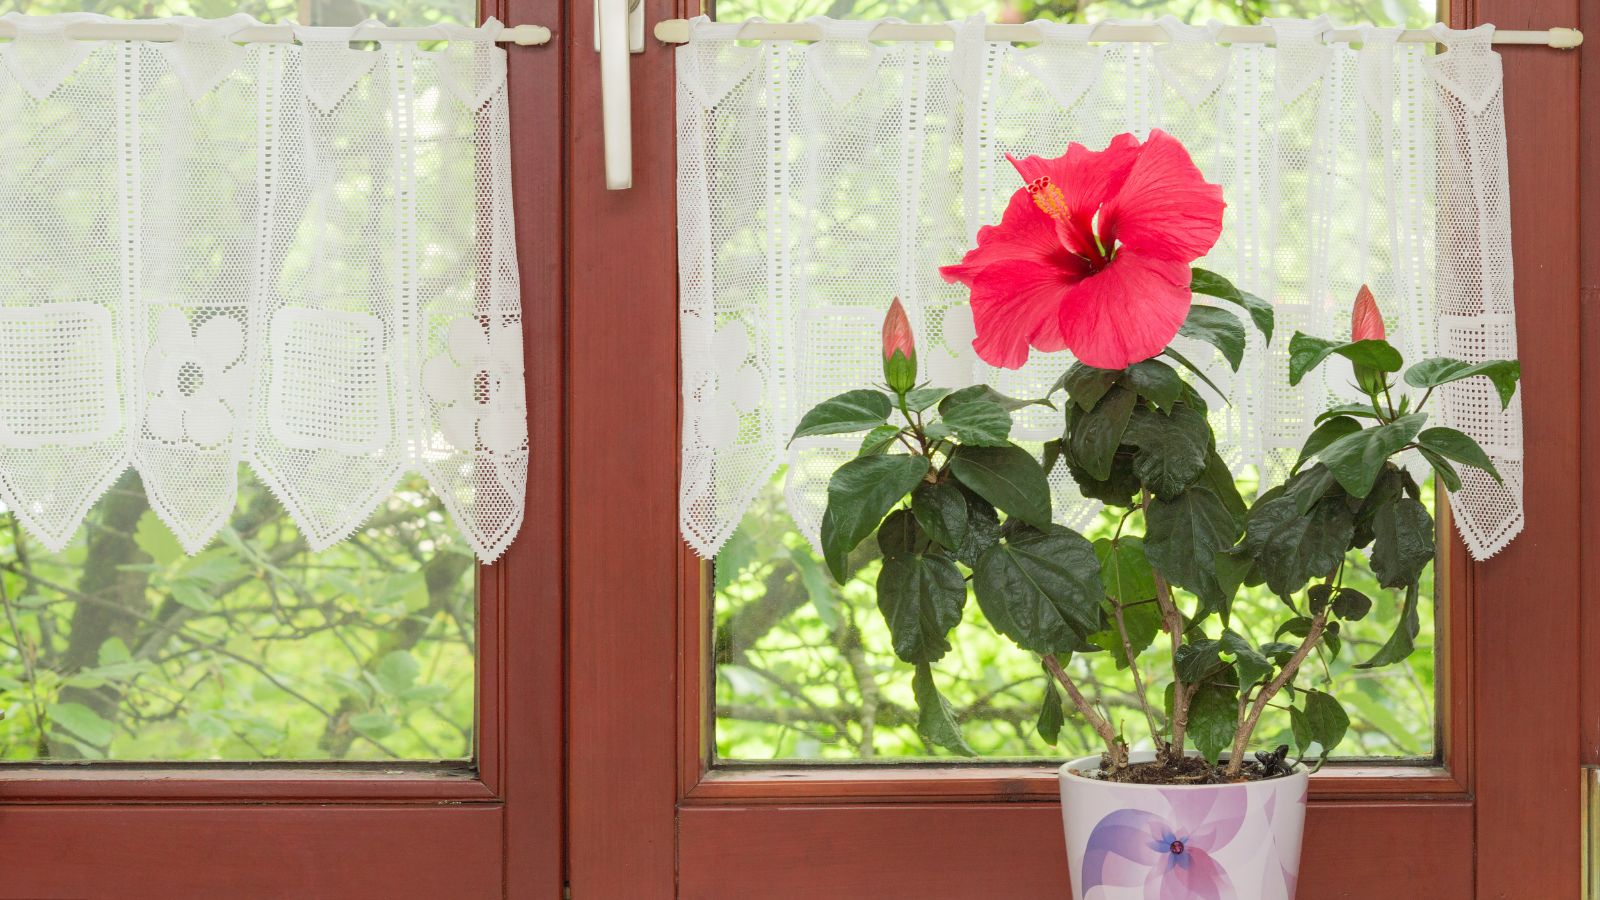
Tropical hibiscus (Hibiscus rosa-sinensis) is the kind of houseplant that makes you stop mid-walk just to stare. Those glossy leaves. Those big, tropical blooms that can reach about 4 to 8 inches (10 to 20 cm) wide, depending on the cultivar. And yes, it can absolutely live indoors and flower for you, as long as you give it the two things it craves most: light and consistency.
I like to think of hibiscus as a friendly, dramatic roommate. It will tell you quickly when something is off, but it also bounces back fast once you meet its needs. Below is my indoor routine, plus a troubleshooting section for the most common hiccups like yellow leaves, bud drop, and pests.

Know what you have
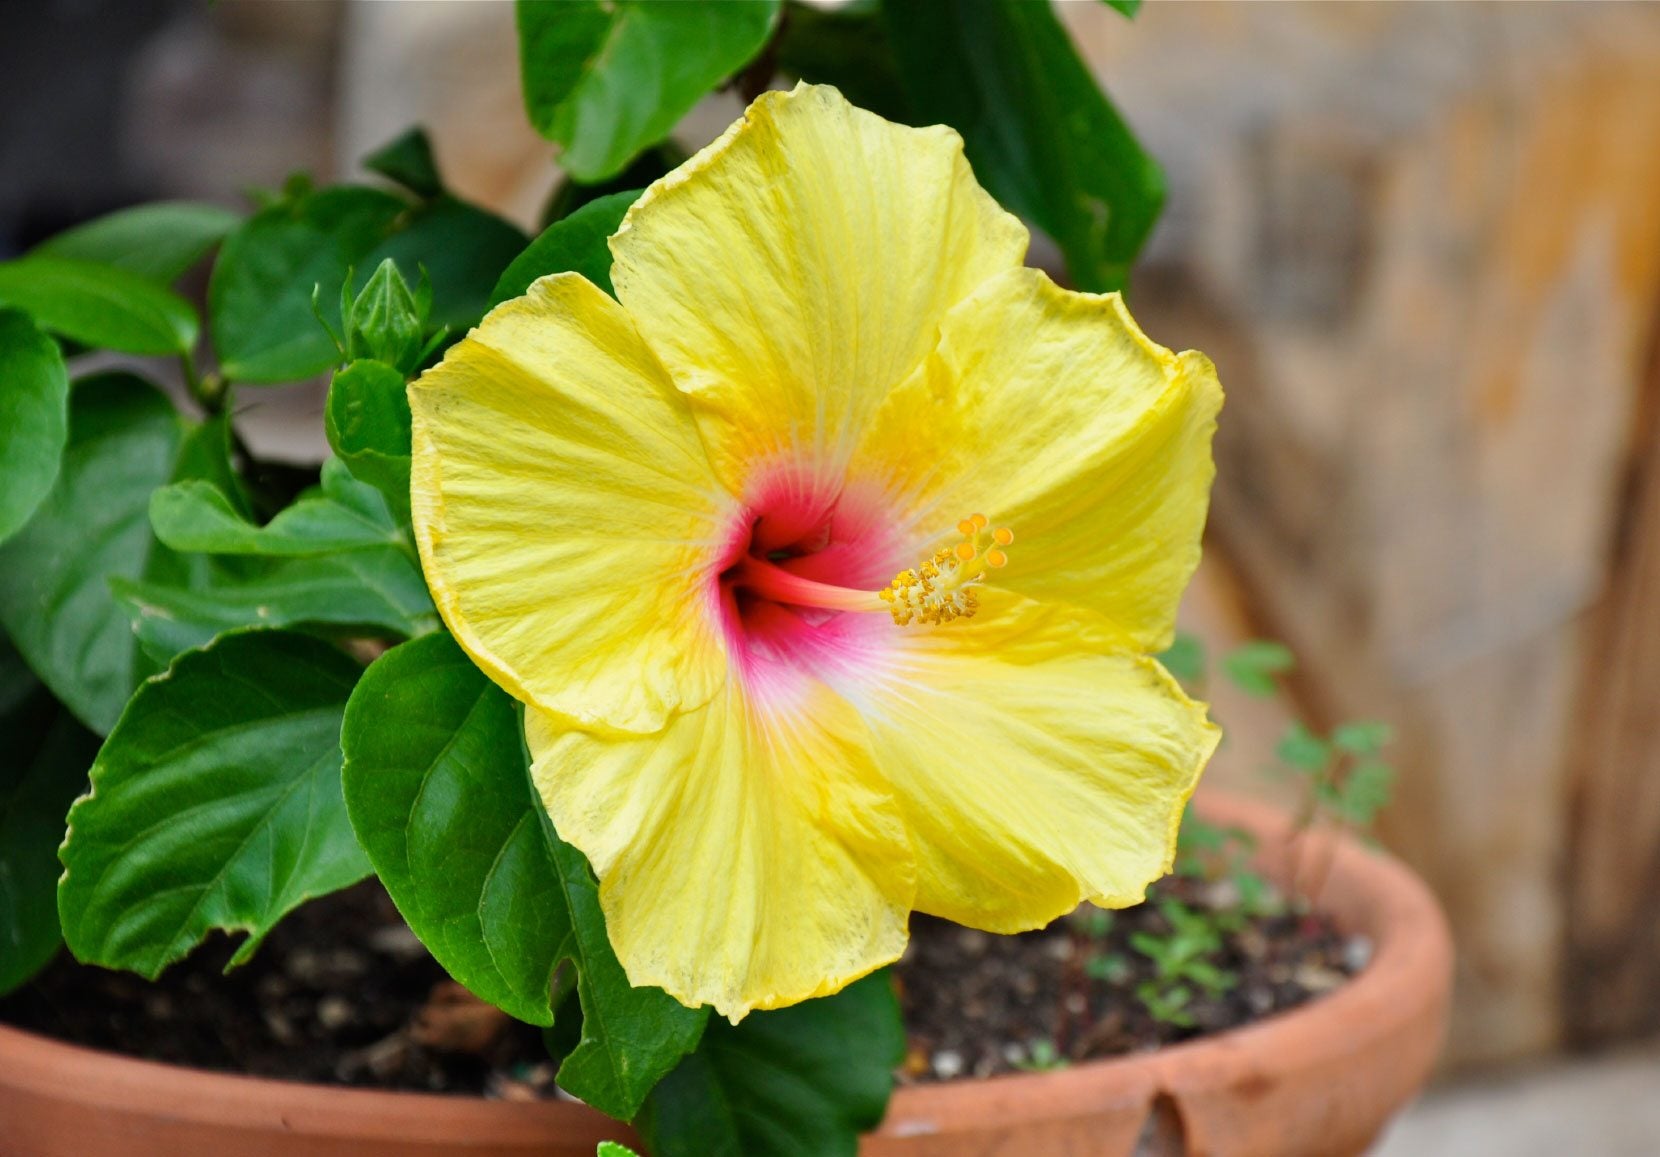
Indoor care advice applies to tropical hibiscus, the evergreen type commonly sold as a patio plant. It has glossy leaves and blooms in bold colors like red, orange, yellow, and pink.
- Tropical hibiscus: Loves warmth, hates frost, can be grown indoors year-round.
- Hardy hibiscus (rose mallow): Dies back in winter, usually grown outdoors, not a typical houseplant.
If your plant came from the houseplant section or the summer patio display, it is very likely tropical.
One more note: Some double-flowering or heavily variegated cultivars can be a bit slower indoors and may bloom less under the same conditions. If yours seems fussier, you are not imagining it.
Light (for blooms)
Hibiscus can survive in moderate indoor light, but it typically will not bloom much without very bright light. Think “sun on your face” brightness.
Best window placements
- South-facing window: The gold standard. Aim for at least 4 to 6 hours of direct sun if possible.
- West-facing window: Great afternoon sun, often strong enough to support blooms.
- East-facing window: Works, but may need backup light for heavy blooming.
- North-facing window: Usually too dim for flowering.
If you do not have enough sun
Add a grow light. A hibiscus under a strong LED grow light can bloom indoors like it is summer outside.
- Place the light 8 to 18 inches above the top leaves as a starting point, then adjust. Strong lights can sit higher. Weaker lights often need to be closer or run longer. Always follow your fixture guidance.
- Run it 12 to 14 hours per day for best bloom support.
- Keep the plant close to the window anyway if you can. More photons, more flowers.
Clara tip: How do you know if the grow light is “strong enough”? If your hibiscus keeps stretching toward it and making longer gaps between leaves, it is asking for more intensity or closer placement.
Clara tip: Rotate the pot a quarter turn every week or two. Hibiscus leans hard toward light and gets lopsided fast.
Indoor bloom expectations
Even happy indoor hibiscus often blooms more lightly in winter unless you are giving it strong supplemental light and steady warmth. Fewer flowers in low-light months does not mean you are failing. It is just the seasonal vibe.

Watering
Indoors, tropical hibiscus likes a rhythm: evenly moist soil with good drainage. The trick is avoiding the two extremes that cause the most problems: bone-dry followed by a flood, or constantly wet soil.
How to water (my reliable method)
- Check the pot by touching the soil. When the top 1 inch feels dry, it is time.
- Water slowly until it runs out of the drainage holes.
- Empty the saucer after 10 to 15 minutes. Hibiscus roots do not enjoy standing water.
Seasonal adjustment
- Spring and summer: You may water 1 to 3 times per week, depending on sun, pot size, and heat.
- Fall and winter: Growth slows. Water less often, but do not let it fully dry out for long stretches.
Pots and drainage: Use a pot with drainage holes. If you love a cachepot, keep the hibiscus in a plastic nursery pot inside it, and never let water pool at the bottom.
Soil that works: Hibiscus likes a chunky, airy mix indoors. Dense, peat-heavy mixes can stay too wet in lower light.
- Easy recipe: 2 parts high-quality potting mix + 1 part perlite + 1 part fine orchid bark (or pine bark fines).
- If your mix is already airy, you may only need to add perlite and a handful of bark.
Humidity and temperature
Tropical hibiscus is happiest at typical indoor temperatures, but it appreciates higher humidity than most homes provide, especially in winter with the heat running.
Temperature targets
- Ideal: 65 to 80°F (18 to 27°C)
- Avoid: Cold drafts, blasts from a heater vent, and temperatures below about 55°F (13°C)
Easy ways to boost humidity
- Humidifier: The simplest, most effective option.
- Group plants together: Creates a small, more humid microclimate.
- Pebble tray: Helpful for a modest bump. Keep the pot above the waterline.
Go easy on heavy misting. It is short-lived and, if leaves stay wet in a cooler room with low airflow, it can contribute to spotting issues. If you mist, do it lightly and make sure the plant dries quickly.
Clara tip: Winter leaf drop is common after moving indoors or when light drops. It is usually acclimation, not a moral failing. Stabilize light and watering, then give it a couple weeks to settle.
Fertilizer
Hibiscus is a hungry bloomer. Indoors, it does best with regular, lighter feedings rather than occasional heavy doses.
My indoor feeding schedule
- Spring through early fall: Feed every 2 weeks at half strength, or use a low-dose fertilizer weekly.
- Late fall and winter: If growth slows and light is lower, reduce to once a month or pause feeding until days lengthen.
What fertilizer should you use?
Look for a balanced fertilizer or one geared toward flowering, and make sure it includes micronutrients. Hibiscus can be sensitive to nutrient gaps.
- Balanced option: Something like 10-10-10 or 20-20-20 (diluted).
- Bloom-leaning option: A formula with slightly higher potassium can support flowering.
Important: Avoid overdoing high-phosphorus “bloom booster” products. In containers, excess phosphorus can contribute to micronutrient lockout (often showing up as chlorosis).
Clara tip: Flush the pot monthly during the growing season to rinse fertilizer salts. A simple method is to run 2 to 3 times the pot’s volume of water through the soil, letting it drain fully.
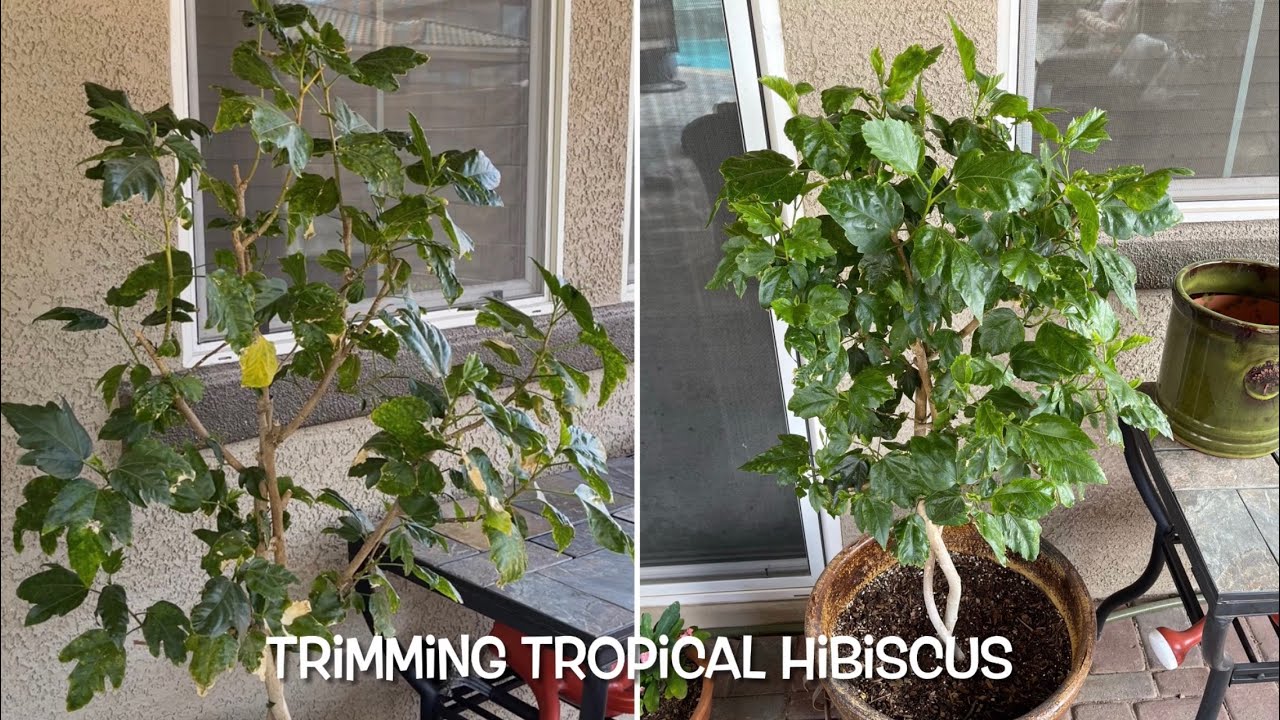
Pruning and shaping
Indoor hibiscus can get leggy, especially in winter. Pruning is your secret weapon for a fuller shape and better blooming because flowers form on new growth.
When to prune
- Best time: Late winter to early spring, right before a growth surge.
- Anytime touch-ups: You can pinch soft tips in spring and summer to encourage branching.
How to prune (simple and safe)
- Use clean, sharp pruners.
- Cut just above a leaf node (where a leaf meets the stem).
- Remove weak, crossing, or inward-growing stems first.
- For a big reshape, prune back up to about one-third of the plant.
After pruning, give bright light and steady moisture, then watch the plant respond with fresh leafy growth that sets the stage for buds.
Repotting
Tropical hibiscus likes being slightly snug in its pot, but too-root-bound can reduce blooming and make watering tricky.
Signs it is time
- Roots circling the bottom or poking out of drainage holes
- Soil drying out extremely fast
- Slower growth even with good light and feeding
How to repot without shocking it
- Move up only 1 to 2 inches in pot diameter.
- Use fresh, well-draining potting mix.
- Water in thoroughly and keep it in steady light, not harsh midday sun for the first week.
Troubleshooting
Yellow leaves
A few yellow leaves now and then is normal. A lot at once means the plant is reacting to stress. Here is how to narrow it down.
- Overwatering: Yellow leaves plus soft stems or soil that stays wet. Let the top inch dry, ensure drainage, and consider a chunkier mix.
- Underwatering swings: Yellowing after the plant repeatedly dries out. Water more consistently and consider a slightly larger pot if it dries within a day.
- Low light: Yellowing and leaf drop in winter, especially away from windows. Move to brighter light or add a grow light.
- Nutrient issues: Pale leaves or yellowing between veins can point to iron or magnesium issues, often tied to fertilizer balance and pH. Use a fertilizer with micronutrients and avoid excessive phosphorus.
- Water quality (sneaky one): If you get persistent interveinal chlorosis (yellow leaves with greener veins), your water may be too alkaline for micronutrient uptake. If this keeps happening, consider testing water pH/alkalinity and using chelated iron as needed.
- Acclimation shock: After moving locations, it may drop some leaves. Keep conditions stable and resist the urge to change everything at once.
Bud drop (buds form, then fall off)
This is the classic hibiscus heartbreak. Bud drop is most often about stress during bud development.
- Inconsistent watering: The top cause. Keep moisture steady once buds appear.
- Low humidity: Common in heated homes. Add a humidifier near the plant.
- Temperature swings or drafts: Buds are sensitive. Keep it away from doors, vents, and cold window glass at night.
- Not enough light: Buds can abort if the plant cannot “afford” them. Increase light intensity.
- Pests: Especially thrips and aphids. Inspect buds closely.
- Ethylene exposure: Ripening fruit and some combustion sources can increase ethylene in indoor air, which can contribute to bud and flower drop in sensitive plants. If you have a mysterious pattern, move the plant away from fruit bowls and kitchens.
Quick reset: Move the plant to your brightest spot, water on a consistent schedule, and stabilize humidity. Then give it two to four weeks to settle.
Leaves curling or looking crispy
- Dry air: Add humidity and keep it away from heat vents.
- Thirst: Check if soil is drying too fast. Water thoroughly and consider a larger pot if needed.
- Spider mites: Curling with fine webbing and stippled leaves. See pest section below.
No blooms (lots of leaves, no flowers)
- Light is too low: Increase direct sun or add a grow light.
- Too much nitrogen: Lush leaves, no buds. Switch to a balanced or bloom-leaning fertilizer and feed lightly but regularly.
- No pruning: A leggy plant with few tips has fewer bloom sites. Prune in late winter or pinch tips in spring.
Pests
Hibiscus is delicious to pests. Catch problems early and you can usually fix them without a big ordeal.
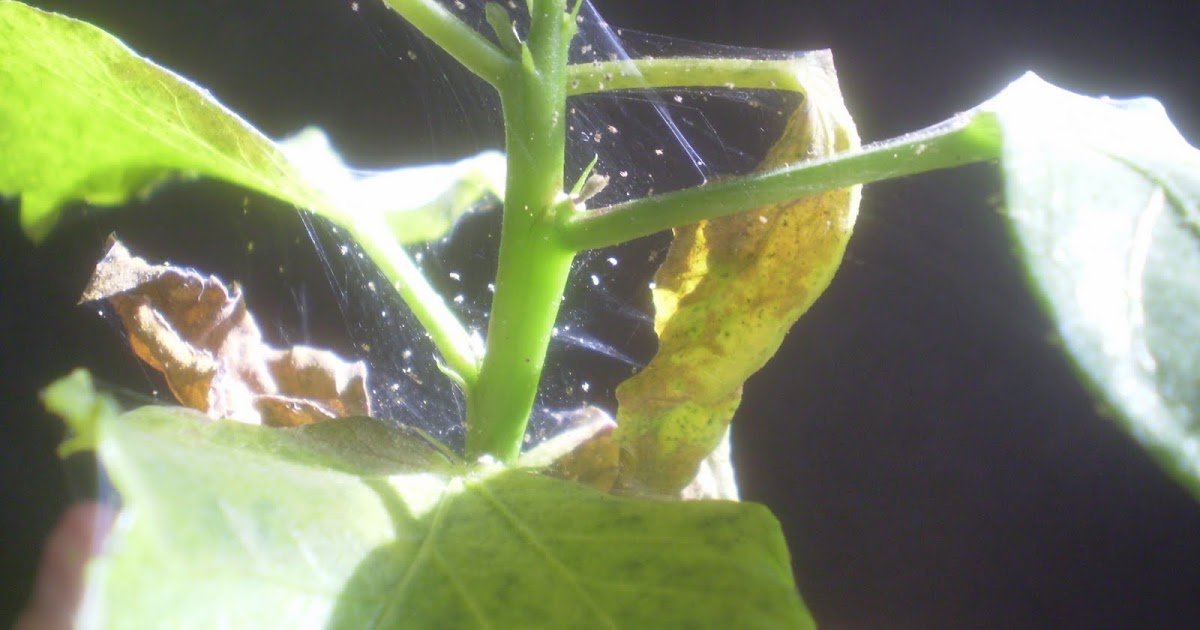
Spider mites
Signs: Fine webbing, dusty stippling on leaves, leaf yellowing and drop, especially in dry winter air.
- Rinse the plant in the shower or sink, focusing on leaf undersides.
- Increase humidity.
- Treat with insecticidal soap or horticultural oil, repeating every 5 to 7 days for a few rounds, or per label.
Aphids
Signs: Clusters of soft green or black insects on new growth and buds, sticky honeydew.
- Blast off with water.
- Follow with insecticidal soap if needed.
- Check buds and tender tips weekly until you are sure they are gone.
Whiteflies
Signs: Tiny white insects that flutter up when you touch the plant, sticky residue, gradual weakening.
- Use yellow sticky traps near the plant to reduce adults.
- Spray undersides with insecticidal soap, repeating weekly or per label.
- Isolate the plant during treatment.
Mealybugs and scale
Signs: Cottony clusters (mealybugs) or brown bumps (scale), sticky leaves, slow decline.
- Remove pests with a cotton swab dipped in isopropyl alcohol.
- Follow with horticultural oil, applied thoroughly and repeated as directed.
Clara tip: When using oils or soaps indoors, ventilate the room, protect surfaces, and follow the label. Avoid treating a drought-stressed plant, and avoid spraying in hot direct sun. Hibiscus can be sensitive, so test on a few leaves first.
Seasonal moves
If your hibiscus spends summer outdoors, it will usually thank you with faster growth and more flowers. The key is a gentle transition in both directions.
Bringing it indoors (fall)
- Bring it in before nights dip below about 50 to 55°F (10 to 13°C).
- Inspect for pests and rinse the foliage well.
- Consider a preventative insecticidal soap treatment and keep it separate from other houseplants for 1 to 2 weeks.
- Expect some leaf drop. This is normal acclimation to lower light.
Moving it back outside (spring)
- Wait until nights are reliably above 55 to 60°F (13 to 16°C).
- Harden off slowly: start with bright shade, then increase sun over 7 to 10 days.
- Resume a stronger feeding schedule once it is actively growing.
Quick checklist
- Light: Brightest window or a grow light, 12 to 14 hours if supplementing.
- Water: When top inch is dry, soak thoroughly, drain well.
- Humidity: Aim higher than average indoor air, especially in winter.
- Fertilizer: Light, regular feeding in the growing season; ease off in winter.
- Prune: Late winter or early spring for shape and more bloom sites.
- Troubleshoot: Yellow leaves and bud drop usually trace back to light and watering consistency.
If you tell me where your hibiscus sits (window direction, pot size, and how often you water), I can help you fine-tune it. Hibiscus has big tropical energy, but once you learn its routine, it is surprisingly forgiving.