Humidity Trays and Plant Grouping for Tropical Houseplants

If you have ever owned a calathea (or any other tropical plant that gets dramatic the second your heat kicks on), you already know the truth: humidity is not a vibe, it is a measurable part of plant comfort. The good news is you do not need a greenhouse to make your home feel kinder. You just need a few simple tools, a little consistency, and one big mindset shift: we are aiming for steady moisture in the air, not wet leaves or soggy soil.
This page walks you through DIY pebble trays (also called humidity trays), smart plant grouping, and the honest limits of misting so you can choose what actually moves the needle.

Quick humidity reality check
Humidity is the amount of water vapor in the air. Most tropical houseplants prefer higher humidity than the average heated or air-conditioned home.
- Typical indoor humidity: often 20 to 40% in winter, sometimes higher in summer depending on climate.
- Where many tropicals do best: often around 50 to 60% plus, with some happiest higher and plenty that adapt just fine to 40 to 50% with consistent care.
If you can, grab a small digital hygrometer. They are inexpensive, and they take the guesswork out of the whole conversation.
Measurement tip: Humidity varies room to room. For a useful reading, measure at plant height and away from vents, drafty windows, and direct humidifier output.
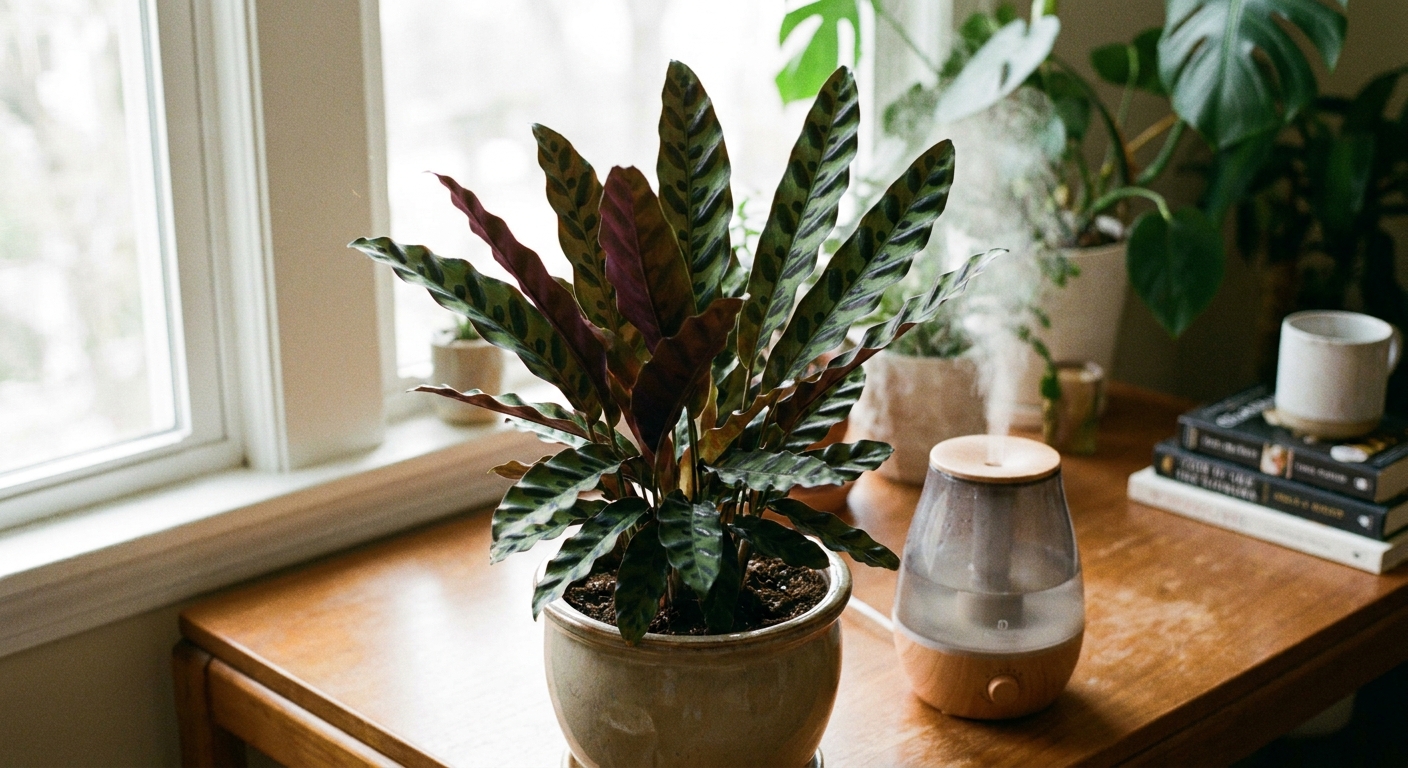
DIY pebble trays (humidity trays)
Pebble trays work by increasing evaporation right around your plant. They are not magic, and they will not turn a desert-dry living room into a rainforest. But they can create a small, gentle humidity bump in the air pocket surrounding your plant, especially when paired with grouping.
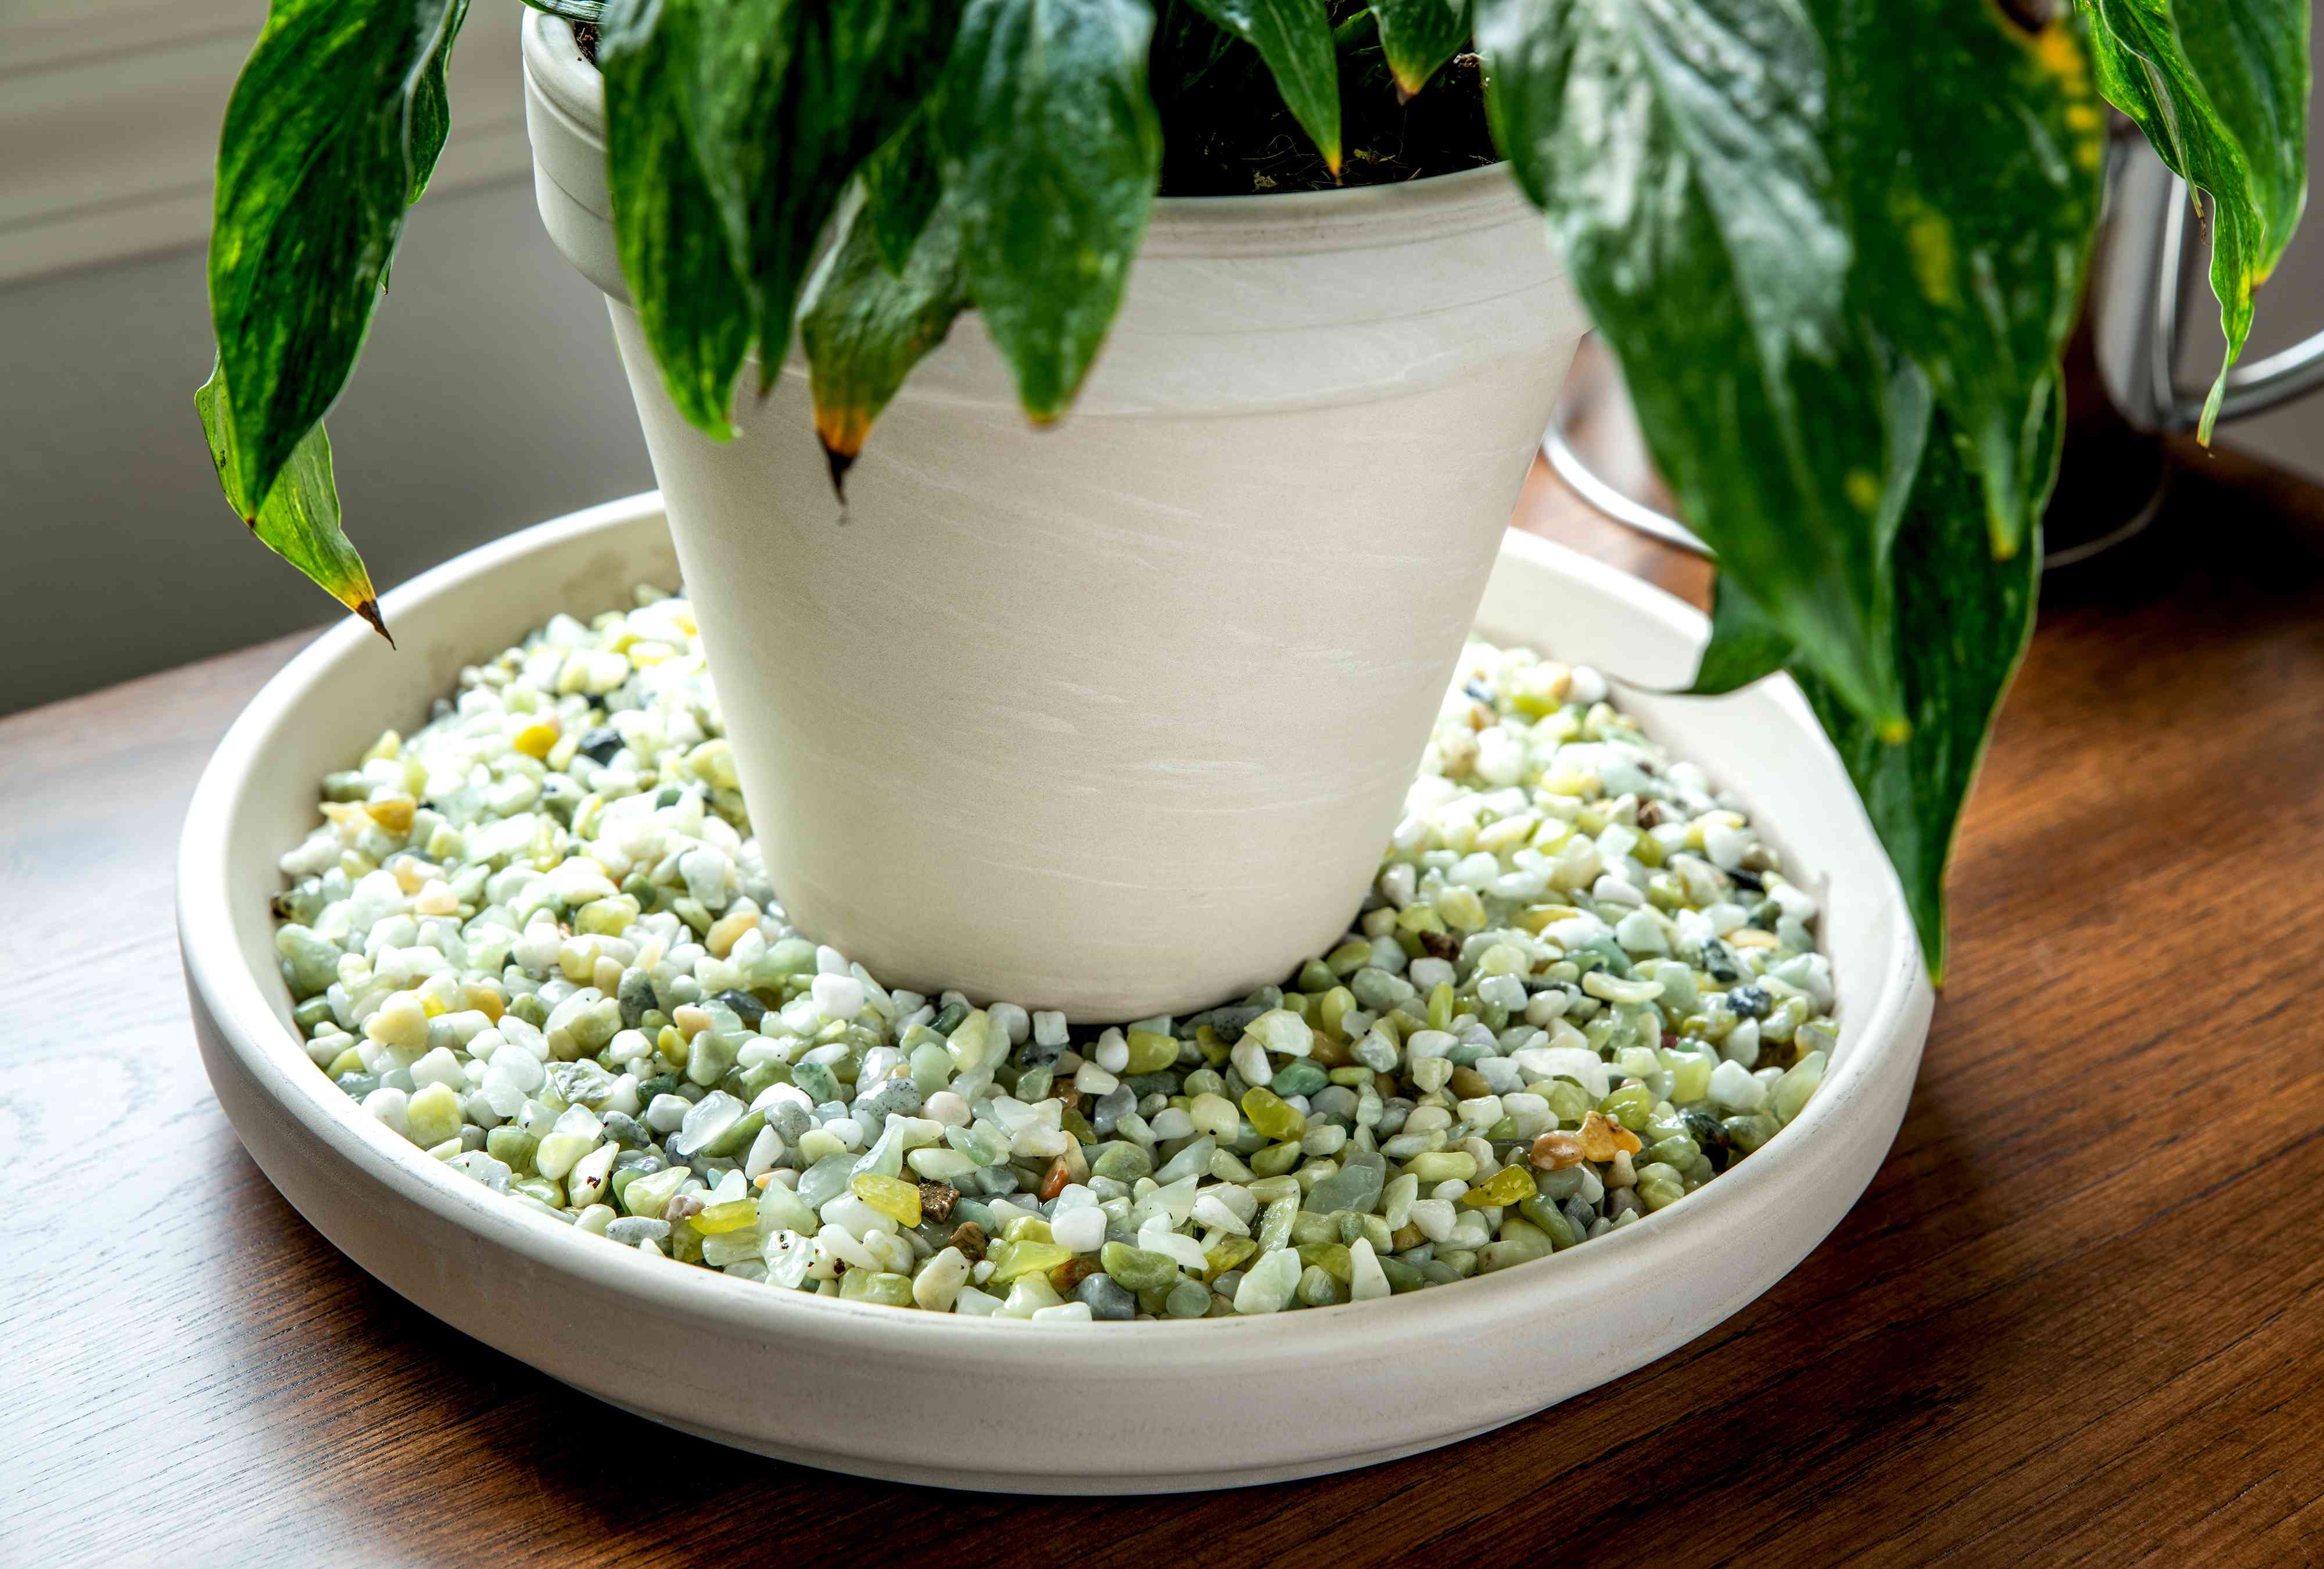
What you need
- A shallow tray or saucer that is wider than your pot
- Small pebbles, aquarium gravel, or polished stones (rinsed)
- Water
- (Optional) A small rack or plant riser if your pot base is very flat
- (Optional) A nursery pot inside a cachepot, if you want stability while keeping the drainage holes above the waterline
How to build it
- Choose a tray with breathing room. Wider is better than deeper. More surface area means more evaporation.
- Add a layer of pebbles. Aim for 1 to 2 inches so the pot can sit above the waterline.
- Pour water in slowly. Stop when the water level is just below the top of the pebbles. Your goal is water in the tray, not water touching the pot’s drainage holes.
- Set the pot on the stones. Press gently until it feels stable. Check from the side. If the pot is sitting in water, remove it and add more pebbles or a riser.
The most important rule
Avoid letting the pot sit in water. Yes, you may still get evaporation either way. The real problem is that a constantly wet pot base can keep the root zone too wet, which raises the risk of root rot, fungus gnats, and that sour “something is off” smell from tired soil.
Also worth saying out loud: pebble trays add moisture to the air, not the soil. Still water based on soil dryness and your plant’s needs, not because the tray exists.
Maintenance
- Top up as needed. In dry seasons, trays can empty quickly. Refill before they go bone-dry if you want steady evaporation.
- Flush monthly. Carry the tray to the sink, rinse the stones, and wash away mineral buildup and algae film.
- Use low-mineral water if possible. Distilled, rainwater, or filtered water helps reduce crusty deposits on stones and trays.
- Watch for mosquitoes. Usually only an issue outdoors, but standing water is standing water. Refresh frequently if the tray is outside. Indoors, it is typically a non-issue unless you have open access and very stagnant water for long stretches.
Common mistakes
- Mistake: Using a tiny saucer under a large plant. Fix: Size up the tray so you have more evaporating surface area.
- Mistake: Filling water to the top of the stones. Fix: Lower the waterline so the pot stays above the water.
- Mistake: Expecting whole-room humidity changes. Fix: Think “microclimate,” then combine with grouping or a humidifier.
Do pebble trays raise humidity?
They can, but usually in a small zone close to the tray and plant. In a large, drafty room, that moisture disperses fast. You will get the best results when:
- The tray is wide and kept filled below the pebble line
- The plant sits in a more enclosed area (not under an AC vent)
- You group plants together so their combined transpiration adds to the effect
If your hygrometer reads very low humidity (think 20 to 30%), a tray alone may not be enough for the pickiest tropicals. That is not failure. That is physics.
Plant grouping
Plants release moisture through their leaves. When you place several plants near each other, that moisture builds up in the shared space around them, creating a slightly more humid pocket. I call it a friendly little plant neighborhood.
How to group safely
- Leave a bit of airflow. Leaves should not be pressed together. Crowding can trap stale air and encourage fungal issues.
- Match water needs. Group plants that like similar moisture rhythms so you are not overwatering one to keep another happy.
- Quarantine new plants. Keep newcomers separate for 1 to 2 weeks to avoid spreading spider mites or thrips into the whole cluster.
- Rotate for even light. Plants on the edges usually get more light than plants in the middle.
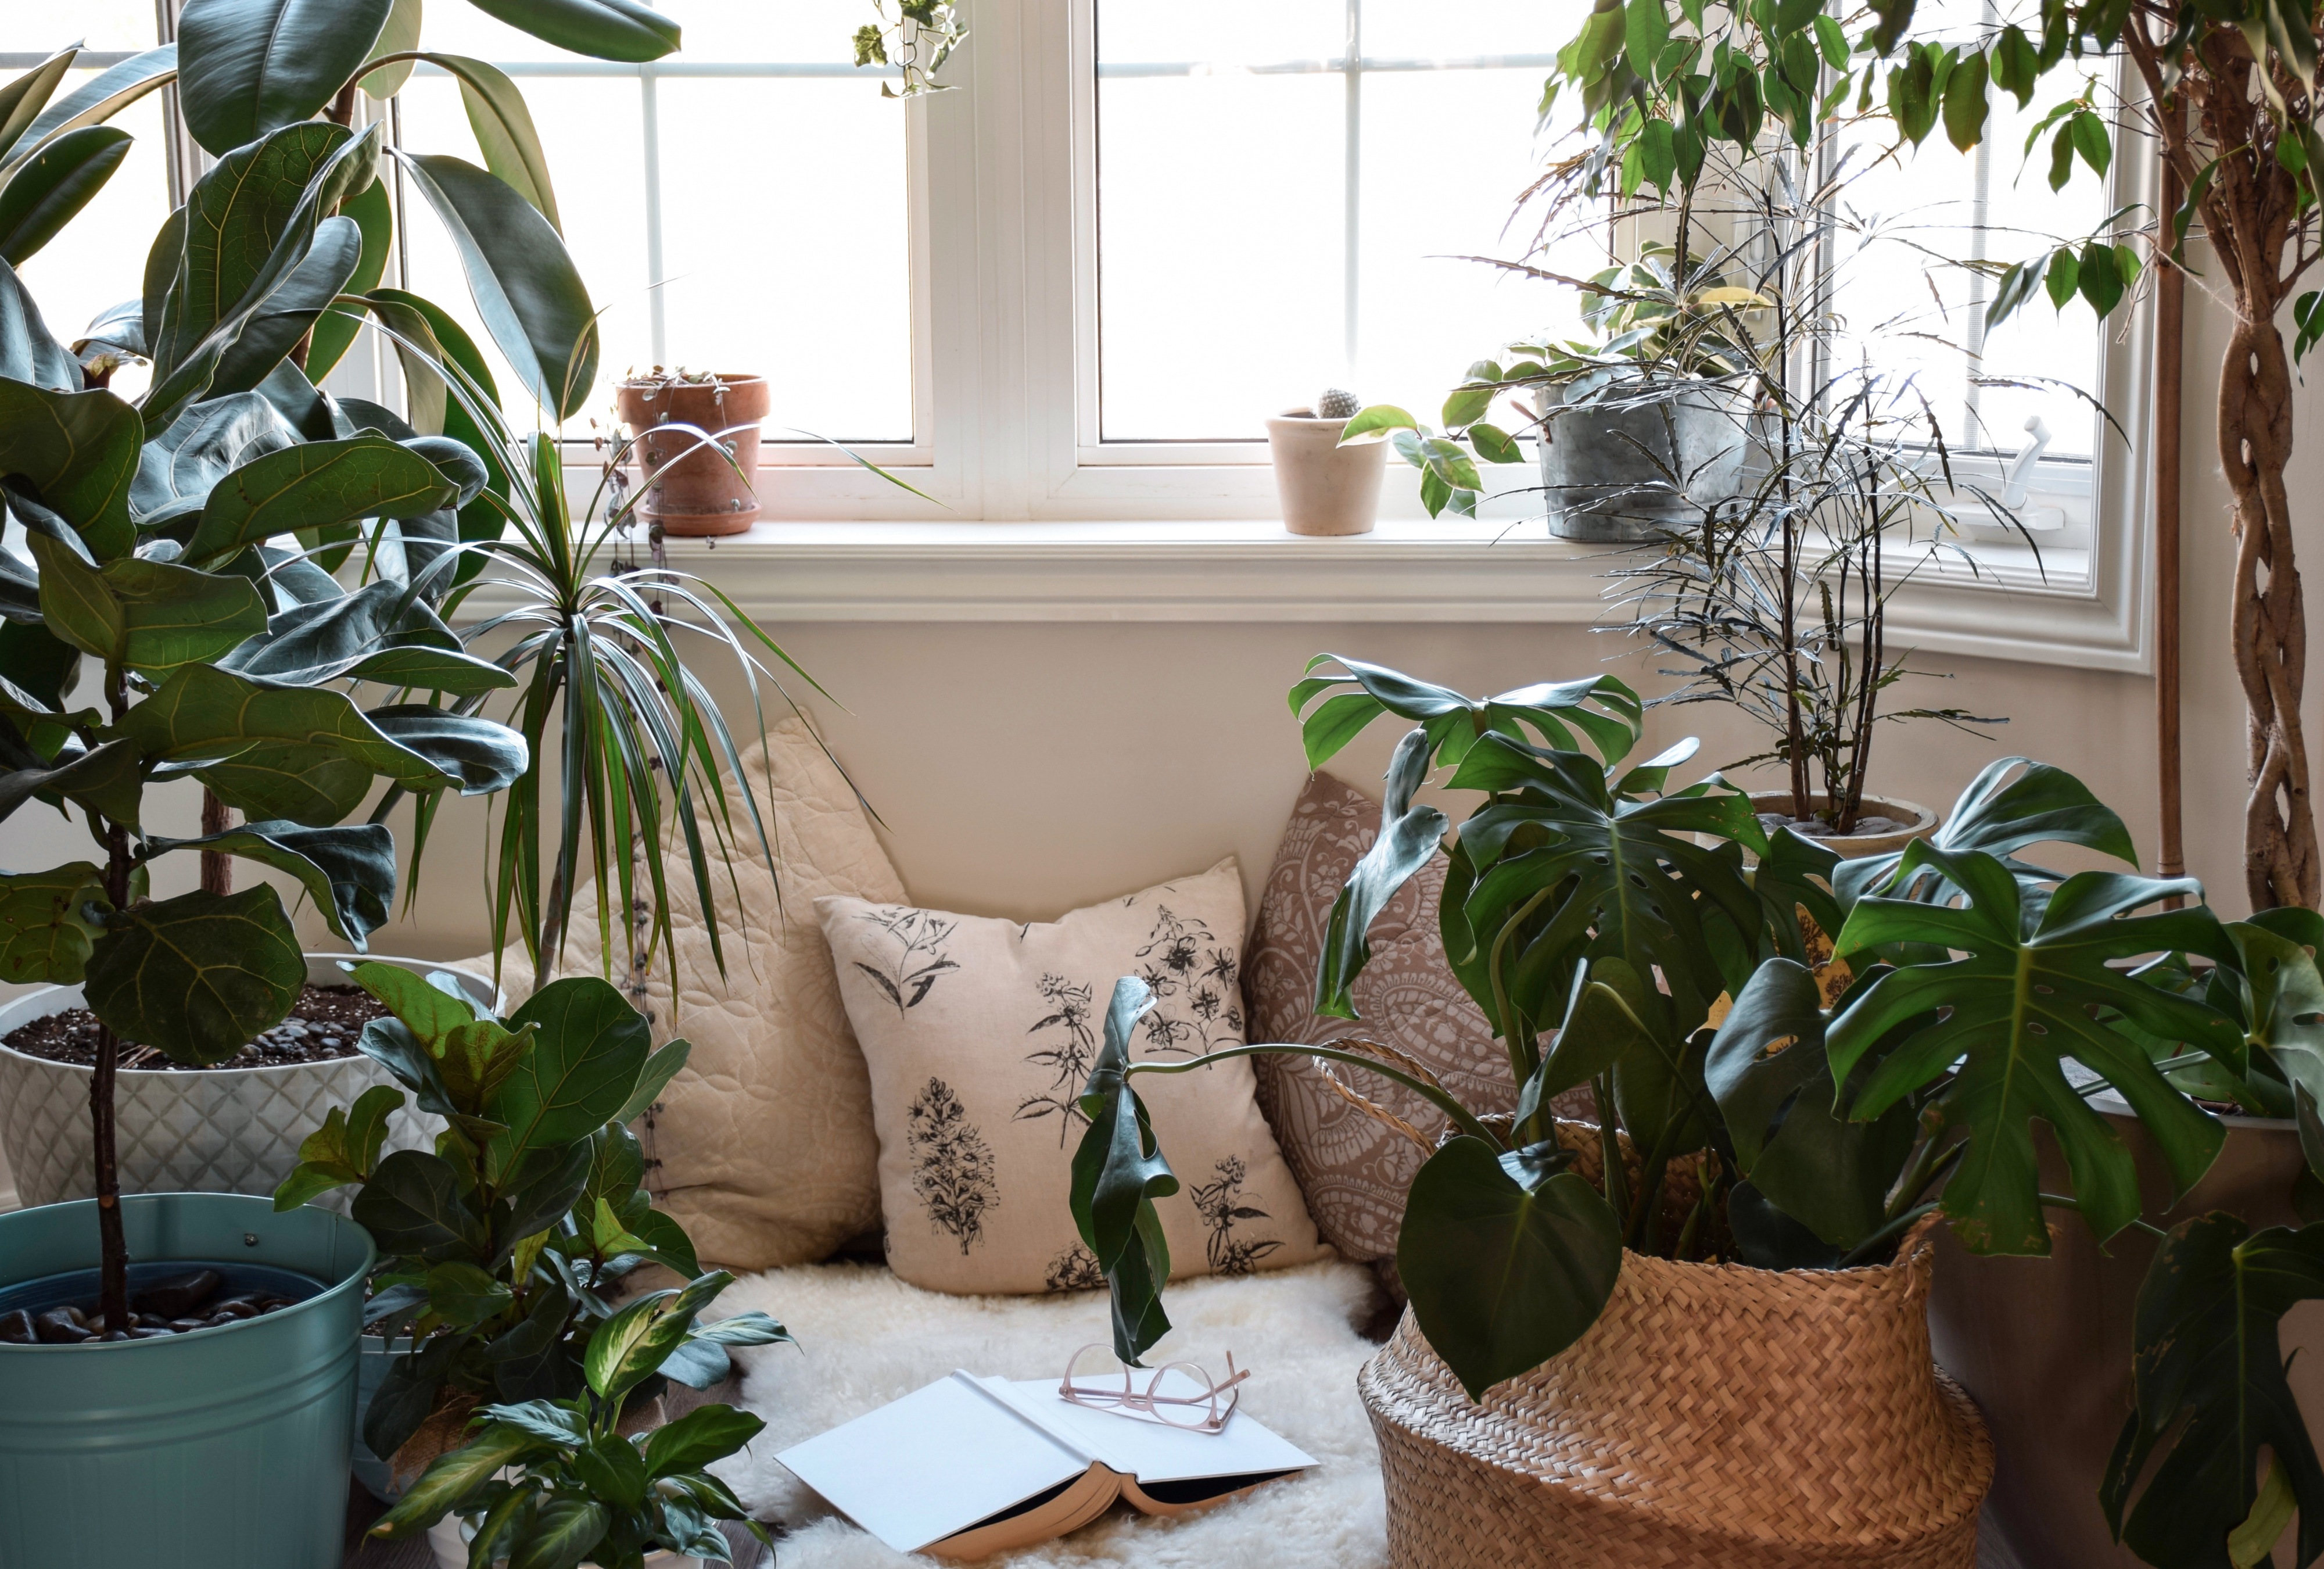
Where it works best
- In a bright bathroom or kitchen where ambient humidity is naturally higher
- Near a window with good light but away from heating and cooling vents
- Inside an open shelf or plant nook that reduces drafts
Where it can backfire
- Low light corners. Moist soil plus dim light can slow drying and invite fungus gnats.
- Tight clusters with wet foliage. If you are also misting heavily, you can create the perfect conditions for leaf spot on sensitive plants.
Misting
Misting is popular because it feels satisfying. I get it. It is the plant-care equivalent of fluffing a pillow. But here is the honest truth: in most homes, misting boosts humidity briefly, especially if your room is warm or has any airflow. Think minutes, not hours.
When misting helps
- To rinse dust lightly before wiping leaves (especially on larger-leaved tropicals)
- As a short-term comfort measure during very dry spells, if your plant tolerates wet leaves
- For propagation setups where you are already controlling the environment (like a clear bin or dome)
When to skip it
- If your plant is prone to leaf spotting or has textured leaves that hold water
- If your room is cool and air circulation is poor
- If you mist at night and leaves stay wet for hours
If you love the ritual, keep it gentle and do it in the morning so leaves dry by evening. But if you are misting daily and still seeing crispy edges, your plant is asking for a different solution.
Humidity without root drama
Humidity conversations often get tangled up with watering, so let’s separate them:
- Humidity supports leaves. It reduces moisture loss, helping prevent crispy tips and stress curl.
- Overwatering harms roots. Constantly wet soil suffocates roots, leading to yellowing, mushy stems, and rot.
The sweet spot is moist air plus well-aerated soil. If you are working hard on humidity but your potting mix is heavy and stays wet, fix the soil first. Your plant will thank you quietly, the way they do.
Simple upgrades
Use a humidifier well
If you have one plant that truly struggles, a small humidifier nearby can be the most reliable option. Aim it so the mist drifts near plants, not directly onto leaves, walls, or wood furniture.
- Target range: many tropicals are happy around 50 to 60%. If you push above about 70% without airflow, you can trade crispy tips for fungal problems.
- Clean weekly: humidifiers can grow biofilm fast. Follow your model’s cleaning instructions.
- Watch for white dust: ultrasonic humidifiers can leave mineral dust. Distilled water usually fixes it, and it keeps buildup down.
Pick the right room
Bathrooms with windows are gold. Kitchens can also work if you have bright light. Even moving a sensitive plant away from a vent can make a bigger difference than any pebble tray.
Build a humidity nook
Group a few tropicals together, add one or two pebble trays underneath the cluster, and keep them in consistent light. This stacks small wins into one calmer microclimate.
Troubleshooting
Crispy brown edges
- Often: low humidity, irregular watering, heat blasts from vents, too much sun, or mineral-heavy water and salt buildup.
- Try: steadier watering habits, moving the plant away from heat and drafts, grouping, a pebble tray, and using filtered or distilled water for sensitive plants.
Yellow leaves with damp soil
- Often: overwatering or poor drainage, not low humidity.
- Try: letting the mix dry a bit more between waterings, improving drainage, and ensuring the pot is not sitting in tray water.
Leaf spots after misting
- Often: water sitting on leaves too long, cool temperatures, or poor airflow.
- Try: stop misting, increase airflow gently, and water at soil level.
A calm plan
If you want a simple routine that does not turn into a full-time job, start here:
- Measure humidity with a hygrometer for one week (at plant height, away from vents).
- Move sensitive tropicals away from vents and drafts.
- Create a plant cluster in the brightest suitable spot.
- Add a properly built pebble tray under the cluster or under your fussiest plant.
- Only add a humidifier if your numbers stay low or your plant keeps crisping despite consistency.
Remember: plants do not need perfection. They need patterns they can trust. And if your calathea throws a little tantrum anyway, you are in good company. I have apologized to mine more than once while refilling a pebble tray.