Hoya Propagation
Hoyas have a funny way of making plant people greedy in the best possible way. One vine turns into two, two become a whole basket, and suddenly you are offering cuttings to friends like it is homemade zucchini season. The good news is that Hoya propagation is very doable at home, as long as you start with the right piece of stem and match your rooting method to your environment.
This guide walks you through taking cuttings, letting them dry a bit when helpful, and rooting in water , moss, or soil, plus how to keep humidity up and when to pot up without snapping your brand new roots.

What makes a Hoya cutting work
The node matters most
If you remember one thing, let it be this: hoyas root most reliably from nodes, not from plain stretches of stem. A node is the little joint where leaves emerge, and where dormant growth points and root tissue live.
- Good cutting: 1 to 3 nodes, with at least one node that can sit in your rooting medium.
- Better cutting: 2 nodes, with leaves on the top node and the lower node bare so it can root cleanly.
- Avoid: single leaves without a node (they may stay green in water for ages but usually will not become a new plant).
Thin vines vs thicker stems
Most hoyas propagate the same way, but their stems behave differently:
- Thin vining types (like Hoya bella, Hoya wayetii, many small-leaf varieties) can dehydrate faster. They like steadier humidity and smaller cuttings so the plant is not trying to support too much foliage.
- Thicker-stem types (like Hoya carnosa and many leathery-leaf cultivars) are slower but steadier. Their thicker stems store more water, but they can be more prone to rot if kept too wet, especially in cool rooms.
Before you cut
Best time to propagate
Spring through early fall is easiest because hoyas are naturally in growth mode. That said, you can propagate year-round indoors if you can provide bright light and warm temperatures.
What you need
- Clean, sharp snips or pruners
- Isopropyl alcohol for wiping blades
- A clear glass or jar (water method) or a small nursery pot (moss or soil)
- Rooting medium: water, sphagnum moss, or a chunky soil mix
- A plastic bag, humidity dome, or clear bin (optional but helpful)
- Optional: rooting hormone (powder or gel), especially for slower, thicker-stem cuttings
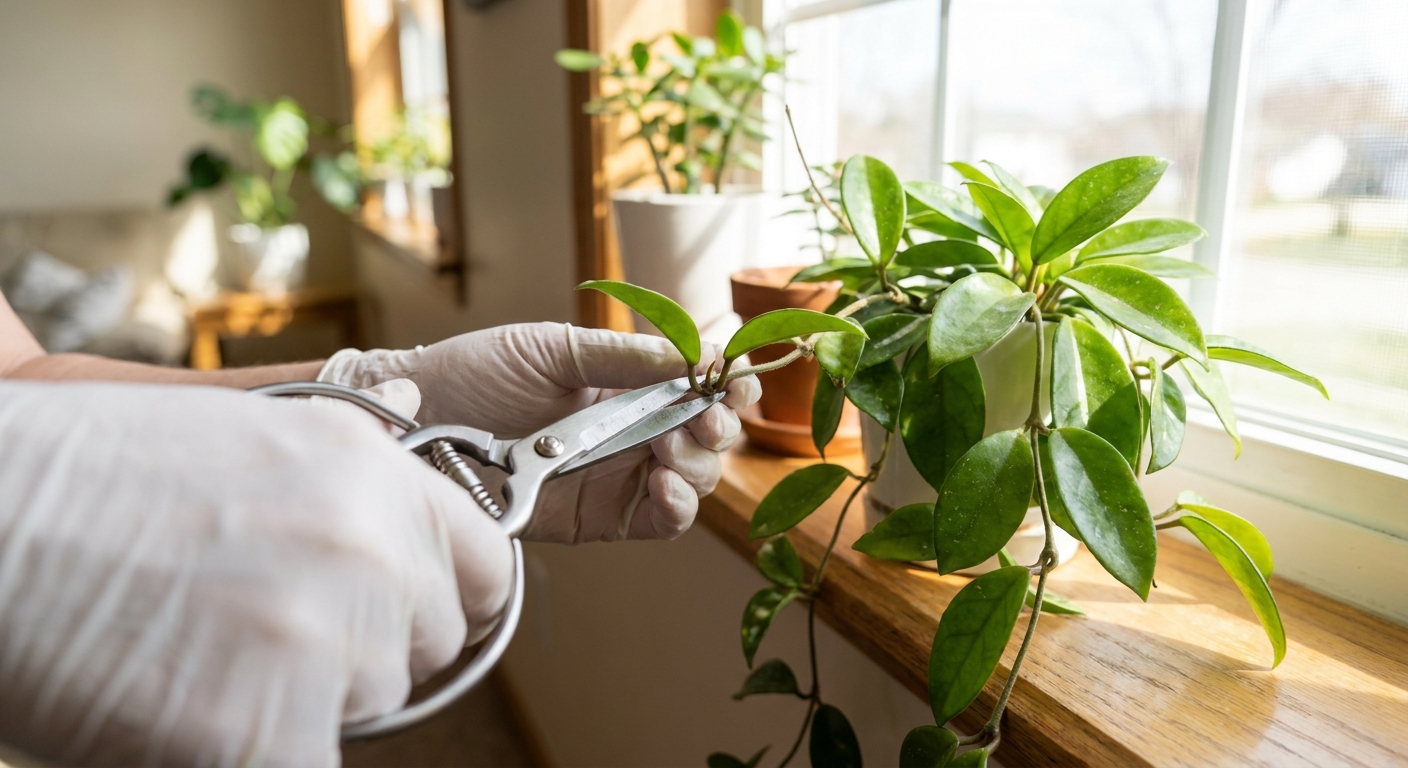
Pick a healthy stem (and watch for peduncles)
Choose a vine that is healthy, firm, and actively growing. Skip stems that are wrinkled, yellowing, or showing signs of pests. If you are dealing with mealybugs or mites, treat first, then propagate.
Quick bonus tip: hoyas often rebloom from the same peduncle (the little flower spur). When you are choosing where to cut on the mother plant, be mindful not to remove peduncles unless you truly do not care about that bloom point.
If you are propagating a highly variegated hoya, expect it to be a little slower and give it brighter indirect light than you would a solid-green type.
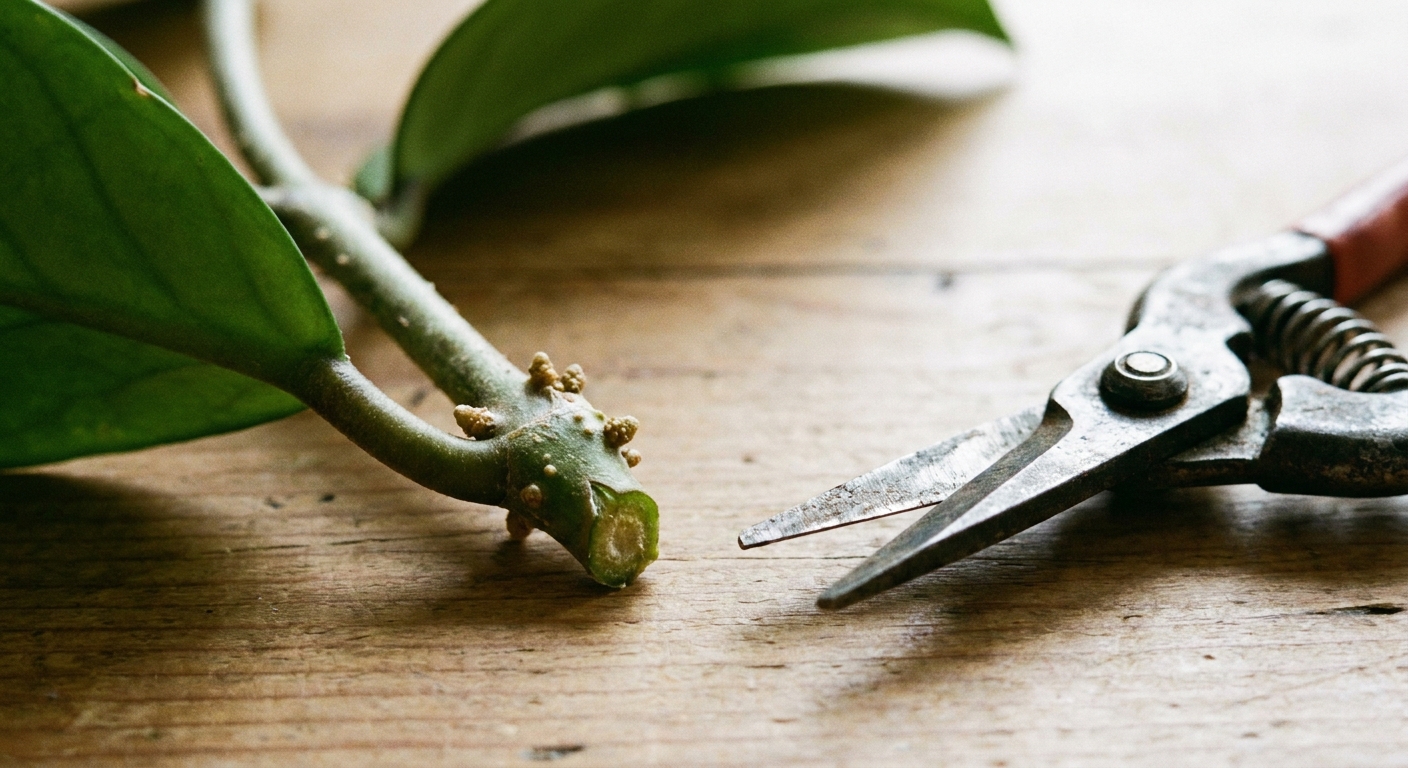
How to take a cutting
- Find your nodes. Select a section of vine with 1 to 3 nodes. Tip cuttings work, but mid-vine sections work too as long as they have healthy nodes.
- Make the cut. Cut just below a node. This gives the cutting maximum rooting tissue.
- Remove lower leaves. Strip leaves from the node(s) that will be in water, moss, or soil. Leaves left submerged rot quickly.
- Optional: let it dry a bit. Callusing is not required for most hoyas, and plenty of growers skip it. But if your home is cool, very humid, or you tend to keep things too wet, it can help to let the cutting sit in bright, indirect light until the cut surface is no longer wet to the touch (often 30 minutes to a few hours).
- Pick your method. Water, moss, or soil. Choose what matches your habits and your indoor humidity.
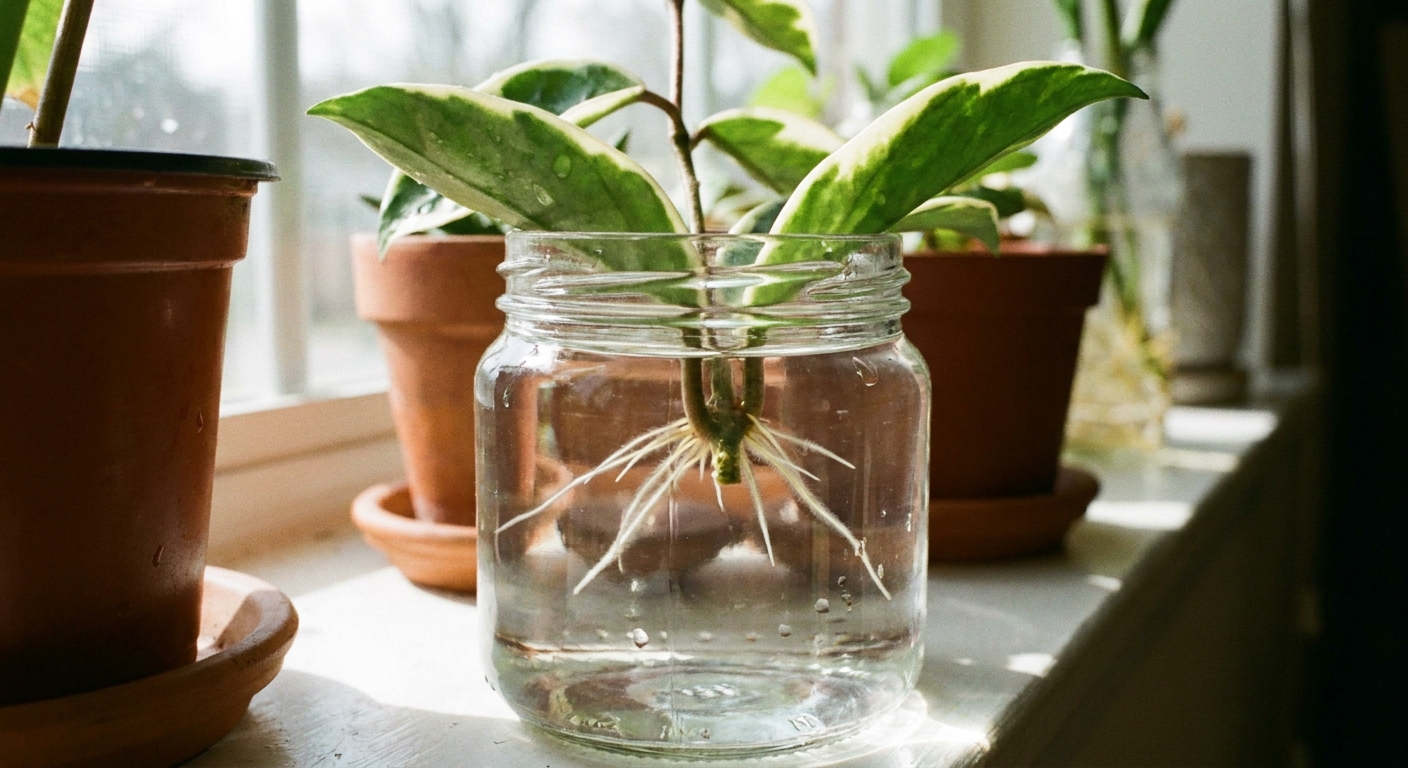
Method 1: Water
Water propagation is satisfying because you can watch roots form. It is also forgiving if you are new, as long as you keep the water fresh and do not submerge leaves.
How to root in water
- Fill a small jar with room-temperature water.
- Place the cutting so at least one node is underwater and leaves stay dry.
- Put it in bright, indirect light. A few feet back from an east or south window often works well, but adjust based on your home. If leaves look stressed or the jar heats up, back it off. If rooting is crawling, move a little closer.
- Change the water every 3 to 7 days, or sooner if it turns cloudy.
Tips to prevent rot
- Use a narrow jar so the cutting stays upright and nodes are not sloshing around.
- Warmth helps. Many hoyas root fastest around 70 to 80°F, but think of it as a comfy range, not a strict rule.
- If you use heavily chlorinated tap water and you notice frequent rot, try letting water sit out overnight or using filtered water. Not mandatory, just a nice tweak.
- If a node turns mushy, trim above the rot to clean tissue and restart with fresh water and a clean jar.
When water roots are ready for soil
Pot up when you have several roots and at least a little branching, and they look sturdy enough to handle gently. Many people aim for roots around 1.5 to 3 inches, but length is not the only goal. If you pot up too early, the cutting struggles. If you wait too long, you can end up with long water roots that sulk during the transition.
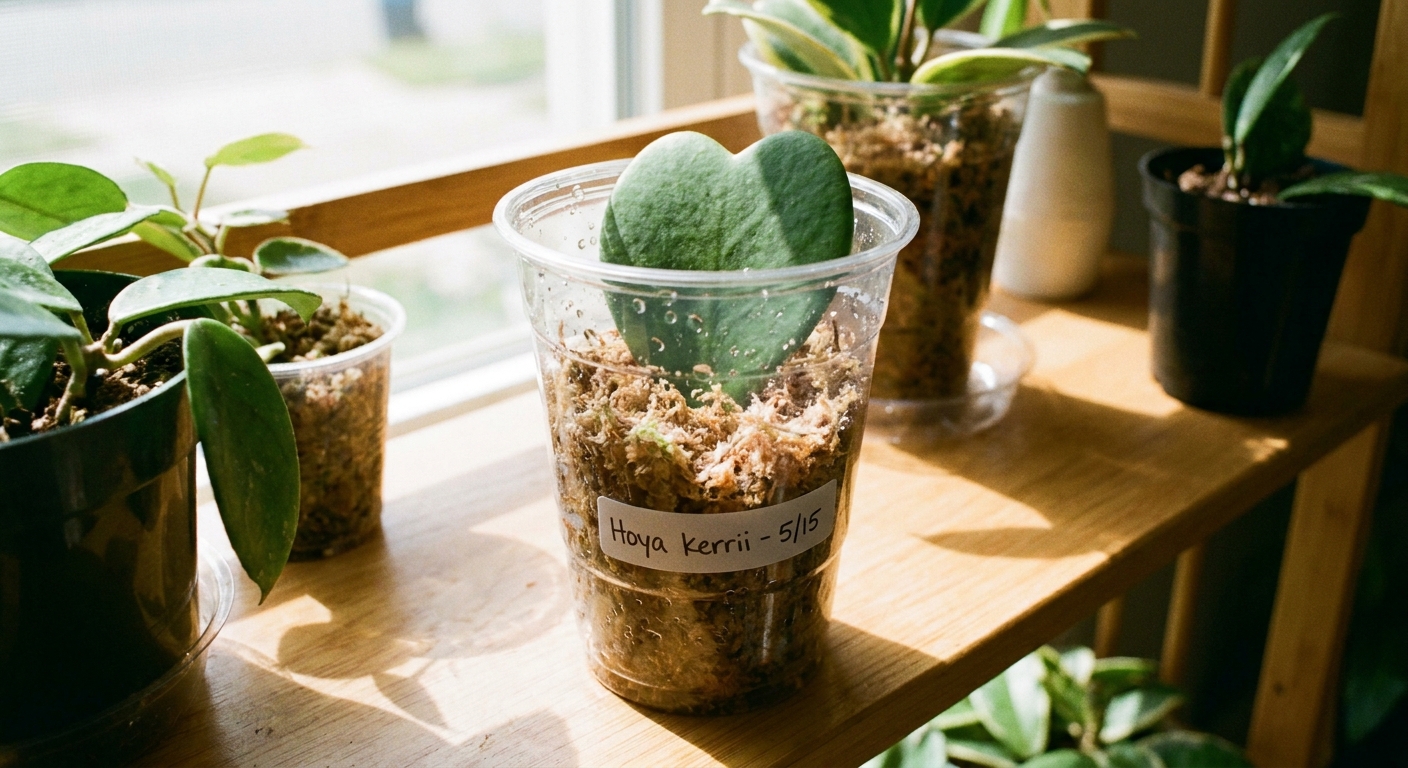
Method 2: Sphagnum moss
Moss is my favorite middle ground. It holds moisture evenly but still allows oxygen around the node, which is exactly what hoya cuttings crave. It is especially helpful for thin vining types that dry out quickly in plain soil.
How to root in moss
- Moisten long-fiber sphagnum moss, then squeeze it until it is damp, not dripping.
- Fill a small pot or cup with the moss and make a hole with a pencil or chopstick.
- Tuck the node into the moss and firm it gently so the cutting does not wobble. Do not pack the moss tight like a cork.
- Cover with a clear bag or place in a clear bin for higher humidity, leaving a small gap for airflow.
Moisture and airflow
- Moss should feel like a wrung-out sponge.
- If you see condensation raining down constantly, vent more often.
- If moss turns crispy in a day, increase humidity or move the cutting out of direct sun.
When to pot up from moss
When you feel resistance from roots and can see roots through the cup or at the drainage holes, it is time. Be gentle. Moss loves to cling to roots, and that is fine in small amounts. If there is a big wad of moss wrapped around the base, tease some of it away so the center does not stay too wet in the pot.
Method 3: Soil
Soil propagation is wonderful if you prefer to skip the transition step. The cutting forms soil roots from the start, which can mean less shock later. The trick is using a mix that stays lightly moist but never soggy.
Best soil mix for cuttings
Aim for airy and fast draining. Here is a reliable DIY blend:
- 2 parts fine orchid bark or coco chips
- 1 part perlite or pumice
- 1 part coco coir or peat-based potting mix
If you only have regular potting mix, cut it with at least 30 to 50 percent perlite to improve airflow.
How to root in soil
- Pre-moisten the mix so it is evenly damp.
- Plant the cutting with one node buried and leaves above the surface.
- Use a small pot. Oversized pots stay wet too long.
- Cover loosely for humidity if your home is dry, then vent briefly each day.
How to water soil props
Water lightly when the top inch feels barely dry. You are not trying to keep it soaked. You are trying to keep the node from drying out while roots form.
Light, humidity, and warmth
Light
Bright, indirect light is ideal. Too little light slows rooting. Harsh direct sun can overheat a bagged cutting and cook it.
Humidity
Most hoya cuttings root faster with moderate to higher humidity (often around 50 to 70 percent), but they still need fresh air. If you use a bag or dome, open it once a day for a minute.
Temperature
Warmth speeds rooting. Many hoyas are happiest rooting in the 70 to 80°F zone, but anything comfortably warm and steady usually helps. If your home is cool, a seedling heat mat on low can help, especially for thicker-stem hoyas that like to take their time.
How long does it take?
Timelines depend on variety, season, and your conditions, but here are realistic ranges:
- Water: roots often start in 1 to 3 weeks, potting up in 3 to 6 weeks
- Moss: usually 2 to 5 weeks to a rooted plug
- Soil: 3 to 8 weeks before you feel strong resistance
Some hoyas root quickly and others act like they are negotiating terms. If the cutting stays firm and green, it is usually still in the game.
Potting up without setbacks
Choose the right pot
Pick a pot only 1 to 2 inches wider than the root mass. Hoyas like to dry a bit between waterings, and too much extra soil can stay damp and cause rot.
Transitioning from water
- Pre-moisten your airy hoya mix.
- Plant carefully, spreading roots gently instead of coiling them tightly.
- Water once to settle the mix, then let it dry slightly before watering again.
- Keep in bright, indirect light for 1 to 2 weeks while it adjusts.
Aftercare
- Hold off on fertilizer until you see new growth. Usually 3 to 4 weeks after potting up.
- Do not tug to check roots. New roots snap easily. Look for new leaves instead.
Common problems
Cutting turns yellow
- Possible causes: too much water, not enough light, cold temperatures
- Try: brighter indirect light, warmer spot, switch to a chunkier medium
Stem gets mushy at the node
- Cause: rot from stagnant water or soggy medium
- Fix: cut above rot to clean tissue, sanitize tools, restart in fresh water or barely damp moss
Leaves wrinkle while rooting
- Cause: dehydration before roots form, common with thin vining hoyas
- Fix: add a humidity bag, reduce leaf load by removing one leaf pair, keep medium evenly moist
Nothing happens for weeks
If the cutting stays green and firm, be patient. Increase warmth, move to brighter indirect light, and check that at least one node is actually in contact with the rooting medium.
Quick checklist
- Cut below a node, and make sure a node is in water, moss, or soil
- Remove any leaves that would sit in the medium
- Bright indirect light and steady warmth speed rooting
- Higher humidity helps, but airflow prevents rot
- Pot up when you have multiple roots with some branching, or the cutting resists a gentle wiggle
If you want my most honest, dirt-under-the-fingernails advice, it is this: propagate more than one cutting when you can. It takes the pressure off, and it is the fastest way to learn what your specific home conditions like best.