How to Stake Peonies Before They Flop
Peonies have a certain talent for making us fall in love, then face-planting into the mulch the moment the blooms get heavy. If your plants look gorgeous at sunrise and look like they need a tiny chiropractor by lunchtime, you are not alone.
The trick is not staking after the flop. The trick is supporting early, while stems are still growing straight and can weave into a support naturally. Below, I will walk you through the easiest supports, the best timing, and how to tie peonies gently so you keep the flowers (and the stems) looking like they belong in a vase, not on the ground.

Why peonies flop in the first place
Peony stems can be sturdy, but blooms can be ridiculously heavy, especially on double varieties that pack on petals. Add rain, overhead irrigation, or a gusty corner of the yard and those tall stems act like little flower cranes that suddenly cannot balance the load.
- Bloom weight: doubles and bomb-types are the usual floppers. Singles and semi-doubles often stand better.
- Rain: water adds weight and bends stems fast.
- Overhead sprinklers: not usually as dramatic as a real downpour, but they can add extra weight and encourage flopping (and disease) during bloom.
- Windy exposure: open lawns, corners, and gaps between buildings create wind tunnels.
- Too much shade: stems stretch toward light and get lanky.
- Excess nitrogen: especially from lawn fertilizer drift, can push fast, softer growth that leans.
Staking does not “fix” the plant. It simply gives those stems a discreet backbone so the blooms can do their showy thing without collapsing.
When to stake peonies for the best results
If you remember just one thing, let it be this: install supports before buds open.
Best timing for herbaceous peonies
Put supports on when shoots are roughly 6 to 12 inches tall (give or take your climate and cultivar) and the plant is leafing out, but before the buds swell and show color. At this stage, stems are still flexible enough to guide through a ring or grid without snapping.
What happens if you wait too long
Once buds are large, you will be trying to lift and corral a whole bouquet at once. That is when stems crack, buds bruise, and you end up with a support that looks like it is wrestling the plant.
If your peony is already flopping, you can still help it, but use softer ties and accept that it may look a bit bundled this season. Next year is where you really nail the timing.
Pick your support: hoops vs grids
There are two main support styles that work beautifully for most garden peonies. Which one is best depends on your plant size, your weather, and how invisible you want the support to be.
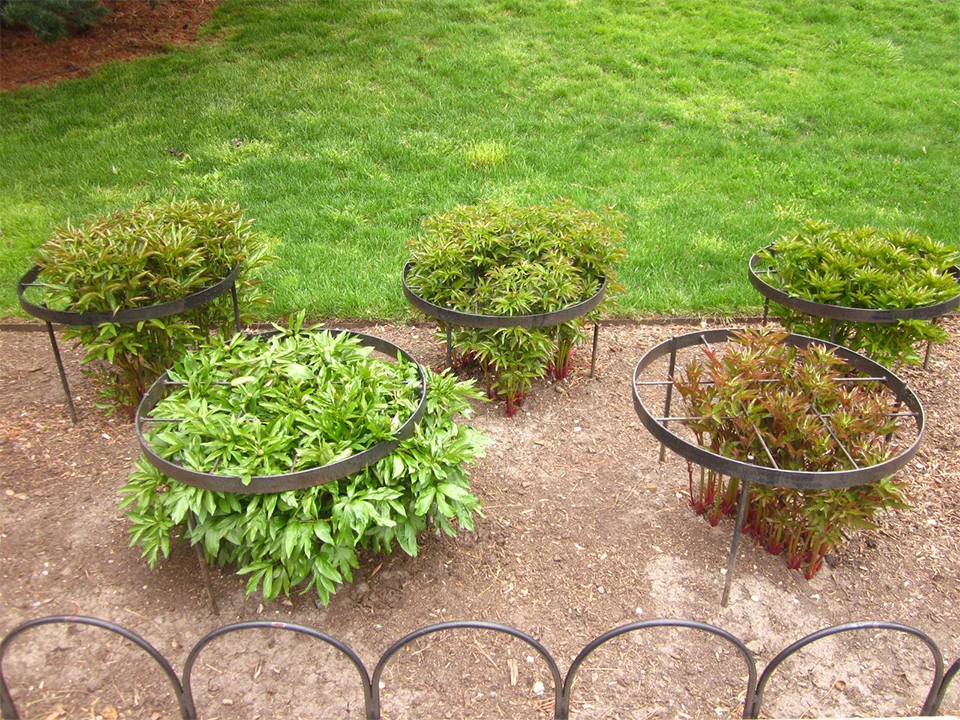
Peony hoop stakes (ring supports)
These are circular rings (often metal) on legs that push into the soil around the crown. The stems grow inside the ring and the ring holds the bouquet upright.
- Best for: medium to large clumps, plants that lean outward as they bloom, gardeners who want a quick install.
- Pros: fast, sturdy, widely available; easy to place around a mature plant.
- Cons: can be visible if installed late or if the ring is too small for the clump.
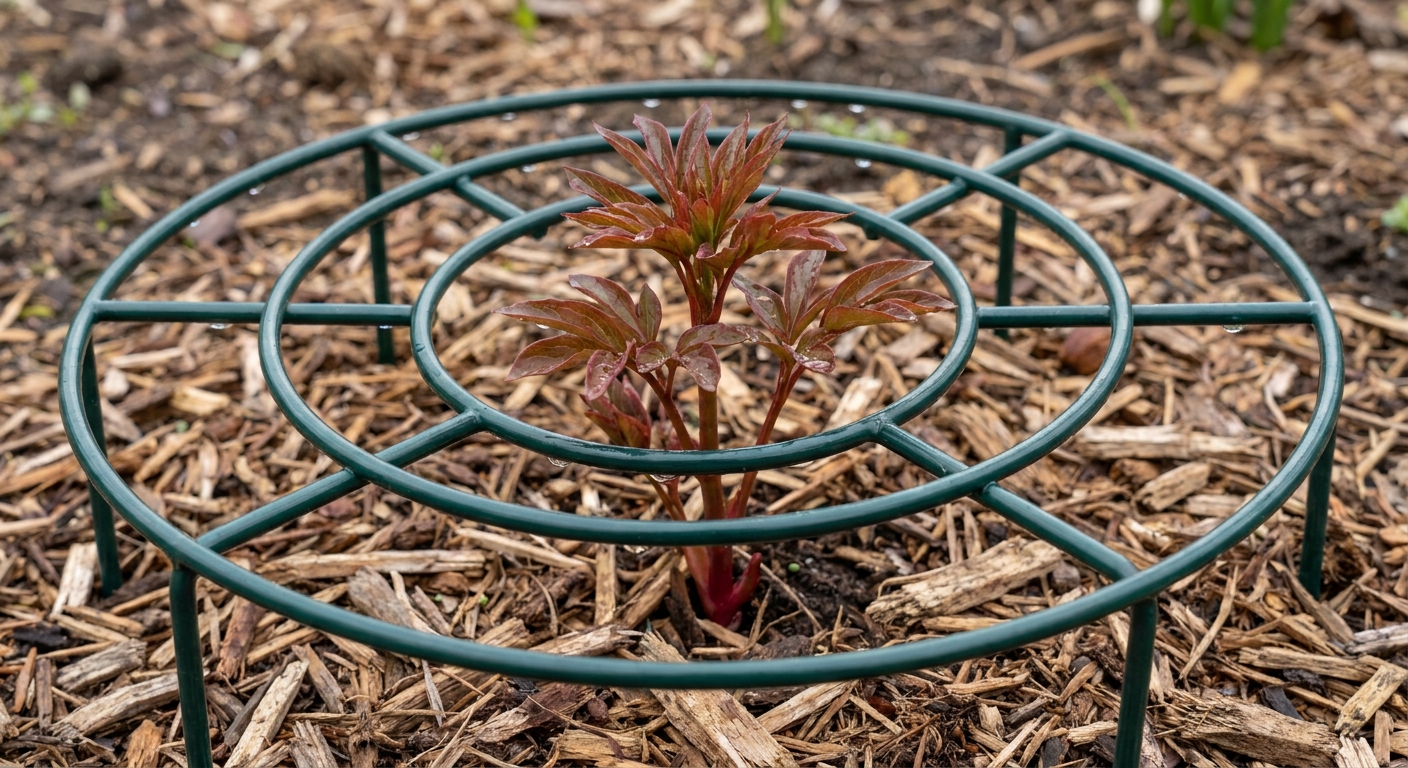
Grow-through grid supports
These are usually square or round grids on legs, sometimes called “grow-through supports.” You set them over the plant early and stems rise through the openings, creating an invisible scaffold once leaves fill in.
- Best for: plants that always flop, windy sites, gardeners who want the most natural look.
- Pros: extremely discreet; supports multiple stems evenly; great in rain and wind.
- Cons: must be installed early; you may need a larger size than you think for mature clumps.
Quick sizing tip
Choose a support that is wider than the plant’s spring footprint. A tight ring forces stems inward and can cause rubbing, bent stems, and crowded airflow. I prefer “a little roomy” over “perfectly snug.”
How to install a support
Staking is easiest when the soil is workable and shoots are still tender. Give yourself 5 minutes per plant and you will save weeks of annoyance later.
Step 1: Find the crown and clear the area
Gently pull aside mulch and locate where stems emerge. Remove any sticks or debris that will interfere with the legs going into the soil.
Quick note: this is not the moment to “fix” planting depth. Herbaceous peonies want their eyes set shallow (generally 1 to 2 inches below soil). Planting depth affects flowering far more than flopping, so if you suspect yours is too deep, plan a proper fall transplant instead of digging around the crown in spring.
Step 2: Center the support
For hoops, if your ring opens, place it around the clump and close it. If it does not open, you will need to thread it down over the shoots early while they are still short and flexible.
For grids, hold it level and center it over the shoots.
Step 3: Push legs in until it does not wobble
As a general guide, aim for about 4 to 8 inches into the ground, depending on soil looseness and the support design. In fluffy amended beds, go deeper. In rocky clay, wiggle and work the legs in slowly to avoid bending them.
Step 4: Guide stems early
As the plant grows, check weekly and gently redirect any stems that are heading outside the ring or grid. This is the secret to a support that disappears once leaves fill in.
Step 5: Mulch and water normally
Keep mulch pulled back a little from the crown. Water at the base when possible to keep foliage and blooms drier (and a bit lighter) during flowering.
Windy sites: extra stability
If your peonies live in a wind corridor, a single ring might not be enough. You do not need to build Fort Peony, but a few tweaks make a big difference.
- Use a heavier gauge support: thicker metal legs flex less.
- Go taller than you think: blooms often sit at the top third of the plant, and support needs to catch stems before they lean.
- Anchor with extra stakes: place 2 to 3 bamboo stakes just outside the ring and loosely tie the ring to them for extra rigidity.
- Planting note: if wind is constant, consider relocating the plant to a spot with morning sun and a bit of natural shelter. If that is on your mind, see our peony transplant page for timing and aftercare.
Tying without damage
Some peonies support themselves perfectly with a grid and never need ties. Others, especially older clumps or very double varieties, appreciate a little extra help.
What to use for ties
- Soft plant ties (foam-coated wire or stretchy garden tape)
- Jute twine for a natural option, used loosely
- Velcro-style plant tape for easy adjustments
What to avoid
- Thin wire directly on stems
- Fishing line
- Tight knots that cinch as stems thicken
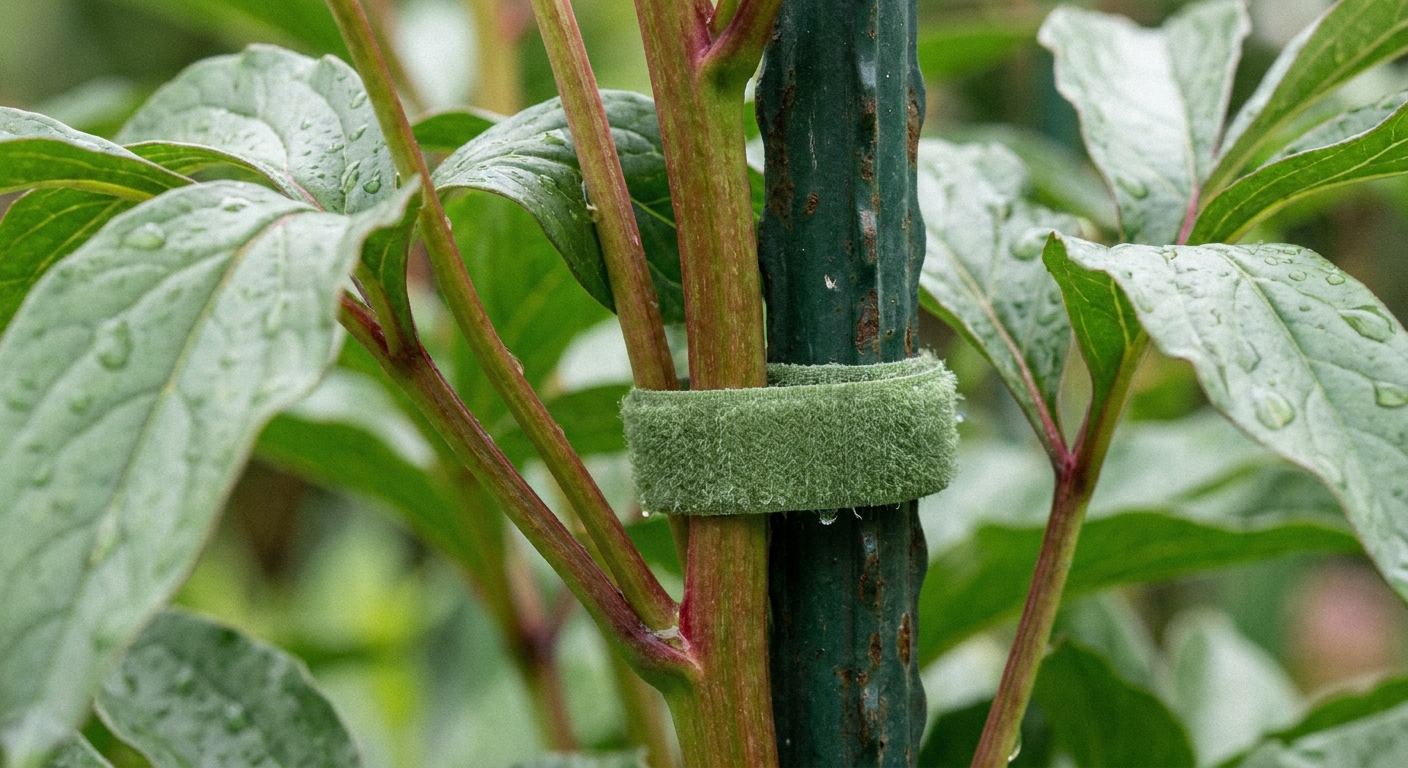
How to tie
Think “gentle hug,” not “zip tie.”
- Bundle a small group of stems, not the whole plant into one tight sheaf.
- Tie in a figure-eight if you can: one loop around the stake or ring, one loop around the stems, with a twist between them. This reduces rubbing.
- Leave room for growth: you should be able to slide a finger under the tie.
- Place ties below the blooms where foliage will hide them, usually 12 to 18 inches up.
One more important habit: check ties every week or two during fast growth and loosen or reposition as needed. Peony stems thicken quickly and a “fine yesterday” tie can start biting sooner than you think.
If buds look healthy but stall or brown after a weather swing, support is only one piece of the puzzle. Our bud blast troubleshooting page can help you pinpoint the cause without guessing.
Herbaceous vs tree vs Itoh
Herbaceous peonies
These are the classic garden peonies that die back to the ground each winter. They are the most common floppers, and hoop rings or grow-through grids are ideal.
Tree peonies
Tree peonies are woody shrubs that keep their framework year to year. They usually need less staking overall, but heavy bloom years can still pull branches outward.
- Young plants may need a single sturdy stake to keep the main stem upright.
- Bloom-heavy branches can benefit from discreet branch support or soft ties to a stake.
- Avoid forcing a rigid ring around a woody structure. You can snap older branches.
Itoh (intersectional) peonies
Itohs are hybrids between herbaceous and tree peonies. They die back like herbaceous types, but they are famous for their sturdy, self-supporting stems. Most Itohs do not need staking unless they are in deep shade, very exposed wind, or you get a week of heavy rain right at peak bloom.
In short: rings and grids are for herbaceous clumps, selective staking and gentle ties suit tree peonies, and Itohs usually stand on their own.
After bloom: what to do
Once flowering finishes, you can decide whether to leave supports in place.
- Leave them on: if your plant flops in summer storms or you want tidiness through the season.
- Remove them: if you prefer an open bed and your plant stands fine after bloom.
Fall cleanup reminder
Herbaceous peonies get cut back in fall after foliage yellows and dies back naturally. Supports are easiest to clean and store after you cut stems down. If you want the full step-by-step and what to do with leaves, hop over to our peony fall cleanup page.
DIY options
If you are not buying specialty supports this year, you can still get peonies upright with what you have.
- Tomato cage (modified): set it over the peony early and use soft ties to keep stems inside the cage openings. Choose a wider cage, not the narrow cone type.
- Twine corral: place 3 to 4 bamboo stakes around the clump and run jute twine around them in a loose loop at 12 to 18 inches high. Add a second loop higher if needed.
DIY supports are not quite as invisible as a grid, but they beat a mud-splattered bloom any day.
Troubleshooting: common mistakes
- Installing after buds open: leads to broken stems and visible supports. Install early next spring.
- Support too small: pinches the plant and creates an awkward vase shape. Size up.
- One tight tie around everything: causes rubbing and mildew risk. Use a few loose ties on small stem groups instead.
- Shallow legs in soft soil: the whole thing tips. Push deeper or add anchor stakes.
- Too little sun: peonies do best in full sun to light shade. More shade usually means longer, floppier stems.
My low-stress routine
If you want the simplest plan that works for most home gardens, here is what I do:
- In spring, when shoots hit about 8 to 12 inches, I place a grow-through grid over floppy varieties.
- In windy spots, I choose a sturdy hoop ring and add two bamboo stakes as anchors.
- As stems grow, I do one weekly “peony pass” and gently tuck wanderers back inside the support.
- Only if needed, I add two or three soft ties below the blooms and check them as stems thicken.
Then I go back to the best part: watching those buds slowly fatten up like tiny floral marshmallows, knowing they are going to stay upright for the grand opening.