How to Stake a Weak or Bent Phalaenopsis Orchid Spike
Phalaenopsis orchid spikes have a funny way of leaning toward the brightest window like they are trying to eavesdrop on the sunshine. A little graceful arch is normal. But when a spike is weak, sharply bent, or flopping under developing buds, staking turns from “nice to have” into “please do this before something snaps.”
The good news is that you can support a spike without forcing it straight. Think of staking like a trellis for a climbing rose. It is there to guide and protect, not to wrestle the plant into perfect posture.

When to stake
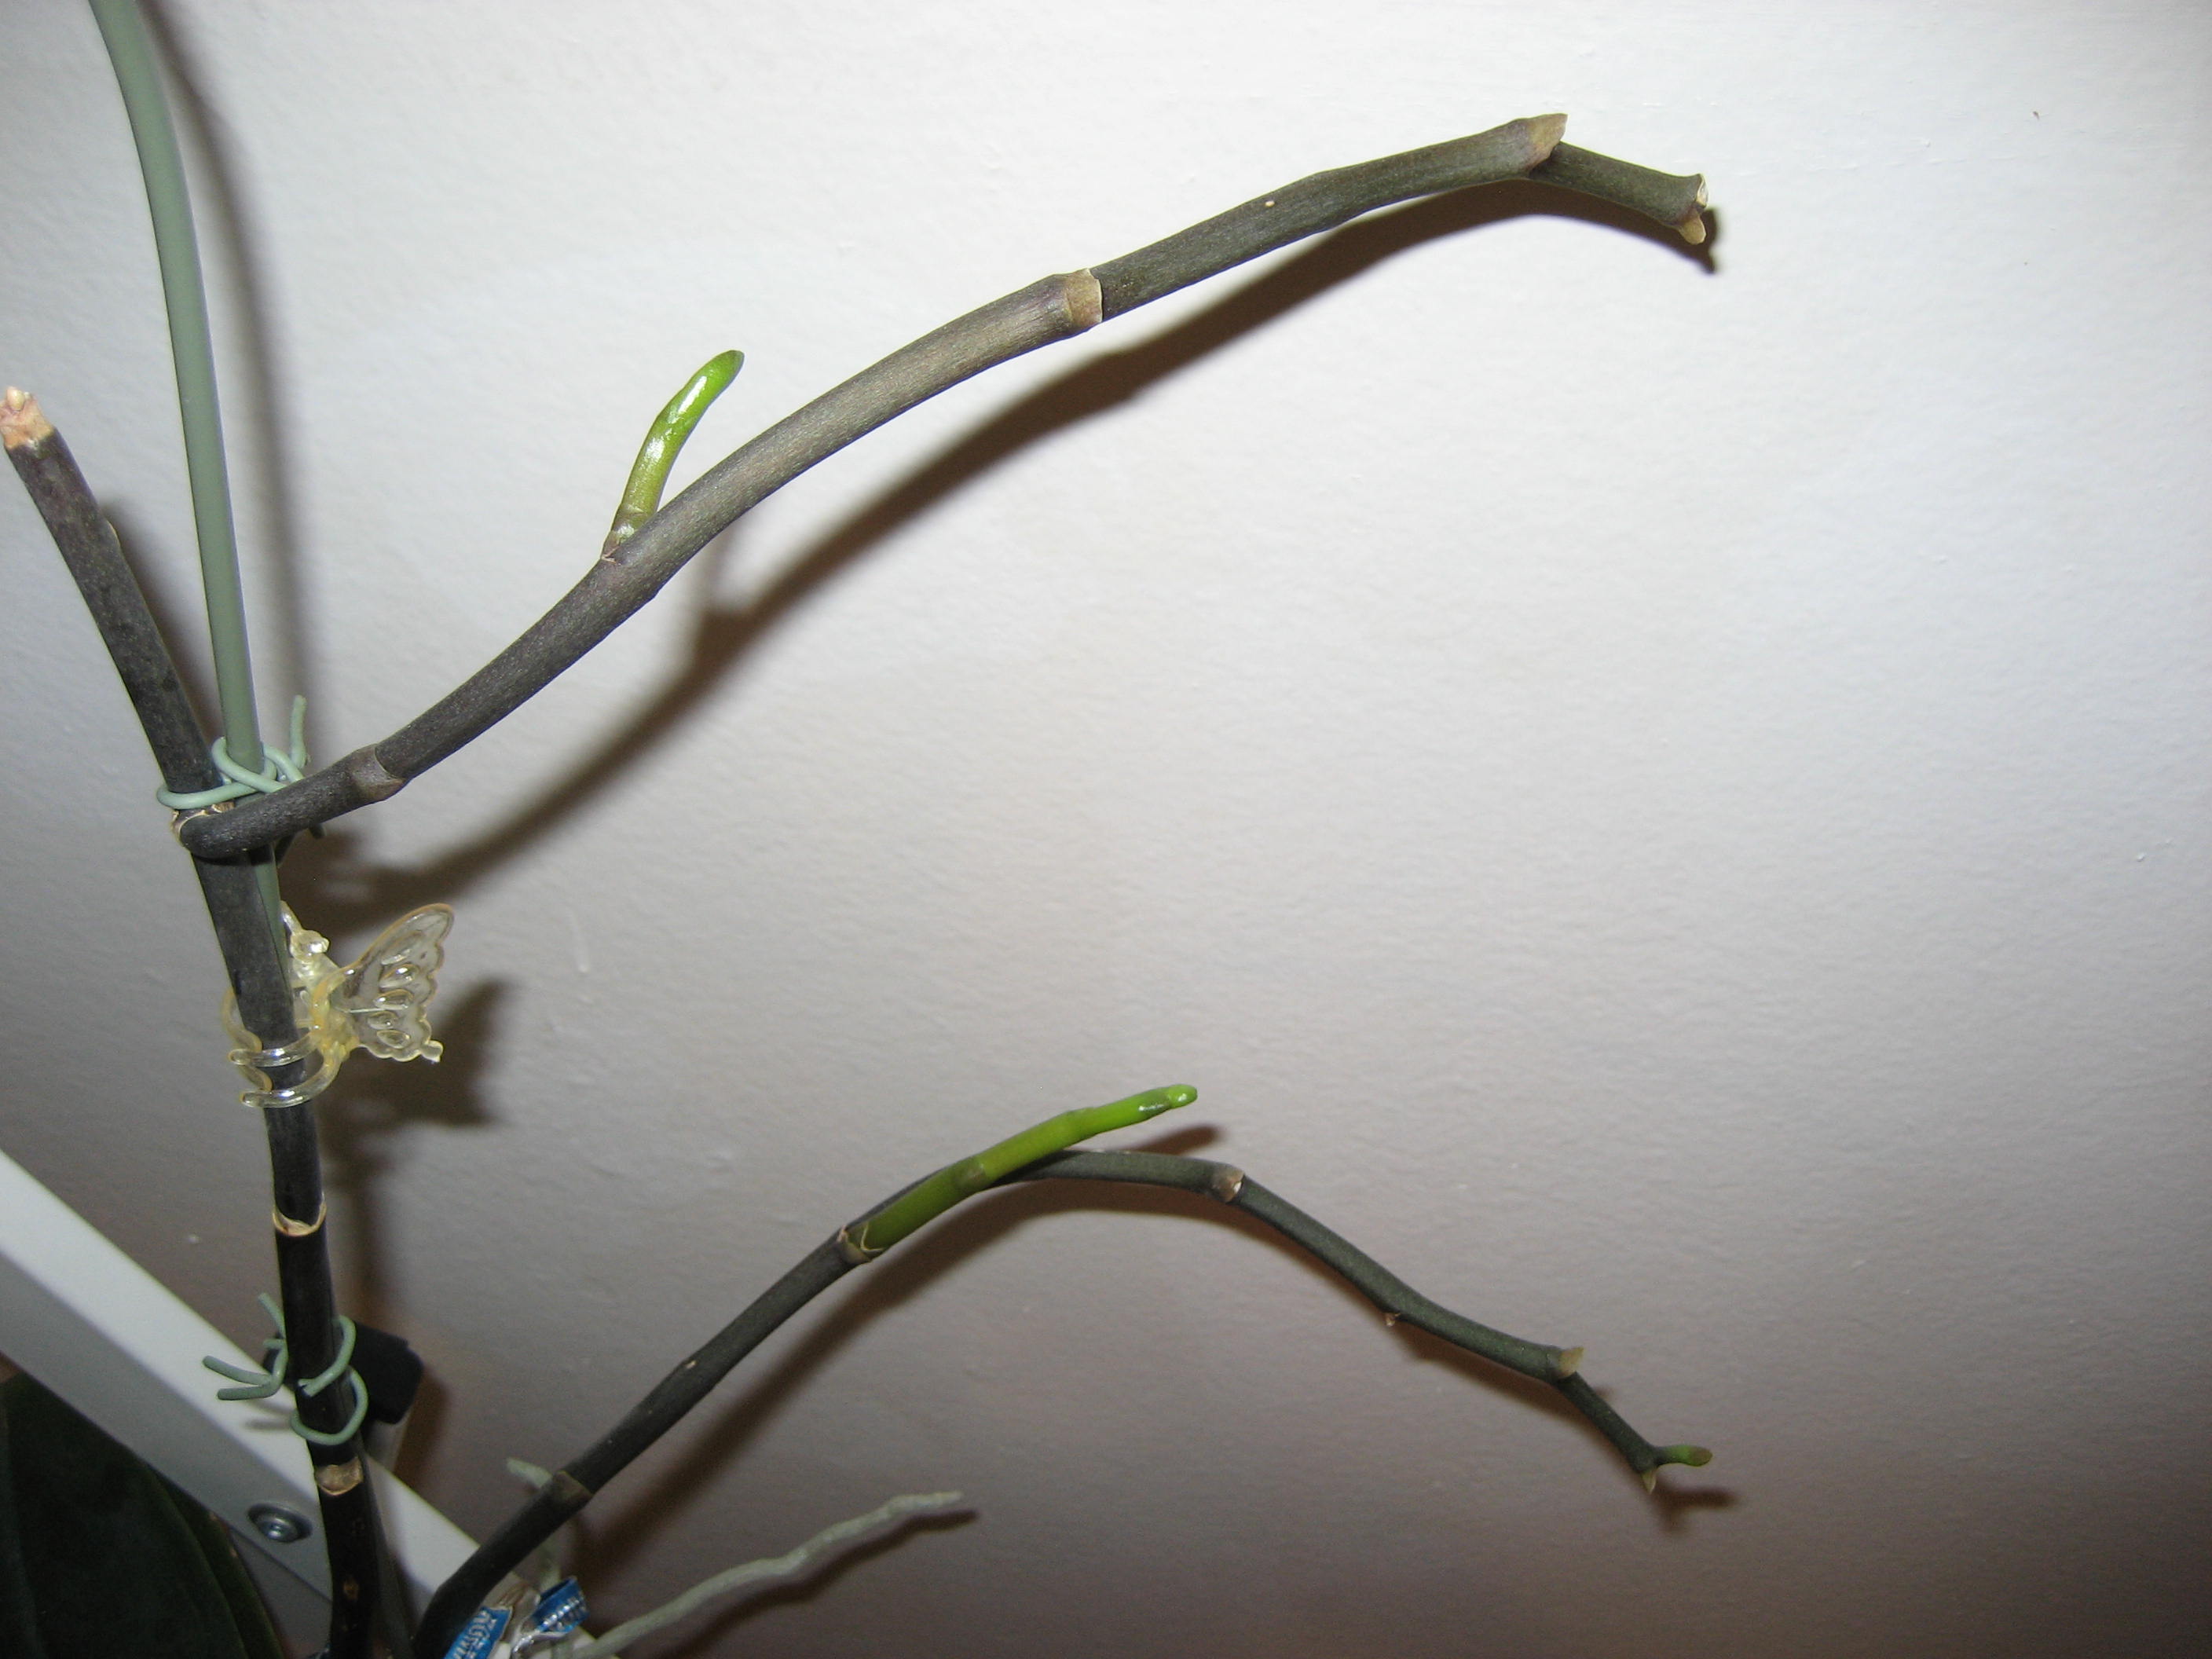
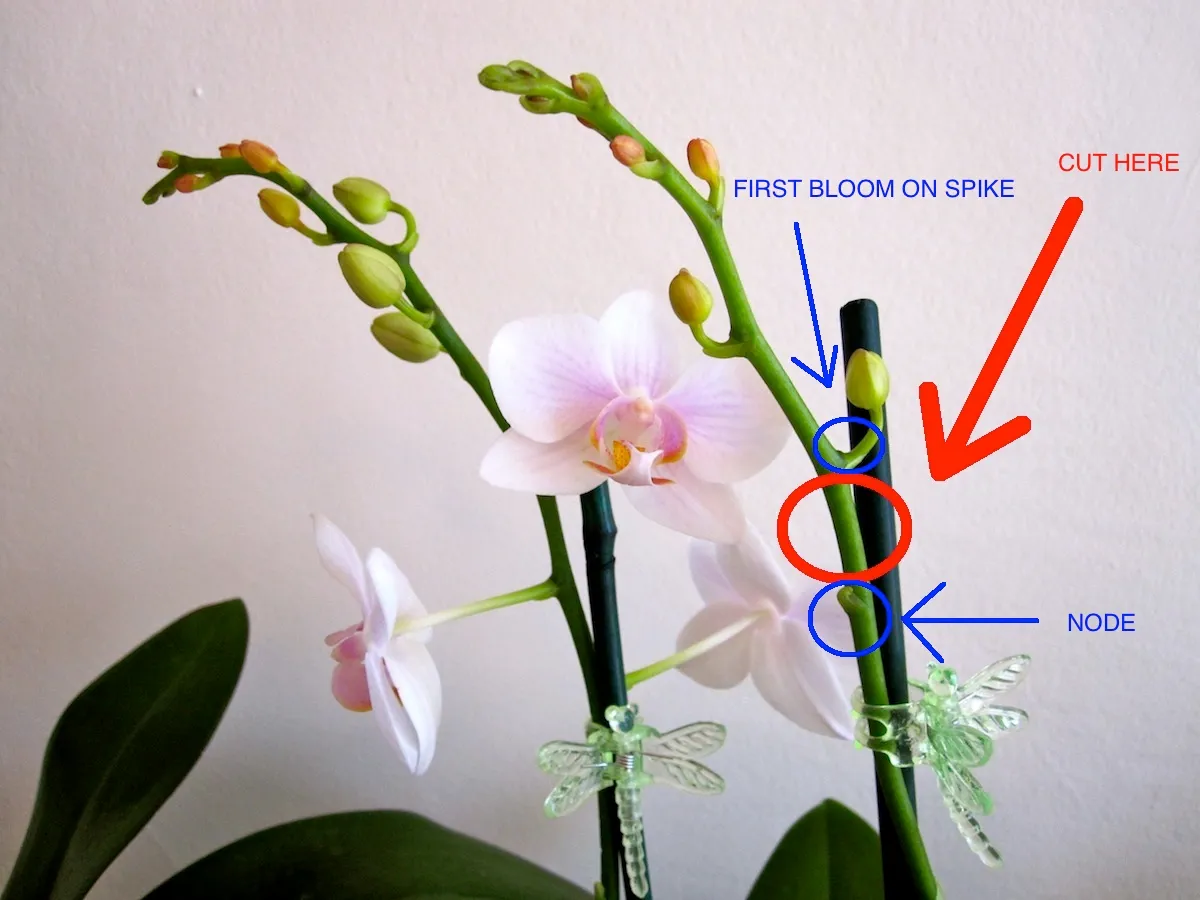
Staking is easiest when the spike is still flexible. Many beginners find it most manageable once the spike has elongated and you can clearly see the nodes. (Nodes are the small bumps along the spike where buds and side branches can form.) You can also stake earlier if you are gentle and do not force direction changes.
- Best all-around timing: when the spike is 6 to 10 inches (15 to 25 cm) tall and has obvious nodes, or when tiny buds are just starting to form.
- If you prefer to stake early: you can add a stake when the spike is only a few inches tall. Just keep the first tie very loose and let the tip choose its own path.
- If buds are already present: you can still stake, just handle the spike from the lower portion near the leaves and avoid bumping the bud cluster.
- If the spike is very young (just emerging): I usually wait a little. Early spikes can bruise easily, and they often “choose” a direction quickly. Let it grow a bit so you are not repositioning every week.
A helpful rule: stake because the spike is weak or at risk, not because it is curving. A gentle curve is classic Phal behavior.
What you need
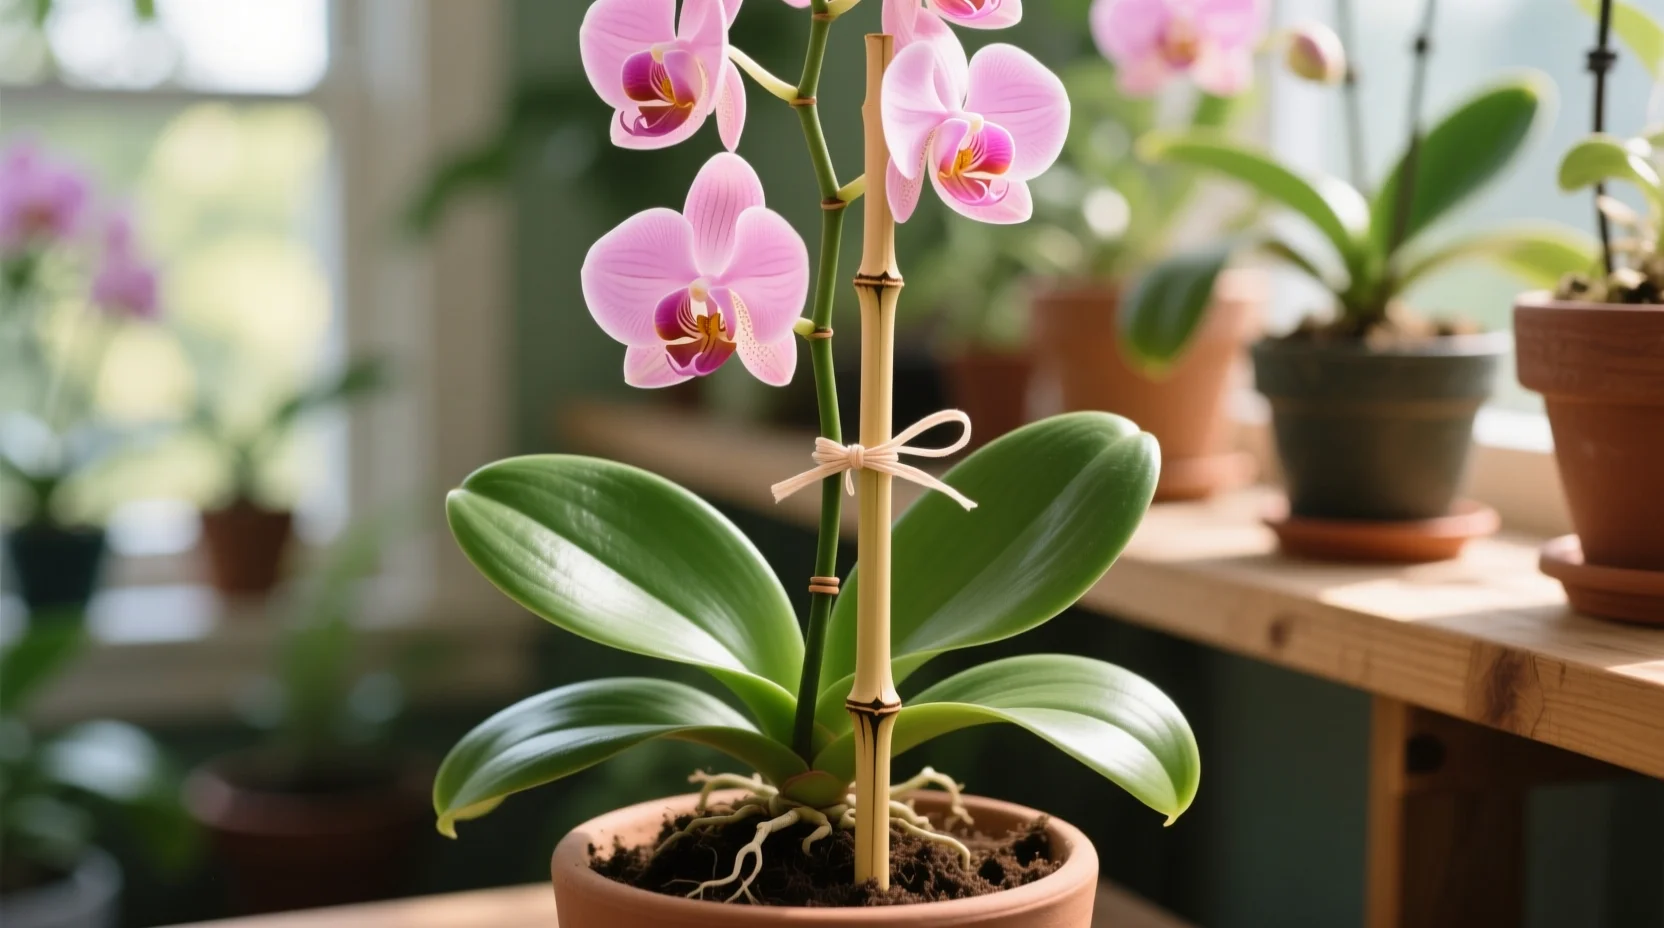
- Orchid stake: bamboo, coated wire, or plastic. Choose a height that ends a couple inches above the uppermost buds or the tip of the spike.
- Soft ties: silicone orchid clips (including the common “butterfly” clips), Velcro plant tape, foam-coated orchid-safe twist ties, or fabric strips. Avoid bare wire, thin string, fishing line, or anything that can cut in.
- Optional: a small pair of clean scissors for trimming ties; rubbing alcohol for wiping tools and clips.
If you only remember one thing, make it this: the tie should never bite into the spike. Leave a little wiggle room for thickening and movement.
One more small safety note: if you tend to mist, avoid keeping ties wet against the spike for long stretches. Damp, snug contact can invite mold or soft spots. Dry and breathable is your friend.
How to stake a spike
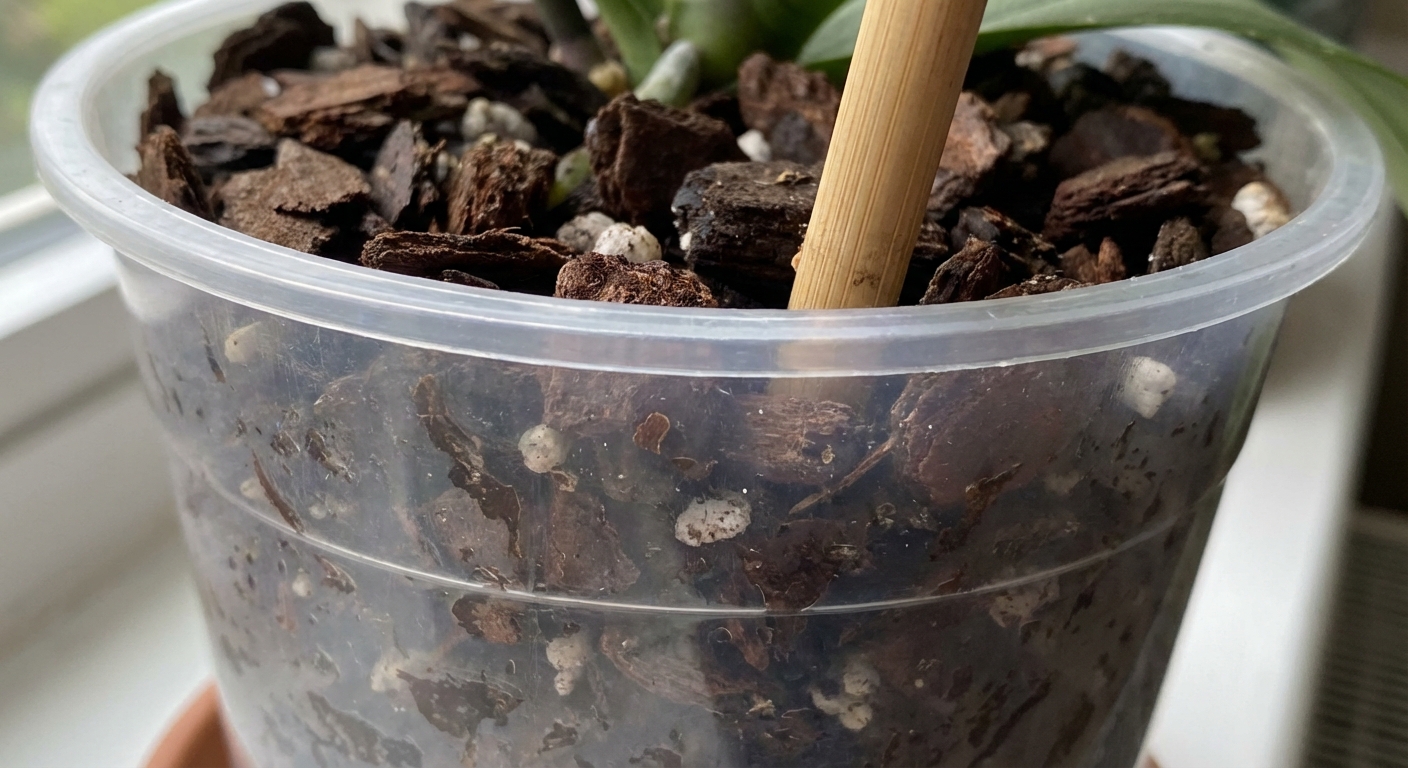
1) Place the stake
Insert the stake where it will be stable and least disruptive:
- Place it near the inside edge of the pot, close to the spike but not pressing into roots.
- Angle the stake slightly so it can follow the spike’s natural line instead of forcing a straight vertical.
Tip from my own windowsill jungle: If you use a clear pot and can see roots hugging the pot wall, rotate the pot and insert the stake in a gap with fewer roots.
If stakes never feel stable in your bark mix: you can sometimes clip the spike to a stake that is anchored at the pot rim, or use a pot-clip style support. The goal is steady support without spearing roots.
2) Support the spike with your fingers
Before any clip or tie goes on, gently cradle the spike with two fingers. Your hand becomes the temporary support so the spike is not bearing stress while you attach it.
- Hold the spike below the bend if it is kinked or flopping.
- Do not pinch the spike. Think “support,” not “grip.”
3) Add the first tie low
The first attachment point is the foundation. Start low, where the spike is thicker and less fragile.
- Place the first tie about 1 to 2 inches (2.5 to 5 cm) above the base of the spike.
- Use a loose loop or a clip that holds the spike to the stake without squeezing.
- Leave a tiny gap so the spike can expand and sway slightly.
Why low first? It reduces leverage on the base, which is where snaps often happen when someone tries to tug the top into position.
4) Tie above the bend
If your spike is bent, the instinct is to “strap down” the bend. Resist that. Tying directly over a kink can create a pressure point.
- Add the next tie 1 to 2 inches (2.5 to 5 cm) above the bend.
- Keep the spike in the position it naturally wants to settle into.
- If you need more correction, do it slowly over days, not minutes.
Gentle correction method: each week, reposition the tie a tiny amount, just a few millimeters or as little as you can manage without stress. Orchids respond beautifully to patience. They do not respond well to force.
5) Use multiple ties
For a long spike carrying buds, use more support points instead of tightening one tie.
- Place ties about every 3 to 4 inches (8 to 10 cm).
- Add an extra tie below the bud cluster if it is heavy.
- Keep the top portion slightly freer so it can orient blooms.
Single vs branching spikes
Single spike
A single spike usually does best with one main stake that follows the spike’s curve.
- Stake close to the spike’s base and run parallel as it rises.
- Use 2 to 4 ties depending on height.
- Do not try to straighten the very tip. Let it “paint the air” a little.
Branching spike
Branching spikes can feel awkward because the main stem has weight going in different directions. Your goal is to support the main trunk and reduce twisting.
- Place the stake so it supports the thicker main spike section.
- Secure the main spike with ties below the branching point.
- If one branch is heavy, add a second thin stake just for that branch, using a loose tie near the branch base.
Watch for torque: if the branching point twists when you move the pot, add support lower down rather than tightening near the branch split.
How to avoid snapping
- Never pull the spike upright in one session. Gradual guidance over a week or two is safer.
- Do not tie on the bend or kink. Tie above and below it.
- Be extra gentle if the spike feels stiff. In cooler rooms, spikes can feel less flexible, so it can help to stake when your space is comfortably warm and the plant is not chilled.
- Rotate the pot instead of forcing the spike. If the spike is leaning toward light, turning the pot can rebalance growth without manhandling it.
- Use more ties, not tighter ties. Stability comes from multiple gentle anchor points.
If a spike is cracked or nearly snapped, you have options. If it is only slightly damaged and still holding, some growers try a gentle splint (support above and below the weak spot, without squeezing). If it is hanging by a thread, it is often kinder to trim just below the break with sterilized snips. If you decide you are done with the whole spike, cut it at the base. That is not a failure. It is good plant triage.
After bloom
Once blooming is finished, you have a choice depending on what you plan to do with the spike.
Keeping the spike
- Leave the stake in place until you decide whether you will trim above a node or let the spike naturally yellow.
- Loosen or adjust ties if the spike is shrinking or drying, so nothing constricts.
Spike is yellow or brown
- That spike is done. You can remove ties and the stake gently.
- Cut the spike at the base with sterilized snips if it is fully yellow or brown.
Remove the stake
- Support the spike with one hand.
- Remove ties from top to bottom so you are not tugging on the base.
- Slide the stake out slowly, watching for roots that may have gripped it.
Troubleshooting
It still leans
That is often light seeking. Rotate the plant a quarter turn every few days, or provide more even light from above or the side. Keep ties supportive, not restrictive.
Ties leave dents
They are too tight or too narrow. Switch to a softer, wider tie and reattach with slack.
The stake wobbles
Push it deeper into the media near the pot wall, or use a sturdier stake. If the potting mix is very loose and broken down, consider repotting after flowering.
Buds drop after staking
Bud blast is usually about sudden environmental change. Check for cold drafts, heat vents, or a big shift in light and watering. Staking itself can contribute if the buds were bumped or the plant was moved repeatedly.
Final note
Your orchid does not need to look perfectly straight to be healthy. A well-staked spike is simply a safer spike. Go slow, use soft ties, and let the plant keep some of its natural curve. Phalaenopsis blooms are at their prettiest when they are allowed to open comfortably, not when they are forced into attention posture.