How To Revive An Orchid
Orchids have a dramatic reputation, but most “dying” orchids are simply sending up distress signals, usually from root trouble or watering habits that do not match their potting mix. The good news: orchids are surprisingly resilient. With a little detective work and a gentle reset, you can often see new root tips in a few weeks, and a fuller rebound over the weeks to months that follow.
Quick note: Most houseplant orchids are Phalaenopsis (moth orchids). The steps below fit them perfectly and work for many common orchids, but if yours has thin cane-like stems (Dendrobium) or a bulbous base (Oncidium, Cattleya), treat this as a rescue framework, not a one-size schedule. Many sympodial orchids prefer a stronger dry-down cycle, and some Dendrobiums have seasonal rest needs. If you can, look up your type before you lock in a watering rhythm.

First, figure out what “dying” means
Orchids can look rough for different reasons, and the fix depends on the cause. Here are the most common symptoms and what they usually point to.
Yellow leaves
- One older bottom leaf yellowing: often normal aging.
- Multiple leaves yellowing quickly: watering issues, root rot, or cold stress.
- Yellow with black mushy spots: bacterial or fungal infection needs quick action.
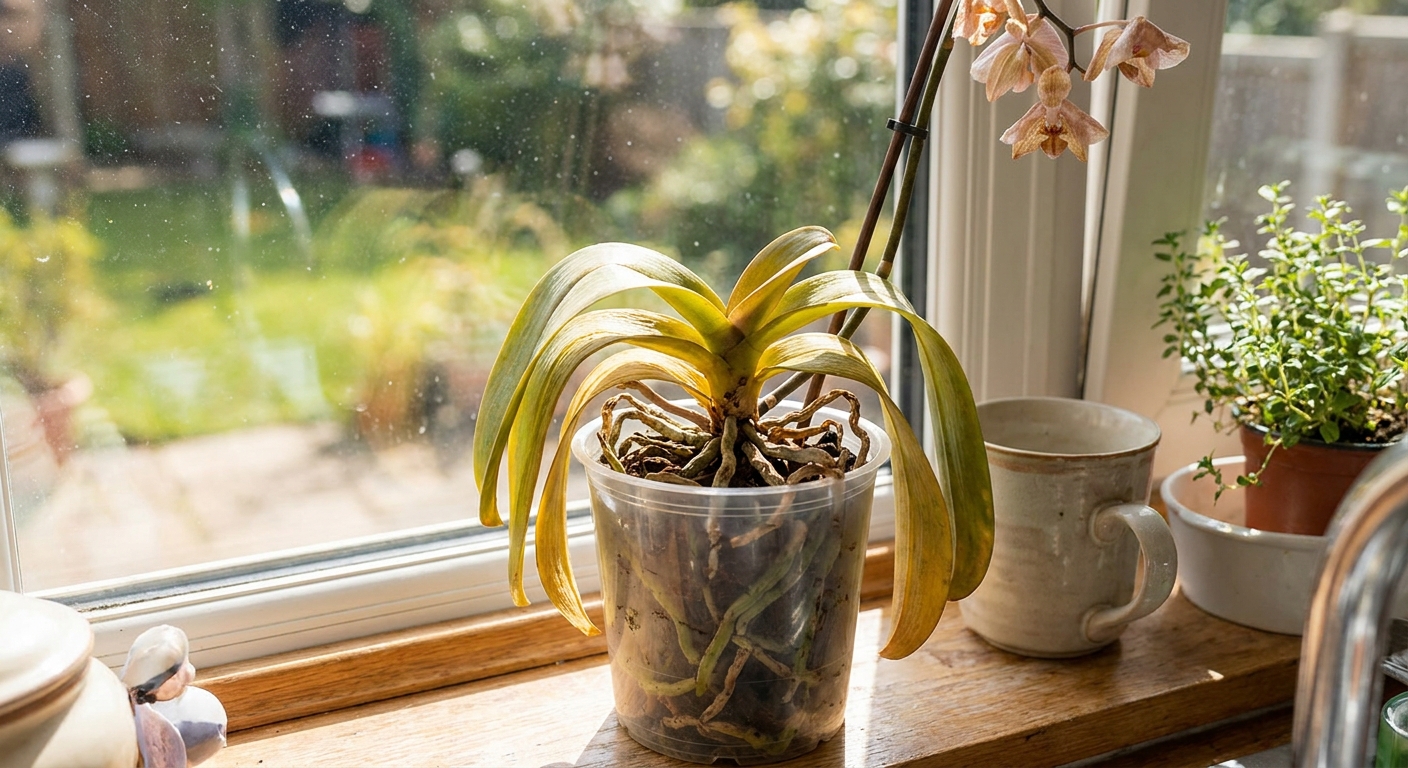
Wrinkled, limp, or floppy leaves
- Dehydration (most common), either from underwatering or from damaged roots that cannot drink.
- Hot, dry air can speed water loss.
Brown, mushy roots or a sour smell
- Classic root rot from staying wet too long or old, broken-down mix.
Flowers dropped, spike turning brown
- Often normal after blooming, or a response to stress like drafts, heat, low light, or watering changes.
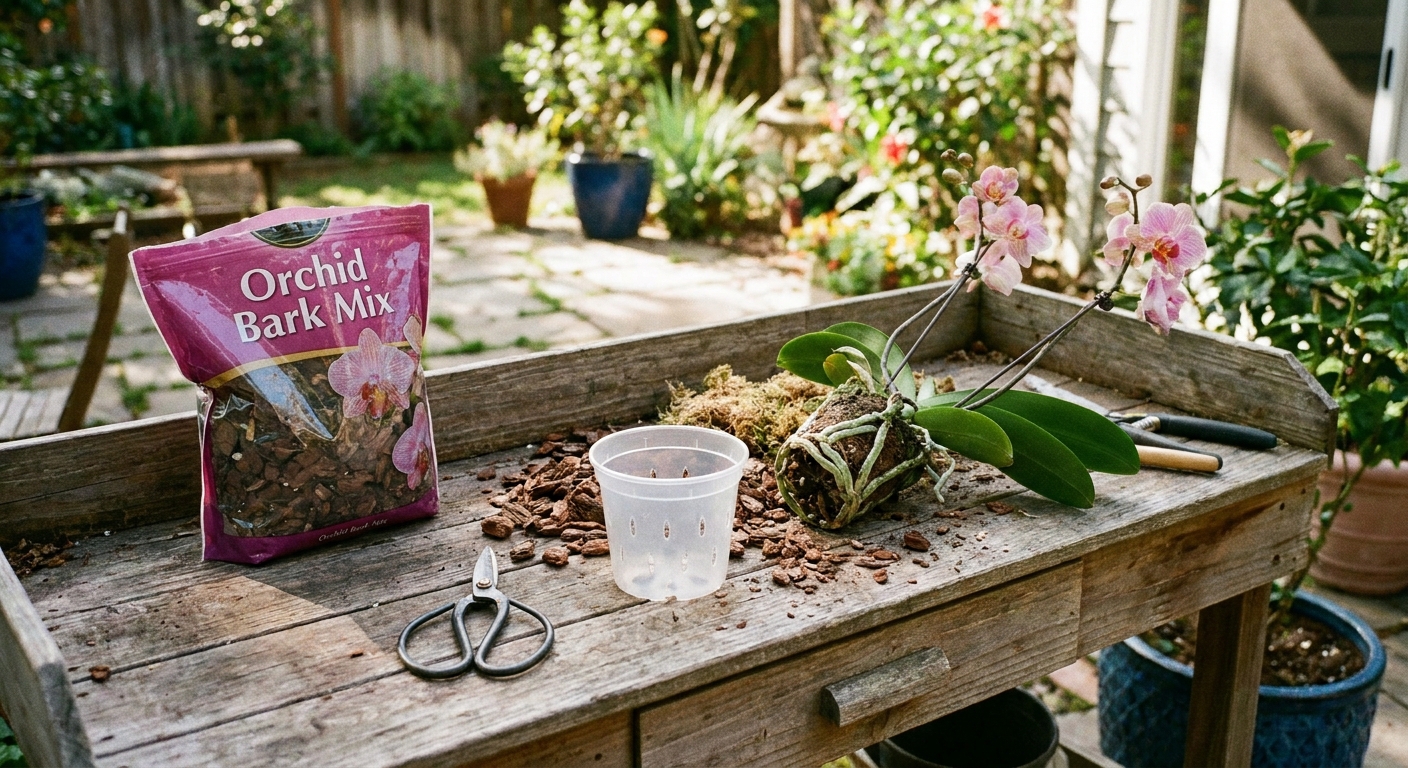
Your orchid revival checklist
Before you start, gather a few basics. This keeps the rescue calm and clean.
- Clean scissors or pruners
- 70% isopropyl alcohol (to sanitize tools)
- Fresh orchid bark mix (or bark + a little sphagnum if your home is very dry)
- A pot with lots of drainage and airflow (clear pots are great)
- Cinnamon (optional) or a commercial fungicide labeled for orchids
- Paper towels
Sanitation note: Wipe tools with alcohol between plants. If you suspect infection, sanitize between cuts too.
If you are repotting, pick a pot only 1 to 2 inches wider than the root mass. Orchids like cozy shoes, not big boots.
Step 1: Inspect the roots
Most orchid problems start below the surface. Carefully slide the orchid out of its pot and peel away old media. If roots are stuck, soak the root ball in lukewarm water for 10 minutes to loosen everything.
How to tell healthy roots from dead ones
- Healthy roots: firm, plump, silvery-gray when dry and green when wet.
- Dead or rotting roots: brown or black, hollow, mushy, or the outer layer slips off leaving a wiry thread.
If you have only a few good roots left, do not panic. Orchids can regrow a root system if you give them the right balance of moisture and air.
Step 2: Remove rot and disinfect
Sanitize your scissors with alcohol. Trim away every mushy or hollow root back to firm tissue. If a root is partly healthy, keep the good section.
- Cinnamon (optional): Some growers use a tiny amount as a drying protectant on cuts. It can also damage living tissue, so use it sparingly and keep it off healthy roots and the crown.
- If you suspect an active infection (bad smell, spreading black spots), consider a labeled orchid fungicide or bactericide and improve airflow. Always follow the label.
Do not cut green, firm roots just to “tidy up.” Those are your orchid’s lifeline.
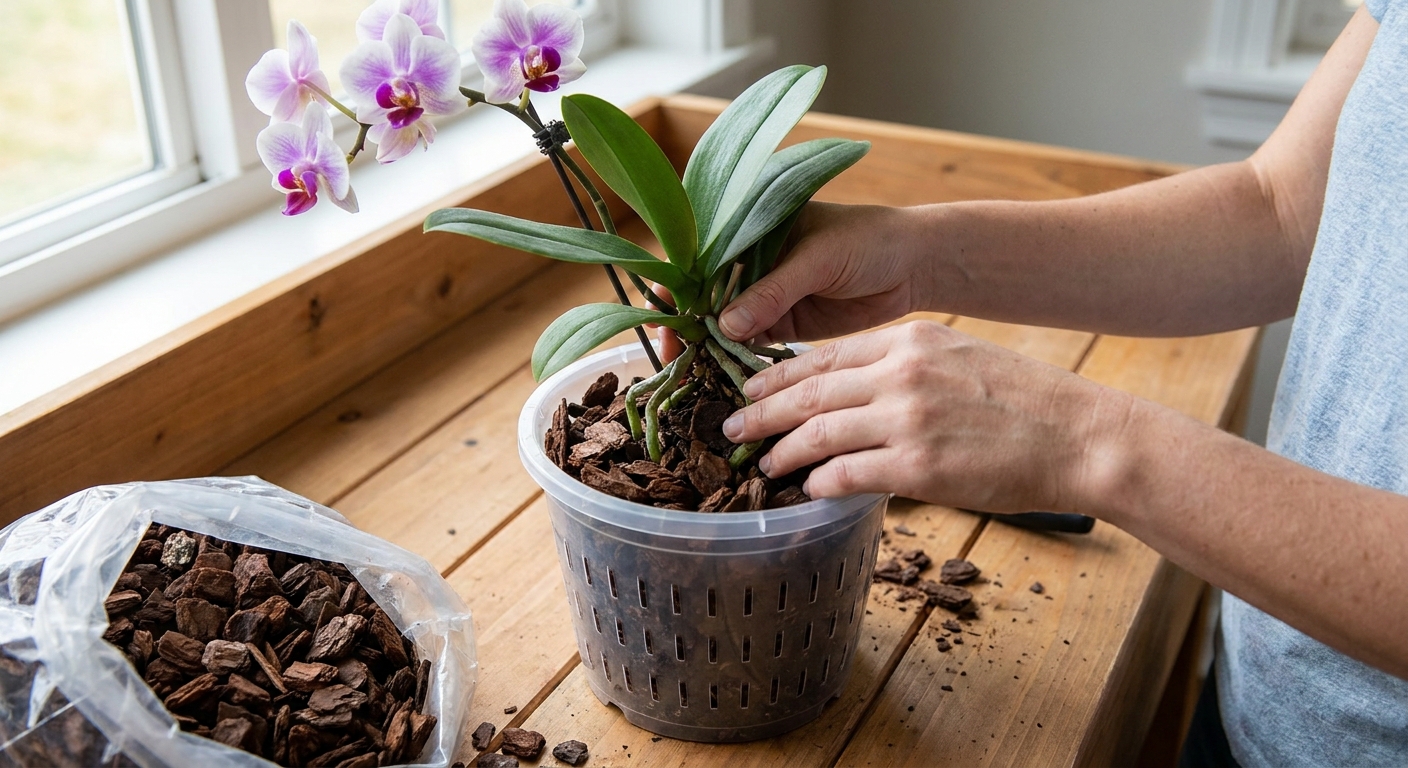
Step 3: Repot in fresh mix
Old orchid media breaks down over time and holds too much water. Repotting gives you a fresh, airy foundation.
How to repot without stressing your orchid more
- Choose a pot with many holes. Clear plastic pots help you see root health and moisture levels.
- Hold the orchid so the base of the plant (the crown) sits just above the mix.
- Gently tuck bark around the roots. Do not pack it down hard. Air pockets are your friend.
- If your orchid wobbles, use a stake or a simple clip to stabilize it while new roots attach.
Media tip: Sphagnum can be great in dry homes, but tightly packed moss is a common reason beginners end up with rot. If you use moss, keep it loose and barely snug, not compressed.
After repotting: if you had to remove a lot of rotten roots, wait 24 to 72 hours before watering so cuts can callus, especially in cooler or more humid homes. If you trimmed very little and your mix is very airy, you can water lightly sooner.
Step 4: Fix watering
The goal is a rhythm: thoroughly wet, then let the mix approach dryness, then water again. Orchids strongly prefer not to sit soggy, and they also do not do well staying bone-dry for long stretches.
The soak-and-drain method
- Take the pot to the sink.
- Run lukewarm water through the mix for 20 to 30 seconds, or soak the pot in a bowl for 10 minutes.
- Let it drain completely. No standing water in a cachepot.
How to know when to water again
- Look: roots in a clear pot turn silvery when dry.
- Lift: a dry pot feels much lighter.
- Touch: bark near the top should feel dry, not cool and wet.
Typical indoor timing for Phalaenopsis is every 7 to 10 days, but your home’s light, humidity, temperature, and mix matter more than the calendar.
Water quality matters
If you see white crust on the pot or bark, you may be dealing with mineral or fertilizer salt buildup. Flush thoroughly with plain water monthly (or a little more often if needed), and consider filtered, rain, or low-mineral water if your tap water is very hard.
Avoid crown rot: do not leave water sitting in the crown (where leaves meet). If water splashes in there, blot it out with a corner of paper towel.
Step 5: Light and temperature
When an orchid is struggling, the temptation is to move it around constantly. Instead, give it a stable, gentle environment.
Best light for revival
- Bright, indirect light is ideal. An east window is usually perfect.
- In a south or west window, use a sheer curtain to prevent leaf scorch.
- Too little light slows root and leaf recovery.
Temperature and drafts
- Most Phalaenopsis prefer 65 to 80°F indoors.
- Keep away from heater blasts, AC vents, and cold window glass in winter.

Step 6: Humidity and airflow
Orchids love humidity, but they also need airflow to prevent rot. Aim for 40 to 60% humidity if you can.
- Pebble tray: can help a little in a small, still area, but results are often modest in an average room.
- Humidifier: the most reliable way to raise humidity, especially in winter heating season.
- Group plants together to create a slightly more humid microclimate.
- Run a small fan on low across the room, not blasting directly at the plant.
Fertilizer: when to feed
If roots are compromised, heavy feeding can burn them. Wait until you see signs of new growth, then feed lightly.
- Use a balanced orchid fertilizer and follow a weakly, weekly approach: about 1/4 strength every 1 to 2 weeks during active growth.
- Flush with plain water about once a month to prevent salt buildup.
If your orchid is in very low light or it is winter-dormant, feed less often.
Special rescue: almost no roots
If you trimmed away most of the root system, your job is to keep the orchid gently hydrated while encouraging new roots.
The “moist sphagnum + airflow” method
- Use a small pot and place barely damp sphagnum moss around the base, not packed tight.
- Keep the crown above the moss.
- Maintain warm temperatures and bright indirect light.
- Mist the moss lightly only when it is close to dry, not wet.
Another option is a loose “humidity tent” using a clear bag with a few air holes, but only if you can prevent condensation from sitting on leaves and you provide daily fresh air. Stagnant humidity can invite rot.
Pests to check
Sometimes “dying” is not watering at all. It is something taking bites while you are busy blaming yourself.
- Mealybugs: cottony clusters in leaf joints and under leaves.
- Scale: little tan or brown bumps that scrape off with a fingernail.
- Spider mites: fine webbing and stippled, dusty-looking leaves, especially in dry air.
If you spot pests, isolate the plant, rinse leaves, and treat with insecticidal soap or horticultural oil per label. Repeat treatments are usually needed.
If you suspect crown rot
If the crown (the center where new leaves emerge) is black, mushy, or smelly, act fast.
- Keep the crown dry and increase airflow.
- Gently wick out any trapped moisture with paper towel.
- If there is clearly rotting tissue, carefully remove only what is mushy with a sterilized tool, then sanitize again.
- Consider a labeled orchid fungicide or bactericide, depending on symptoms, and follow the label closely.
If the entire crown is soft with no firm tissue left, recovery is unlikely.
What to do with a dead flower spike
Flower spikes confuse a lot of people, so let’s make it simple.
- Spike is brown and dry: cut it at the base with clean scissors.
- Spike is green: you can leave it to potentially branch, but if your plant is weak, it is often better to cut the spike so energy goes into roots and leaves.
My personal rule: if the orchid is limp or recently repotted for rot, I choose recovery over repeat blooms every time.
Signs your orchid is coming back
Recovery is not always fast, but it is wonderfully visible when it starts.
- New root tips that look like bright green or pinkish nubs
- A new leaf emerging from the crown
- Leaves feel firmer and less accordion-wrinkled
- The plant stops wobbling as roots grab the mix
Blooms can take months to return. That is normal. Think “rebuild the engine” before “polish the paint.”
Common mistakes
- Watering on a schedule instead of watering based on dryness
- No drainage or leaving the pot in standing water
- Using regular potting soil instead of orchid mix
- Low light that prevents growth
- Water in the crown leading to crown rot
- Oversized pot that stays wet too long
- Packed moss that keeps roots wet and airless
When an orchid cannot be saved
I hate saying it, but sometimes a plant is too far gone. If the crown is mushy or the entire base is rotting with no firm tissue left, it is usually not recoverable. If the leaves are gone and there are no viable growth points, the odds are slim.
If you are unsure, check for one thing: firm, living tissue anywhere near the crown plus at least a few firm root segments. If you have that, I would try.
Orchid revival FAQ
Should I cut off yellow leaves?
If a leaf is fully yellow and comes away with a gentle tug, you can remove it. If it is partly green, leave it. Orchids reabsorb nutrients from aging leaves.
Can I use ice cubes to water my orchid?
I do not recommend it. Most common indoor orchids are warm-growing, and repeated cold shocks can stress roots. Lukewarm water and thorough drainage are more reliable.
How often should I repot?
Usually every 12 to 24 months, or sooner if the mix smells sour, stays wet too long, or the roots are overcrowded and circling.
Why are my orchid’s leaves wrinkled even after watering?
Wrinkles often mean the roots are not functioning. Inspect the roots and repot if needed. Leaves can take time to re-plump after root recovery begins.
A gentle pep talk
If you are reading this with an orchid that looks like it has given up, breathe. Orchids are slow and steady, and that can feel like nothing is happening right up until you spot that first new root tip. Focus on airy roots, smart watering, and bright indirect light. Then let your orchid do what it has always wanted to do: grow.