How to Repot an Orchid
Orchids have a reputation for being fussy, but repotting is one of those tasks that looks scarier than it is. The big secret is that most common orchids (especially Phalaenopsis, the grocery store favorite) are not planted in soil at all. They want airy bark, fast drainage, and roots that can breathe.
If you have been staring at those twisty roots and wondering if you are about to ruin everything, take a breath. I talk to my ferns and I still get nervous repotting orchids. We will go slow, keep the roots happy, and set your plant up to bloom again.
When to repot an orchid
Repotting is not something orchids need constantly. In fact, too-frequent repotting is a common reason they sulk. Most orchids do best with a repot every 1 to 2 years, or whenever the potting medium breaks down.
Best timing
- After blooming: For Phalaenopsis, repot when the last flowers drop and the spike starts to fade, or once you see fresh root growth starting.
- When new roots are just beginning: That little burst of new root tips helps the orchid anchor into fresh bark quickly.
Signs your orchid is asking for a repot
- Roots are overgrowing the pot: A few aerial roots are normal. But if the pot is crammed with roots and the plant wobbles, it is time.
- Bark is decomposing: Old bark turns dark, crumbly, or spongey and holds water too long. That is a fast track to root rot.
- Water runs through too slowly: Fresh bark drains quickly. If your pot stays wet for days, the medium is breaking down or packed too tightly.
- You smell sour or swampy odors: Healthy orchid media should smell woody and clean, not funky.
- Visible root issues: Mushy, hollow, or black roots mean the plant needs rescue and fresh, airy mix.
One gentle rule: avoid repotting a stressed orchid unless you have to. If it is in full bloom and seems happy, wait. If the medium is breaking down or roots are rotting, repot anyway. Health comes first.
What you need before you start
Orchid repotting goes smoothly when everything is within reach. Once roots are out in the air, you want to work efficiently and gently.
- Fresh orchid bark mix (more on choosing it below)
- A pot with drainage (clear or opaque)
- Clean scissors or pruning shears
- Isopropyl alcohol or a flame for sterilizing blades
- Cinnamon (optional, for cuts on roots only, not the crown)
- Gloves (optional, but helpful if you are sensitive to sap or just prefer them)
- A bowl or bucket for soaking bark
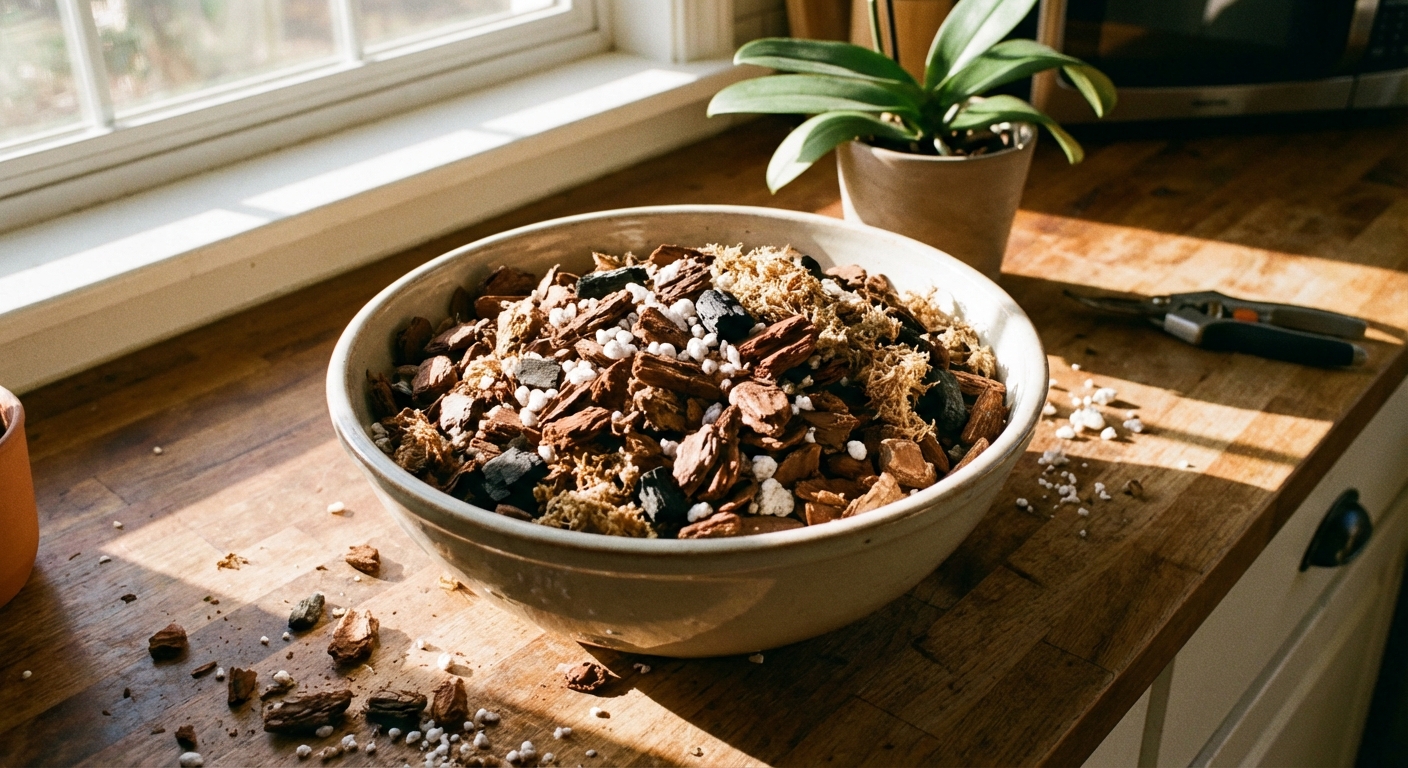
Choosing the right orchid bark mix
Most orchids sold as houseplants are epiphytes, meaning they naturally cling to trees and let rainwater rush past their roots. Bark mimics that airy environment.
What a good mix looks like
- Chunky and breathable: Pieces should be large enough to create air pockets.
- Fast-draining: Water should flow through easily, not pool.
- Clean and fresh-smelling: Avoid dusty, broken-down bags if you can.
Common mix options (and who they suit)
- Classic fir or pine bark: Great all-around choice for Phalaenopsis and many epiphytic orchids.
- Bark + perlite: Adds extra airiness and helps prevent compaction.
- Bark + charcoal: Can help keep the mix fresher and improve drainage.
- Sphagnum moss blends: Holds more moisture. Useful in very dry homes, but easy to overwater if your space is humid or your pot drains slowly.
Clara tip: If you are new to orchids, err on the side of chunkier bark rather than moisture-holding mixes. Most indoor orchid problems start with roots staying wet too long.
Soak the bark first
Dry bark repels water at first. Soak your bark mix for 15 to 30 minutes, then drain. This helps it hydrate evenly and reduces early drying stress after repotting.
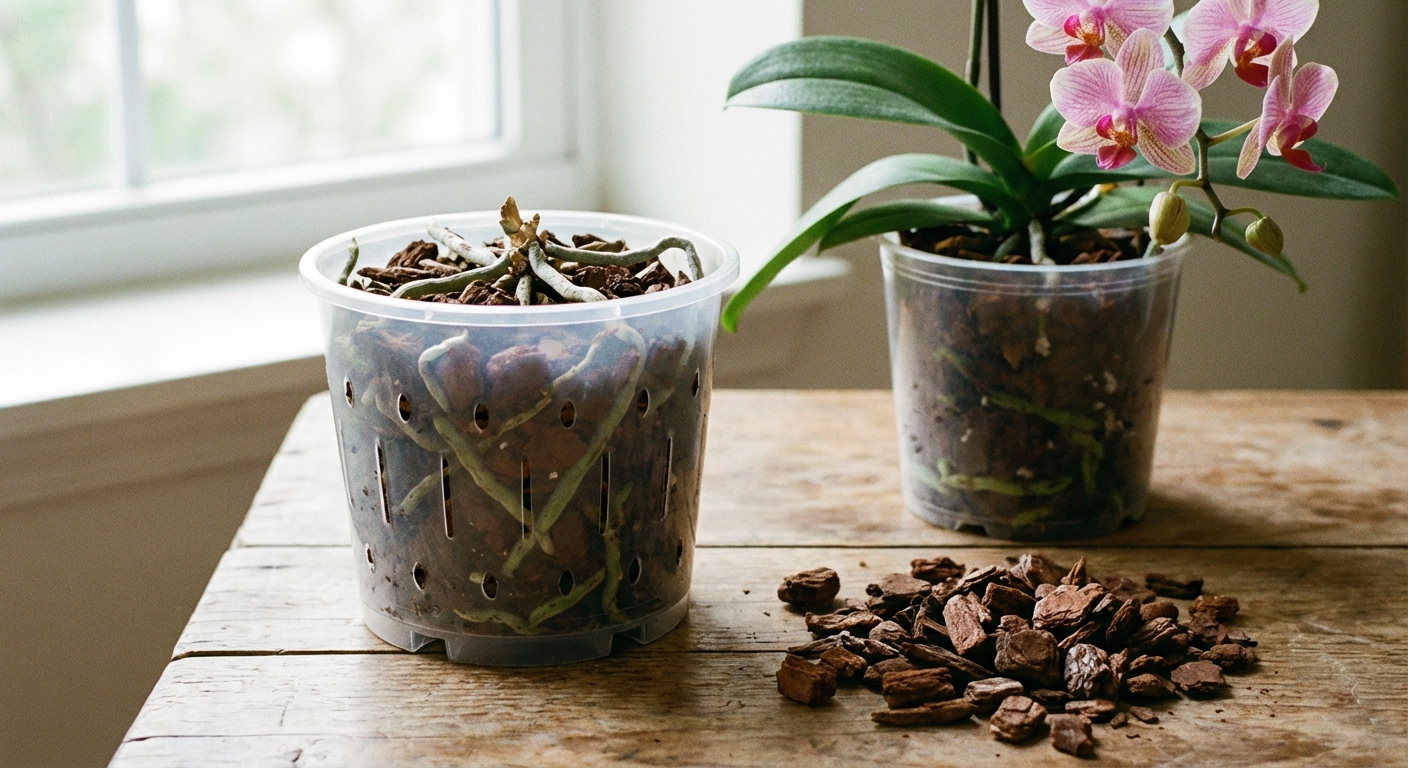
Picking the best pot (clear vs opaque)
The pot is not just a container. For orchids, it is part of the care routine.
Clear pots: why they are popular
- You can see root health: Green roots usually mean hydrated. Silvery roots usually mean dry. Brown and mushy is trouble.
- Light to roots: Some orchids photosynthesize in their roots. It is not mandatory, but it can help.
- Easier watering decisions: You can see condensation and moisture level.
Opaque pots: when they make sense
- Better for aesthetics: Many people slip a clear pot inside a decorative cachepot.
- Less algae: Clear pots in bright light can grow algae on the inside. It is mostly cosmetic.
Drainage is non-negotiable
Choose a pot with lots of drainage holes, ideally on the bottom and the sides. Orchid roots want air movement.
What size pot should you use?
Orchids usually prefer being slightly snug. Move up only 1 to 2 inches wider than the current pot, or keep the same size if you removed a lot of dead roots. Oversized pots hold extra moisture and invite rot.
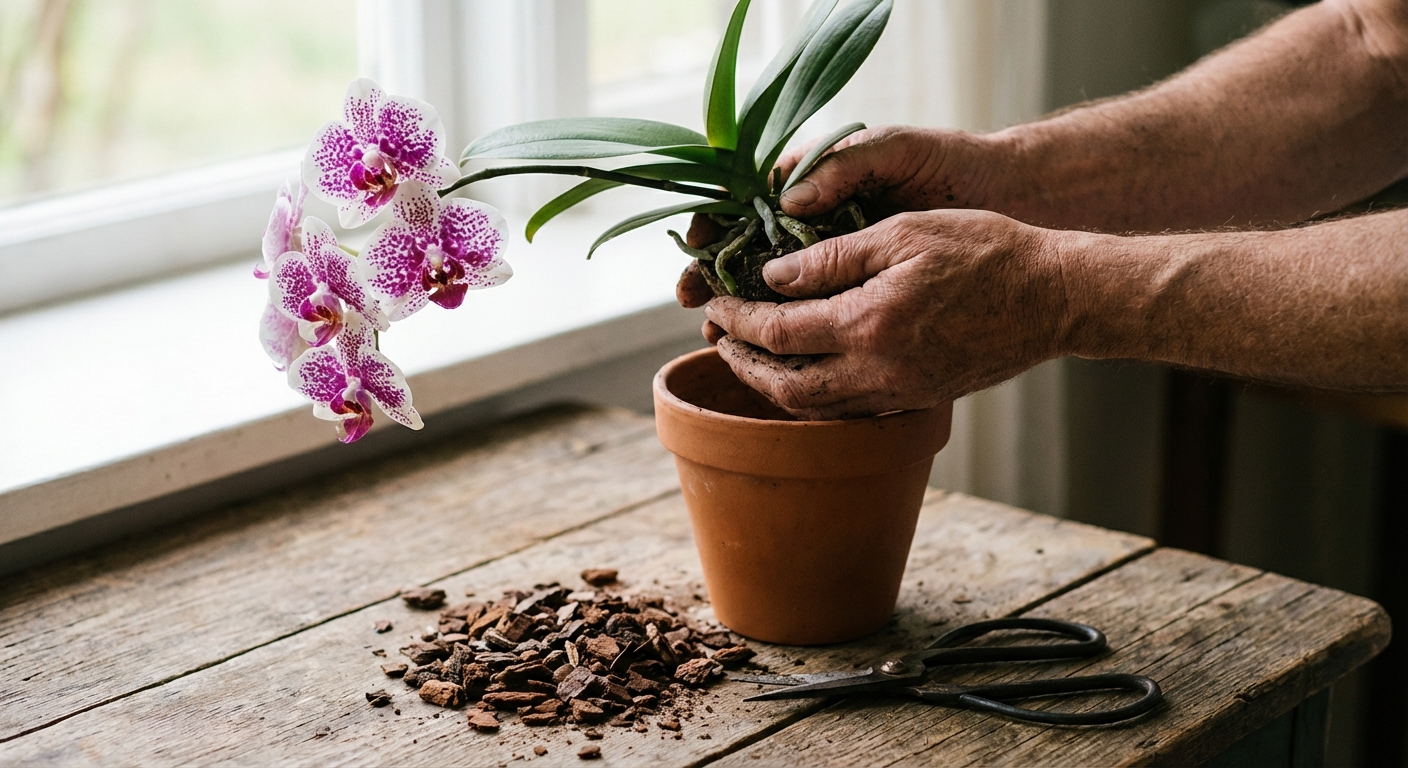
How to repot an orchid, step by step
This method works beautifully for Phalaenopsis and many common epiphytic orchids. If you have a different type (like a terrestrial orchid), the mix and approach can vary.
1) Water lightly the day before (optional but helpful)
Slightly hydrated roots are more flexible and less likely to snap. If the plant is already quite wet, skip this.
2) Sterilize your tools
Wipe blades with isopropyl alcohol (or flame-sterilize if appropriate), then let them cool. Orchid roots are sensitive to pathogens.
3) Remove the orchid from its pot
Gently squeeze the sides of a plastic pot to loosen roots. If roots are stuck, run a clean butter knife around the inside edge or cut the pot away if needed. Your goal is to save roots, not the container.
4) Remove old medium
Tease away bark and moss with your fingers. Be patient. Old medium can cling tightly, especially if it has started to decompose.
5) Rinse and inspect the roots
Rinse under lukewarm water so you can see what you are working with.
- Healthy roots: firm, plump, green (wet) or silvery (dry)
- Dead or rotting roots: mushy, hollow, papery, black, or brown and squishy
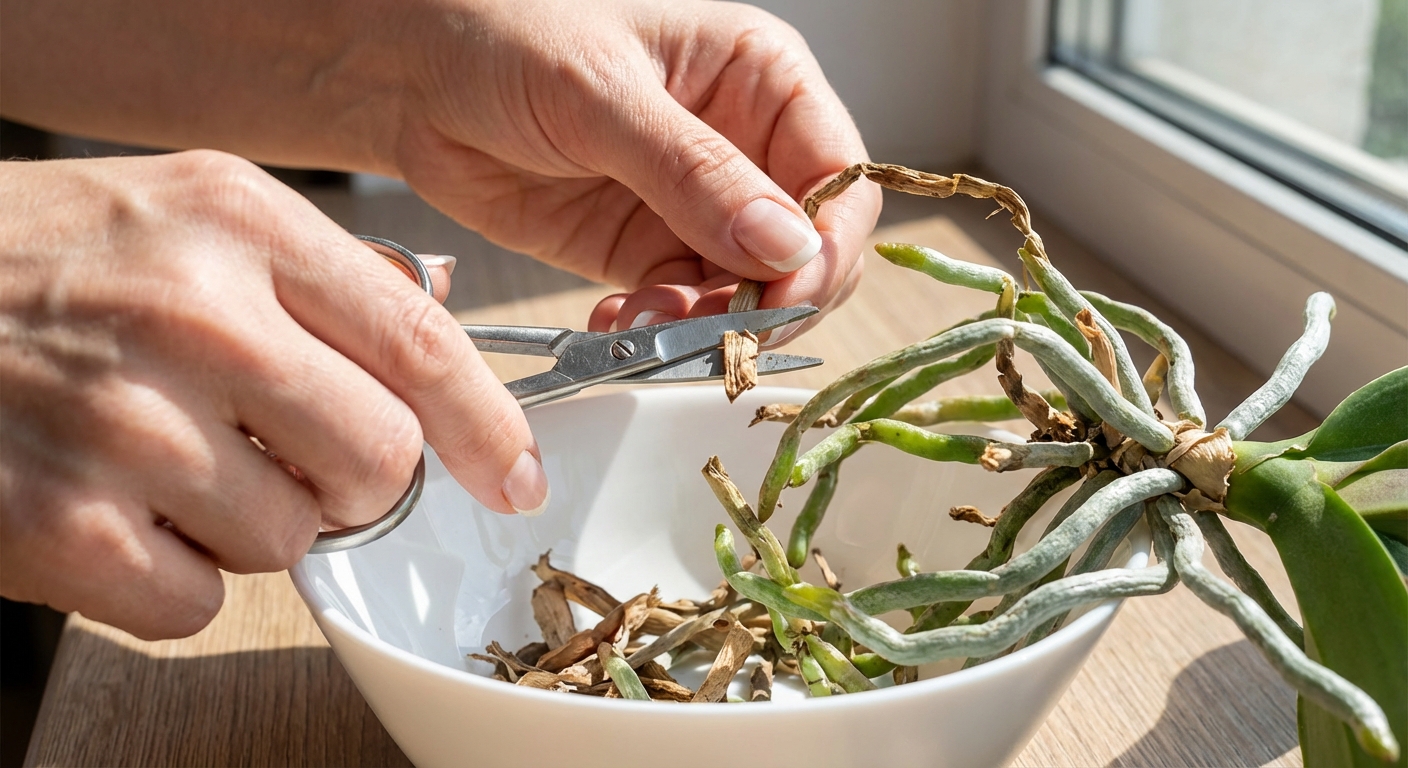
6) Trim only what is dead
Cut away dead roots with sterilized scissors. If you are unsure, gently squeeze the root. If it is firm, keep it. If it collapses like an empty straw, it can go.
If you like, dust cuts on roots with a tiny bit of cinnamon. Keep cinnamon away from the crown and new root tips, since it can be drying.
7) Set the orchid in the new pot
Hold the plant so the base (where leaves meet roots) sits just above the bark line. The crown should never be buried. Rot at the crown is one of the few things that can take an orchid down fast.
Let aerial roots stay aerial if they naturally want to. You can guide a few into the pot if they are flexible, but never force brittle roots.
8) Add bark and settle it gently
Fill around the roots with pre-soaked bark, tapping the pot to help pieces settle. Do not pack it tight like houseplant soil. You want air pockets.
9) Stabilize if needed
If the plant wobbles, use an orchid stake or a simple clip until new roots grab the mix. Stability helps root recovery.
Post-repot care (how to avoid shock)
Right after repotting, orchids often pause. That is normal. Your job is to keep conditions steady so the roots can reestablish.
Wait to water (usually)
If you trimmed roots, wait 3 to 5 days before watering to let cuts callus over. If you did not trim anything and the orchid is very dry, you can water sooner. When in doubt, a short wait is safer.
Light: keep it bright, not harsh
Give bright, indirect light. Avoid hot direct sun for a week or two, especially if the plant is already stressed.
Humidity and airflow
- Moderate humidity helps: 40 to 60 percent is a comfortable range for many homes.
- Airflow matters: gentle air movement helps prevent rot in fresh media.
Skip fertilizer for a bit
Hold off on fertilizer for 2 to 4 weeks. Fresh bark and recovering roots do not need extra salts right away. When you restart, use a diluted orchid fertilizer and flush with plain water occasionally.
What to watch for
- Wrinkled leaves: can mean root loss, underwatering, or adjusting after repotting. Check roots through the pot if it is clear.
- Yellowing lower leaf: often normal aging, especially if it is just one older leaf.
- Soft crown or black spots: act quickly. Keep water out of the crown and improve airflow.
Troubleshooting common repotting problems
My orchid is wobbly after repotting
Totally common. Use a stake or clip for a few weeks. Wobble can damage new root tips as they try to attach.
The roots looked fine, but the orchid still droops
Repotting can temporarily reduce water uptake. Keep the light gentle, avoid overwatering, and be patient. If you moved from moss to bark, the watering rhythm changes and the plant may need time to adjust.
I accidentally broke a few roots
You are in good company. Orchids are tougher than they look. Focus on stable care and avoid keeping the mix soggy. New roots will come.
There is mold on the bark
A little surface mold can show up in very fresh, damp mix. Increase airflow, ensure the pot drains freely, and let the bark dry slightly between waterings. Persistent mold usually means it is staying too wet.
Quick repot checklist
- Repot after blooming or when bark breaks down.
- Use chunky, breathable orchid bark mix and soak it first.
- Choose a snug pot with excellent drainage.
- Trim only dead, mushy, hollow roots with sterilized tools.
- Keep the crown above the medium.
- Wait a few days to water if you cut roots, and skip fertilizer for a few weeks.
If you want, tell me what type of orchid you have and share a photo of the roots and pot. I can help you decide whether it needs a repot now or can wait until after the next bloom cycle.