How to Repot a Monstera
Repotting a Monstera is one of those plant chores that sounds intimidating until you do it once, then you realize it is mostly about three things: air in the soil, just enough pot space, and support for that wonderfully awkward climbing habit. The goal is not to “upgrade” your Monstera into a mansion. The goal is to give the roots fresh, oxygen-rich mix and give the plant something to lean on so it can grow bigger leaves without flopping over.
This guide is written with Monstera deliciosa in mind (the most common one people grow indoors), but the same approach works for most indoor Monsteras.
I will walk you through timing, pot size, a simple aroid-style soil mix, how I deal with those determined aerial roots, how to add a moss pole or stake, and exactly how to water after repotting so transplant shock stays minimal.

When to repot (and when to leave it alone)
Monsteras appreciate being repotted, but they do not want to be repotted constantly. Many do best about every 1 to 2 years, but the real schedule depends on how fast it grows and how quickly the mix breaks down.
Best time of year
Spring through early summer is prime. The plant is waking up and can quickly grow new roots into fresh mix. You can repot in other seasons if you have to, but expect slower recovery in winter.
Signs your Monstera is ready
- Roots circling the bottom or poking out the drainage holes.
- Water runs through fast and the pot feels dry again in a day or two, even though you watered thoroughly.
- The plant feels top-heavy or unstable, especially if it is leaning away from the pot.
- The soil has become dense and hydrophobic, meaning it resists taking in water.
- You notice a persistent “stale” smell from the mix, which often means it is breaking down and holding too much moisture.
When not to repot
- If your Monstera is newly purchased and looks healthy, give it 2 to 4 weeks to adjust to your home first.
- If it is actively stressed from low light, cold drafts, pests, or recent overwatering, fix the underlying issue first.
Pot size: go only one size up
This is the repotting mistake I see most: choosing a pot that is “future-proof.” Monsteras do not love swimming in extra wet soil. A too-large pot stays damp longer, which can lead to root rot and slower growth.
What “one size up” means
Aim for a pot that is 1 to 2 inches wider in diameter than the current pot (or up to 3 inches for very large, mature plants). If you are switching from an 8-inch pot, move to a 10-inch pot, not a 12 or 14.
Drainage matters more than material
- Always choose a pot with a drainage hole.
- Terracotta breathes and can help if you tend to overwater.
- Plastic holds moisture longer and is lighter for big Monsteras, but you need a well-aerated mix and careful watering.
If you love a decorative cachepot with no holes, keep the Monstera in a nursery pot inside it. Your floors will stay happier, too.
The best Monstera soil mix (airy, chunky, fast-draining)
Monsteras are aroids. In nature, their roots get lots of oxygen and they cling to tree bark and leaf litter, not dense, muddy soil. That is why a typical all-purpose potting soil often feels “fine” for a while, then slowly turns into a soggy sponge.
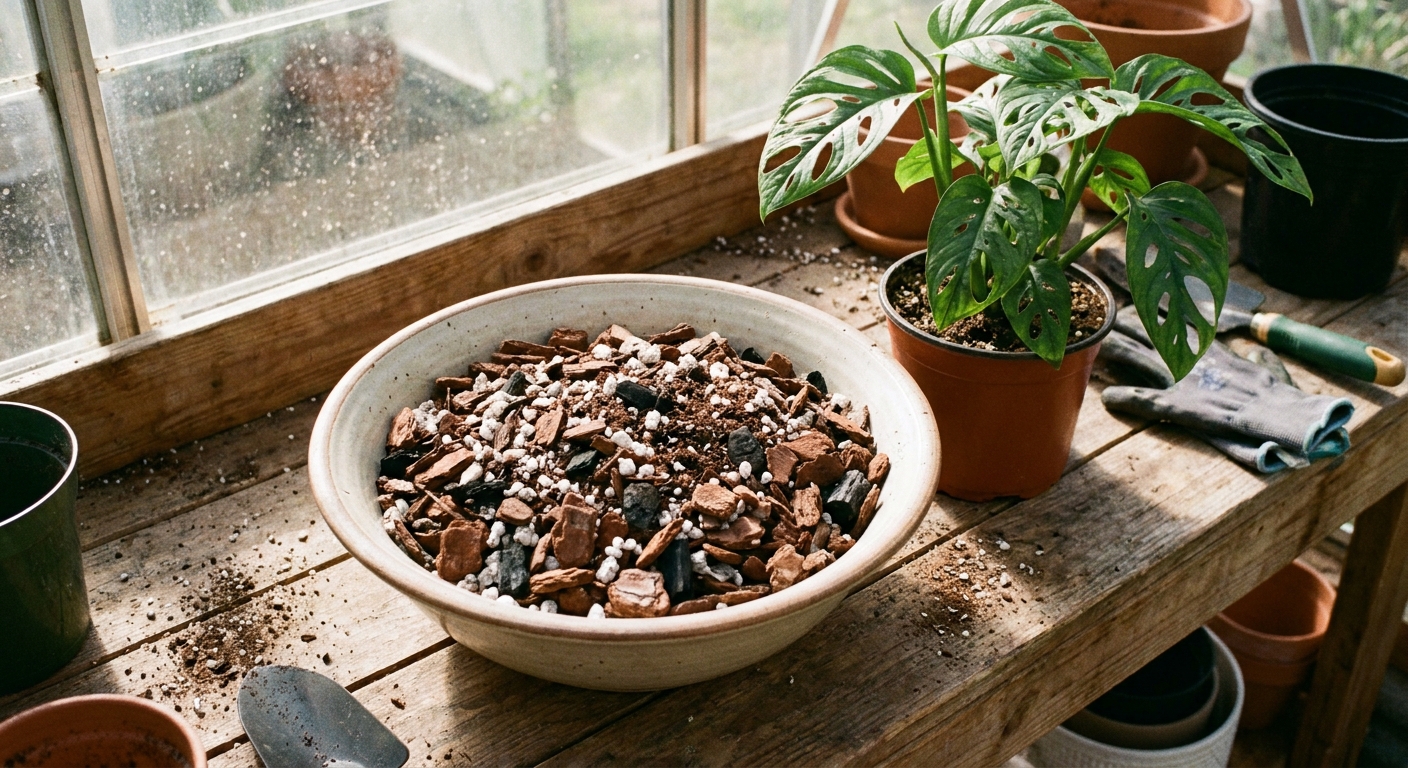
A simple aroid-style mix you can make at home
Here is my go-to blend for most indoor Monsteras:
- 40% indoor potting mix or coco coir based potting mix
- 30% orchid bark (medium grade)
- 20% perlite or pumice
- Up to 10% worm castings or compost (optional)
Mix it in a bucket and break up any clumps. You want a texture that feels like a loose trail mix, not cake batter.
Note: In cooler, lower-light homes, keep compost or castings on the lighter side (or skip them) so the mix does not stay wet too long.
Optional upgrades (nice, not required)
- A small handful of horticultural charcoal can help keep the mix fresher.
- If your home is very dry, a little extra coco coir can add water retention, but keep the bark and perlite high so the roots still breathe.
Tools and prep (make it easy on yourself)
Before you pull the plant out, get your station ready. Repotting goes smoother when you are not trying to hold a leaning Monstera with one hand while hunting for a stake with the other.
- New pot with drainage hole
- Fresh aroid mix
- Moss pole, coir pole, or sturdy stake
- Soft plant ties or Velcro garden tape
- Pruners or scissors (cleaned)
- Optional: gloves, tarp, chopstick for teasing roots
Pro tip: Repot when the root ball is slightly moist, not soggy. If it is bone-dry, water lightly the day before so the roots are more flexible. If your home runs cool or low light and the mix stays wet easily, skip the pre-watering and repot on the drier side.
Step-by-step: repotting your Monstera
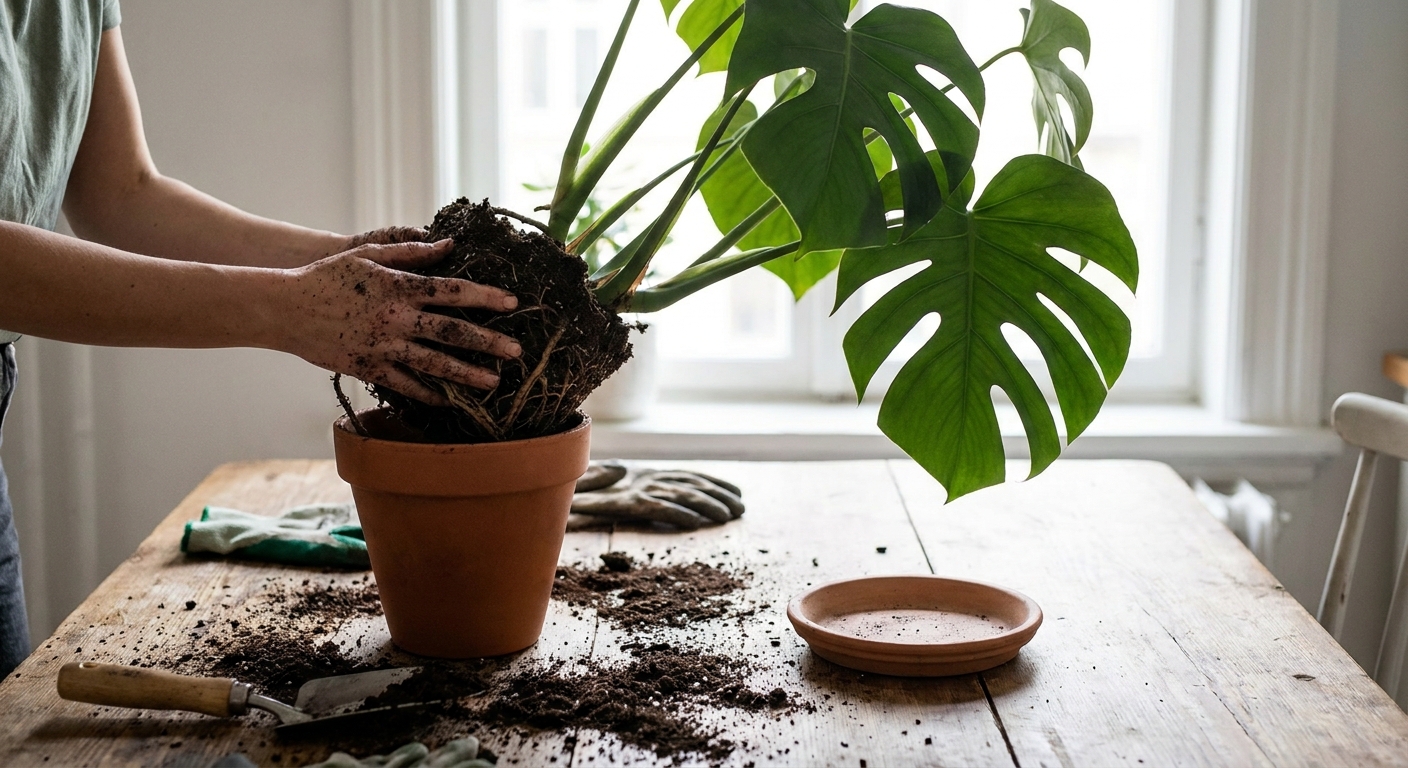
1) Remove the plant gently
Lay the pot on its side and support the base of the stems. Wiggle the pot and ease the root ball out. If it is stuck, squeeze a plastic pot or run a blunt knife around the inside edge. Avoid yanking the stems.
2) Check roots and pests
Healthy Monstera roots are usually firm and pale tan to creamy white. If you find roots that are black, mushy, or smell sour, trim them back with clean pruners.
This is also a great moment for a quick pest check. Look along the stems and undersides of leaves for thrips, scale, and mealybugs before you put everything back together.
Do not panic over a little brown staining. What you are watching for is soft, collapsing tissue.
3) Loosen the root ball a little
If the roots are tightly circling, tease the outer layer loose with your fingers or a chopstick. You do not need to fully untangle everything. Think “encourage outward growth,” not “detangle every strand.”
If it is severely rootbound and feels like a solid brick, you can do one of these:
- Gently score the outer roots in a few places (light vertical slices), then tease them outward.
- If the mix is hydrophobic and refusing water, soak the root ball briefly in a bucket of water for 10 to 15 minutes, then let it drain well before potting up.
4) Add support first (pole or stake)
If you want to add a moss pole or stake, do it before filling the pot. This prevents you from spearing roots later.
- Place the pole slightly behind the main stems, where you want the plant to climb.
- Push it down near the pot wall for stability.
- If the pole is tall, choose a heavier pot or use a wider base to prevent tipping.
5) Set the plant at the right height
Add a little soil mix to the bottom of the new pot. Place the Monstera so the top of the root ball sits about 1 inch below the rim.
Important: Do not bury the main stem or petiole bases deeper than they were before. Keeping the crown area too deep and wet can invite rot.
6) Fill around, do not pack down
Scoop in mix around the sides, tapping the pot to settle it. Resist the urge to press hard. Compacted soil reduces airflow, and Monsteras live for oxygen at the roots.
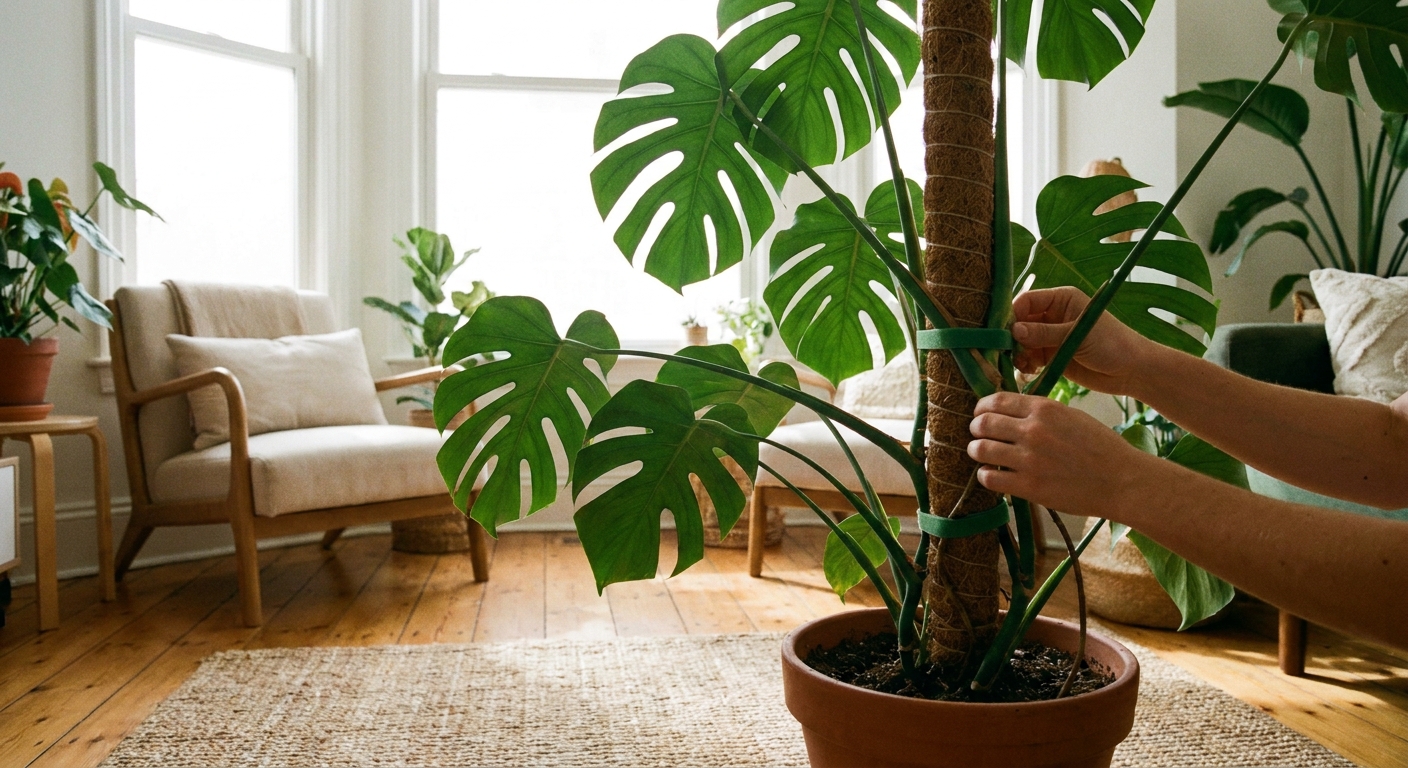
7) Tie in the stems
Use soft ties to secure the main stem to the pole. Keep ties snug enough to support, loose enough to avoid pinching. I like a gentle figure-eight tie so the stem is cushioned.
If your Monstera has multiple stems, you do not have to strap everything tightly into one column. A little spread is natural. The pole is there to guide growth upward, not to force a perfectly tidy shape overnight.
Aerial roots: what to do with the long, curly ones
Aerial roots are your Monstera’s climbing and anchoring tools. They can look a little wild indoors, but they are not a problem. When repotting, you have a few good options.
Option A: Guide them into the pot
If an aerial root is long and flexible, you can gently curve it into the new pot and cover it with the chunky mix. This can help the plant stabilize and access moisture. Do not force stiff roots that resist bending.
Option B: Train them to the pole
This is my favorite for a climbing Monstera. Tuck aerial roots against the moss pole or coir pole so they can grab on as they grow. If you use a moss pole, keep it evenly damp, not dripping. Constant saturation can invite fungus gnats or a bit of funk.
Option C: Leave them be
It is perfectly fine to let aerial roots hang. If they are not bothering you, you do not have to do anything.
Can you cut aerial roots?
Yes, if you truly need to for space or aesthetics, you can trim an aerial root. Use clean pruners and avoid removing a whole bunch at once. Cutting aerial roots will not kill the plant, but heavy removal can stress it and slow down that “anchored and climbing” momentum. If an aerial root is actively attaching to a pole, I try to leave it alone when possible.
Aftercare: watering and reducing transplant shock
Aftercare is where most repots succeed or fail. Your Monstera just had its root system disturbed, which temporarily reduces how efficiently it can drink.
Watering right after repotting
If the mix is fairly dry, water thoroughly until you see water drain out the bottom. This settles the mix around the roots and eliminates big air gaps. Then let it drain completely.
Optional exception: If you had to remove a lot of rotten roots, or your mix and root ball are already quite damp, you can wait 12 to 24 hours to water. The idea is to avoid keeping freshly cut areas wet nonstop.
The next 2 to 3 weeks
- Keep it in bright, indirect light. Avoid harsh direct sun while it recovers.
- Hold off on fertilizer for 3 to 4 weeks.
- Water only when the top 2 inches of mix feel dry. New mix can hold moisture differently than old mix, so check with a finger, not a calendar.
- Expect a little pause in growth. That is normal.
Normal vs not normal after repotting
- Normal: a day or two of mild droop, slower growth, one older leaf yellowing.
- Not normal: rapidly yellowing multiple leaves, sour smell, mushy stems, or persistent wilting despite appropriate moisture.
If something feels off, the most common culprit is overwatering in a too-dense mix or a pot that is too large. Airy soil and patience fix a lot.
Quick troubleshooting
My Monstera is leaning more after repotting
That usually means the pole is not deep enough, or the plant is not tied at the right points. Push the pole deeper (carefully, near the pot edge) and add one or two additional soft ties. A slightly heavier pot can also help.
The soil stays wet for a long time
Increase airflow and light, and check that your pot truly has drainage. Next time, add more orchid bark and perlite. For now, let it dry more between waterings.
I lost some roots while repotting
Monsteras are resilient. Keep conditions steady: bright indirect light, warm temps, and conservative watering. Avoid fertilizer for a few weeks and let it rebuild.
A gentle repot is a gift your Monstera will use
Repotting is not about perfection. It is about giving your Monstera a breathable home base and a sturdy support so it can do what it naturally wants to do: climb, stretch, and unfurl those big, dramatic leaves like it is putting on a little living room show.
If you want a simple mantra to remember: one size up, chunky mix, support first, water once, then wait. Your Monstera has the rest.