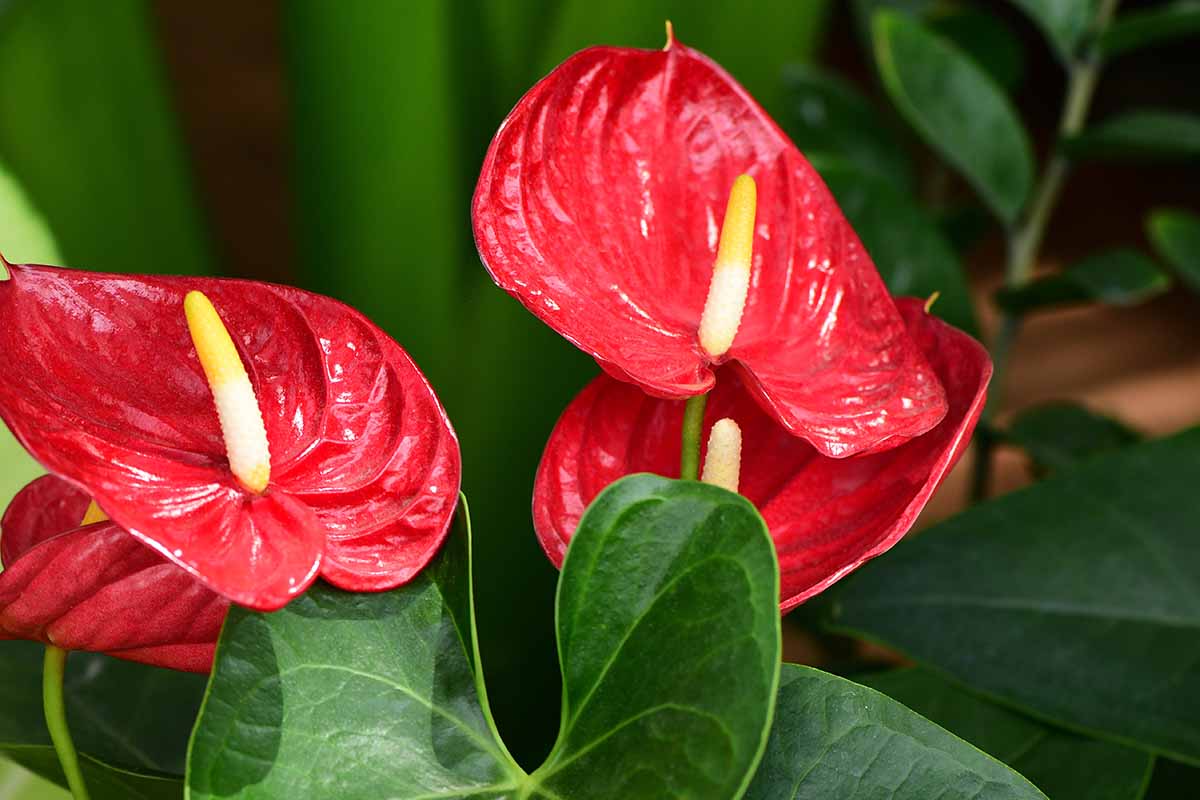
How to Propagate an Anthurium at Home
If your anthurium has been thriving, you might notice it doing that quiet plant magic where one becomes two. A new little clump appears at the base, or the pot starts to look crowded, or a stem leans and begs to become its own plant. Good news: you can absolutely propagate anthurium at home, and you do not need a lab, a heat mat, or a PhD in tropical vibes.
Quick safety note before we play plant surgeon: anthurium sap can be irritating, and the plant is toxic if chewed. If you have sensitive skin, kids, or pets who sample greenery, wear gloves and keep cuttings out of reach.
There are three beginner-friendly paths for most common houseplant anthuriums (like A. andraeanum hybrids and many velvety types), with a small caveat: some species and cultivars are more stubborn about rooting from cuttings. When in doubt, division and offsets are the low-drama winners.
- Division at repotting (my favorite, and the most reliable)
- Basal offsets (when the plant gives you babies at the base)
- Stem cuttings (possible, but slower and fussier, with high humidity needed)
I will walk you through each method, then we will talk aftercare for slow rooters and how to avoid the number one propagation heartbreak: crown rot from staying too wet.
Before you start
Best time
Propagate in spring through early summer if you can. Anthuriums root and recover faster when days are longer and temperatures are steady. You can do it in winter, but it is like asking someone to move house during a snowstorm. Possible, not pleasant.
What you will need
- Clean snips or a sharp knife
- Rubbing alcohol (for tool sterilizing)
- Small pots with drainage holes
- A chunky, airy aroid mix
- Optional: clear plastic bag or a small humidity dome
- Optional: sphagnum moss or perlite for cuttings
- Optional: rooting hormone (not required, but fine if you already have it)
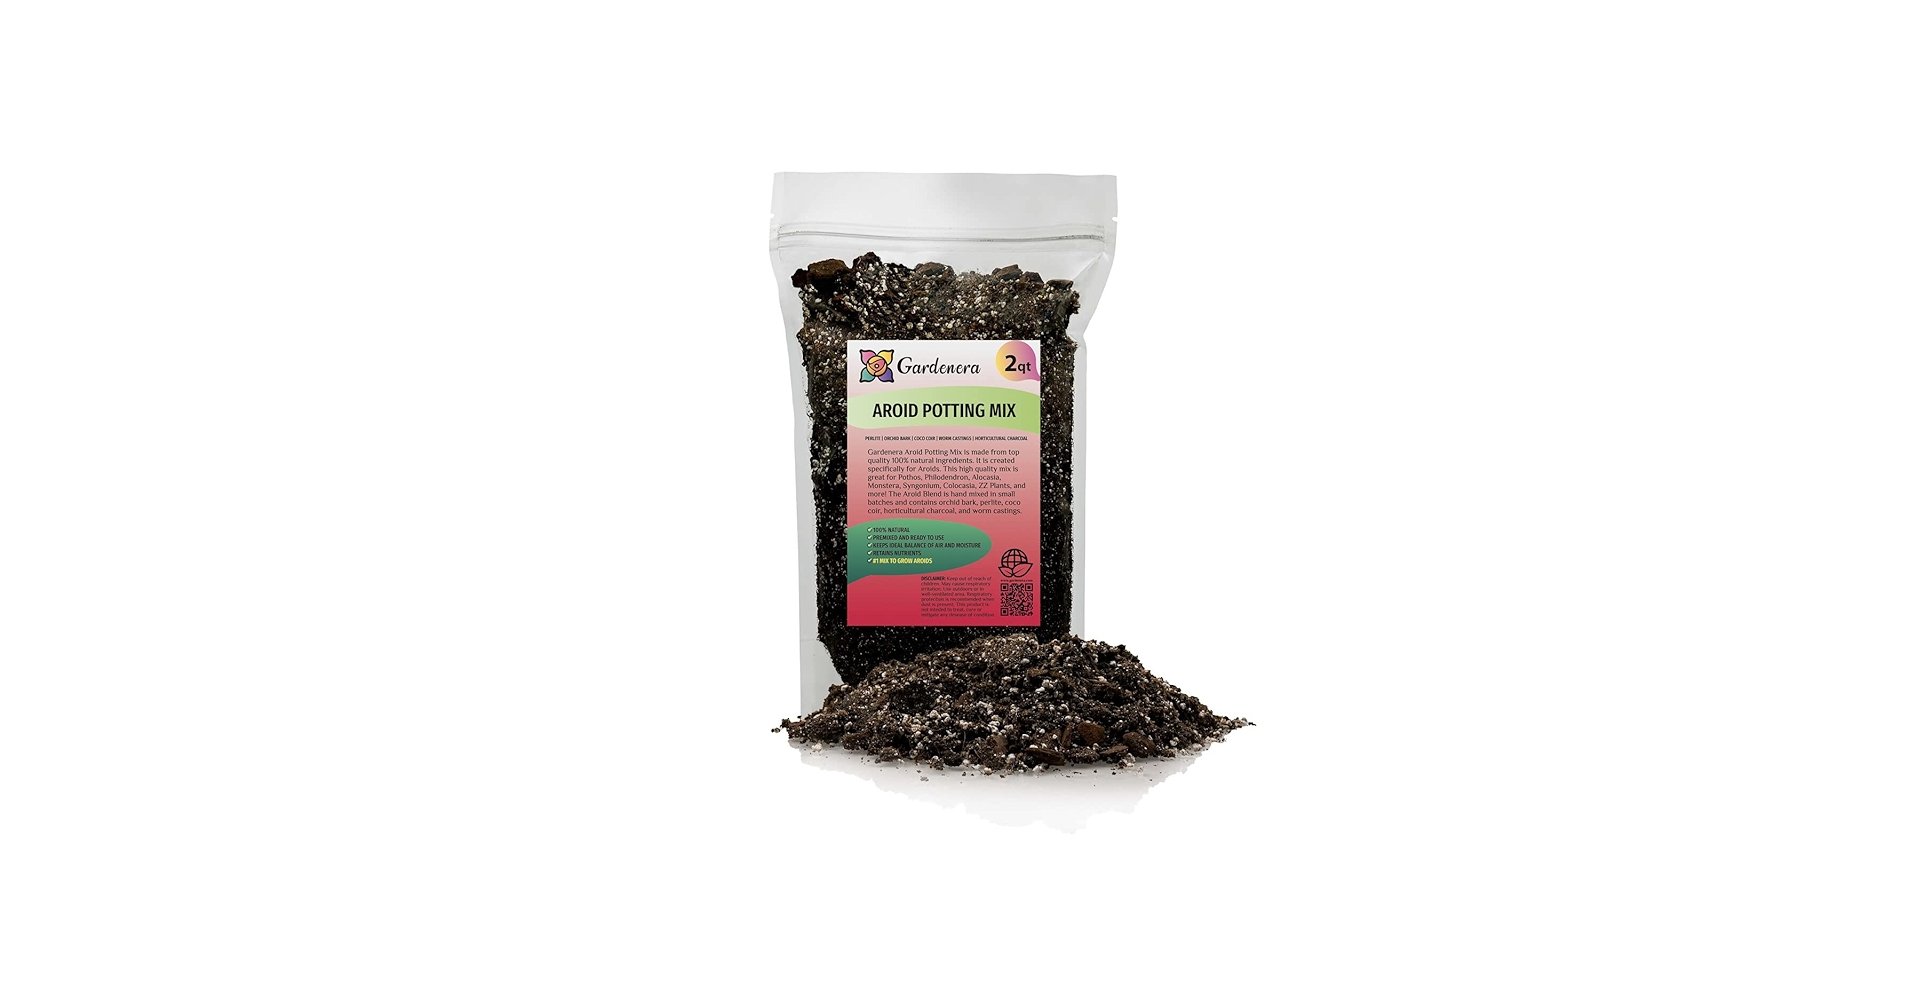
My simple propagation mix
Anthuriums want oxygen at the roots. For most homes, a good DIY blend looks like this:
- 2 parts fine or medium grade orchid bark (not the huge decorative chunks)
- 1 part coco coir or peat
- 1 part perlite or pumice
- A small handful of worm castings (optional)
If you already have a quality aroid mix, use it. The goal is fluffy and fast draining, not dense and soggy.
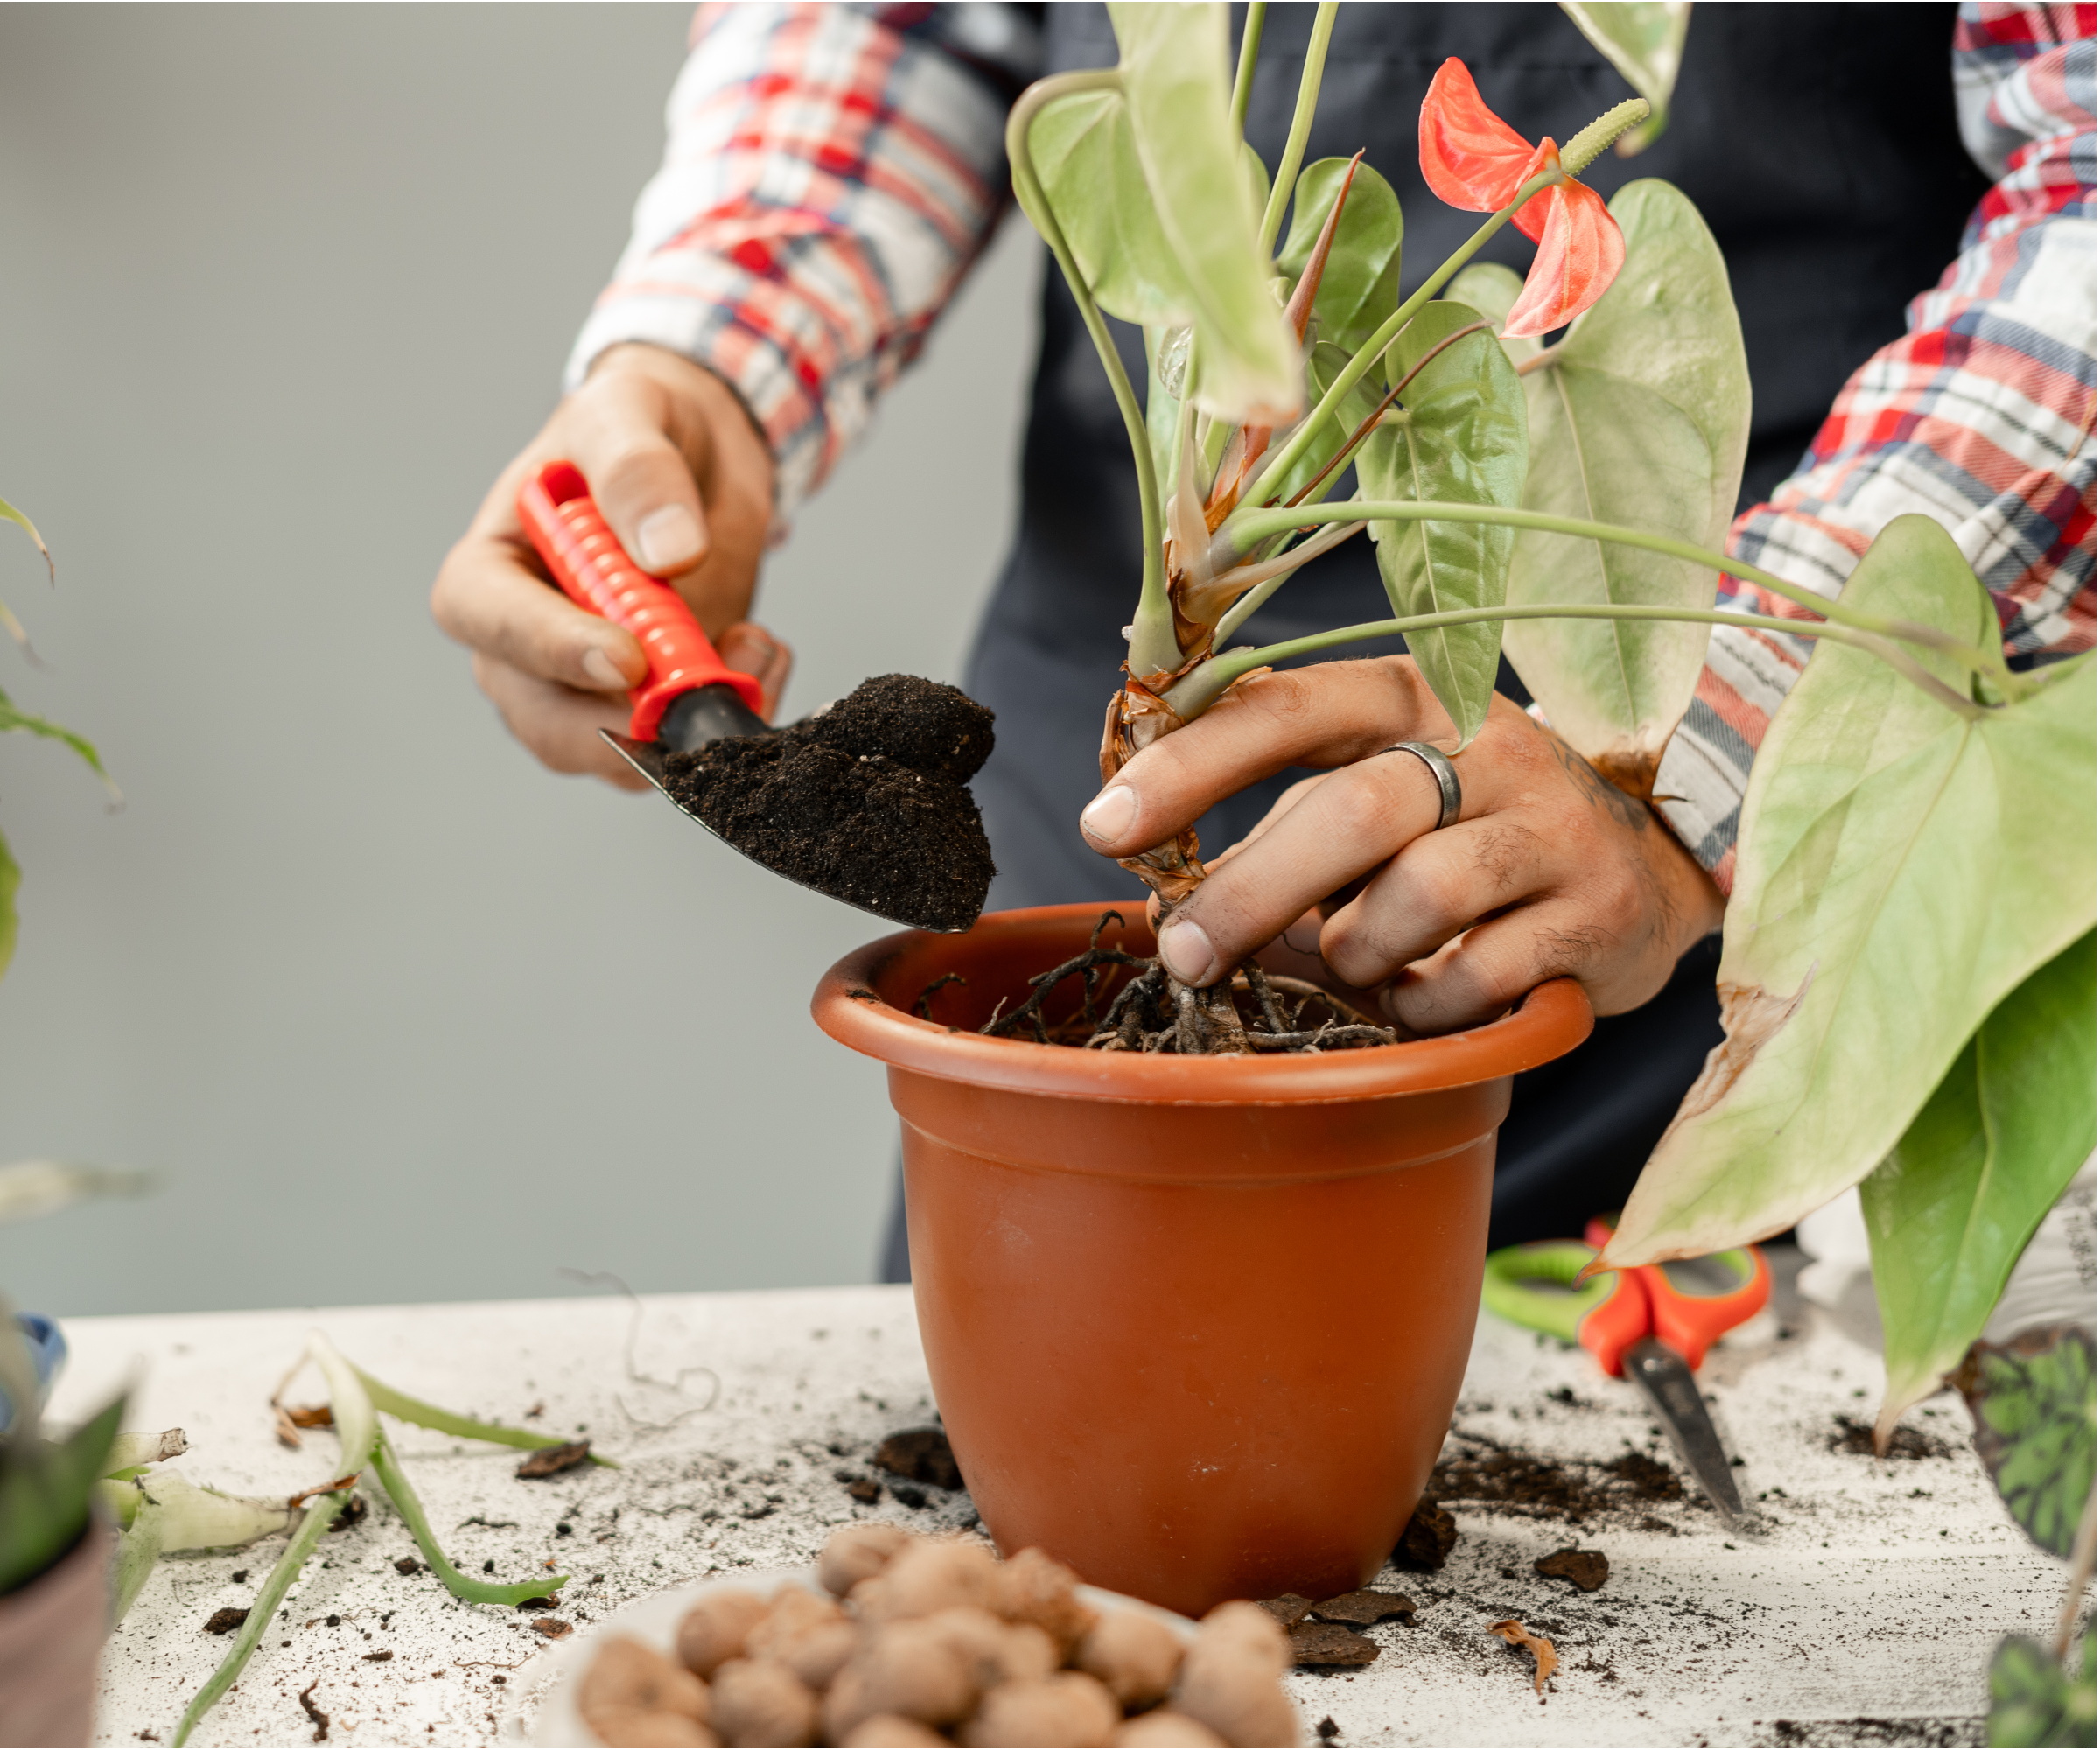
Method 1: Division
If your anthurium has multiple crowns or obvious clumps, division is the easiest way to get two healthy plants that look good immediately.
When it is ready
- It has two or more growth points (crowns) that each have their own leaves
- You can see separate root clusters once you remove it from the pot
- The plant is pot-bound and drying out quickly
Steps
- Water the day before. Lightly moist roots are more flexible and less likely to snap.
- Slide the plant out of the pot. Support the base and ease it out. Do not yank by the stems.
- Loosen the root ball. Use your fingers to tease roots apart, especially where clumps meet.
- Find the natural split. Most anthuriums practically show you where they want to separate.
- Separate gently. If roots are tightly fused, sterilize your knife and make one clean cut.
- Pot up each division. Choose pots that fit the root mass snugly. Oversized pots hold too much moisture.
- Water lightly. You want the mix evenly damp, not drenched.
Success tip
Each division should ideally have at least 2 to 3 leaves and a healthy root section. Tiny divisions can survive, but they sulk longer. Also, a little droop the first week is common. Do not panic-water to “fix” it.
Method 2: Basal offsets
Basal offsets are the little bonus plants that pop up at the base of a mature anthurium. When the plant is happy, it sometimes produces these pups as a slow, steady expansion.
When an offset is ready
- The offset has its own leaves (ideally 2 or more)
- You can see or feel it has some roots of its own
- It is large enough to handle without snapping (think palm-sized, not thumbnail-sized)
Steps
- Remove the plant from its pot. Offsets are easiest to separate when you can see what you are doing.
- Brush away mix around the base. Find where the offset connects to the mother plant.
- Gently wiggle and peel roots apart. Use your fingers first.
- Cut only if needed. If the offset is firmly attached, sterilize your blade and cut the connecting tissue cleanly.
- Pot the offset in a small pot. Keep the crown at the same height it was growing before.
- Increase humidity for 2 to 3 weeks. A clear bag over the pot (not touching leaves) works beautifully.
Offsets are usually more forgiving than stem cuttings because they already have a head start on roots. Think of them as a teenager moving out, not a newborn.
Method 3: Stem cuttings
Stem cuttings can work for some anthuriums, especially if you have a leggy plant with a longer stem and visible nodes. This method is slower and more humidity-dependent than division, so go into it with patience and a clean setup. If your plant already has aerial roots on the stem, congratulations, you just got an easy mode upgrade.
What to cut
- Top cutting: a leafy top section with at least one node (and ideally an aerial root)
- Node segments: a leggy stem chopped into sections with at least one node each. Yes, leafless chunks can work, they just look depressing until they do not.
What a viable cutting looks like
- A stem section with at least one node (where roots can form)
- Ideally one leaf on the cutting (too many leaves can dehydrate the cutting)
- No mushy tissue, no bad smell, no dark collapse at the crown
Steps (moss or perlite method)
- Sterilize your tools. Wipe blades with rubbing alcohol.
- Take a cutting below a node. Make a clean cut. If the plant is leggy, take multiple node sections.
- Optional: let it air-dry briefly. Some growers pot immediately. If you are rot-anxious, 30 to 60 minutes on a clean paper towel can help, but clean cuts and an airy medium matter more.
- Prep sphagnum correctly. If using moss, soak it, then thoroughly wring it out until it feels like a wrung-out sponge. Beginners tend to leave it dripping, and that is basically a rot invitation.
- Root in lightly damp sphagnum or perlite. Barely moist is the vibe. Fluffy, not wet.
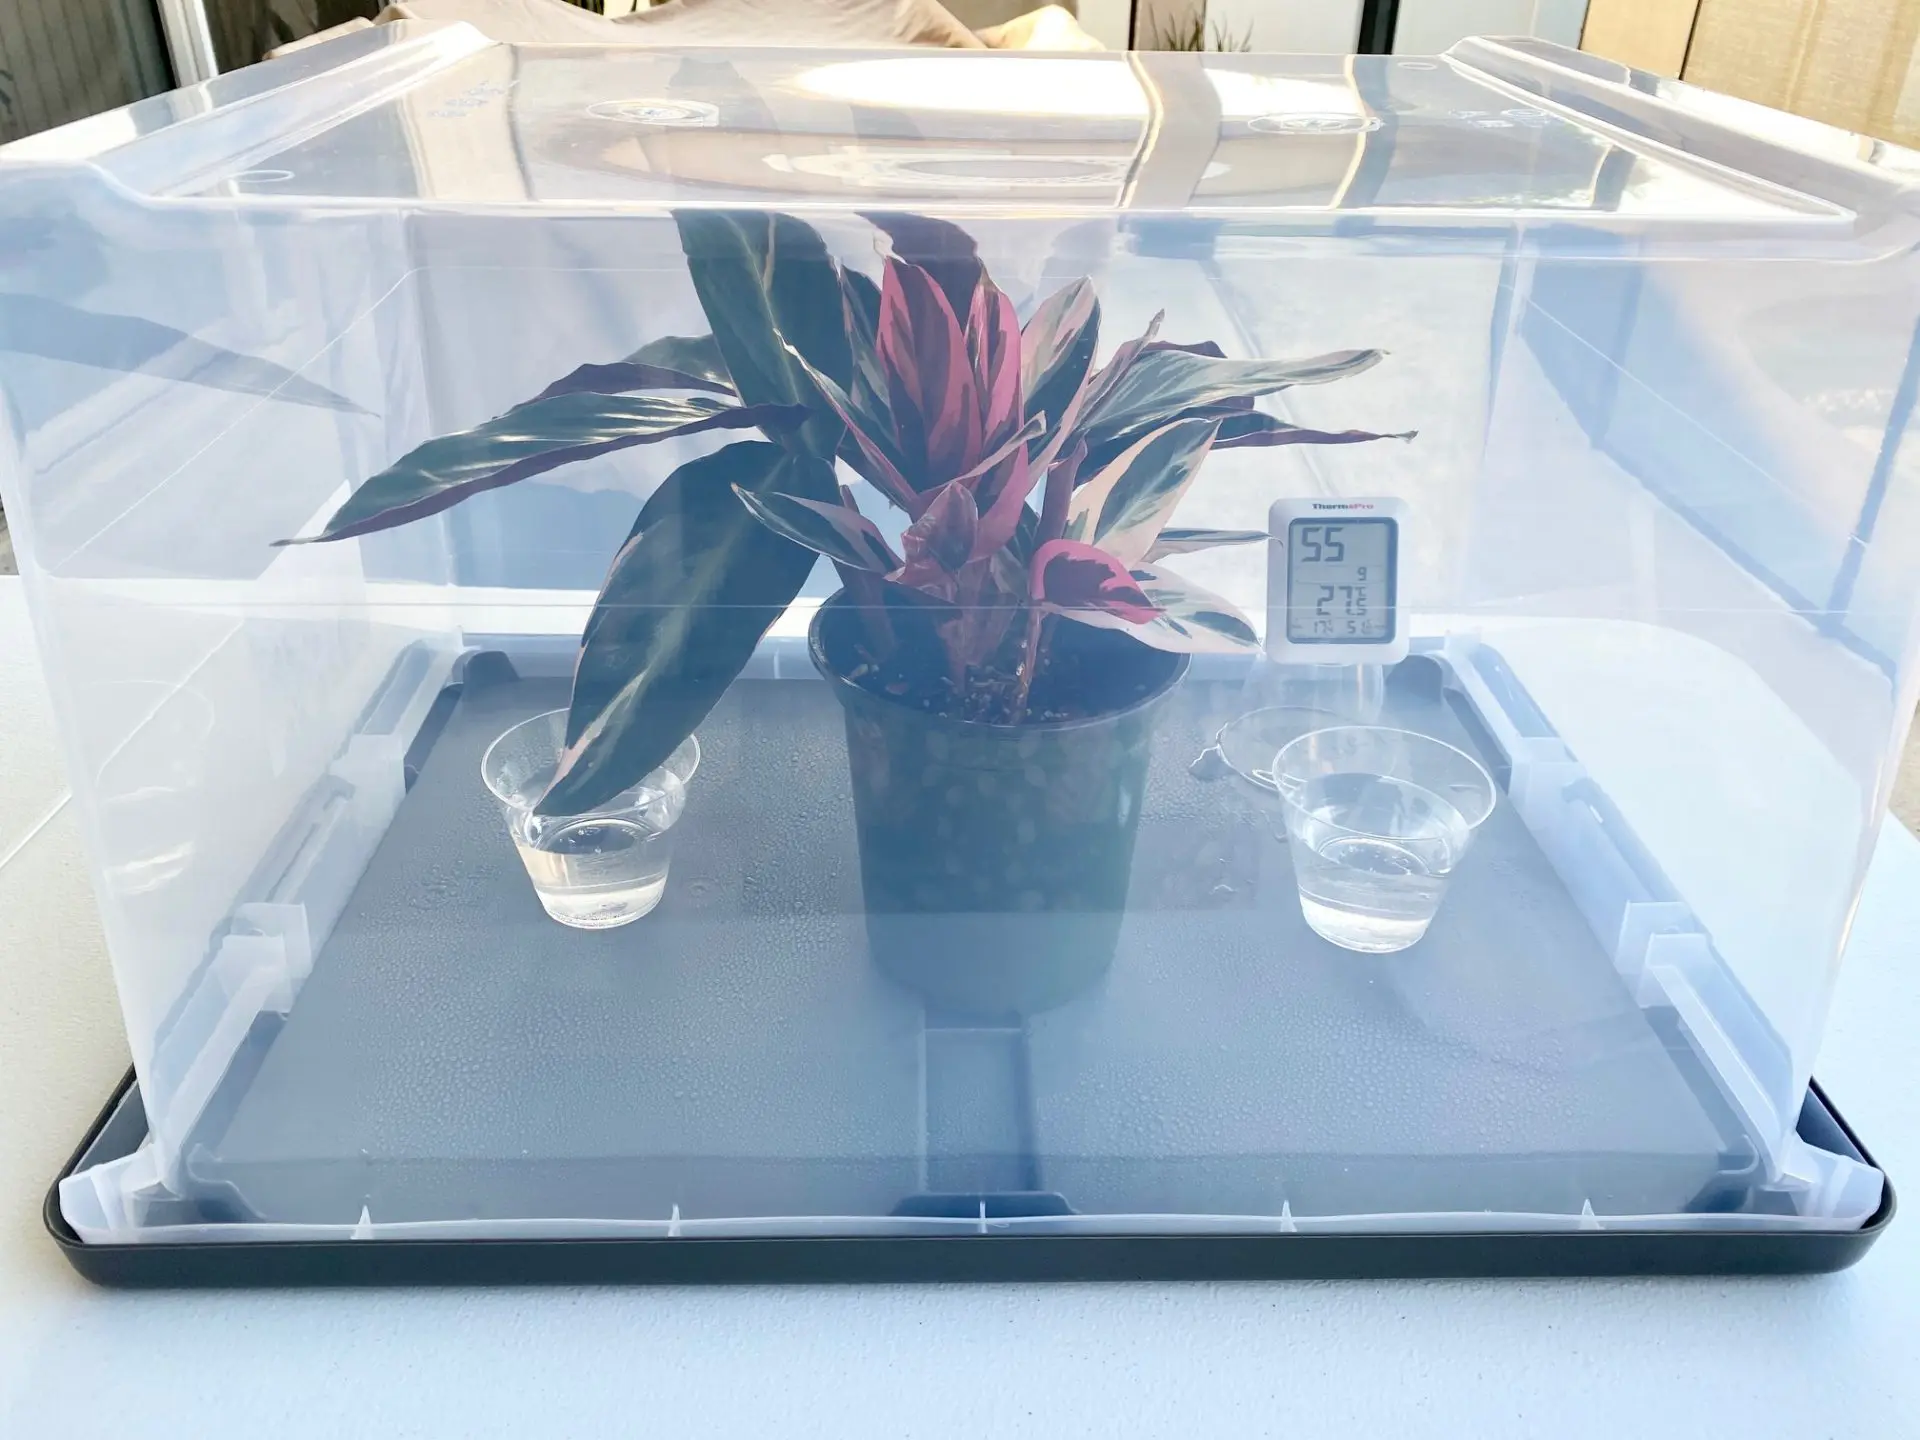
- Add a humidity dome. A clear plastic container or bag helps keep leaves from dehydrating.
- Provide warm, bright, indirect light. Avoid direct sun, which can cook a cutting under plastic.
Water propagation (yes, you can)
Water propagation is popular for a reason: you get to watch roots happen, and it feels like progress. It can work for anthurium cuttings with a node (especially top cuttings), but it comes with a small tradeoff. Water roots are not the same as soil roots, so the transition to potting mix can be a little dramatic.
- How: Place the node in water and keep the crown and leaves above the waterline.
- Keep it clean: Refresh water every few days, or at least weekly.
- Light: Bright, indirect light.
- When to pot up: When roots are a few inches long and you can see branching.
- My preference: Moss or perlite usually gives you sturdier roots for potting, but if water is what keeps you motivated, use water. Motivation is an underrated gardening tool.
How long will it take?
Expect 4 to 10+ weeks to see meaningful roots depending on temperature, light, and the plant’s mood. Anthuriums are not sprinters. They are marathoners who stop for snacks.
Aftercare
This is where most propagation guides get a little too cheerful and then abandon you. Fresh divisions and cuttings often root slowly, and slow is normal. Your job is to prevent rot while the plant figures out its new reality.
Light
Give bright, indirect light. Too low and rooting crawls. Too high and you stress tender tissue, especially under a humidity cover.
Water
- Divisions: Water when the pot feels noticeably lighter and the mix is mostly dry, but not bone dry. With chunky mixes, the “top 1 to 2 inches” test can lie to you.
- Offsets: Keep lightly and evenly moist for the first 2 weeks, then shift toward the division routine.
- Stem cuttings: Keep the medium barely moist. If it is wet, rot moves in like it pays rent.
Humidity
For offsets and cuttings, higher humidity helps for a short window:
- Use a clear bag or dome for 2 to 4 weeks
- Open it daily for fresh air (stale air plus wet medium is rot’s favorite combo)
When to remove the dome: Once you see new growth or the cutting feels gently anchored (a little resistance when tugged), start venting more each day for a week, then remove it fully. Gradual is kinder than ripping off the humidity training wheels overnight.
Temperature
Rooting is fastest around 70 to 80°F (21 to 27°C), with many plants happiest in the mid to upper 70s. Cold windowsills slow everything down.
Fertilizer
Wait until you see new growth. Then feed lightly at quarter strength every 4 to 6 weeks during the growing season. Freshly cut roots are sensitive.
When to pot up
Move to a slightly larger pot only when roots are filling the container and the plant dries faster. Anthuriums like being a bit snug.
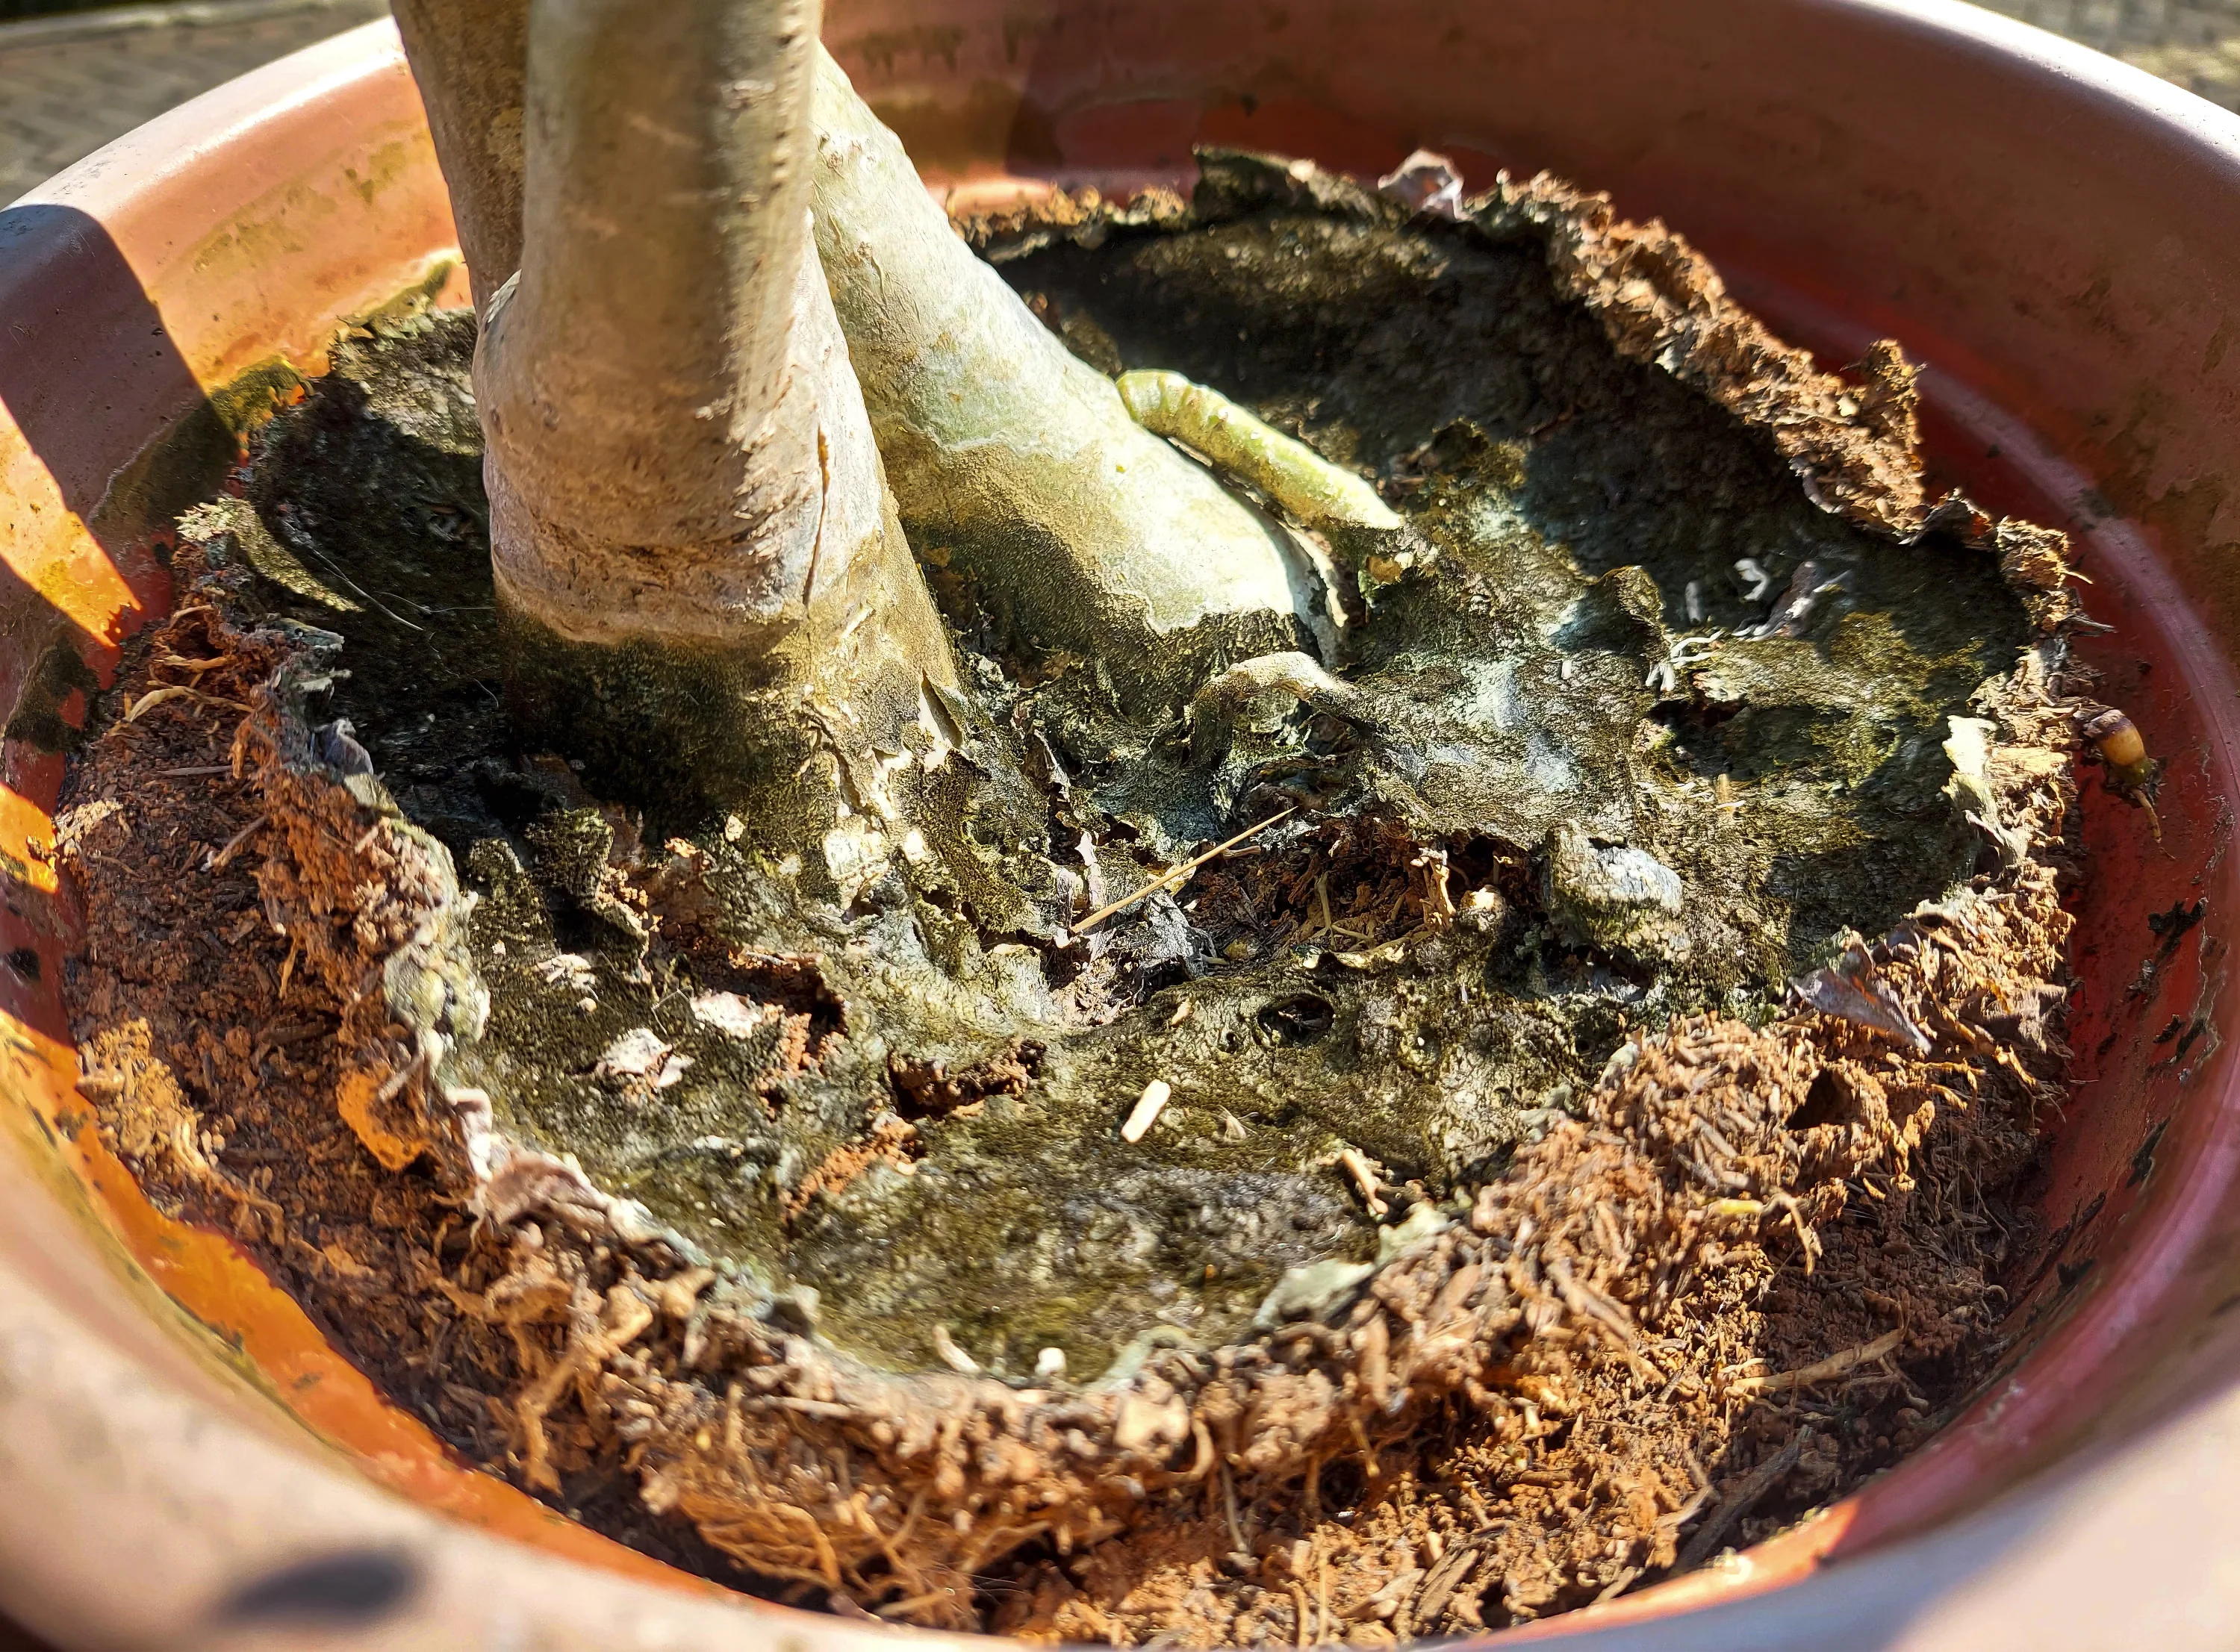
Crown rot
Let’s talk about the scary one, because catching it early is everything. Crown and root rot usually show up when conditions stay too wet and airless, and opportunistic pathogens take advantage. The good news is you can prevent most of it with a chunky mix, drainage, and restraint.
Early signs
- Soft, mushy tissue at the base of stems or at the crown
- Yellowing leaves that feel limp rather than crisp
- Dark, water-soaked patches near the soil line
- Funky smell from the potting mix
- A plant that wobbles because the base is breaking down
What to do
- Unpot immediately. Do not wait and hope.
- Rinse off the roots. You need to see what is healthy and what is not.
- Cut away all mushy tissue. Sterilize your blade between cuts.
- Let the plant dry. Set it on a clean towel for a few hours so wounds can air out.
- Repot into a drier, chunkier mix. Use a smaller pot if needed.
- Hold back on watering. Give just enough to settle the mix, then let it dry more than usual.
If rot has reached the main crown, sometimes the best rescue is taking any healthy node sections above the damage and restarting with the stem cutting method in barely moist medium.
Troubleshooting
My division looks droopy
- Likely causes: root disturbance, low humidity, too much direct sun
- Fix: move to bright indirect light, keep lightly moist for a week, and consider a loose humidity tent for a few days
- Note: one or two older leaves yellowing after division can be normal. The goal is new growth, not perfection.
My cutting is not rooting, but it is not dying
- Likely causes: cool temps, low light, medium too wet or too dry
- Fix: warm it up, increase indirect light, and keep the medium barely moist with daily ventilation
Leaves are yellowing on a new offset
- Likely causes: overwatering in an oversized pot, shock from separation
- Fix: check the crown for firmness, reduce watering, and ensure the pot drains freely
Which method to use
- Choose division if your plant has multiple crowns. Fastest and most reliable.
- Choose basal offsets if your plant is offering pups. Low drama, high success.
- Choose stem cuttings if your plant is leggy or you are rescuing healthy nodes. Slow, but satisfying.
- Choose water propagation if seeing roots keeps you consistent. Just pot up gently and keep the mix lightly moist at first.
If you are nervous, start with division. It feels a little like performing surgery the first time, I know. But anthuriums are tougher than they look, and they want to grow. Your job is just to give them air at the roots, gentle moisture, and a patient timeline.
And if you do everything “right” and it still takes a while, welcome to the club. I have been growing aroids for years, and I still have plants that sit there rooting like they are contemplating the meaning of life. That is gardening. Slow, quiet, and worth it.