How to Plant Dahlia Tubers in Spring
If dahlias have ever made you nervous, you are not alone. They look like they should be fussy, but they are mostly just particular about two things in spring: temperature and drainage. Get those right, plant at the proper depth, and your tubers will wake up like they never missed a season.
Below is my simple, dirt-under-the-fingernails method for that first planting after storage, including depth, spacing, watering, labeling, and how to avoid the classic tuber-rot heartbreak.

When to plant
Dahlias are warm-season flowers. The tubers can rot in cold, wet soil and the new shoots can be zapped by frost. Your goal is to plant when the ground is reliably warming, not when spring is merely feeling optimistic.
- Plant outdoors after your last frost date, or when frost risk is very low.
- Wait for soil to warm. A good target is soil that is consistently around 55 to 60°F / 13 to 16°C a few inches down. Warmer is better if your spring is wet.
- If your spring is cold and rainy, it is often better to wait an extra week or two than to put tubers into a soggy bed.
If you are itching to get going early, you can pre-sprout tubers indoors in slightly damp potting mix and transplant later. But for in-ground planting, warmth and drainage come first.
Pick the right spot
Light
Dahlias bloom best with 6 to 8 hours of direct sun. In very hot climates, a little afternoon shade can prevent stress, but too much shade equals tall, floppy plants with fewer blooms.
Soil and drainage
Think “moist like a wrung-out sponge,” not “wet like a puddle.” Dahlias want rich soil, but they hate sitting in water.
- Avoid low spots where water collects.
- Raised beds are wonderful for dahlias if your soil is heavy.
- If you have clay soil, plan to loosen and amend the planting area rather than trying to fix it with a little compost on top.
Soil prep
Dahlias are hungry bloomers later, but at planting time the biggest risk is rot and weak, sappy growth. The best soil prep is about structure first, nutrition second.
Do this
- Loosen soil 10 to 12 inches deep so roots can run.
- Mix in 2 to 3 inches of finished compost for organic matter and steady fertility.
- If drainage is questionable, add a texture booster such as pine fines (where available), composted bark, leaf mold, horticultural grit, or expanded shale to help air and water move through.
Skip this at planting time
- Fresh manure (too hot, can burn and encourages overly lush growth).
- High-nitrogen fertilizers (you will get leaves and long stems, but fewer flowers).
- Heavy, water-holding amendments in already-wet soils.
- Mixing sand into clay as a “quick fix.” It can make a concrete-like texture if the ratios are not right.
If you like to use an organic, bloom-leaning fertilizer, wait until you see growth above ground. I will walk you through that timing below.
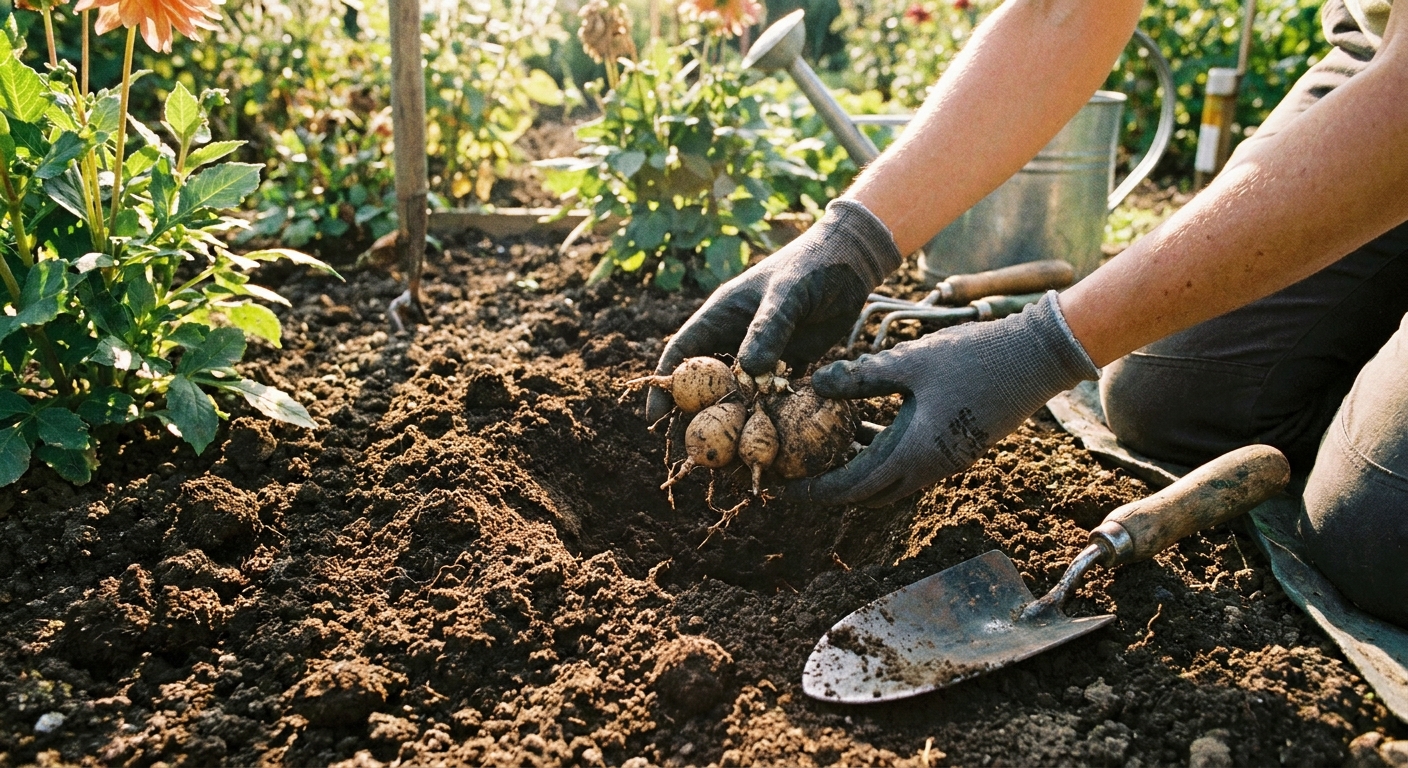
Inspect tubers
Right before planting, I do a quick “tuber wellness check.” It takes two minutes and can save a whole season.
- Firm is good. Slightly wrinkled is usually fine. Mushy, foul-smelling, or leaking tubers should be discarded.
- Look for the neck (where the tuber connects to the crown). If the neck is broken off, that single tuber usually will not sprout because the growing points are on the crown.
- Find at least one eye on the crown. Eyes can look like tiny bumps or little pinkish nubs.
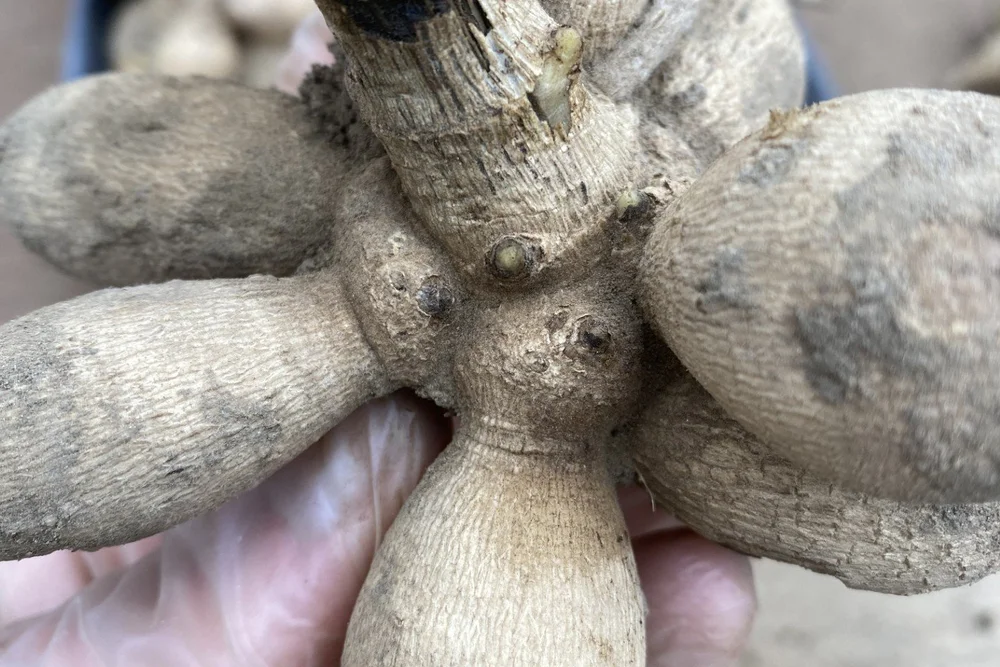
How deep to plant
Depth is one of the biggest success levers, especially for tall varieties that need stable roots. Quick definition: the crown is the knobby top where the eyes and stems form.
- Standard in-ground depth: dig a hole or trench 4 to 6 inches deep, then place the tuber and cover it so there is 4 to 6 inches of soil over the crown.
- In warm sandy soil: aim toward 6 inches to help with moisture stability.
- In heavy soil: stay closer to 4 inches and prioritize drainage.
Do not plant so shallow that the tuber is barely covered. Shallow planting dries out faster and plants are more likely to tip in summer winds.
Which way should the eye face?
This is the question I hear most at the nursery. Here is the truth: dahlias are determined. They can sprout even if you do not place the eye perfectly upward.
- Best practice: lay the tuber or clump horizontally with the eye or eyes facing up.
- If you cannot find the eye: plant the clump horizontally anyway. Most will sort themselves out.
- If it is a clump: do your best to angle the crown slightly upward, even if individual tubers point in different directions.
Avoid planting a tuber straight down like a carrot. Dahlias prefer a horizontal position so shoots rise from the crown and roots anchor broadly.
Spacing
Spacing depends on the dahlia’s mature size. Crowding reduces airflow, invites mildew, and leads to spindly stems reaching for light.
- Border and compact varieties (about 18 to 30 inches tall): space 12 to 18 inches apart.
- Medium dahlias (3 to 4 feet tall): space 18 to 24 inches apart.
- Tall and dinnerplate types (4 to 6 feet tall): space 24 to 36 inches apart.
If you are planting for cut flowers, lean toward wider spacing. You will get sturdier stems and easier harvesting.
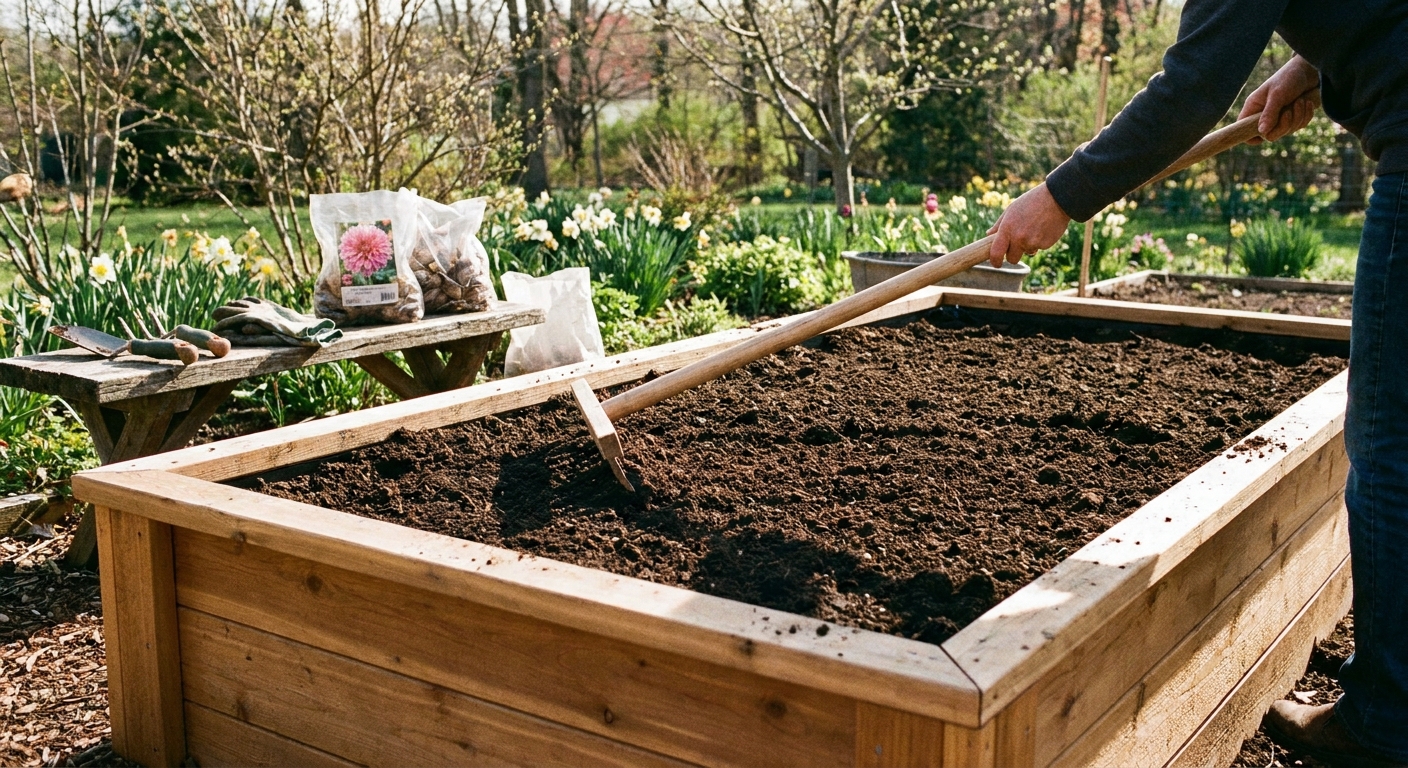
Planting steps
Dig the hole or trench 4 to 6 inches deep and wide enough that the tuber is not cramped.
Set a stake first for tall varieties. This is a big one. If you stake later, you can spear the tuber.
Place the tuber horizontally, crown and eyes up if you can see them.
Backfill with loosened soil (not chunky clods). Gently firm it so there are no big air pockets, but do not compact.
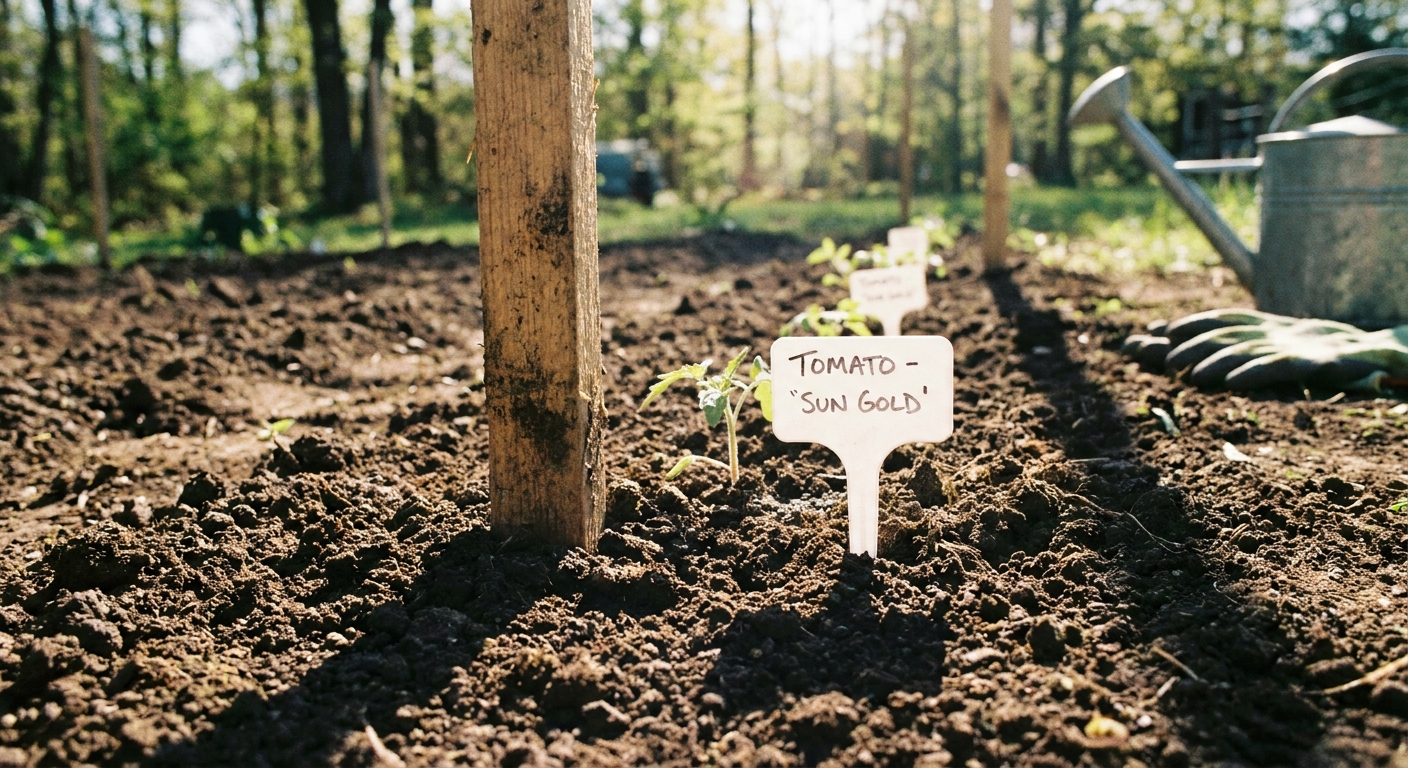
Label immediately. Dahlias all look identical as sprouts, and you will swear you will remember. You will not. Use a weatherproof tag, or write on a plastic label with a garden marker.
Staking plan
If your dahlia will be taller than about 3 feet, plan for support from day one. Dahlias grow fast once they start, and summer storms do not wait for you to get organized.
Simple staking options
- Single sturdy stake (wood or metal): set it just outside the planting hole, about 4 to 6 inches from the crown area, then tie stems as they grow.
- Tomato cage: works best for bushier, medium varieties and in calmer wind areas.
- Corral system (multiple stakes with twine): great for a row of cut-flower dahlias.
Use soft ties or stretchy garden tape. Tight ties can girdle thickening stems.
Watering rules
Here is my slightly quirky mantra: tubers are not thirsty until they have leaves. A dahlia tuber already holds stored energy and moisture. In cold or damp conditions, extra watering can encourage rot before the plant even wakes up.
Right after planting
- If soil is already moist: do not water, or give only a light settling-in sip.
- If soil is dry and crumbly: water once to lightly moisten the planting zone, not to soak it.
Until sprouts emerge
- Hold off on regular watering until you see shoots breaking the surface.
- If you get frequent spring rain, you may not water at all during this phase.
- Caveat for sandy beds and containers: check the soil every few days. If it is drying out fast, give a small drink so the tuber does not desiccate, but still avoid keeping it constantly wet.
After shoots are 3 to 6 inches tall
- Start watering more consistently. Aim for deep, infrequent watering that encourages deeper roots.
- In average summer weather, that often looks like 1 to 2 thorough waterings per week, adjusting for rainfall and heat.
Avoid daily sprinkles. They keep the surface wet, invite disease, and train roots to stay shallow.
First fertilizer
At planting time, I keep it simple: compost in the bed is enough. Once your plant is actively growing, you can feed for blooms.
- When to start: when shoots are 6 to 12 inches tall or when the plant has several sets of true leaves.
- What to use: an organic fertilizer that is lower in nitrogen and supports rooting, overall vigor, and bloom production. If you have not done a soil test in a while, this is a great crop to justify one, especially for phosphorus.
- How often: every 3 to 4 weeks during active growth, or follow your product label.
Too much nitrogen makes gorgeous green plants that flop and bloom late. Dahlias are not here for a leaf contest.
Pinching and early pests
Pinching
If you want bushier plants and more stems, pinch once when the plant is about 12 to 16 inches tall. Snip the main stem just above a set of leaves. It feels rude for five seconds, then the plant turns into a blooming machine.
Slugs and snails
Fresh dahlia shoots can be irresistible to slugs and snails. If you have a history with them, protect new growth early with your preferred controls (hand-picking at dusk, iron phosphate bait, or simple barriers).
Common mistakes
Mistakes that cause rot
- Planting too early into cold soil.
- Overwatering before sprouting.
- Poor drainage, especially in clay soil or low spots.
- Mulching heavily right away in cool weather, which can keep soil too wet and cold.
Mistakes that cause weak, floppy plants
- Too much shade.
- Over-fertilizing with nitrogen.
- Crowding plants too close together.
- Waiting to stake until the plant is already tall and top-heavy.
If you suspect rot because nothing is sprouting after several weeks in warm weather, gently dig where you planted. A healthy tuber will still be firm. A rotted one will be soft or hollow. It happens to every gardener eventually, including the ones who talk to their ferns.
Container notes
Yes, dahlias can thrive in pots, but containers dry out faster and need steadier care.
- Pot size: use a roomy container with drainage holes (bigger is better for tall varieties).
- Depth: you can plant a bit shallower than in-ground, but still aim for several inches of mix over the crown.
- Water: you may need to water sooner than in the ground once shoots are up, especially in heat and wind.
Quick checklist
- Plant after last frost, when soil is warming toward 55 to 60°F / 13 to 16°C.
- Choose full sun and excellent drainage.
- Amend with compost, skip high nitrogen at planting.
- Plant 4 to 6 inches deep, tuber horizontal, eyes up if possible.
- Space 12 to 36 inches depending on variety size.
- Stake first, label immediately.
- Water lightly only if soil is dry, then wait to water regularly until shoots appear (watch sandy soil and containers).
- Begin bloom-leaning fertilizer once plants are actively growing.
- Pinch at 12 to 16 inches if you want a bushier plant.
FAQ
How long do dahlias take to sprout after planting?
In warm soil, you may see sprouts in 2 to 4 weeks. In cooler conditions, it can take longer. Patience matters here, and overwatering while you wait is the fastest way to lose tubers.
Can I plant dahlia tubers if I cannot find the eye?
Yes. Plant the tuber horizontally. Many eyes are hard to spot until the tuber warms and begins to wake up.
Should I mulch right after planting?
If your soil is warm and you are heading into dry weather, a light mulch layer can help conserve moisture. In cool, wet springs, wait until plants are up and the weather has settled so you do not trap cold moisture over the tubers.
If you want, tell me your general location or your last frost month and whether your soil is sandy or clay. I can suggest the safest planting window, ideal spacing for your variety type, and a watering rhythm that fits your spring weather.