How to Mount an Orchid on Bark or Cork
Mounting an orchid is one of those techniques that looks fancy, but it is really just a way of copying how many orchids live in nature: clinging to trees, roots exposed to air, and water flowing through instead of sitting around. If you have ever felt like your orchid is always either too wet or too dry in a pot, mounting can be the reset button.
I like to think of a mount as a “root runway.” You are giving the roots a stable surface to grip, lots of airflow, and a predictable water path so moisture moves through quickly. The tradeoff is that you become the weather. Mounted orchids usually need more frequent watering than potted orchids, especially in dry homes.

When mounting beats pot culture
Mounting is not better for every orchid, but it can be a game changer for the right plant and the right grower. Here is when I reach for cork or bark instead of a pot.
Mounting is a great choice if:
- Your orchid is epiphytic (tree-dwelling) and prefers airy roots that dry out between waterings, such as many Cattleya , Dendrobium, Oncidium, and Vanda and Vanda-alliance orchids (many of which are commonly grown bare-root).
- You want to mount a Phalaenopsis: Phals are epiphytes too, and they can do beautifully mounted, but they usually need higher humidity, more frequent watering, or a small moss pad to avoid drying out too fast.
- You struggle with root rot in pots, especially in cooler seasons when potting media dries slowly.
- You want maximum airflow around roots to encourage strong, thick root growth.
- You enjoy hands-on care and can water more often, or you grow in a humid environment.
- You have limited space and want a vertical display, like a hanging mount near a bright window or under grow lights.
Pot culture is usually better if:
- Your home is very dry (heated winter air can be brutal) and you cannot water frequently.
- You are growing terrestrials (soil-growing orchids) such as many Paphiopedilum or Cymbidium, which generally prefer staying evenly moist in a potting mix rather than drying quickly on a mount.
- You are stabilizing a stressed orchid with very few roots. A slightly more buffered pot environment can be easier for recovery, depending on the situation.
If you are on the fence, try mounting one orchid first, ideally one with healthy roots and a growth habit that naturally wants to sprawl.
Supplies and materials
You do not need a mountain of gear, but the quality of your mount and your tie-down materials matters. Orchids hate wobbling. If the plant shifts, new root tips can stall or break.
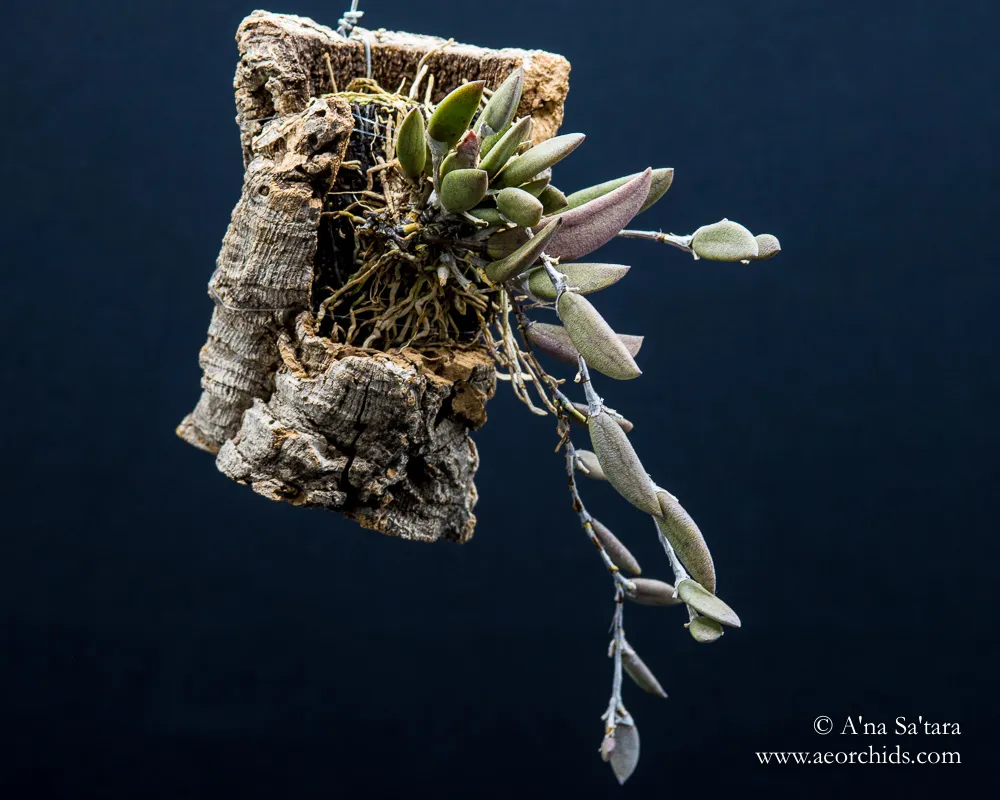
Mount options: cork vs bark
- Cork bark (slabs or tubes): My favorite for beginners. Cork lasts a long time, resists decay, and dries evenly. Roots cling beautifully.
- Hardwood bark slabs: Also works well, but choose rot-resistant wood and expect it to break down faster than cork. Avoid resinous softwoods that can ooze sap.
- Tree fern plaques: Excellent root grip and moisture balance, but availability and sustainability can be concerns. If you use it, source responsibly.
Whatever you choose, aim for a mount with texture and grooves so roots can grab on.
Fasteners: what to tie with
- Fishing line (monofilament): Strong and nearly invisible, but can cut into tissue if pulled too tight.
- Soft plant tie, nylon stocking strips, or orchid-safe twine: Gentler on pseudobulbs and rhizomes.
- Stainless steel wire: Useful for hanging hardware, less ideal directly against living tissue unless cushioned.
Skip copper wire against living tissue. In constant moisture, copper can leach and cause localized damage or salt issues over time.
Moisture helpers (optional but useful)
- Long-fiber sphagnum moss: A small pad behind the roots can help new mounts stay hydrated. The keyword is small. Overpacking is how mounts turn into rot traps.
- Coconut husk fiber: An alternative to sphagnum for a thin moisture layer.
Tools and extras
- Clean scissors or snips
- Bucket or bowl for soaking
- Spray bottle or watering can
- Hanging hook, eye screw, or mount hanger
- Label and pencil (future-you will be grateful)
Water quality note: Mounted culture can make mineral and fertilizer salts more obvious because everything is exposed. If you can, use low-mineral water (rain, RO, or filtered), and flush regularly.
Set up the mount
Before you tie anything down, take a moment to plan how water will move. This one habit prevents a lot of beginner problems.
Think like a raindrop
- Hang direction matters: Position the mount so water can run down and off instead of pooling at the crown or at the base of pseudobulbs.
- Keep the crown safe: For monopodial orchids like many Phalaenopsis, avoid a setup where water funnels into the crown.
- Create a “drip edge”: A mount with texture and a slight tilt encourages water to exit quickly.
If you are mounting a Phalaenopsis, I generally angle it slightly sideways so water drains away from the crown after misting or dunking. For sympodials like Cattleyas, I keep the rhizome elevated and let older pseudobulbs sit a bit higher than the new growth direction.
Step-by-step: mount an orchid
Set aside an unhurried hour. Calm hands really do help you avoid snapping roots.
1) Water the orchid first
Watering a few hours before mounting makes roots flexible instead of brittle. If the plant is dry, roots crack more easily.
2) Soak your materials
- Cork or bark: Soak for 20 to 60 minutes so it is pre-hydrated and does not wick moisture as aggressively at first.
- Sphagnum (if using): Rinse, then squeeze until it is damp but not dripping.
3) Remove the orchid from its pot
Gently tease away old media. If roots are glued to the pot, cut the pot rather than ripping roots free.
4) Clean up the root system
Trim only what is truly dead: roots that are hollow, papery, or mushy all the way through. If you are unsure, leave it. A “so-so” root can still help anchor the plant while new roots establish.
5) Decide the position
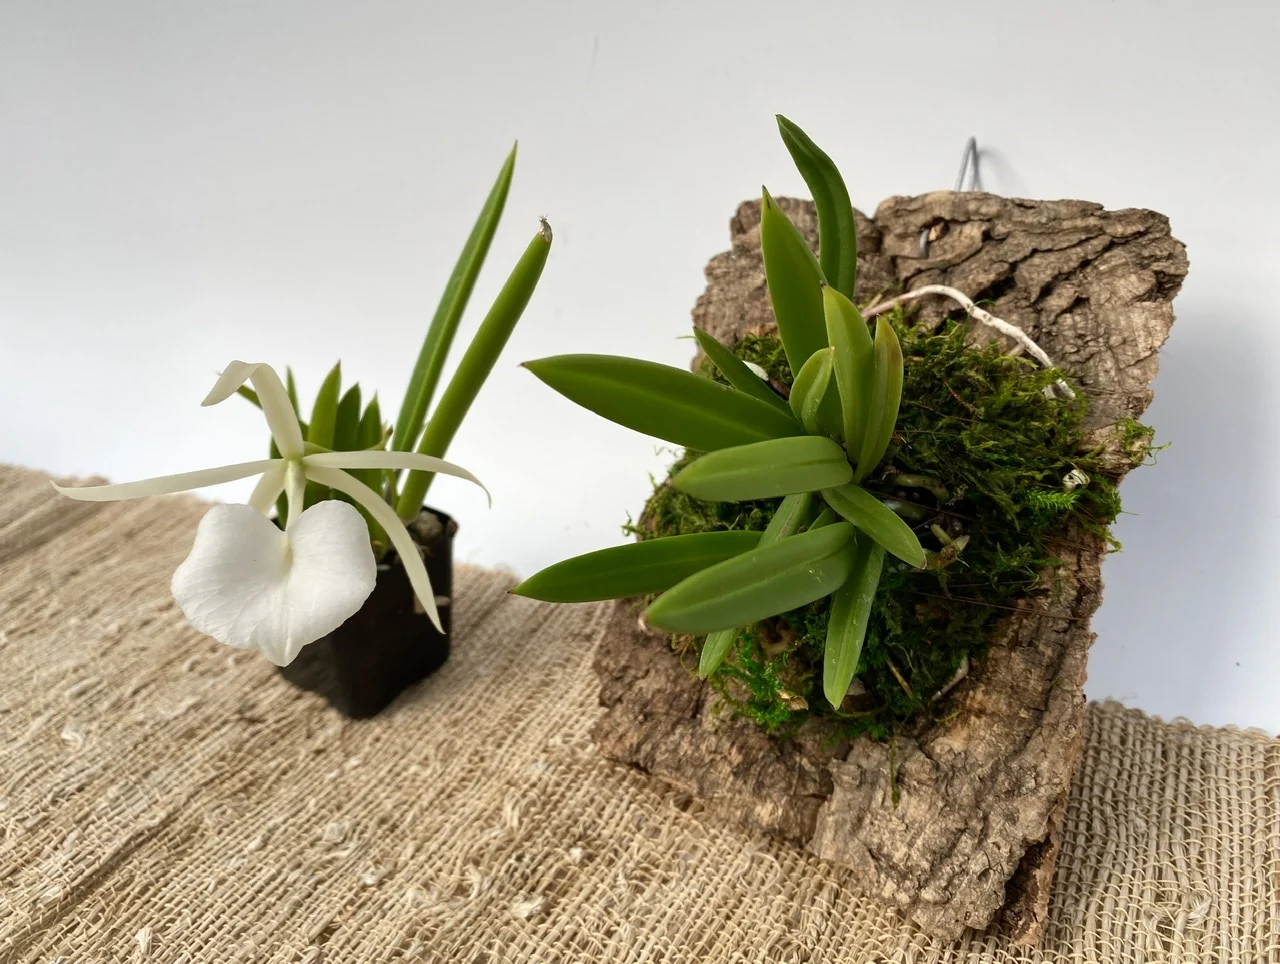
- Monopodials (Phalaenopsis, Vanda types): Place the base against the mount with roots fanned outward. Keep the crown open to airflow.
- Sympodials (Cattleya, Oncidium types): Place the rhizome on the mount so new growth has room to crawl forward across the surface.
This is also the moment to add a label and decide where your hanger will go.
6) Add a thin moisture pad (optional)
If your home is dry or the orchid is thirsty-prone, tuck a thin wisp of sphagnum behind the root mass. Do not wrap the whole root system like a burrito. You want humidity, not soggy storage.
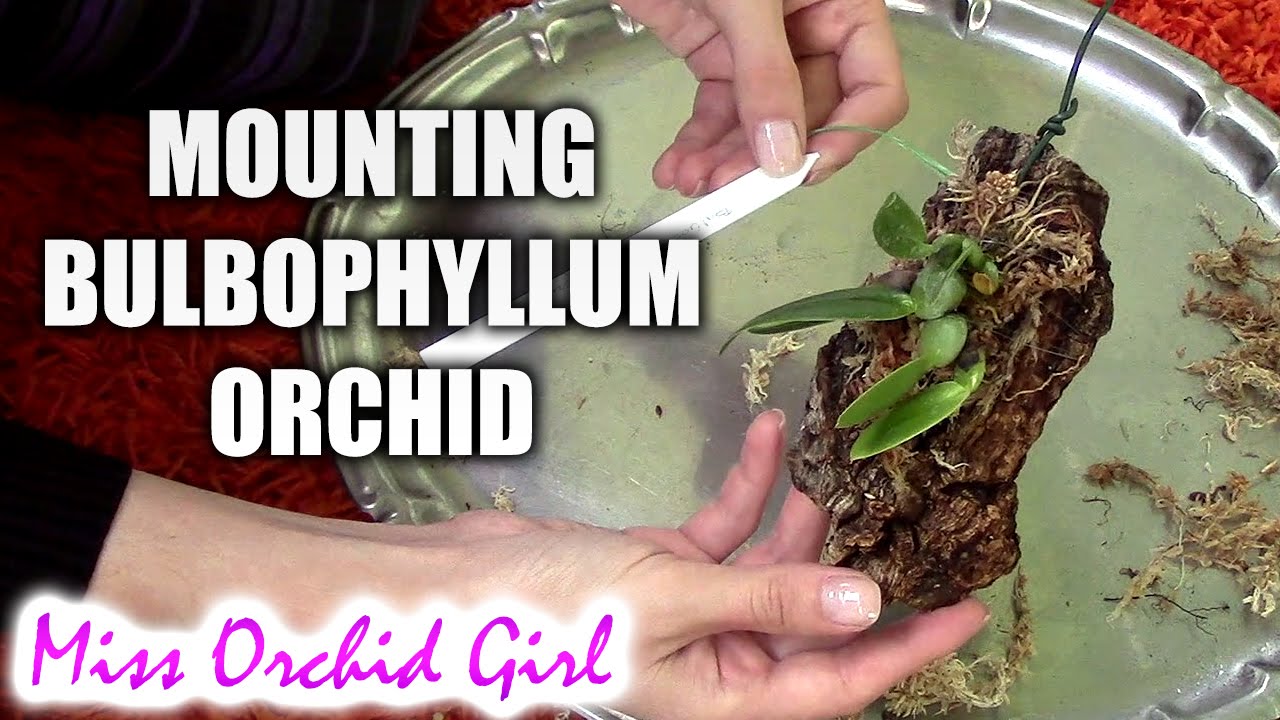
7) Tie it down firmly
Secure the plant so it does not wiggle. Wrap your line or tie around the mount and over the root mass, avoiding tight pressure on the crown, eyes, or new growth points. The goal is “snug like a seatbelt,” not “cinched like a tourniquet.”
8) Add hanging hardware
Use stainless hardware if possible. Make sure the mount hangs level and stable.
First watering
This first watering sets the tone. You want to fully hydrate the roots and the mount, then let everything drain fast.
Option A: Dunk soak (my favorite)
- Submerge the mounted orchid in room-temperature water for 10 to 20 minutes.
- Lift it out and let it drip dry completely.
Dunking is gentle and thorough. It also avoids blasting tender root tips off the surface.
Option B: Shower rinse
- Use lukewarm water and a soft flow.
- Rinse until the mount is saturated and roots turn green (for many orchids).
- Shake off excess and let it drain.
If you use the shower method, be mindful of water collecting in crowns and leaf joints. A quick tilt and gentle shake helps.
Should you fertilize right away?
I usually wait a week, then begin a light routine. For mounted orchids, “weekly weakly” works well: a low-dose orchid fertilizer during active growth, with occasional plain-water rinses to prevent salt buildup.
Aftercare
Mounted orchids reward consistency. The roots are out in the open, so you will learn their language quickly.
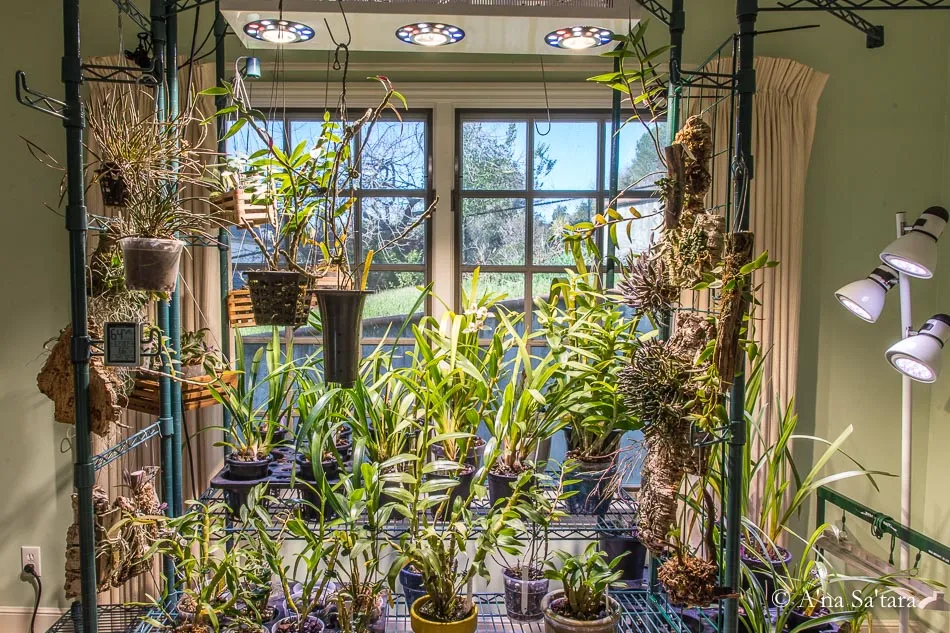
Light
Most mounted orchids do best in bright, indirect light. Too little light and they sulk. Too much and leaves bleach or burn. If you are mounting a Phalaenopsis, think bright shade, not sunbathing.
Watering rhythm
How often you water depends on temperature, airflow, mount size, moss use, and the type of orchid. Treat the numbers below as a starting point, then adjust so the mount gets fully wet, drains fast, and dries down within a reasonable window (often same-day in a typical home). Roots and dry-down time are the real schedule.
- Average home (40 to 55% humidity): water about every 2 to 4 days.
- Dry home (below 40% humidity): water may be needed daily, especially in winter heat.
- Humid grow area (above 60% humidity): water about 1 to 2 times per week.
A quick mist can help between soakings, but misting alone often is not enough to fully hydrate roots on a mount. I use misting as a “top-up,” not the main meal.
Humidity and airflow
Humidity helps, but airflow keeps mounts safe. Aim for gentle air movement so the mount dries within a reasonable window after watering. If your mount stays wet for long periods, scale back moss and increase airflow.
Feeding and flushing
- Fertilize lightly during active growth.
- Flush with plain water regularly, especially if you see white crusting on the mount or roots.
When can you remove the ties?
Once new roots have attached to the cork or bark and the orchid no longer wobbles, you can carefully remove or loosen ties. This may take weeks to a few months depending on the orchid and season.
Quick species note: Some Dendrobiums have seasonal rest periods where watering should be reduced, mounted or not. If yours is a cane Dendrobium with a winter rest, follow that rhythm even on a mount.
Troubleshooting
Mounted orchids usually fail for one of two opposite reasons: they dry too fast, or they stay wet in the wrong spots. Here is how to tell which one you are dealing with.
If the orchid is dehydrated
Common signs:
- Wrinkled pseudobulbs (in sympodials)
- Leaves that look limp or accordion-pleated
- Roots that stay silvery and shriveled even after watering
- New root tips stop growing
Fix it:
- Increase soak frequency or soak time (try 15 to 30 minutes).
- Water earlier in the day so it can dry by night.
- Add a small, thin pad of sphagnum behind the root zone.
- Raise humidity with a humidifier or by grouping plants, without blocking airflow.
- Move slightly farther from intense light or heat vents.
If the orchid is rotting
Common signs:
- Mushy, dark roots that collapse when pinched
- Bad smell near the root zone
- Blackened base or spreading soft spots
- Water lingering in the crown or leaf joints
Fix it:
- Remove excess moss. Mounted orchids should not feel swampy.
- Increase airflow and make sure the mount can drain freely.
- Water in the morning only, so surfaces dry before nighttime.
- Reposition the orchid to protect the crown from water pooling.
- Trim truly rotten roots with clean tools, then keep the plant warm and airy and wait until at least the next day before the next soaking so cuts can dry.
If you are stuck between the two, check the drying time. A healthy mount is thoroughly wet after watering and then dries down steadily. You want “wet then airy,” not “wet then wet.”
Before you start
Your first mount does not need to be perfect. Orchids are adaptable, and they are surprisingly forgiving when you give them three basics: stable attachment, good airflow, and a watering routine you can actually maintain.
If you want to stack the odds in your favor, start with a vigorous orchid, use cork, skip heavy moss, and commit to consistent soak watering. Then watch the roots. They will tell you everything, quietly, one green tip at a time.