How to Grow Watermelons at Home
Watermelons look like a big, braggy summer project. But they are really just sun, warmth, and consistency wrapped up in a vine that likes to sprawl. If you can grow a cucumber, you can grow a watermelon. The trick is giving the plant what it wants at the right time: warm soil to start, room to run, steady moisture while fruit is forming, and a little patience while it sweetens.
I will walk you through variety choice, soil warming, spacing, pollination, and the ripeness cues that save you from slicing into a sad, pale melon. We will also talk containers, disease prevention, and organic pest fixes, because real gardens come with real bugs (and a little mildew now and then).

Pick the right variety
Choosing a variety is half the battle, especially if your summers are short or your space is tight. Watermelons generally fall into a few practical buckets.
Best types for most gardens
- Icebox melons (6 to 15 lb): Faster, smaller, and easier to ripen. Great for raised beds and smaller yards.
- Personal-sized melons (3 to 8 lb): Perfect for containers and trellises when supported.
- Seedless: Delicious, but they require a seeded “pollinizer” variety nearby for pollen. If you want simple, start with seeded.
- Long-season giants (15 to 30+ lb): Fun, but they need more heat, more time, and more space.
Small-space favorites
Look for varieties marketed as container, bush, mini, or icebox. A few widely available types that tend to behave in small gardens include:
- Sugar Baby (classic icebox)
- Crimson Sweet (a bit larger, very reliable in warm areas)
- Golden Midget (small, fun color cues)
- Mini Love or other “personal” minis (varies by seed company)
Seed packet reality check: Pay attention to “days to maturity” and match it to your summer. In cooler regions, aim for earlier varieties and use soil-warming tricks so you are not racing the first fall chill.
Seedless quick tip: A common home-garden rule of thumb is about 1 pollinizer for every 2 to 3 seedless plants (or follow your seed company’s recommendation). Plant them close enough that bees can do quick, easy trips between blooms.
Give them heat and sun
Watermelons are warm-season sweethearts. They want full sun and soil that feels like summer, not spring.
Sun needs
- 8+ hours of direct sun is ideal.
- Less sun often means lots of vine, fewer melons, and lower sweetness.
Timing: frost first, soil second
Watermelons are frost-tender. Do not plant until all danger of frost has passed, and the garden has truly warmed up.
Soil temperature matters more than the calendar. Watermelon seeds sulk in cold soil and can rot instead of sprouting. Aim for 70°F (21°C) or warmer for ideal germination. For many gardens, 65°F (18°C) is a practical minimum for reliable growth, but warmer is better.
Simple organic soil-warming tricks
- Black plastic or landscape fabric for 1 to 2 weeks before planting to trap heat.
- Low tunnels with clear plastic (vent on hot days).
- Raised beds warm faster than in-ground soil.
- Compost-rich soil improves drainage and biology, which helps roots thrive. For pure warming power, plastic and raised beds are your best levers.
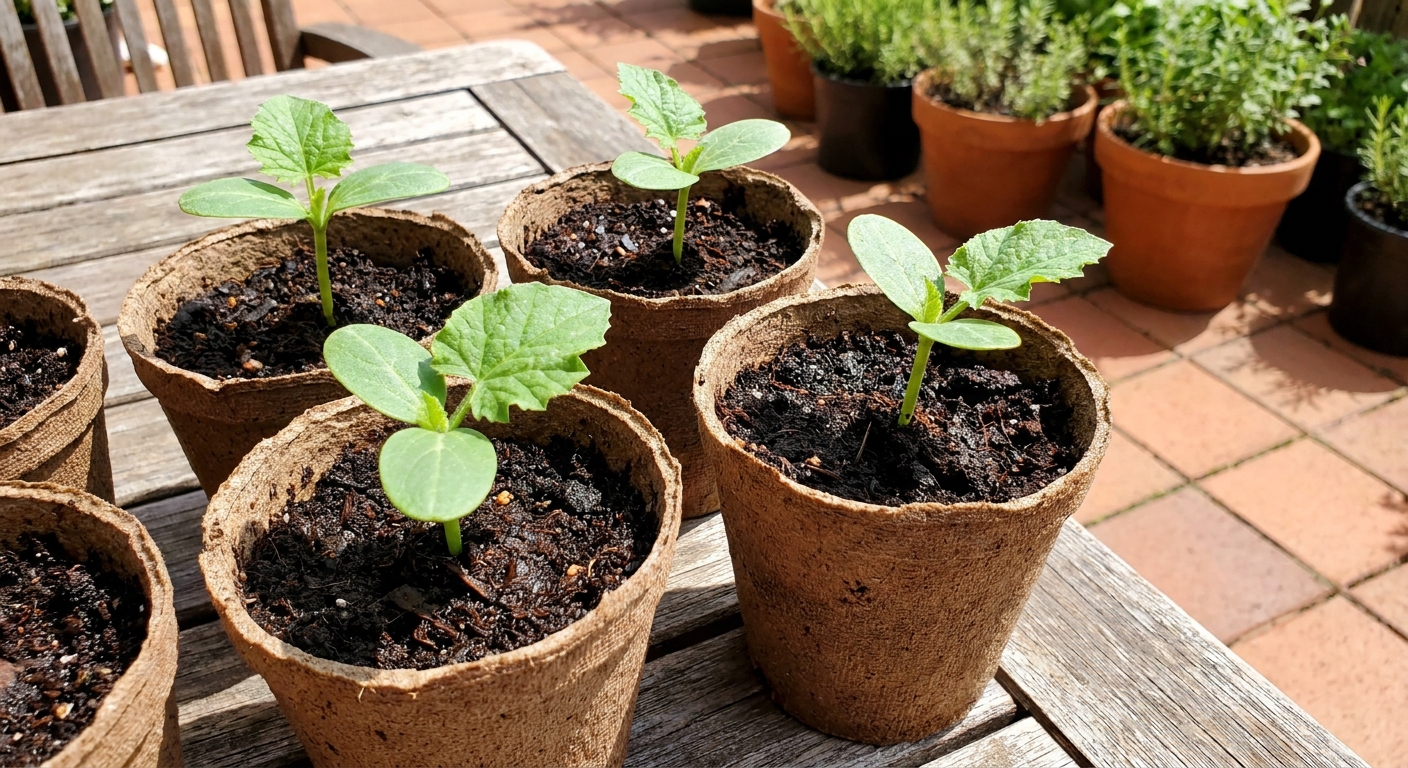
If your spring is slow, start seeds indoors 3 to 4 weeks before transplanting. Use biodegradable pots or be gentle, because watermelons do not love their roots disturbed.
Prep soil for sweetness
A watermelon plant is basically a solar-powered pump. To make big, sweet fruit, it needs soil that is fertile, well-draining, and biologically alive.
Ideal soil
- Texture: Loamy and well-draining. Soggy soil invites root problems.
- pH: Slightly acidic to neutral, roughly 6.0 to 7.0.
- Organic matter: Compost is your best friend for moisture balance and steady nutrition.
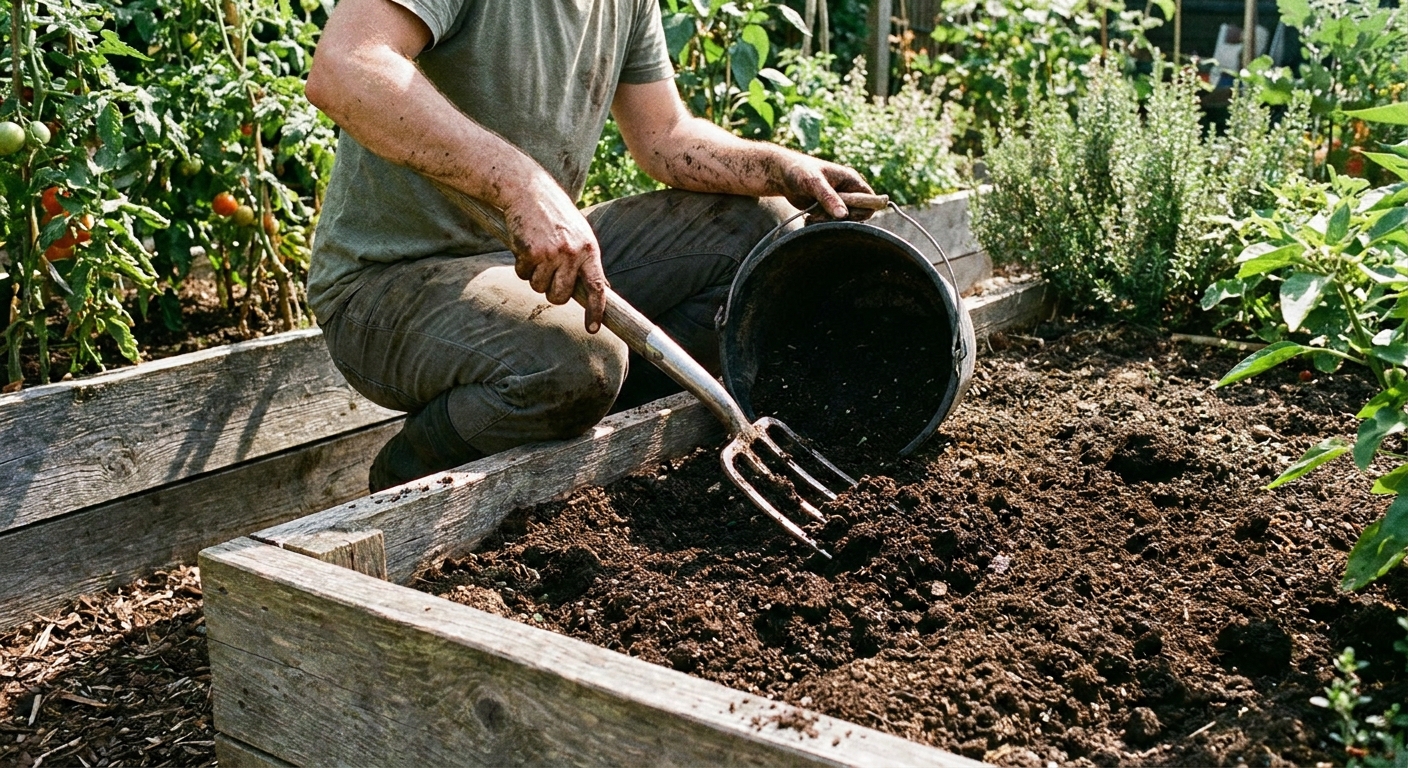
How to prep a bed
- Work in 2 to 4 inches of finished compost.
- If your soil is poor, add an organic balanced fertilizer (something like 4-4-4) per label directions.
- Create mounds or hills 6 to 12 inches high if drainage is questionable. Melons love a slightly raised root zone.
Note: Go easy on high nitrogen early on. Too much nitrogen can mean gorgeous vines and disappointing fruit. Once flowering starts, the plant benefits from steadier potassium and phosphorus support.
Planting and spacing
Most watermelon problems I see in home gardens trace back to crowding. Crowded vines dry slowly after rain, invite disease, and compete for light.
Direct sow vs transplant
- Direct sow: Easiest if your soil is warm. Plant 2 to 3 seeds per spot and thin to the strongest seedling.
- Transplant: Helpful in short-season climates. Harden seedlings off for a week and transplant gently when warm weather is stable.
Spacing guidelines
- Icebox and small varieties: 2 to 3 feet between plants, 5 to 6 feet between rows.
- Larger varieties: 3 to 4 feet between plants, 6 to 8 feet between rows.
If you are growing in hills, place 2 plants per hill for many home gardens, and space hills 5 to 8 feet apart depending on variety.
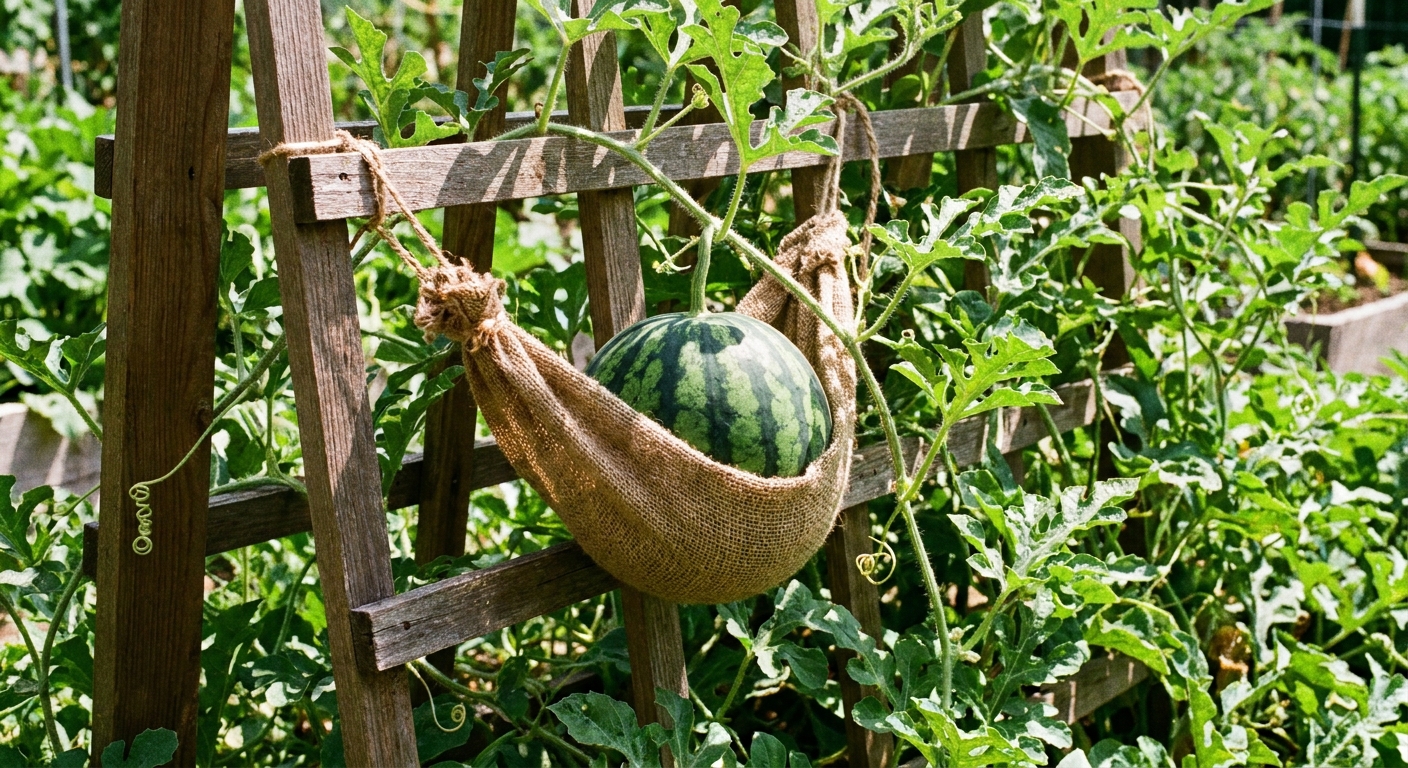
Trellising
Yes, especially smaller varieties. Use a sturdy trellis and support each fruit with a sling made from fabric or mesh. Think of it like a little hammock for your melon.
Watering for fruit and flavor
Watermelons do not want constant drama. They want a steady supply of moisture while they are growing vines and setting fruit, then slightly drier conditions as the fruit finishes.
The key watering window
From flowering through fruit set and early fruit growth is when consistent moisture matters most. Drought stress here can cause poor fruit set, misshapen melons, or bland flavor.
How much water?
- Aim for about 1 to 2 inches of water per week from rain plus irrigation.
- Water deeply and less often, rather than shallow sprinkles. Deep watering builds deeper roots.
- Keep water off leaves when possible. Drip irrigation or a soaker hose helps.
When to ease up
Once fruits are close to full size and approaching ripeness, ease up a bit on watering. Excess water late in the ripening window can reduce sweetness and may increase cracking in some conditions, especially if moisture swings from dry to drenched. Do not let the plant wilt dramatically, just avoid keeping the soil constantly saturated.
Mulch helps
After the soil has warmed, add straw, shredded leaves, or untreated grass clippings around the plants. Mulch keeps moisture steady, suppresses weeds, and protects shallow roots.
Pollination help
Watermelons have separate male and female flowers. Male flowers show up first. Female flowers have a tiny baby watermelon (an ovary) behind the bloom. No pollination means that baby melon yellows and drops.
Male vs female flowers
- Male: A straight stem behind the flower.
- Female: A small swelling behind the flower that looks like a miniature melon.
Encourage pollinators
- Plant nearby flowers like borage, calendula, zinnias, or native blooms.
- Avoid spraying even organic pesticides when bees are active, especially mornings.
- Provide a shallow water source nearby with stones for landing.
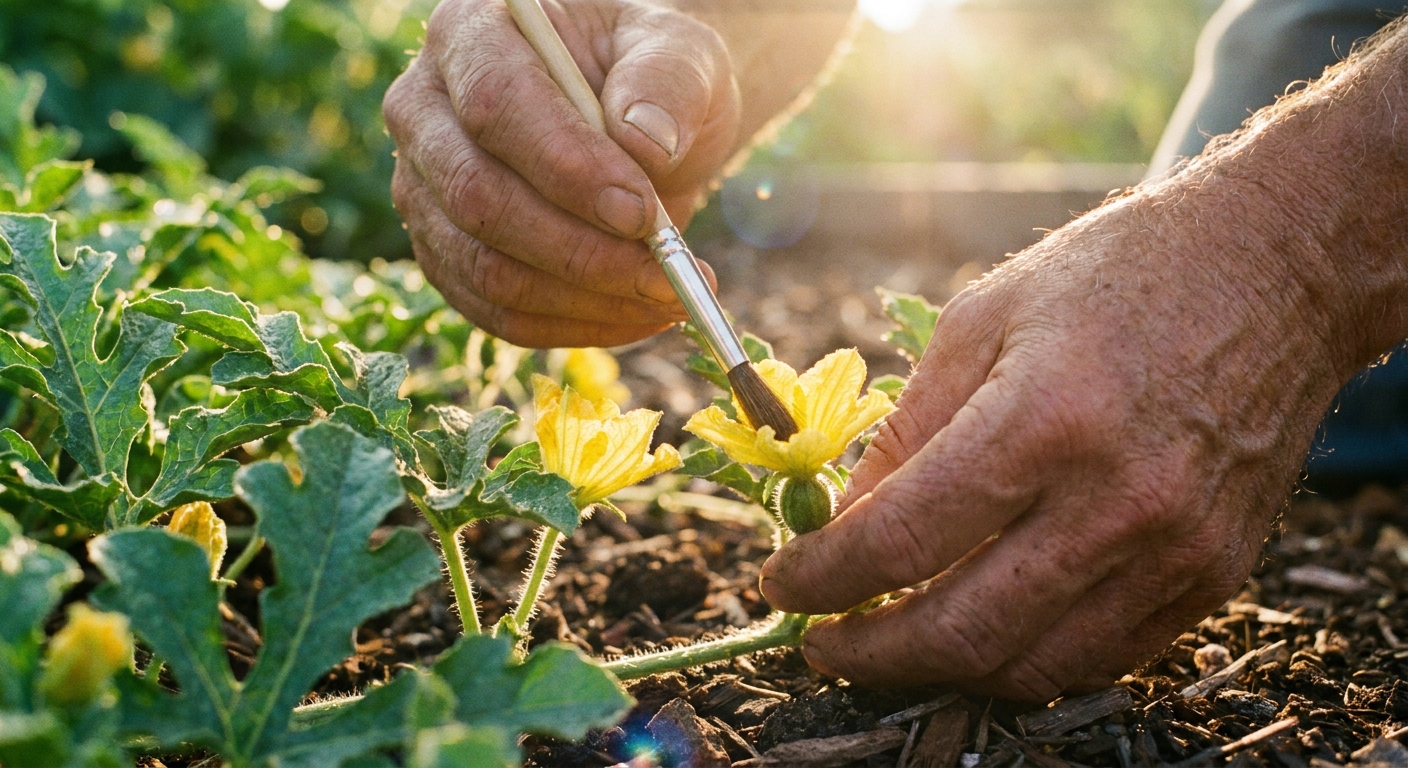
Hand-pollination
If you have lots of flowers but few fruits, try hand-pollinating in the morning:
- Pick a freshly opened male flower.
- Peel back petals to expose the pollen-covered center.
- Gently dab it onto the center of a freshly opened female flower.
For seedless varieties, remember you still need a seeded pollinizer variety planted close enough for bees to move pollen between them.
Feeding: what and when
Think of watermelon nutrition in phases.
Early growth
- Compost plus a light, balanced organic fertilizer is usually enough.
- If growth is pale or slow, a gentle nitrogen boost from fish emulsion or alfalfa meal can help. Do not overdo it.
Flowering and fruiting
- Switch focus away from nitrogen-heavy inputs.
- Top-dress with compost and consider an organic fertilizer with a bit more potassium, following label directions.
- Maintain even moisture so nutrients can move through the plant.
Soil health tip: If you can, rotate melons away from other cucurbits (cucumbers, squash, pumpkins) year to year to reduce pest and disease pressure.
Diseases: prevention first
Most watermelon disease issues are easier to prevent than to “fix” later. The big names to know are powdery mildew, downy mildew, and fungal leaf and stem diseases like anthracnose and gummy stem blight.
How to prevent problems
- Give vines space: Airflow is a quiet superpower.
- Water at the soil line: Drip or soaker hoses help keep foliage drier.
- Mulch: Reduces soil splash onto leaves during rain.
- Clean up: Remove badly infected leaves and clear plant debris at season end.
- Rotate crops: Avoid planting cucurbits in the same spot every year.
- Choose resistant varieties when available, especially if mildew is a yearly guest in your garden.
Pests and organic fixes
Melons are in the cucurbit family, which means the usual suspects may show up. The good news is you can handle most problems with early scouting and a few organic tools.
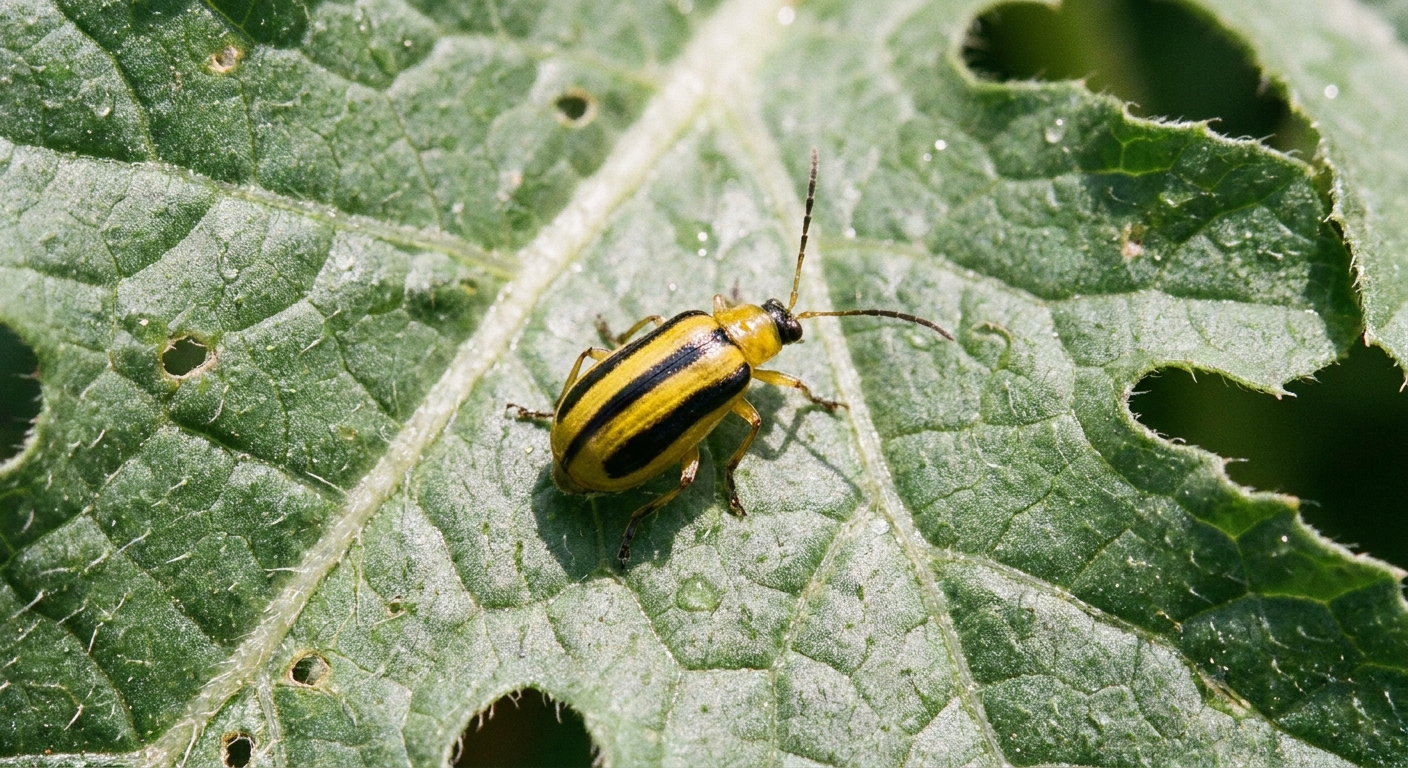
Cucumber beetles
Signs: Yellow and black beetles, leaf chewing, seedlings collapsing. They can spread bacterial wilt especially in cucumbers and muskmelons; it is less common in watermelon, but the feeding damage is still worth taking seriously.
- Row covers early in the season, removed at flowering so pollinators can reach blooms.
- Hand-pick in the morning when beetles are sluggish.
- Kaolin clay (surround-type products) to deter feeding.
- Yellow sticky traps nearby can reduce adults, but place thoughtfully to avoid beneficials.
Squash bugs
Signs: Bronze eggs in clusters under leaves, wilting vines, gray-brown bugs hiding at the crown.
- Check leaf undersides and scrape off eggs into soapy water.
- Lay boards near plants overnight. In the morning, lift and remove bugs hiding underneath.
- Keep the area weed-free and remove plant debris at season end to reduce overwintering sites.
Aphids
Signs: Sticky honeydew, curled leaves, clusters of soft-bodied insects.
- Blast off with a firm spray of water.
- Encourage beneficial insects with flowering plants.
- Use insecticidal soap only if needed and spray in the evening.
Spider mites
Signs: Fine webbing, speckled leaves that look dusty or stippled.
- Increase humidity around plants with morning ground watering (not leaf soaking at night).
- Rinse leaf undersides with water.
- Neem or horticultural oils can help if used carefully and not in intense heat.
Rodents and raccoons
Signs: Chewed holes in ripening fruit, melons disappearing overnight.
- Harvest promptly when ripe.
- Use garden fencing where practical.
- Place a board or straw under each melon to reduce rot and make fruit less inviting at ground level.
Common problems
Lots of flowers, no fruit
- Normal early on: male flowers appear first.
- Low pollinator activity: add flowers nearby or hand-pollinate.
- Cool, rainy spells can reduce pollination success. Wait for warmer weather and try again.
Fruit starts then turns yellow and drops
- Often incomplete pollination.
- Also possible: drought stress during fruit set. Water consistently during bloom and early fruit development.
Leaves turning yellow
- Check moisture first. Overwatering and underwatering can both cause yellowing.
- Look under leaves for pests like aphids and mites.
- If older leaves yellow slowly while new growth stays green, a light feeding or compost top-dress may help.
Cracked fruit
- Usually caused by sudden heavy watering after a dry stretch.
- Use mulch and deep, consistent irrigation to avoid big swings.
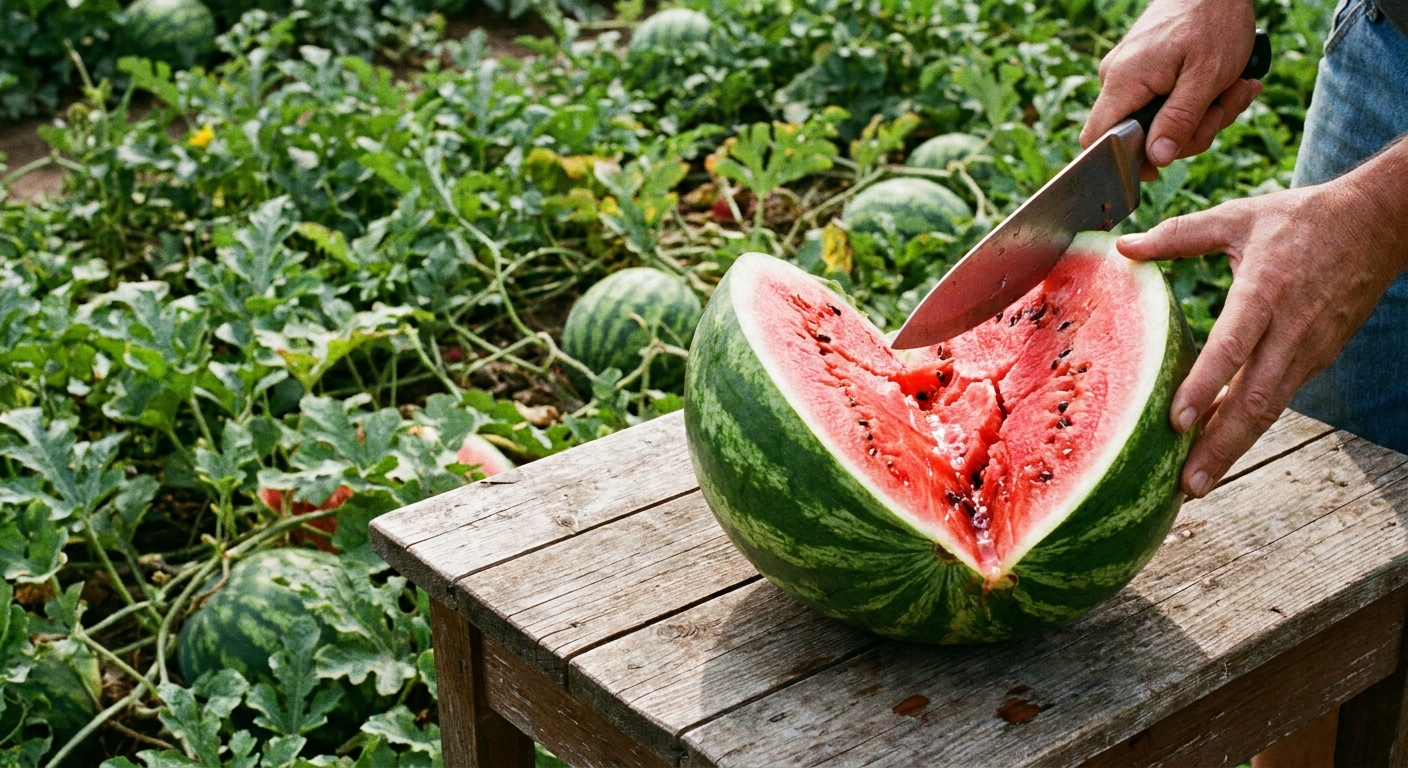
How to tell when it is ripe
This is the moment that makes gardeners nervous, because watermelons do not keep ripening much after you pick them. The sugar content will not increase after harvest. Use a combination of cues. No single trick is perfect, but together they are very reliable.
1) The tendril test (my favorite)
Find the curly tendril closest to where the melon attaches to the vine. When the melon is ripe, that tendril often turns brown and dry.
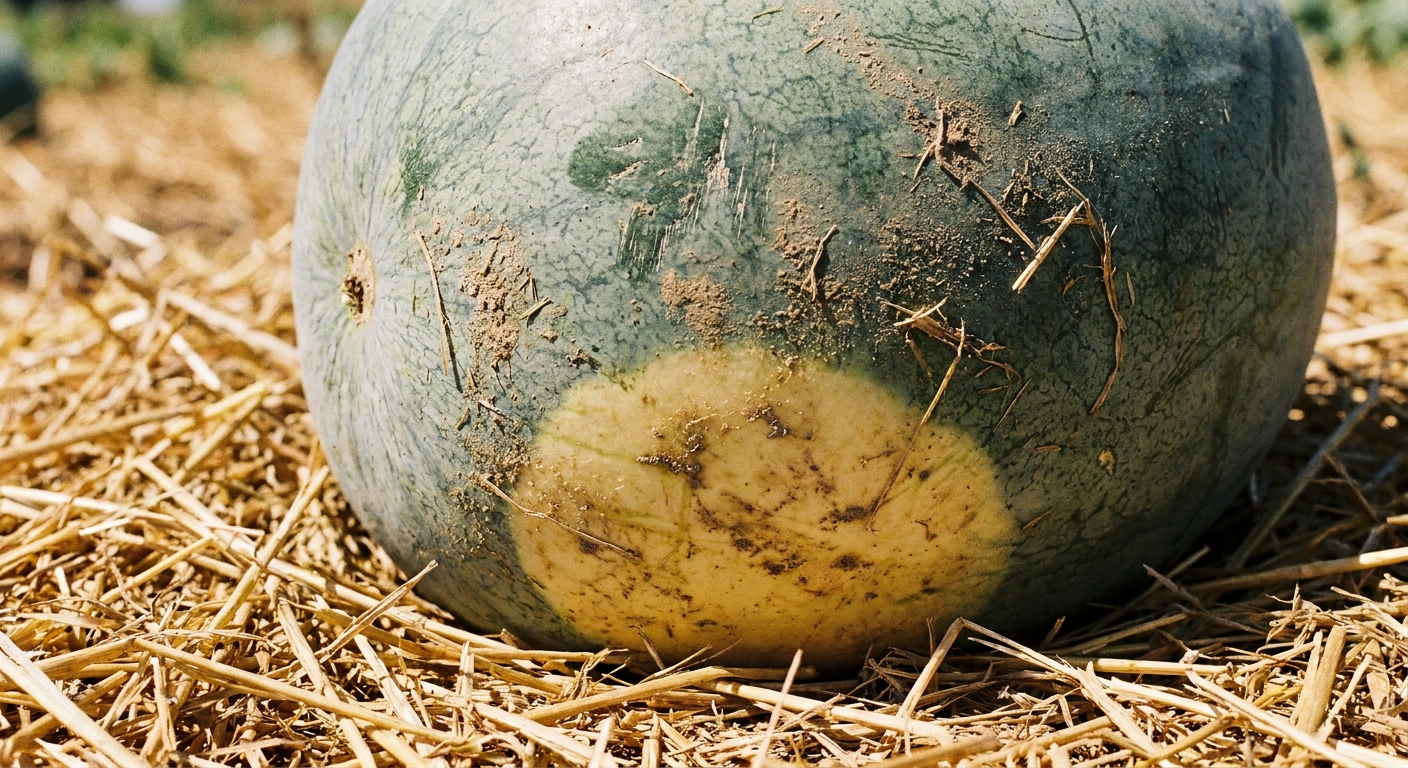
2) The ground spot
The spot touching the soil changes from white or pale green to a richer creamy yellow as it ripens.
3) Skin and weight cues
- The rind often looks a bit duller, not shiny.
- The melon should be fully sized for its variety and feel heavy for its size.
4) The thump (fun, but least reliable)
Tap the melon. A ripe melon tends to give a deeper, hollow sound, while an unripe one can sound higher-pitched. Pair it with the tendril and ground spot, which are usually more dependable.
Cut the stem with pruners rather than yanking. Then chill it, slice it, and enjoy the kind of sweetness that tastes like you bottled sunshine.
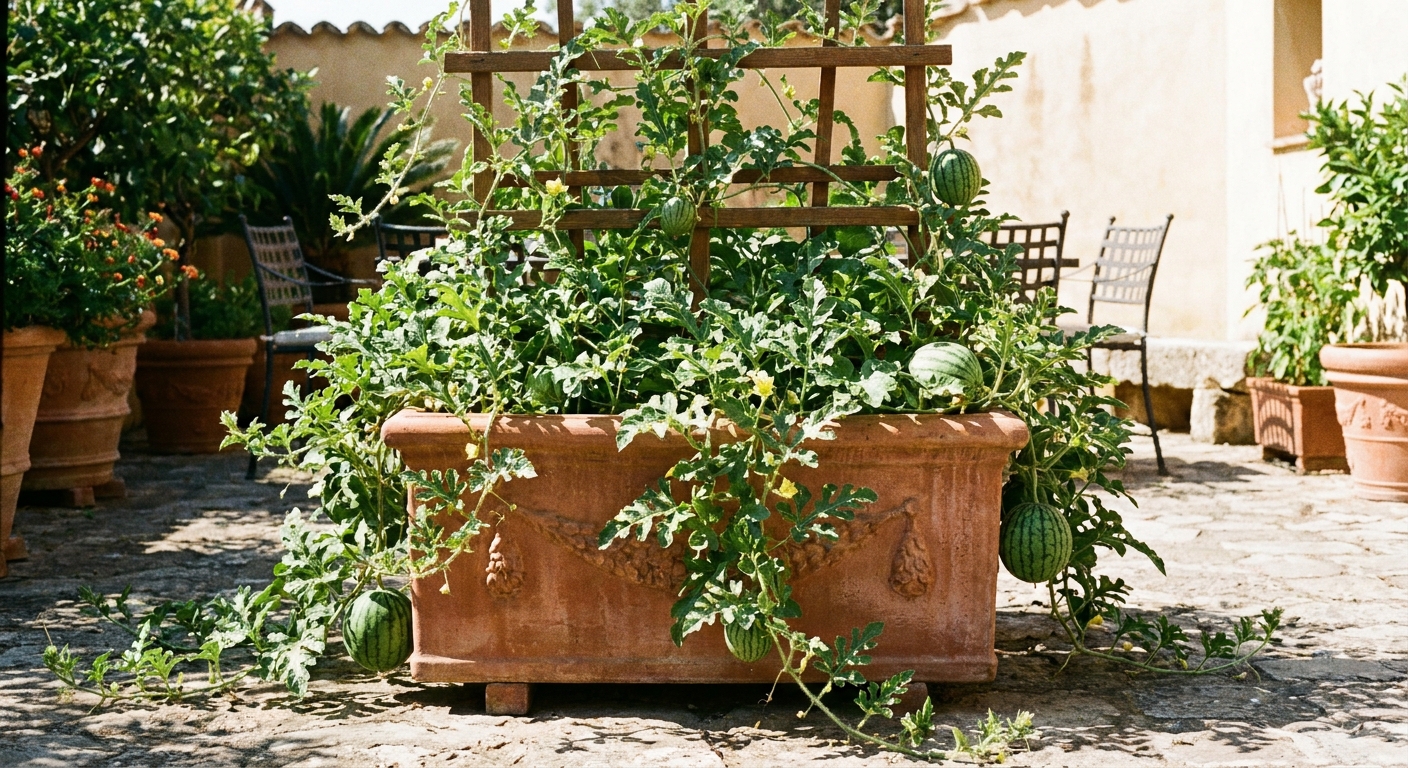
Containers
If you only have a balcony, patio, or small courtyard, you can still grow watermelons. Choose a smaller variety and build a setup that is stable, sunny, and easy to water.
Container basics
- Pot size: 20 to 25 gallons per plant is more reliable for most mini types. 15 gallons can work for the smallest varieties if you are very consistent with watering and feeding.
- Soil: High-quality potting mix plus compost. Avoid heavy garden soil in pots.
- Support: A trellis for the vine and slings for fruit if growing vertically.
- Water: Containers dry fast. Expect to water more often, especially in heat.
A simple container plan
- Fill a large pot with potting mix blended with compost.
- Plant 1 watermelon seedling in the center.
- Install a sturdy trellis at planting time.
- Mulch the surface and keep moisture steady through flowering and fruit set.
- Sling each developing melon so the vine is not doing all the heavy lifting.
Quick checklist
- Before planting: Wait until frost risk is gone, warm the soil, add compost, pick a variety that fits your summer length and space.
- Planting time: Space generously, protect seedlings from cold nights, water deeply.
- Flowering: Encourage bees, avoid spraying, hand-pollinate if fruit is not setting.
- Fruit set: Keep watering consistent and mulch well.
- Ripening: Ease up slightly on water, watch the tendril and ground spot.
- Harvest: Cut with pruners and chill before slicing for best texture.
If you try watermelons this season, promise me one thing: do not panic if the vines look like they are taking over the zip code. Watermelons are a little wild by nature. Give them sun, warmth, and steady care, and they will pay you back in the sweetest possible way.