How to Grow Peas at Home
Peas are the kind of spring vegetable that makes you feel like a garden wizard. One week you have tidy little sprouts, and the next you are pinching tendrils off your shirt because the plants keep reaching for you. They love crisp air, they can enrich the bed over time, and they reward you fast. If you have ever wanted a confidence-boosting crop, peas are it.
In this guide, I will walk you through growing shelling peas, snap peas, and snow peas at home, including soil prep, trellising, succession sowing, inoculant basics, watering, harvest timing, and organic fixes for aphids and powdery mildew.
Quick soil note: Peas are legumes, so they can fix nitrogen when they form healthy root nodules. Most of that nitrogen lives in the plant. You get the biggest soil benefit when you leave roots in the ground and return plant residue to the bed.

Shelling, snap, or snow
All peas are Pisum sativum, but you grow and harvest them a little differently depending on what you want to eat.
- Shelling peas (garden peas): You let pods fill out, then shell the peas and compost the pods. Best for soups, freezing, and classic “peas with butter.”
- Snap peas: You eat the whole pod when it is plump and crisp. The sweetness is hard to beat.
- Snow peas: You harvest pods flat while peas inside are still tiny. Perfect for stir-fries and quick sautés.
My quick pick: If you are new to peas, snap peas are the most forgiving because you get a wider harvest window than snow peas, and you skip shelling.
When to plant peas
Peas thrive in cool temperatures. They will germinate in chilly soil, then grow best before summer heat shows up.
- Spring planting: You can sow when soil is about 40°F (peas can germinate there), but for smoother, faster growth aim for 50 to 65°F. Many gardeners plant 4 to 6 weeks before the last expected frost.
- Fall planting (mild climates): In areas with cool autumns, you can sow in late summer for a fall crop. Aim for the plants to mature in mild weather, not during a heat wave.
Frost note: Seedlings can handle light frosts. Flowers are more delicate, so if a hard freeze threatens during bloom, toss on a row cover for the night.
Heat note: Once daytime temps regularly climb above about 80°F, pea flowers may drop and pods can get tough. This is why early planting and succession sowing matter so much.
Soil prep
Peas want soil that drains well and stays evenly moist. The goal is a loose bed that roots can glide through, not a sticky clay brick or a dry sandbox.
Ideal soil conditions
- Soil texture: Loamy and crumbly is perfect, but you can grow peas in many soils if drainage is improved.
- pH: Around 6.0 to 7.5.
- Fertility: Moderate. Too much nitrogen makes lush vines with fewer pods.
How to prep the bed
- Mix in 1 to 2 inches of finished compost before planting.
- If your soil is heavy, add compost and consider planting on a slight mound or raised bed for better drainage.
- Avoid high-nitrogen fertilizers. If you fertilize at all, choose something gentle and balanced.
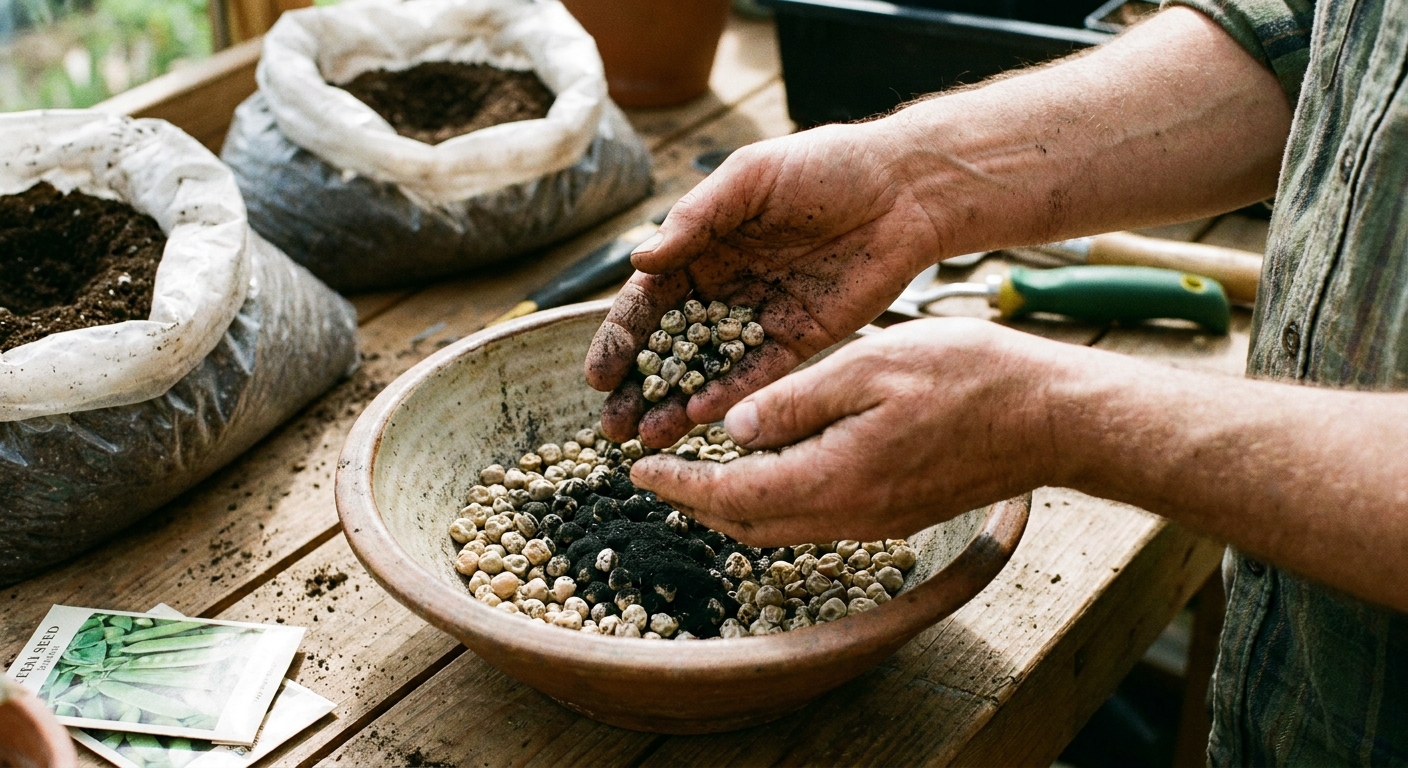
Inoculant basics
A pea inoculant is a powder containing beneficial bacteria that helps peas form nitrogen-fixing nodules on their roots. In many gardens, the right bacteria are already present. But if you are planting peas for the first time in a new bed, or you have struggled with weak pea growth, inoculating is a low-cost, low-effort upgrade.
Label tip: Look for an inoculant specifically for peas and vetch (often Rhizobium leguminosarum bv. viciae), not just a generic “Rhizobium.”
How to use pea inoculant
- Moisten seeds lightly (a mist of water is enough, or a tiny splash in a bowl).
- Dust seeds with inoculant until coated.
- Plant right away and keep seeds out of direct sun.
Storage tip: Inoculant is living. Store it cool and dry, and check the expiration date.
Planting peas
Depth and spacing
- Depth: Plant seeds about 1 inch deep (slightly shallower in cold, wet soil).
- Spacing: Aim for 2 inches apart for best airflow. You can plant closer (about 1 inch) along a trellis if you are tight on space, but keep an eye on mildew later.
- Row spacing: 12 to 18 inches apart, or closer if you are growing on a trellis and can reach both sides.
To soak or not to soak?
Soaking pea seeds for a few hours can speed germination, but it is optional. In very cold or wet soil, soaked seeds may be more prone to rot. My compromise is simple: I plant dry seeds and focus on consistent moisture.
Germination expectations
Depending on temperature, peas typically sprout in about 7 to 14 days. Cooler soil means slower starts, but that is normal.
Keep critters from “helping”
Birds and rodents sometimes dig up freshly planted peas like they are hunting treasure. If that is an issue in your garden, lay row cover over the bed until sprouts are up, or pin down a piece of light mesh to discourage digging.
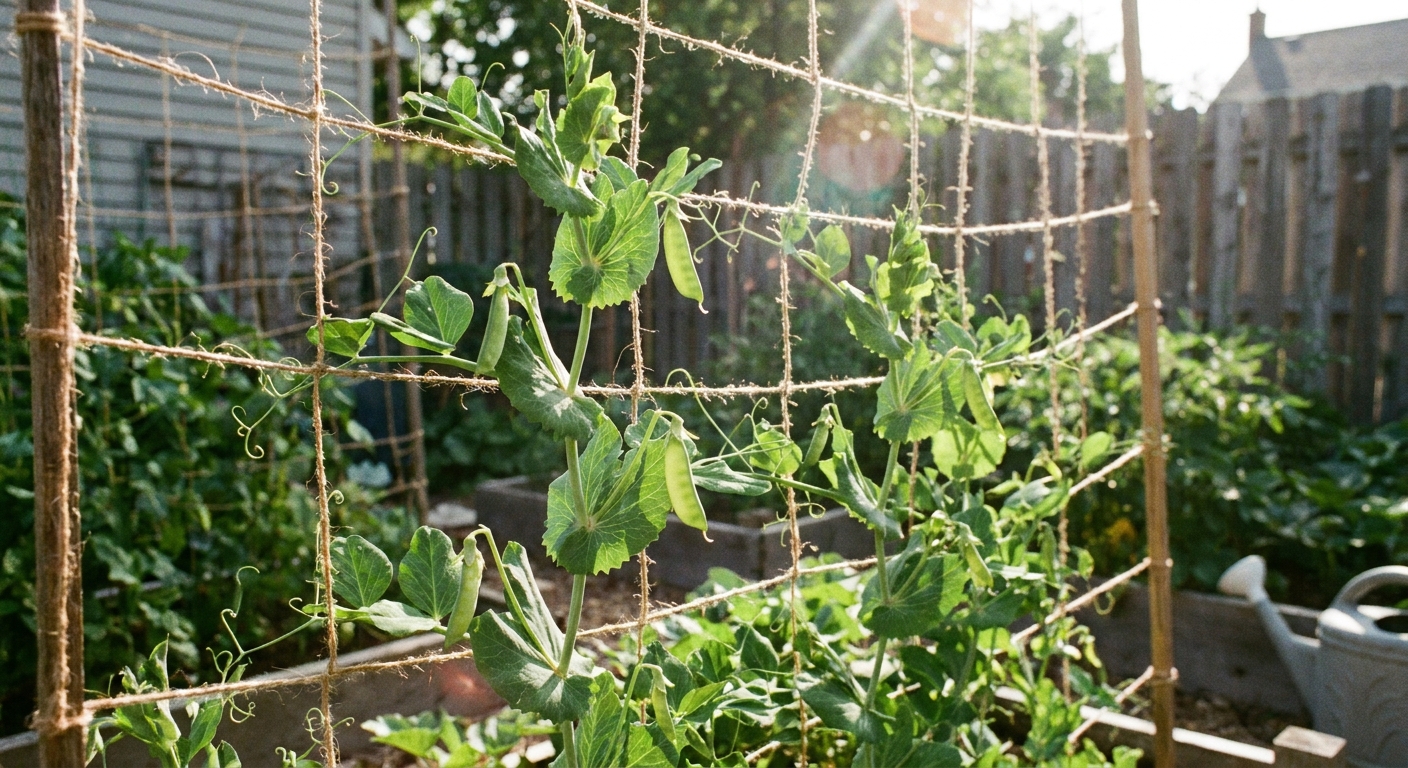
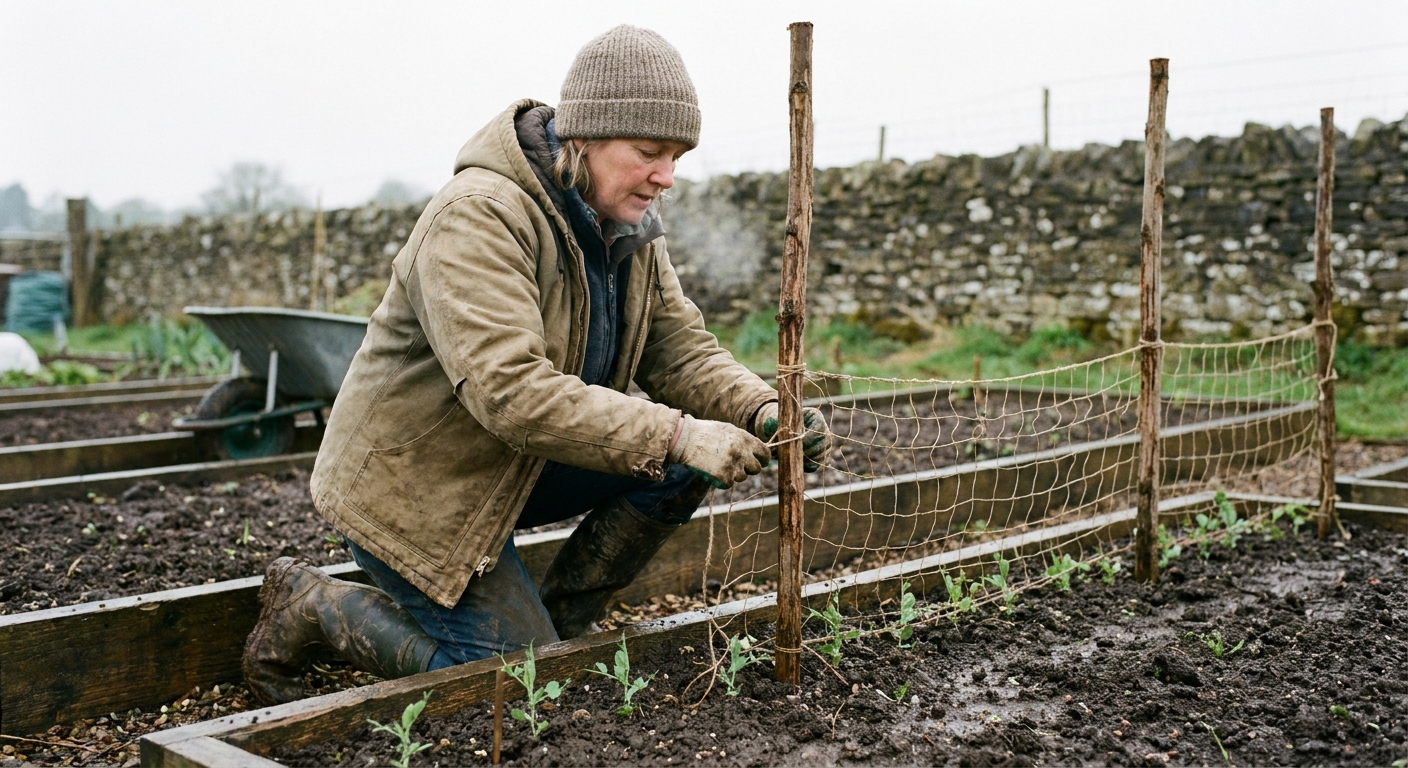
Trellising
Most peas climb. Even “bush” types are tidier with a little support. Trellising improves airflow (hello, fewer mildew issues), makes harvesting easier, and keeps pods clean.
Easy trellis options
- Pea netting on stakes: Fast, lightweight, and perfect for a dedicated pea row.
- String trellis: Two sturdy posts with vertical strings, or a simple ladder-like frame.
- Wire fencing panel: Durable and great for heavier yields.
- Container support: A tomato cage, bamboo tripod, or small obelisk in a pot.
Setup timing: Put the trellis up at planting time. Peas grow quickly, and it is surprisingly easy to accidentally snap a young vine while installing supports later.
Varieties and size
Before you plant, check two things on the seed packet: days to maturity and vine height. That is your trellis and timing blueprint.
- Dwarf peas: Often around 18 to 30 inches tall, usually ready in roughly 55 to 70 days. Great for containers and short trellises.
- Tall peas: Commonly 4 to 6 feet (sometimes more) and often mature in a similar window, depending on variety. These give big harvests but want a real trellis.
Planning tip: For succession sowing, pair an early variety with a mid-season one, or plant snow peas first (quick harvest), then snap peas.
Succession sowing
Peas often produce a big flush, then slow down as the weather warms. Succession sowing keeps you in pods longer.
A simple plan
- Cool spring areas: Sow every 2 to 3 weeks for 2 to 3 rounds.
- Short spring areas: Do two sowings about 2 weeks apart, then switch to a warm-season crop when heat arrives.
Watering peas
Peas are most sensitive to water stress during flowering and pod fill. Irregular watering can mean fewer pods or stringier texture.
How much to water
- Aim for about 1 inch of water per week from rain and irrigation combined.
- Water deeply so roots grow down, not just at the surface.
- Try to water at the soil line. If you wet foliage, do it early in the day so plants dry before evening.
Mulch lightly
Once seedlings are a few inches tall, a thin layer of mulch (straw, shredded leaves, or fine compost) helps stabilize moisture and keeps soil from splashing onto leaves. Keep mulch from piling directly against the stems.
Feeding and care
Peas are relatively low-maintenance if your soil has compost and decent structure.
- Fertilizer: Usually unnecessary. If plants are pale and growth is slow, a small amount of balanced organic fertilizer can help, but avoid heavy nitrogen.
- Weeding: Weed gently. Pea roots are fairly shallow, and aggressive hoeing can damage them.
- Training: Guide young vines onto the trellis so they catch on. After that, they do the rest.
Talking-to-plants optional: My ferns insist it helps. Your peas will not complain either way.
Growing in containers
Peas do surprisingly well in pots, especially dwarf or medium-height varieties.
- Pot size: Aim for at least 10 to 12 inches deep. Bigger is easier to keep evenly moist.
- Spacing in pots: Plant about 2 inches apart across the surface, then add a small trellis or cage right away.
- Watering: Containers dry out faster, especially once vines are climbing and flowering. Check moisture often.
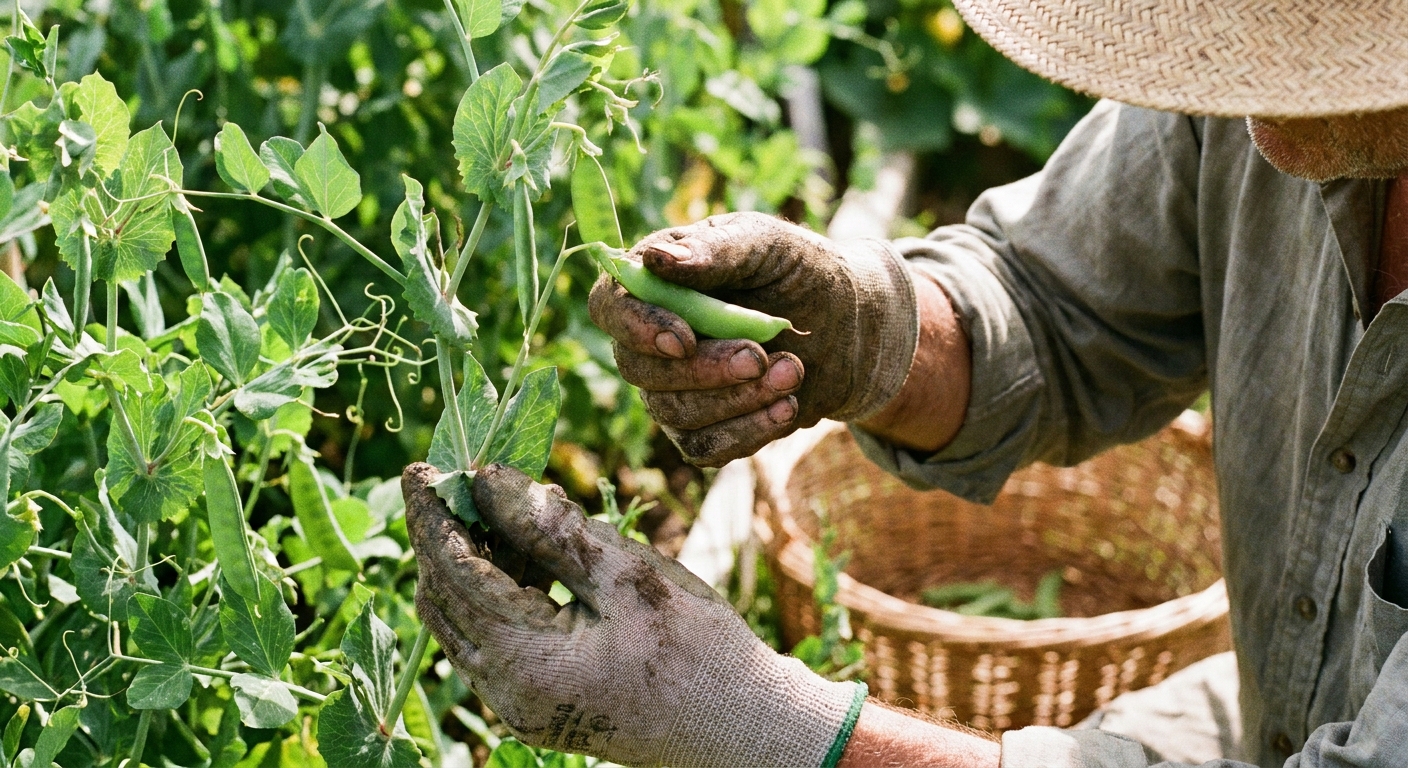
Harvest cues
Harvesting at the right time is the difference between “sweet and crisp” and “why is this pod stringy?” Check plants often once they start producing. Peas can go from perfect to overgrown in just a few days.
Snow peas
- Pick when pods are flat, glossy, and still tender.
- If you can clearly see bulging peas, you are late for snow peas (but they are still edible).
Snap peas
- Pick when pods are plump and rounded, but still bright green and crisp.
- Test one. The pod should snap cleanly when bent.
Shelling peas
- Pick when pods are full and peas inside feel rounded.
- For the sweetest flavor, harvest before peas get starchy. If the pod looks dull or leathery, it is likely past peak.
Harvest technique: Hold the vine with one hand and pick with the other so you do not yank the plant off its trellis.
Shelling peas fast
Shelling peas can be downright meditative if you set yourself up right. I like to do it outside with a bowl in my lap and a compost bucket nearby.
Quick method
- Snap off the stem end.
- Pull the string along the seam if it is tough.
- Pop the pod open with your thumb and roll peas into a bowl.
Storage: Peas are sweetest right after picking. Refrigerate unwashed pods in a breathable bag and use within a few days. For longer storage, blanch and freeze.
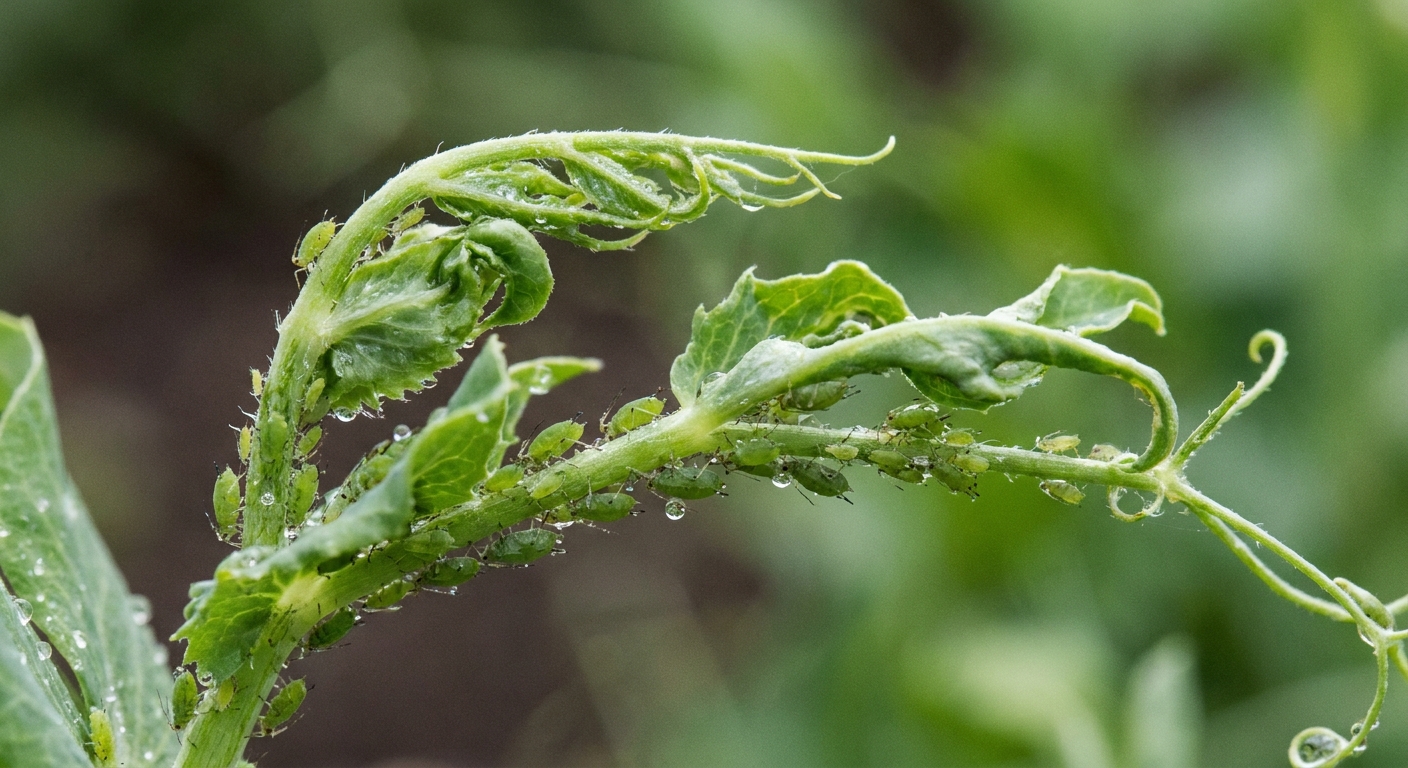
Organic fixes for aphids
Aphids love tender pea tips. You will usually spot them clustered on new growth, sometimes with ants farming them like tiny dairy cows.
Signs of aphids
- Clusters of small green, gray, or black insects on stems and tips
- Curled or distorted new growth
- Sticky residue (honeydew), sometimes followed by sooty mold
What to do
- Blast them off: Use a firm spray of water on the undersides of leaves and growing tips. Repeat every couple of days as needed.
- Pinch heavily infested tips: If a shoot is truly coated, remove it and toss it.
- Invite beneficial insects: Lady beetles, lacewings, hoverflies, and tiny parasitic wasps are your allies. Let some herbs flower nearby if you can.
- Use insecticidal soap if needed: Spray in the cool part of the day and coat pests directly. Follow the label, and reapply as directed.
Avoid: Broad-spectrum sprays that knock out the beneficial insects that would solve the problem long-term.
Organic fixes for mildew
Powdery mildew often shows up as the season warms, especially when nights are cool and days are sunny. It looks like someone dusted leaves with flour.
How to recognize it
- White, powdery coating on leaves and stems
- Yellowing leaves and slowed growth over time
- Most common later in the pea season when plants are dense
Prevention
- Trellis for airflow and avoid overcrowding.
- Water at soil level when you can, and avoid wetting foliage late in the day.
- Clean up plant debris at the end of the season.
What to do if you see it
- Remove the worst leaves: Start with the most affected foliage. Do not compost heavily infected leaves if your compost does not heat up well.
- Try an organic fungicide: Products with potassium bicarbonate, sulfur, or neem can help when used early and consistently. Follow label instructions carefully, especially around temperature and timing.
- Harvest what you can: If mildew arrives late, you may be better off picking remaining pods, then pulling plants and moving on to a summer crop.
Gentle reality check: Powdery mildew is common. It is not a moral failure. It is simply a cue that your peas are nearing the end of their favorite weather.
Common problems
Seeds rot instead of sprouting
- Likely cause: Cold, soggy soil
- Fix: Improve drainage, plant a bit shallower, wait for a drier window, and avoid soaking seeds
Lots of vines, few pods
- Likely cause: Too much nitrogen, too much heat, or inconsistent watering
- Fix: Skip high-nitrogen feeding, sow earlier next time, keep moisture steady during flowering
Pods are tough or stringy
- Likely cause: Harvested late or grown in heat stress
- Fix: Pick more frequently, plant earlier, and try a heat-tolerant variety for your region
Stunted seedlings or missing sprouts
- Likely cause: Seedcorn maggot or other soil pests, or birds pulling seedlings
- Fix: Use row cover at planting time, avoid planting into fresh undecomposed manure or heavy amounts of raw organic matter, and re-sow once soil is warming
Leaves look mottled or oddly distorted
- Likely cause: Viral issues can happen (often spread by aphids)
- Fix: Remove affected plants, manage aphids, and do not save seed from sick plants
After peas
One of my favorite things about peas is how well they fit into a seasonal rhythm. When heat arrives and pea plants fade, you can pull them and plant something that loves warmth.
- Great follow-up crops: bush beans, cucumbers, basil, zucchini, or summer squash
- Soil tip: Cut pea vines at the base instead of yanking roots out. Leaving roots in place can add organic matter and keeps soil structure happier. If you have space, you can also chop the vines and compost them or use them as a light mulch.
Quick checklist
- Plant early for cool weather growth, and protect blooms from hard freezes if needed
- Loosen soil and add compost, avoid heavy nitrogen
- Use a pea and vetch inoculant if peas are new to the bed or growth has been weak before
- Install a trellis at planting time
- Succession sow every 2 to 3 weeks for a longer harvest
- Water steadily, especially during flowering and pod fill
- Harvest often for the sweetest, most tender pods
- Use water sprays and beneficial insects for aphids, and prioritize airflow to slow mildew
Want help dialing it in? Leave a comment with your USDA zone (or general location), whether you are growing in-ground, raised beds, or containers, and how tall a trellis you can fit. We can help you pick a simple planting window and support style that matches your space.