How to Grow Clematis in a Container

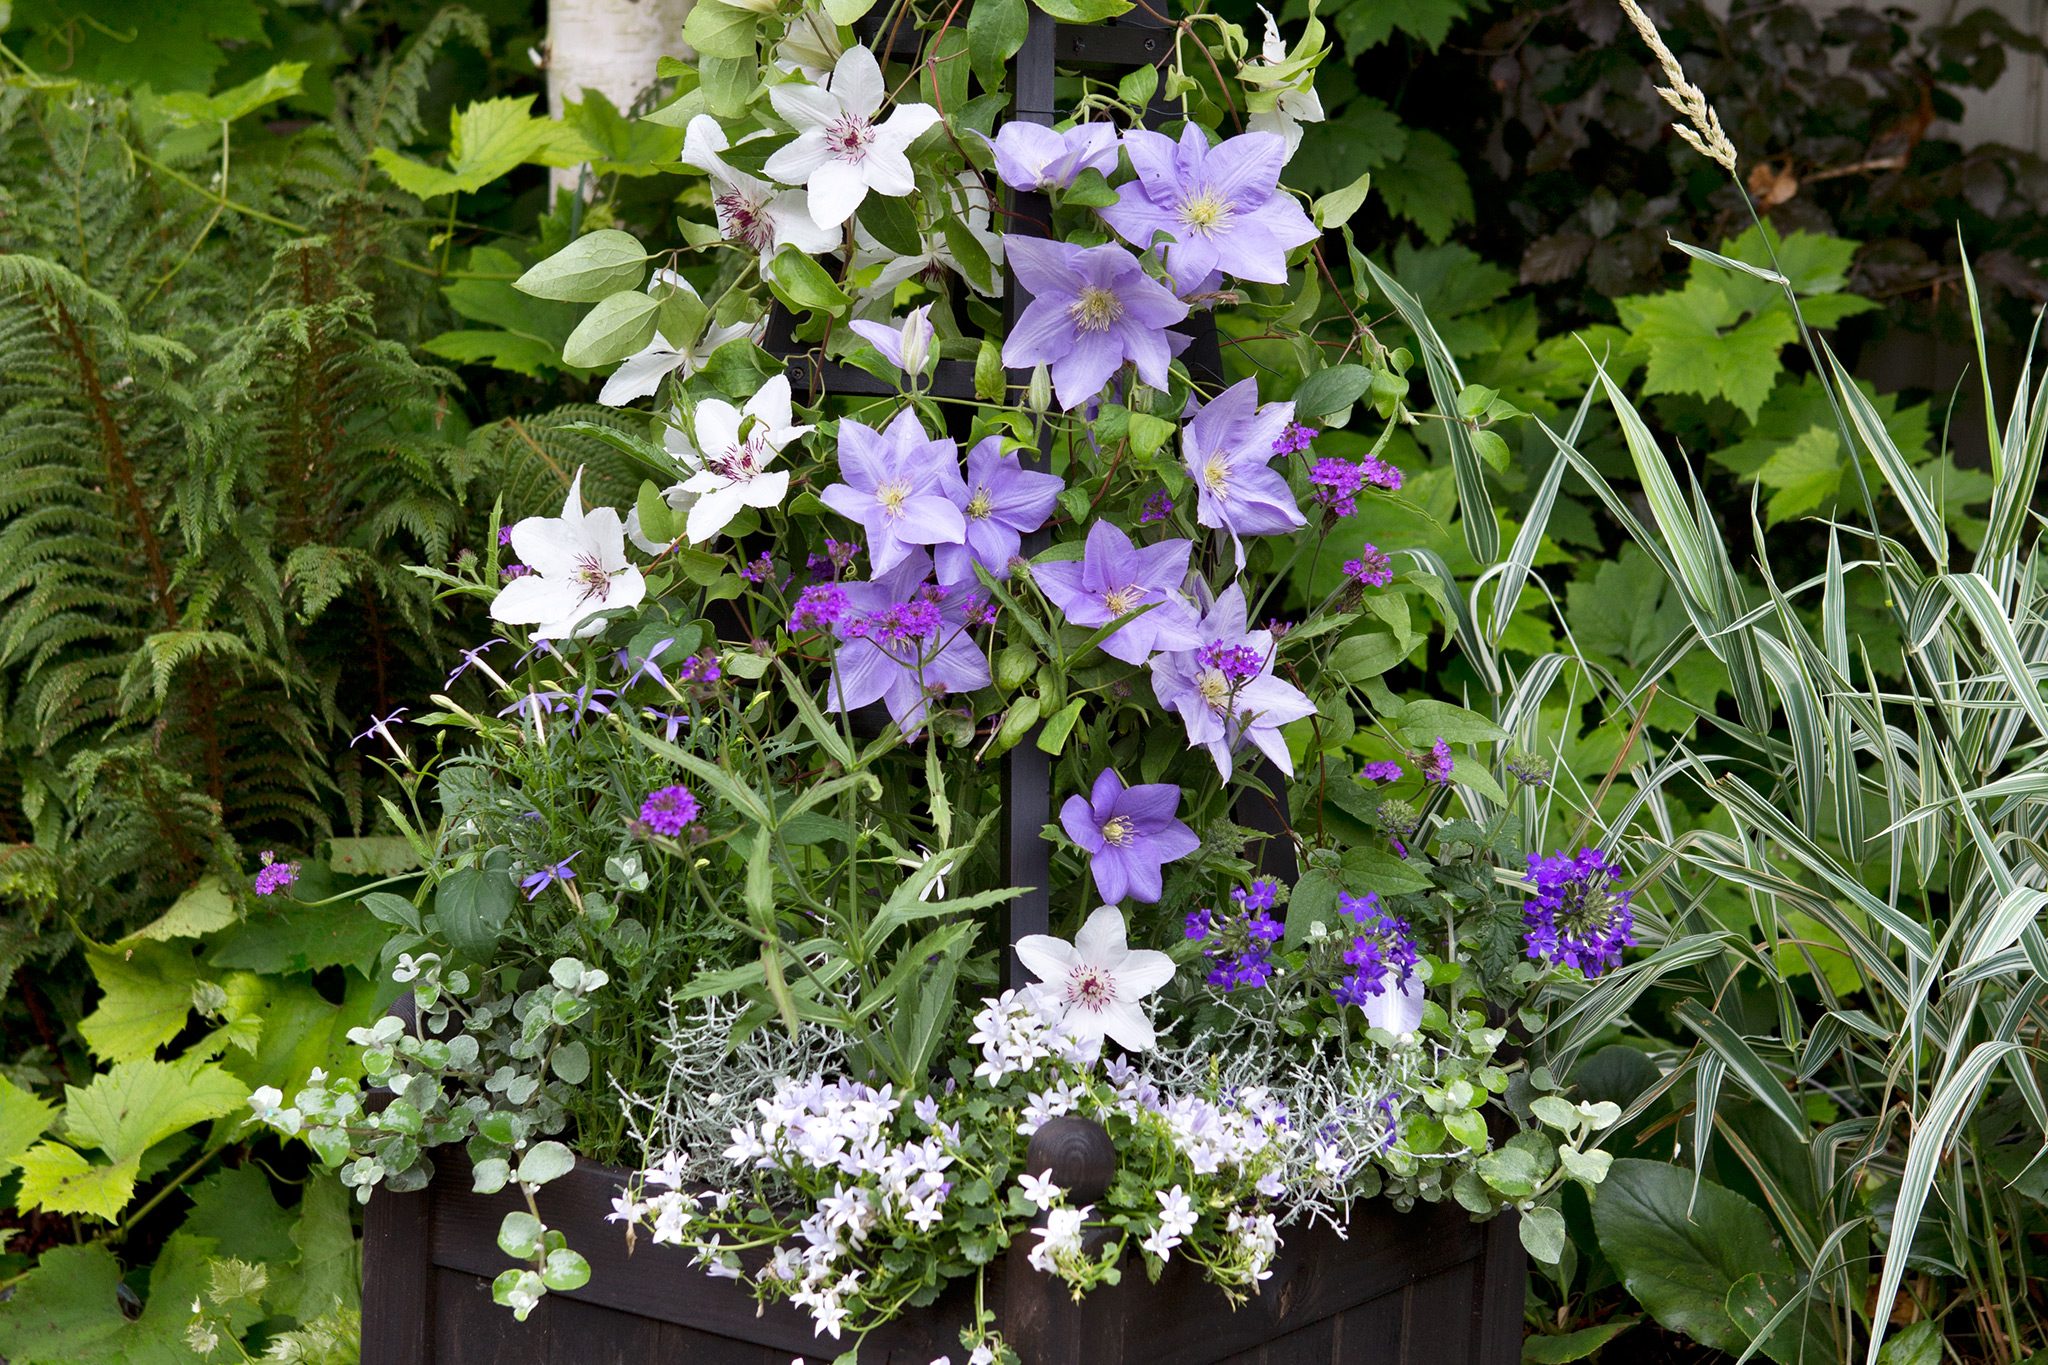
The first clematis I ever grew was in a too-small pot on a third-floor apartment balcony. I gave it sun, I gave it love, I even gave it pep talks (I still do), and it responded by wilting dramatically any time I missed a watering. Once I finally upsized the container, shaded its root zone, and stopped pretending a skinny bamboo stake was “support,” it turned into the flowering vine I had imagined all along.
Clematis can be wonderfully happy in a container, but it is less forgiving of shortcuts than many patio plants. The goal is simple: give that vine a deep, evenly moist root run, keep the roots cool, and provide a structure it can climb without snapping in the wind.

Pick the right clematis
Most clematis can live in a container, but some are much easier than others. In pots, I like varieties described as compact, patio, or container-friendly. They tend to top out at a manageable height and bounce back faster after stress.
- Compact growers are easier to support and less likely to dry out the pot trying to feed a massive top.
- Large, vigorous types can still work, but they need a very large container and consistent care.
- Extra-vigorous ramblers (especially some montana-type clematis) are usually impractical long-term in pots unless you have a truly huge container and a plan for serious pruning.
- Evergreen clematis can be gorgeous, but common evergreen choices like Clematis armandii and Clematis cirrhosa are often less cold-hardy and more challenging in containers in cold climates.
If you already have a clematis you love, you can still pot it up. Just plan to go bigger on the container and more attentive on watering.
Container size matters
If clematis struggle in containers, it is almost always a pot volume issue first, and a soil issue second. Clematis like their roots deep and steady. Small pots swing from soaked to bone-dry in a single warm afternoon.
Best pot size
- Minimum: aim for a large container in the 15 to 20 gallon range.
- Ideal long term: a container closer to 20 to 30 gallons is noticeably easier to keep stable.
- Depth counts: a clematis appreciates a deeper pot more than a wide, shallow bowl.
- Go heavier than you think if your patio is windy. A big vine on a trellis can act like a sail.
Inches-to-gallons conversions get fuzzy because pots taper and manufacturers measure differently, so I treat gallon ranges as the most reliable guide and then choose the deepest, sturdiest option I can live with visually.
Choose real drainage
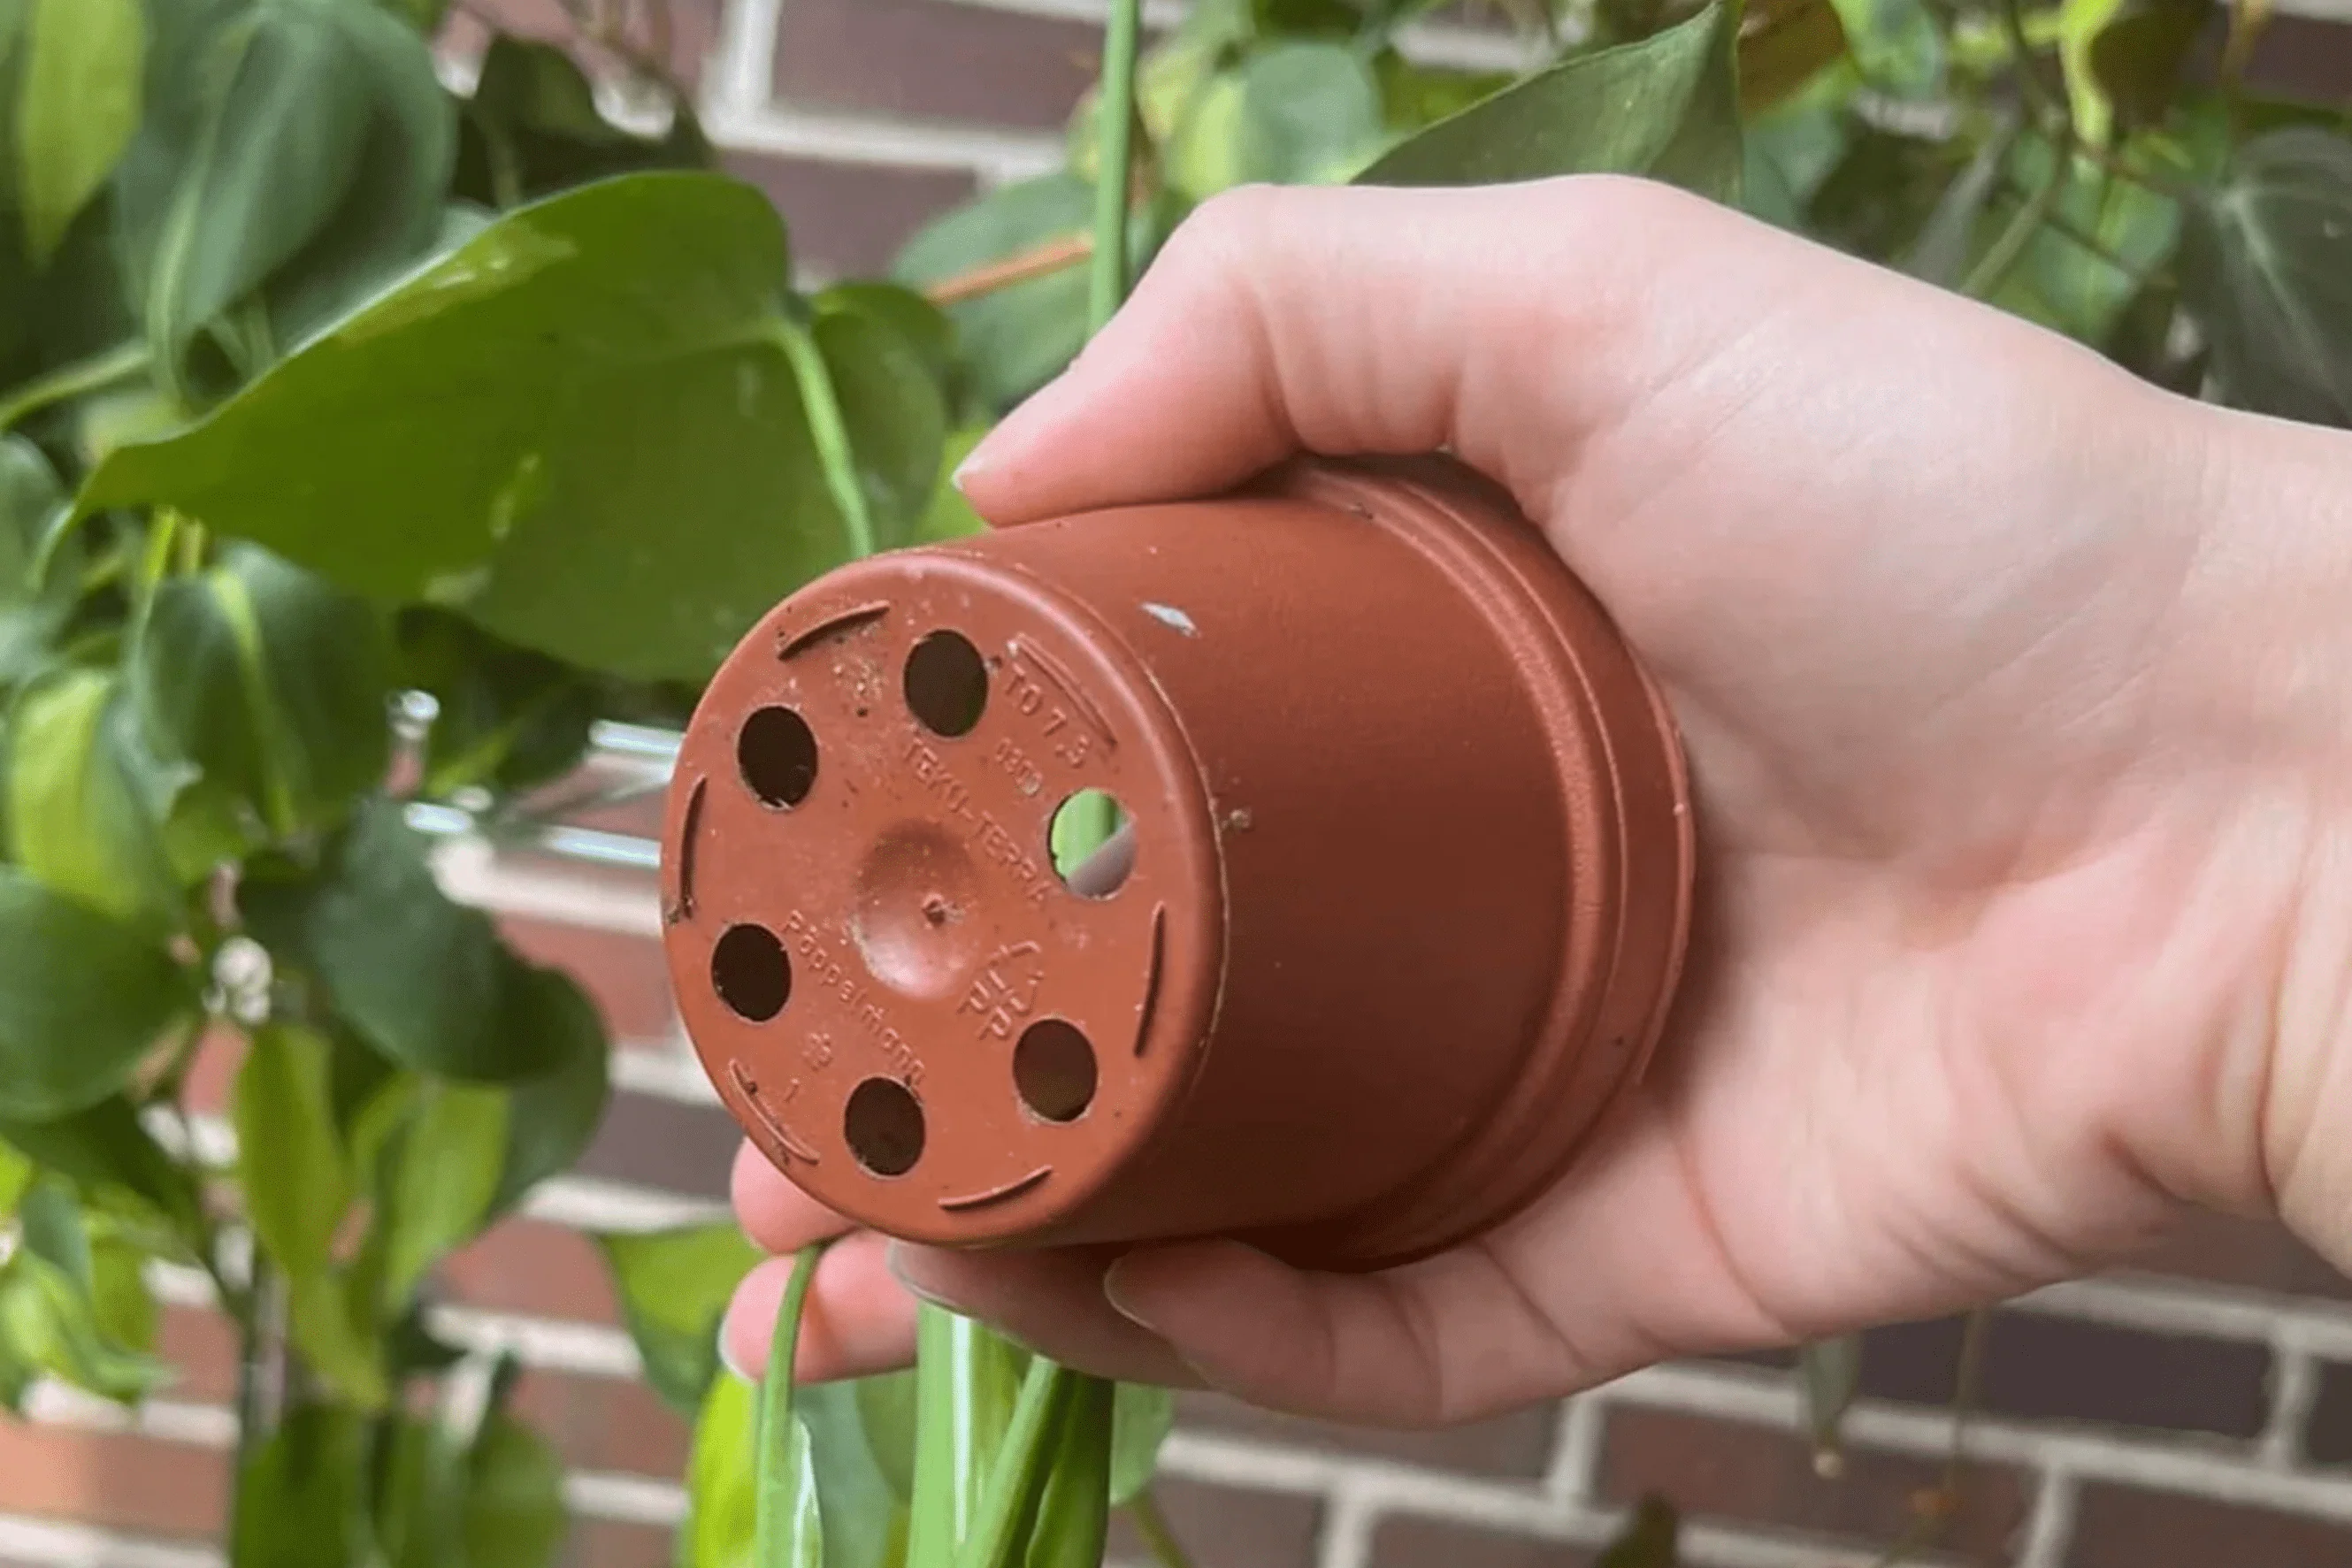
Clematis roots hate sitting in water, especially in cool weather. Look for a container with multiple drainage holes. If you fall in love with a decorative pot that only has one small hole, drill more if possible.
Avoid adding gravel at the bottom. It does not improve drainage the way people hope. It usually just reduces the soil volume your clematis desperately needs.
Lift the pot
If your container sits flat on a balcony or patio, drainage holes can get blocked by the surface underneath. A simple fix is to set the pot on pot feet, bricks, or a low plant stand so excess water can escape freely.
Soil mix basics
Container clematis need a potting mix that holds moisture, drains well, and does not collapse into a soggy brick midseason. Garden soil alone is too heavy for containers and compacts over time.
A simple mix
- High-quality potting mix as your base (peat-free if you can find one you like).
- Compost mixed in for gentle nutrition and better water-holding.
- Pine bark fines or a chunky conditioner for structure and air pockets.
If you prefer buying one bag and being done, choose a premium potting mix and improve it with a few scoops of compost. Your future self will thank you when summer hits.
How to plant
Planting technique is where potted clematis differs from in-ground clematis in a few important ways, especially around stability and future watering.
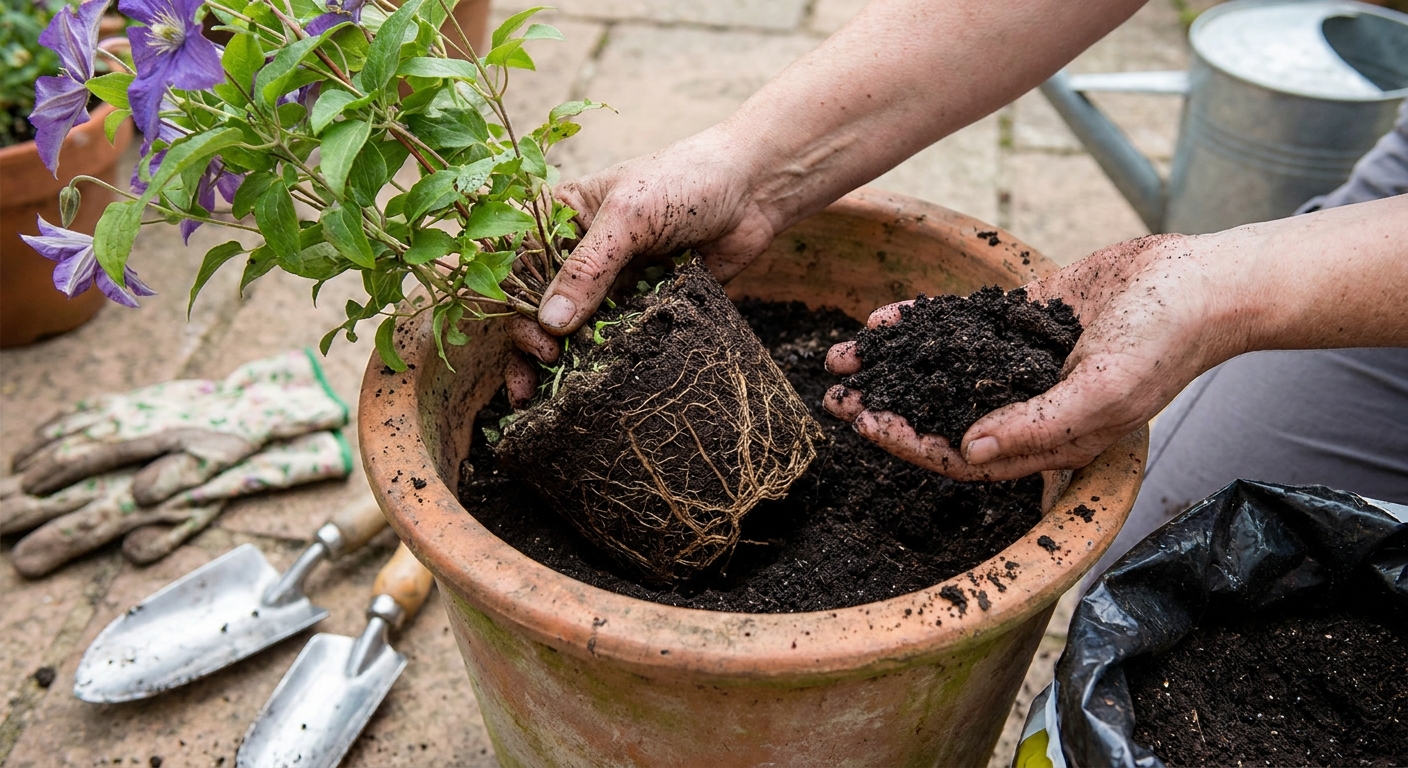
- Pre-water the plant in its nursery pot so the root ball is evenly moist.
- Add soil to the container so the plant will sit at the appropriate depth once placed.
- Set the vine in place and backfill gently, firming the mix so there are no large air gaps.
- Water slowly and deeply until water runs freely from the drainage holes.
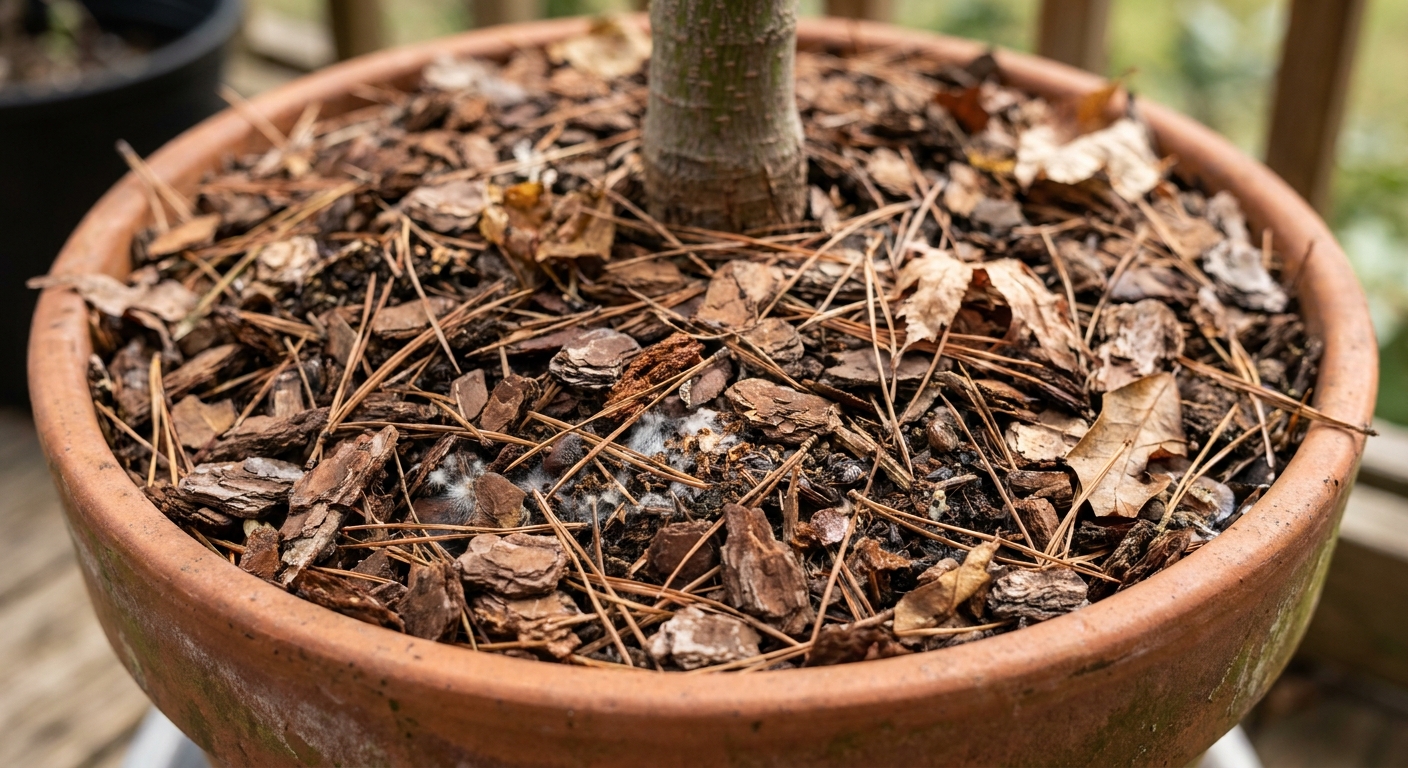
- Mulch the surface to reduce evaporation, keeping mulch slightly back from the crown.
Planting depth in pots
This is the part that gets people (including me) overthinking. A conservative, container-safe baseline is this:
- Do not plant higher than it was in the nursery pot. A crown that sits above the soil line dries faster and is more prone to stress.
- For many large-flowered hybrids, you can plant the crown about 2 to 3 inches deeper than the nursery soil line, as long as your mix drains well and you keep mulch off the crown.
- In containers, avoid burying so deep that the crown stays cold and soggy for long stretches, especially in rainy climates or shaded patios.
If you want the variety-specific nuance (and the “why” behind deeper planting), Leafy Zen’s clematis planting depth guidance goes deeper without turning into a rabbit hole.
Give it real support
Clematis are climbers, not clingers. They climb by wrapping their leaf stems (petioles) around slender supports, which means they need something narrow enough to grab, but strong enough not to wobble.
Good options
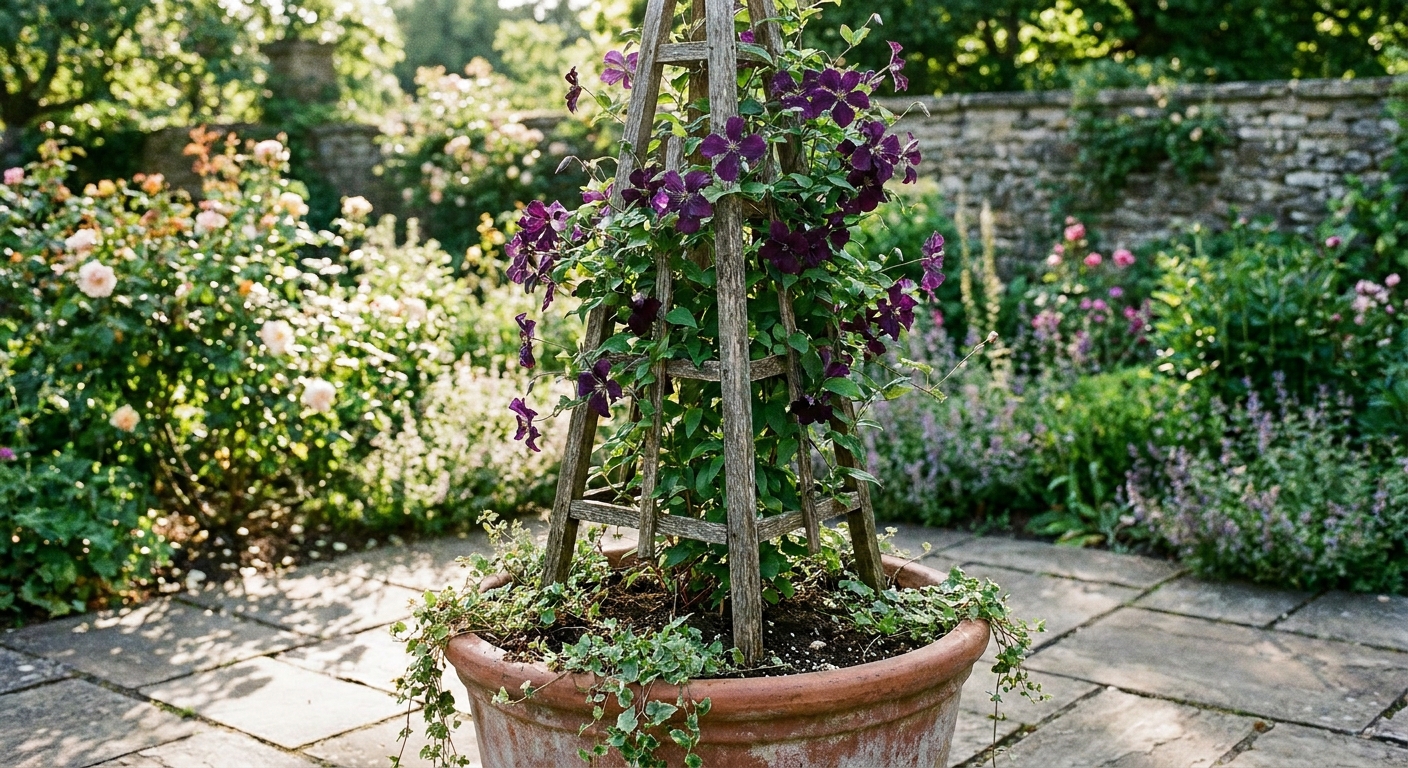
- Obelisk trellis anchored deep in the potting mix.
- Fan trellis for training against a wall, fence, or balcony rail.
- Small arbor positioned behind the container, if you can secure it safely.
My rule: if you can shake the trellis with two fingers, the wind will absolutely bully it. Choose sturdy, and tie new growth loosely with soft plant ties until the vine learns the route.
Keep roots cool
You will hear the classic clematis line: “head in the sun, feet in the shade.” In containers, this is not a cute saying. It is survival advice. Pots heat up fast, and warm roots lead to stress, droop, and constant watering battles.
Easy ways to cool roots
- Mulch with shredded bark, leaf mold, or compost to reduce surface evaporation.
- Top-dress with a living mulch like low sedum, sweet alyssum, or small violas to shade the soil surface. Keep companions modest so they do not compete heavily.
- Use a double-pot trick by setting the nursery-style pot inside a slightly larger decorative pot with no drainage (a cachepot), leaving breathing room and keeping drainage intact.
- Shade the container itself if it sits in intense afternoon sun. Even moving the pot a foot can change the heat load.
If you only do two things for container clematis, make the pot big and keep the roots cool. Those two choices fix a surprising number of “mystery problems.”
Watering routine
Clematis want evenly moist soil, not constant wetness. In a container, that translates to thorough soakings, then letting the top couple inches dry slightly before the next deep watering. Little daily sips often only wet the surface.
How to water
- Check before watering: stick a finger 2 inches into the mix. If it feels dry at that depth, water.
- Water slowly: pour until it runs out the bottom, pause, then water again. This re-wets dry pockets.
- Morning is best: less evaporation, and foliage dries faster.
In summer
In hot weather, especially on balconies where wind accelerates drying, you may water daily. That is not failure. It is container physics. Mulch and a larger pot buy you more time between waterings.
In spring and fall
As temperatures cool, the pot stays moist longer. Overwatering becomes more likely. Always check the soil first.
Feeding in a pot
Container plants rely on you for nutrition. Clematis are not heavy feeders like some annuals, but they do appreciate steady fertility while building stems and buds.
- At planting: mix in compost. If your potting mix already contains slow-release fertilizer, go easy on extras at first.
- During active growth: feed every 3 to 4 weeks with a balanced liquid fertilizer, or use a slow-release granular product according to label directions.
- Do not overdo nitrogen: too much nitrogen can push leafy growth and fewer flowers, so follow label rates and avoid “lawn-style” high-n formulas.
- Late season: ease off feeding so the plant can slow down and prepare for dormancy rather than pushing tender new growth.
Signs your clematis may be underfed include pale leaves, weak growth, and reduced flowering, especially when watering and light are already on point.
Sun and placement
Most clematis bloom best with at least 6 hours of sun, but the ideal exposure depends on your summer intensity.
- Cooler climates: full sun is often perfect.
- Hotter climates: morning sun with afternoon shade can prevent stress and scorched leaves.
- Windy sites: provide a windbreak if possible, and keep the trellis secure. Wind can snap stems and dry the pot quickly.
A clematis in a pot is also wonderfully movable. If a heat wave is coming, shifting the container to brighter shade for a few days can prevent a midsummer meltdown.
Ongoing care
Container clematis are not “plant it and forget it,” but they are also not as needy as they can seem once you get a rhythm.
Refresh the soil
- Each spring: scrape off the top 2 to 3 inches of mix and replace it with fresh compost and potting mix, then re-mulch.
- Every 3 to 5 years: plan a repot into fresh mix, either back into the same container after trimming circling roots, or up one size if the plant is clearly root-bound.
If water starts running down the inside edge of the pot and out the bottom without soaking in, the mix may have become hydrophobic. That is a strong hint it is time for a refresh or repot.
Common pests
Containers do not eliminate pests, but they make it easier to spot issues early.
- Aphids: cluster on soft tips and buds. A strong spray of water or insecticidal soap usually keeps them in check.
- Slugs and snails: chew young shoots, especially in spring. Check at dusk and remove them, or use appropriate slug controls for your space.
- Powdery mildew: more likely in still, crowded corners. Give the vine airflow and avoid wetting foliage late in the day.
Winter protection
In the ground, soil insulates roots. In a pot, the root ball is exposed on all sides, so freezing and thawing cycles are tougher on the plant. Your goal is to keep the roots cold but stable, and to prevent the container from cracking.
Simple strategies
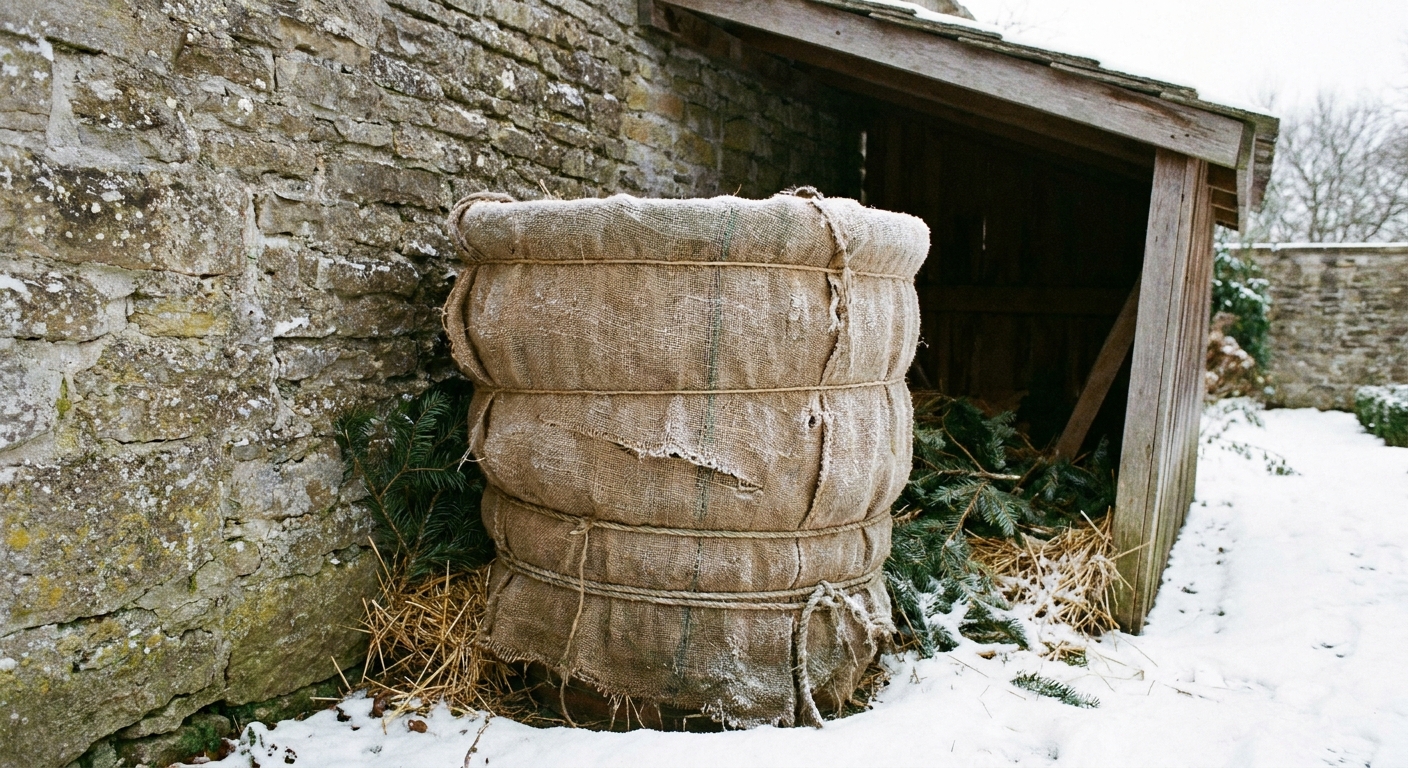
- Move the container to shelter like an unheated garage, shed, or against a house wall out of harsh wind.
- Insulate the pot with burlap, old blankets, or bubble wrap around the outside, leaving drainage holes clear.
- Mulch extra on top of the soil surface once the plant is dormant.
- Water lightly during winter when the mix is dry and not frozen. Roots can desiccate even when it is cold.
If your clematis is rated hardy in your zone in the ground, it often still needs help in a container. Many gardeners treat potted perennials as if they are one zone less hardy, but outcomes depend a lot on exposure, pot material, and how wet the mix stays during freeze cycles.
If it wilts
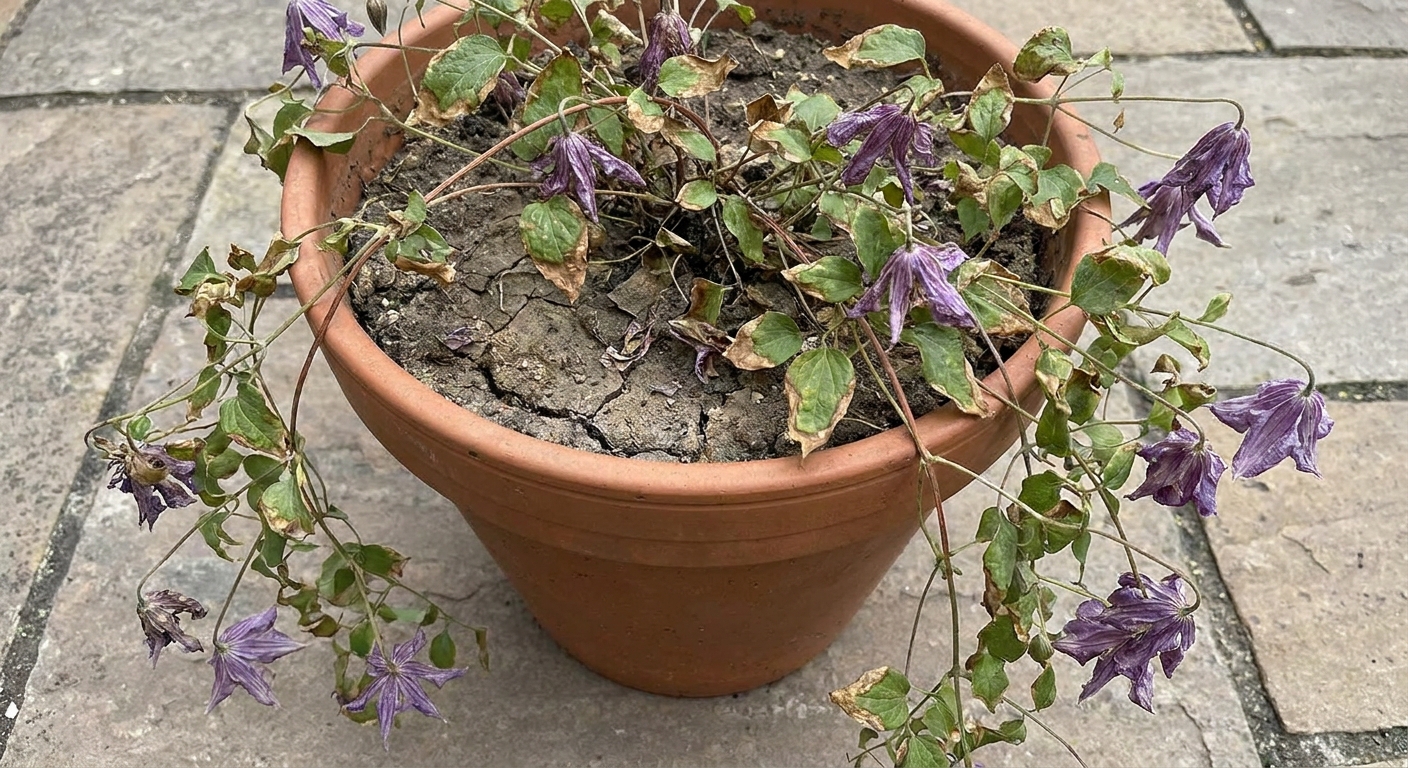
Wilting can be as simple as dry soil, or it can be something more serious. Start with the basics because they are most common in containers.
First checks
- Soil moisture: if the potting mix is dry several inches down, water deeply and shade the pot for the day.
- Heat stress: if the pot is hot to the touch, cool the root zone with shade and mulch.
- Wind damage: look for a kinked or snapped stem near the base.
If you suspect clematis wilt, quick action matters. I keep the full wilt troubleshooting and recovery steps on Leafy Zen’s dedicated clematis wilt page so it is easy to follow and kept up to date.
Pruning groups
Pruning still matters in containers, but the actual cuts depend on your clematis type. Here is the quick orientation that keeps you out of trouble:
- Group 1: blooms on old wood, usually pruned lightly after flowering.
- Group 2: often blooms on old and new wood, typically pruned with a gentler hand.
- Group 3: blooms on new wood, usually cut back harder in late winter or early spring.
If you want the exact timing and cut points by group, Leafy Zen’s clematis pruning pages walk you through it. Container vines follow the same pruning logic. They just need more attention to watering and winter root protection.
Quick checklist
- Pot: roughly 15 to 30 gallons, deep, with excellent drainage, ideally raised on pot feet.
- Soil: quality potting mix plus compost, kept evenly moist.
- Support: sturdy trellis or obelisk installed at planting time.
- Cool roots: mulch, living groundcover, and container shading.
- Water: deep soakings, more often in heat and wind.
- Winter: shelter and insulation for the pot, occasional moisture checks.
If you want a clematis that feels like a little celebration every time you step outside, container growing can absolutely deliver. Once you nail the pot size and root comfort, the rest becomes a gentle routine. The kind you can do while chatting with your ferns, if that is your style too.
FAQ
Can clematis stay in a pot permanently?
Yes, as long as the container is large enough and you refresh the top few inches of potting mix with compost each year. After several years, some vines benefit from a careful repot into fresh mix, either in the same container or one size up.
Do I need to repot clematis often?
Not yearly, but expect to do some kind of refresh. If watering becomes difficult because the mix repels water, or the plant looks stalled despite good care, it may be time to repot and replace tired soil.
What is the best pot material?
Any material can work if drainage is good, but in hot climates, thicker pots (ceramic, terracotta, wood) tend to buffer heat better than thin plastic. In freezing climates, choose something rated frost-resistant or be prepared to insulate and shelter it.
Can I underplant clematis in the same container?
Yes, and it can help shade the root zone. Choose shallow-rooted, non-aggressive companions and keep them from crowding the clematis crown. Think small annuals, low sedums, or violas rather than thirsty, fast-growing spreaders.