How to Get Rid of Moles in Your Yard Naturally
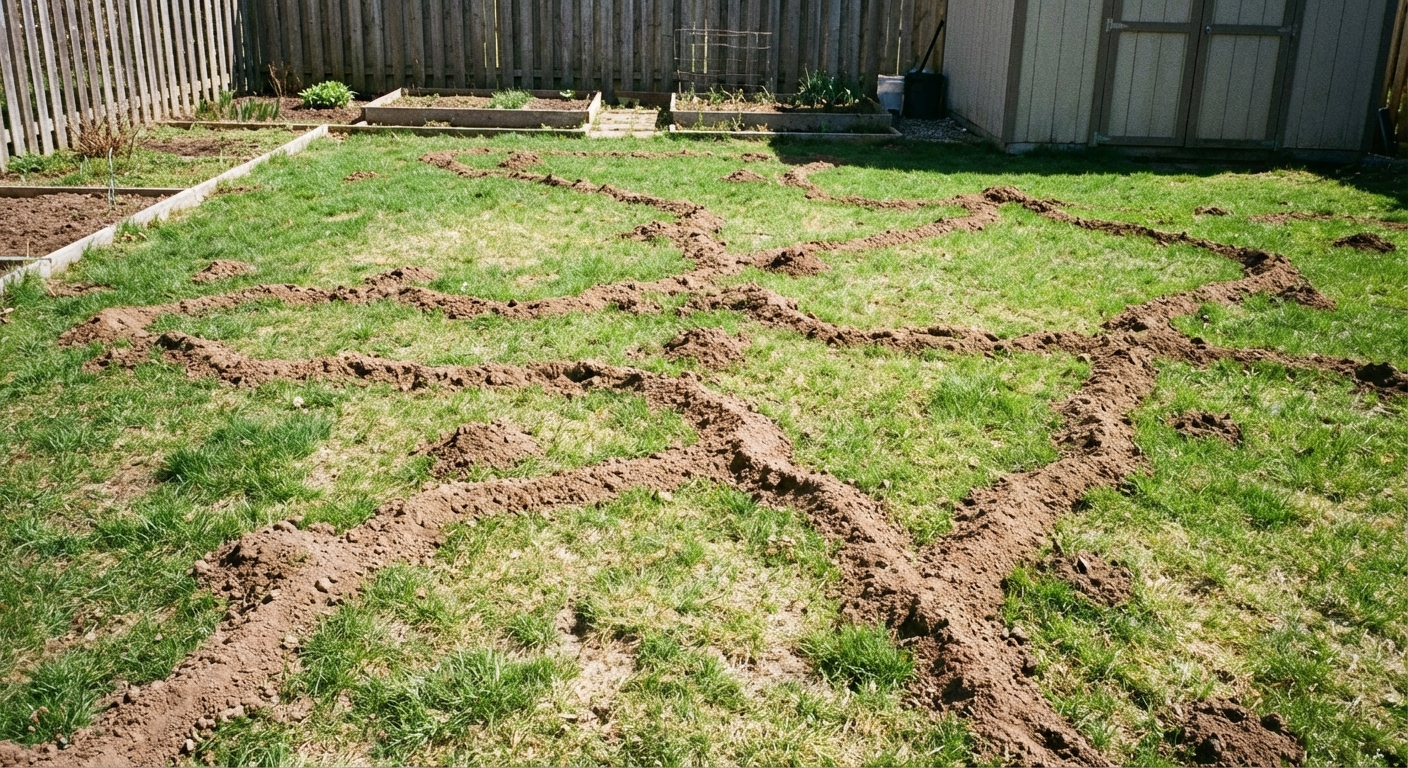
If your lawn looks like it has tiny speed bumps and your garden beds are suddenly lumpy, you are not imagining things. Moles are master diggers, and while they do not eat your plants, their tunneling can tear up roots, heave seedlings, and turn a tidy yard into a bumpy obstacle course.
The good news: you can often get moles under control without reaching for harsh chemicals. The trick is to (1) confirm you are dealing with moles, not voles, (2) make your yard less inviting, and (3) use repellents and trapping strategically instead of randomly.
Moles vs. voles
This step saves so much frustration. Moles and voles are completely different animals, and what works for one often does nothing for the other.
Signs you have moles
- Raised ridges in the lawn that feel squishy underfoot: these are shallow feeding tunnels.
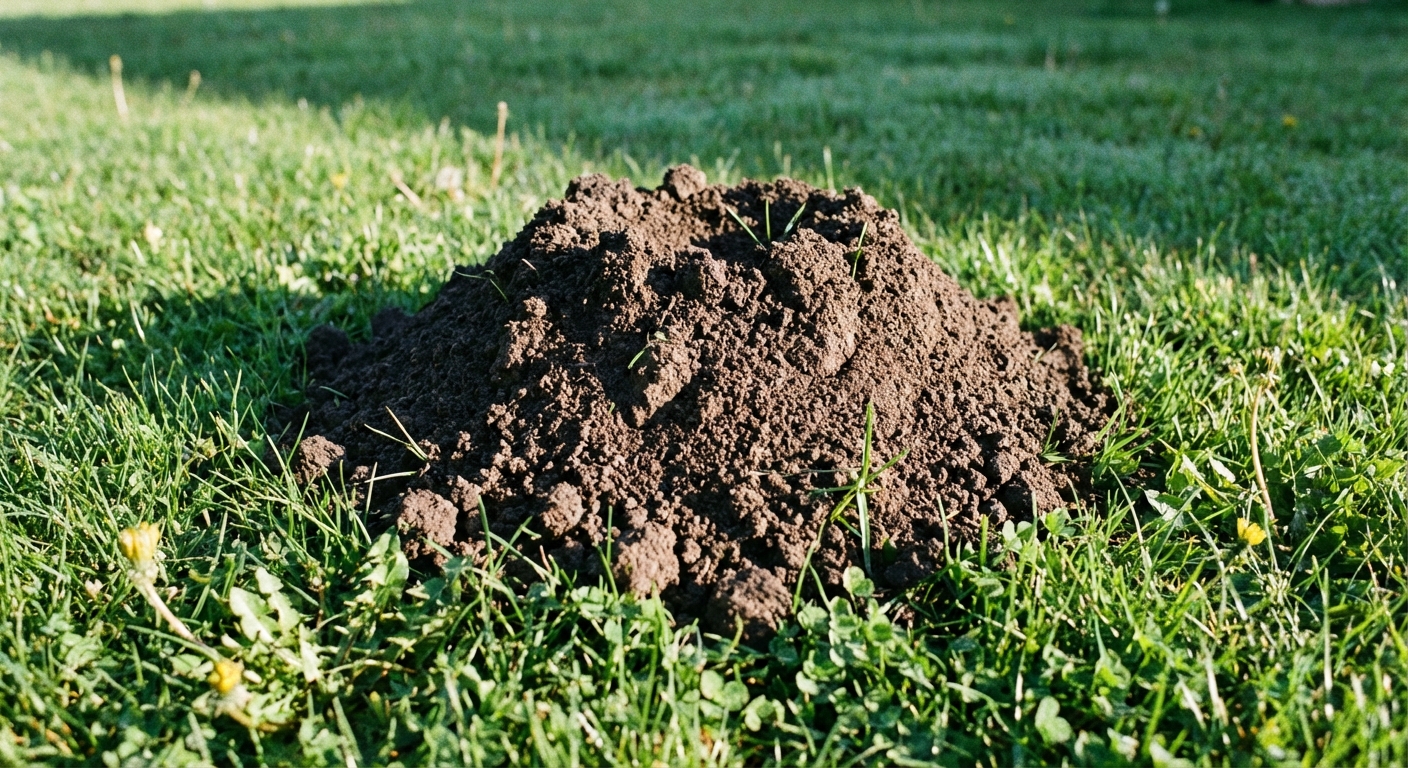
- Molehills or volcano-shaped mounds of soil: these are usually pushed up from deeper tunnels.
- Little plant damage above ground: moles eat mostly insects and worms, not your vegetables.
Signs you have voles
- Surface runways through grass that look like narrow paths, often with grass clipped short.
- Chewed stems and roots, especially in winter or early spring.
- Small burrow openings about 1 to 2 inches wide, with no soil mound.
If you are seeing chewing damage on plant crowns, bark, bulbs, or carrots, that points more toward voles. If you are seeing ridges and mounds, you are likely dealing with moles.
Why moles show up
Moles are after food, not your tomatoes. Their main diet is grubs, beetle larvae, earthworms, and other soil-dwelling insects. A yard with rich soil life can be a buffet, especially if it also has moist, easy-to-dig ground and plenty of cover.
That means natural mole control is usually a combination approach: reduce the welcome mat, encourage them to move along, and trap the individuals that refuse to take the hint.
Step 1: Find active tunnels
Not all tunnels are active every day. Before you treat or trap, locate the highways moles are actually using.
- Flatten a few raised ridges with your foot or the back of a shovel.
- Check again in 24 to 48 hours.
- If the ridge is pushed back up, that tunnel is active and is where you focus your efforts.
I like to mark active spots with a little flag or a twig so I can work methodically instead of chasing fresh-looking dirt all over the yard.
Step 2: Try castor oil
Castor oil does not “kill” moles. It makes the tunnel environment unpleasant, which can encourage them to relocate. In some yards it helps a lot, and in others it is more of a mild nudge, so treat it as a tool, not a guarantee. Consistent application and good coverage matter, and you will likely need to reapply after rain or irrigation.
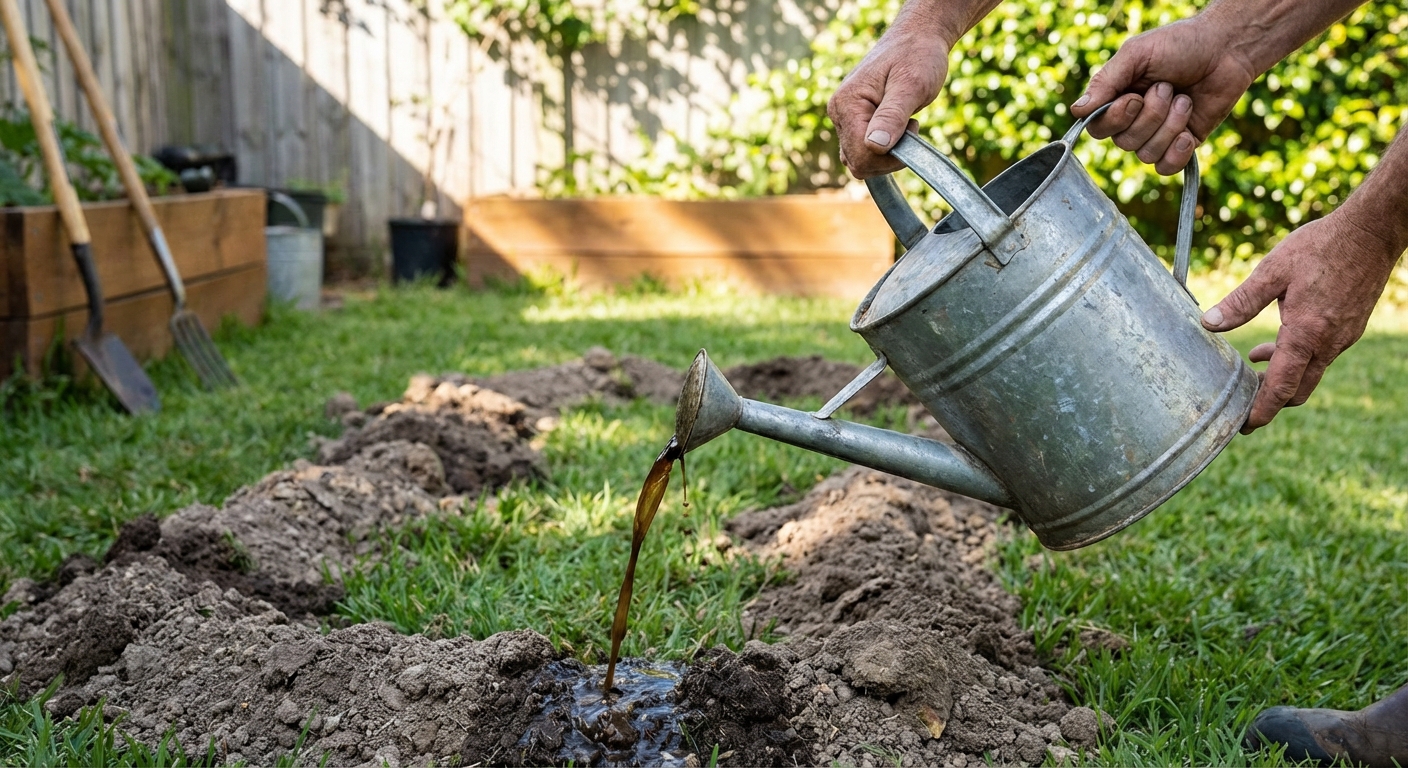
DIY castor oil drench
You will need: castor oil, liquid dish soap, and water.
- Mix 3 tablespoons castor oil with 1 tablespoon dish soap in a jar. Shake well to emulsify.
- Add this concentrate to a watering can or sprayer with 1 gallon of water.
- Apply over active tunnels and the surrounding area. You want the solution to soak down into the soil, not just sit on the grass.
- Water lightly afterward if the ground is dry, to help it move into the tunnel zone.
Coverage: Because this works best as a soil drench (not a mist), 1 gallon typically covers about 20 to 40 square feet, depending on how dry your soil is and how heavy you apply. If you have a large tunnel network, you will probably need to scale up the batch.
Reapply: after heavy rain, or every 1 to 2 weeks during active mole seasons (often spring and fall).
Store-bought castor oil products
Granular or hose-end products can be convenient for large lawns. The best ones still rely on castor oil as the active ingredient. Follow the label rates carefully and remember: coverage and consistency matter more than “stronger” concentrations.
Author note: Castor oil treatments may temporarily change earthworm activity in the treated zone, and that is part of why some people see moles move. It is also why I aim treatments at active runs and perimeter areas rather than blanket-coating the entire yard week after week.
Safety note: Keep concentrates away from kids and pets, and avoid overapplying near storm drains, ponds, or creeks. More is not better here.
Step 3: Make your yard less inviting
You do not need to sterilize your soil or wage war on earthworms. But a few gentle changes can reduce mole activity, especially when paired with repellents or trapping.
Reduce grub hot spots
If you have lots of moles, you may also have lots of grubs. Consider an organic grub strategy that supports a healthier balance. Just keep expectations realistic: in many lawns, earthworms are a major food source, so moles can still show up even if you reduce grubs.
- Beneficial nematodes (species like Heterorhabditis bacteriophora) can target certain lawn grubs when applied at the right time and soil temperature.
- Milky spore can help with Japanese beetle grubs in some regions, but it is slower acting and region-dependent.
- Avoid overwatering since consistently wet soil is easier to tunnel and can increase insect activity.
Limit easy cover
- Keep heavy mulch layers a bit back from lawn edges where tunnels tend to run.
- Trim dense groundcovers near problem areas if tunnels are concentrated there.
- Repair irrigation leaks and chronically soggy spots.
Step 4: Plant helpers
Plants alone will not solve a serious mole problem. Moles are not browsing your beds, so “mole-repelling plants” are often oversold. That said, certain plantings can still be useful in two ways: (1) they may discourage other digging pests near beds, and (2) they can help you define and protect borders when combined with barriers and repellents.
Daffodils
Daffodil bulbs contain compounds many critters avoid. They are more reliably deer and rodent resistant than “mole proof,” but they can be a smart border plant in areas where multiple burrowers are an issue.
Alliums
Alliums (garlic, chives, ornamental alliums) have a strong scent. Some gardeners like them along borders. Think of them as a mild add-on rather than a standalone fix.
How to use them
- Plant clusters of alliums around raised beds or the most disturbed garden areas.
- Use daffodils as a border along fences and lawn edges where tunneling starts.
- Pair plantings with castor oil treatments early in the season for a stronger nudge.

Step 5: Trapping
If repellents are not enough, trapping is the most direct way to reduce the population quickly. It sounds intimidating, but once you locate an active tunnel, it becomes a straightforward process.
What “humane” means here
Most effective mole traps are quick-kill traps (like scissor and harpoon styles). Professionals often call these “humane” because they are designed to kill rapidly when set correctly. Live-trapping is uncommon for moles, and relocating wildlife is illegal or restricted in many areas. Always check your local rules before you trap or relocate any animal.
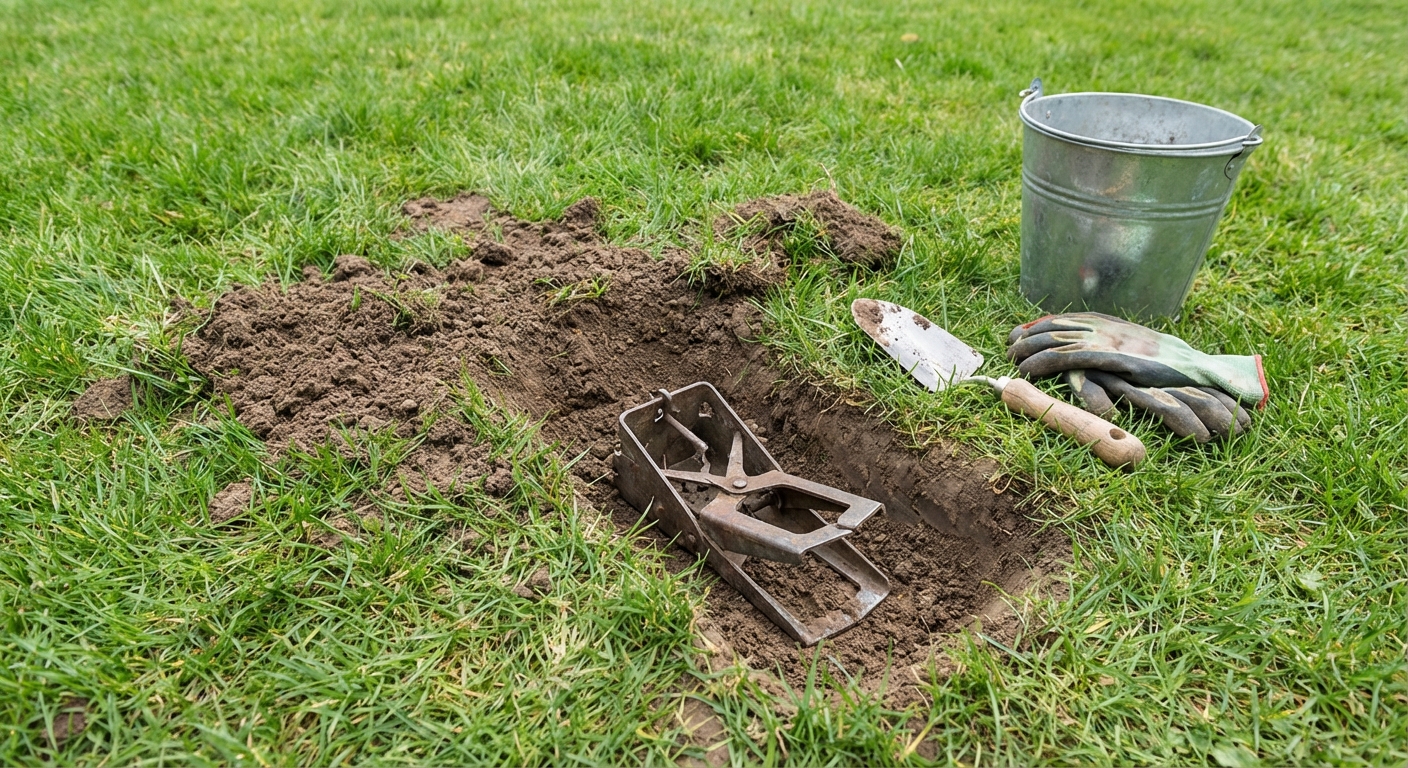
Choose a trap style
- Scissor or harpoon traps: set over an active tunnel. These are common and effective when positioned correctly.
- Choker loop traps: placed in a tunnel and triggered as the mole passes through.
- Tunnel (box) traps: placed inline with the tunnel. These can be a bit more user-friendly for some gardeners.
How to set traps well
- Find a straight, active run, ideally a main travel tunnel (often along fences, sidewalks, or the edge of a bed).
- Expose the tunnel carefully with a trowel. Try not to collapse it.
- Set the trap per manufacturer directions and ensure it is aligned with the tunnel path.
- Block light and drafts by covering the opening with soil, a piece of sod, or a board. Moles tend to prefer a sealed tunnel and often plug open holes.
- Check traps daily. Relocate if there is no activity after 2 to 3 days.
Speed tip: If you have multiple active runs, setting two or more traps can shorten the timeline.
Safety note: Keep pets and kids away from set traps. If you are not comfortable with mechanical traps, this is a great moment to call a professional who specializes in targeted control.
What to avoid
- Flooding tunnels: Usually ineffective and can damage your lawn structure. Moles can dig away fast.
- Chewing gum, broken glass, or sharp objects: Not humane, not reliable, and can harm people, pets, and wildlife.
- Sound and vibration spikes: Sometimes they help briefly, but many moles adapt or simply tunnel around them. If you try them, use as a short-term add-on, not your only plan.
- Overcorrecting your soil life: Healthy soil has worms and insects. The goal is balance and targeted control, not scorched-earth yard care.
Protecting beds
Moles love to run along edges. If you have a vegetable garden, bulb bed, or new perennials going in, a little prevention goes a long way.
Quick protection options
- Hardware cloth barrier: Line the bottom of raised beds with 1/2-inch hardware cloth before filling. This is fantastic for protecting roots and bulbs from multiple diggers.
- Edge barriers: For small areas, you can trench in hardware cloth 12 to 18 inches deep along the border.
- Keep soil evenly moist, not soggy: Overly wet beds are easier to tunnel through.
When to call a pro
I am all for DIY, but you do not have to do this alone, especially if the yard damage is escalating.
- Multiple fresh molehills daily across a large area.
- Trapping feels unsafe for your household or you cannot keep pets away.
- You have irrigation, cable, or shallow utilities and you are worried about digging into tunnels.
- Repellents and DIY traps have not helped after 2 to 3 weeks of consistent effort.
Look for wildlife control operators who can explain their approach clearly, focus on targeted trapping rather than blanket poisoning, and offer practical prevention advice for after the moles are removed.
A simple plan
If you want a calm, step-by-step path that works for most yards, here is the order I recommend:
- Confirm it is moles (ridges and mounds, not chew damage).
- Map active tunnels by flattening and checking in 24 to 48 hours.
- Apply a castor oil drench on active areas and likely travel edges.
- Set traps on the most active straight runs if new ridges keep showing up.
- Reduce grub hot spots with organic methods if needed.
- Protect prized beds with hardware cloth and smart borders.
What success looks like: You are aiming for fewer fresh ridges and no new active runs after several days. If you see new tunnels pop up after a quiet stretch, it can be seasonal activity or a new mole moving in, and a quick re-treatment on active areas usually goes much faster the second time.
Moles are persistent, but you can be more persistent, gently and consistently. And once you get ahead of the first wave, seasonal maintenance is usually much easier than starting from scratch every year.
FAQ
Will moles leave on their own?
Sometimes, especially if food sources shift. But if your soil stays moist and full of insects and worms, new moles may move in even after one leaves. That is why prevention and perimeter deterrence help.
Do moles eat roots or bulbs?
Moles primarily eat insects and worms. However, their tunnels can damage roots and dislodge bulbs, and their runs can act like highways for voles that do eat plants.
Does castor oil hurt grass?
When diluted and applied as a soil drench, castor oil is generally lawn-safe. Avoid overconcentrating and test a small area first if your turf is stressed by heat or drought.
When are moles most active?
Many gardeners notice more tunneling in spring and fall when soil is moist and temperatures are mild. Activity can still happen year-round in some climates.
Are mole control methods legal everywhere?
Rules vary by state and country, especially for trapping and relocation. If you are unsure, check local regulations or call a licensed wildlife professional.