How to Get Rid of Cutworms Naturally
If you have ever walked out in the morning feeling proud of your neat row of transplants, only to find one lying on its side like it fainted overnight, you have met cutworms. They are sneaky, fast, and honestly a little rude. The good news is you can get them under control naturally with a few targeted habits, especially in that vulnerable first week after planting.

Cutworms are the larvae of several kinds of night-flying moths. Most hide in the top few inches of soil during the day and feed at night. In vegetable gardens, they love tender stems and fresh transplants.
How to tell if cutworms are the culprit
Cutworms can look like a lot of other seedling problems until you know what to look for. Here are the classic signs.
Night feeding clues
- Seedlings severed at soil level, as if someone snipped them with tiny scissors
- Plants toppled over but still green and “fresh” looking
- Chewed stems on tomatoes, peppers, broccoli, cabbage, kale, and lettuce transplants
- Missing seedlings where the cutworm may drag the top growth into a nearby hole
- Irregular chewing on low leaves of beans, peas, and young squash when populations are high
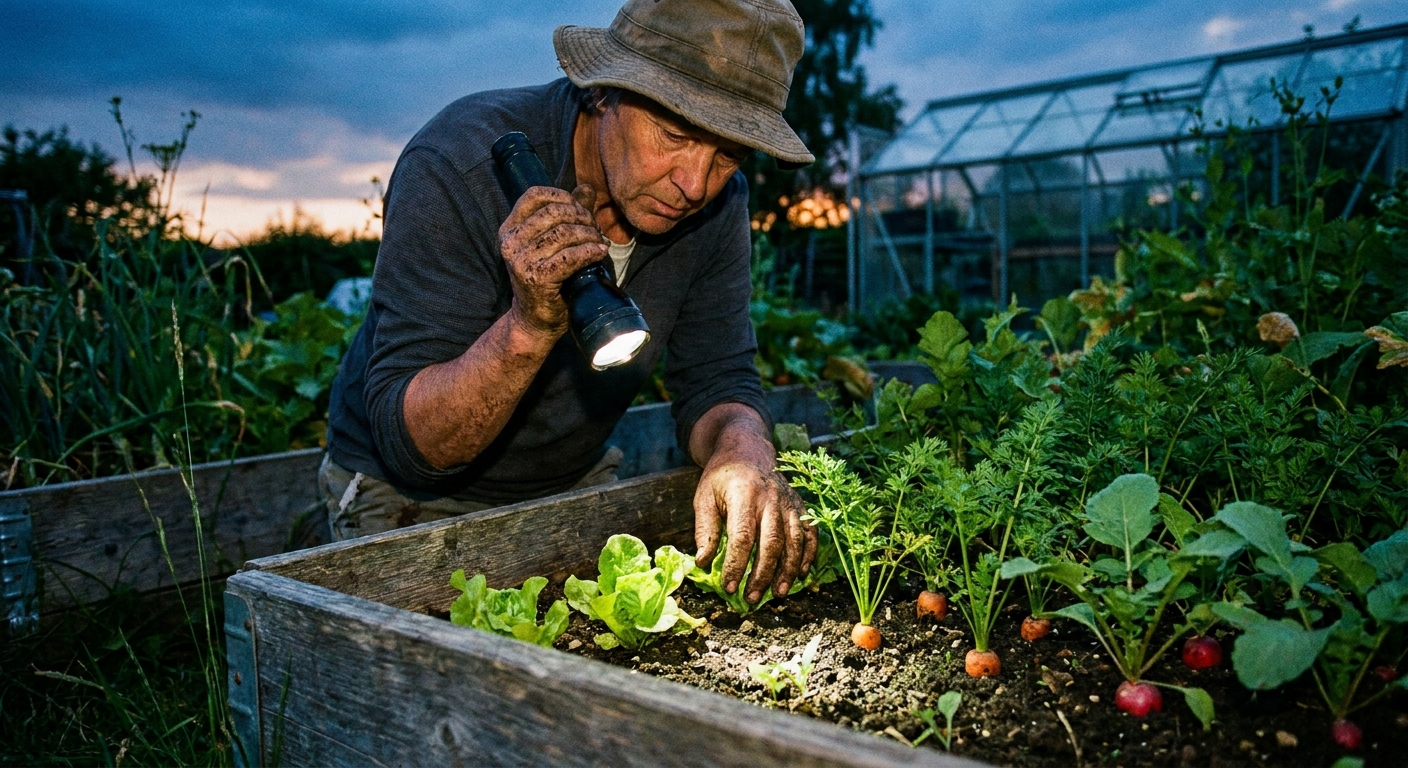
If you go out after dark with a flashlight and see caterpillars hugging the soil line, that is your smoking gun.
What it is not
- Slugs and snails usually leave shiny slime trails and chew holes in leaves more than they cleanly cut stems.
- Flea beetles make tiny “shot holes” in leaves, especially on brassicas like cabbage and broccoli.
- Damping off makes stems look pinched, watery, or rotten at the base rather than chewed.
- Wind, birds, or rodents can also knock seedlings around. If the stem is intact and you cannot find chewing, confirm with a nighttime check before you declare war.
Scout at the soil line
When I suspect cutworms, I do a quick, gentle investigation right where the stem meets the soil. You do not need to dig up your whole bed, just check like a detective.
Best times to look
- Dusk to early night: you may catch them feeding on stems or leaves.
- Early morning: sometimes they are still near the surface.
- Daytime: they are usually buried, but you can find them by carefully scraping soil.
How to check without wrecking seedlings
Pick one damaged plant as your “case file.”
With your fingers or a hand trowel, gently loosen soil in a circle 2 to 4 inches around the stem and 1 to 2 inches deep.
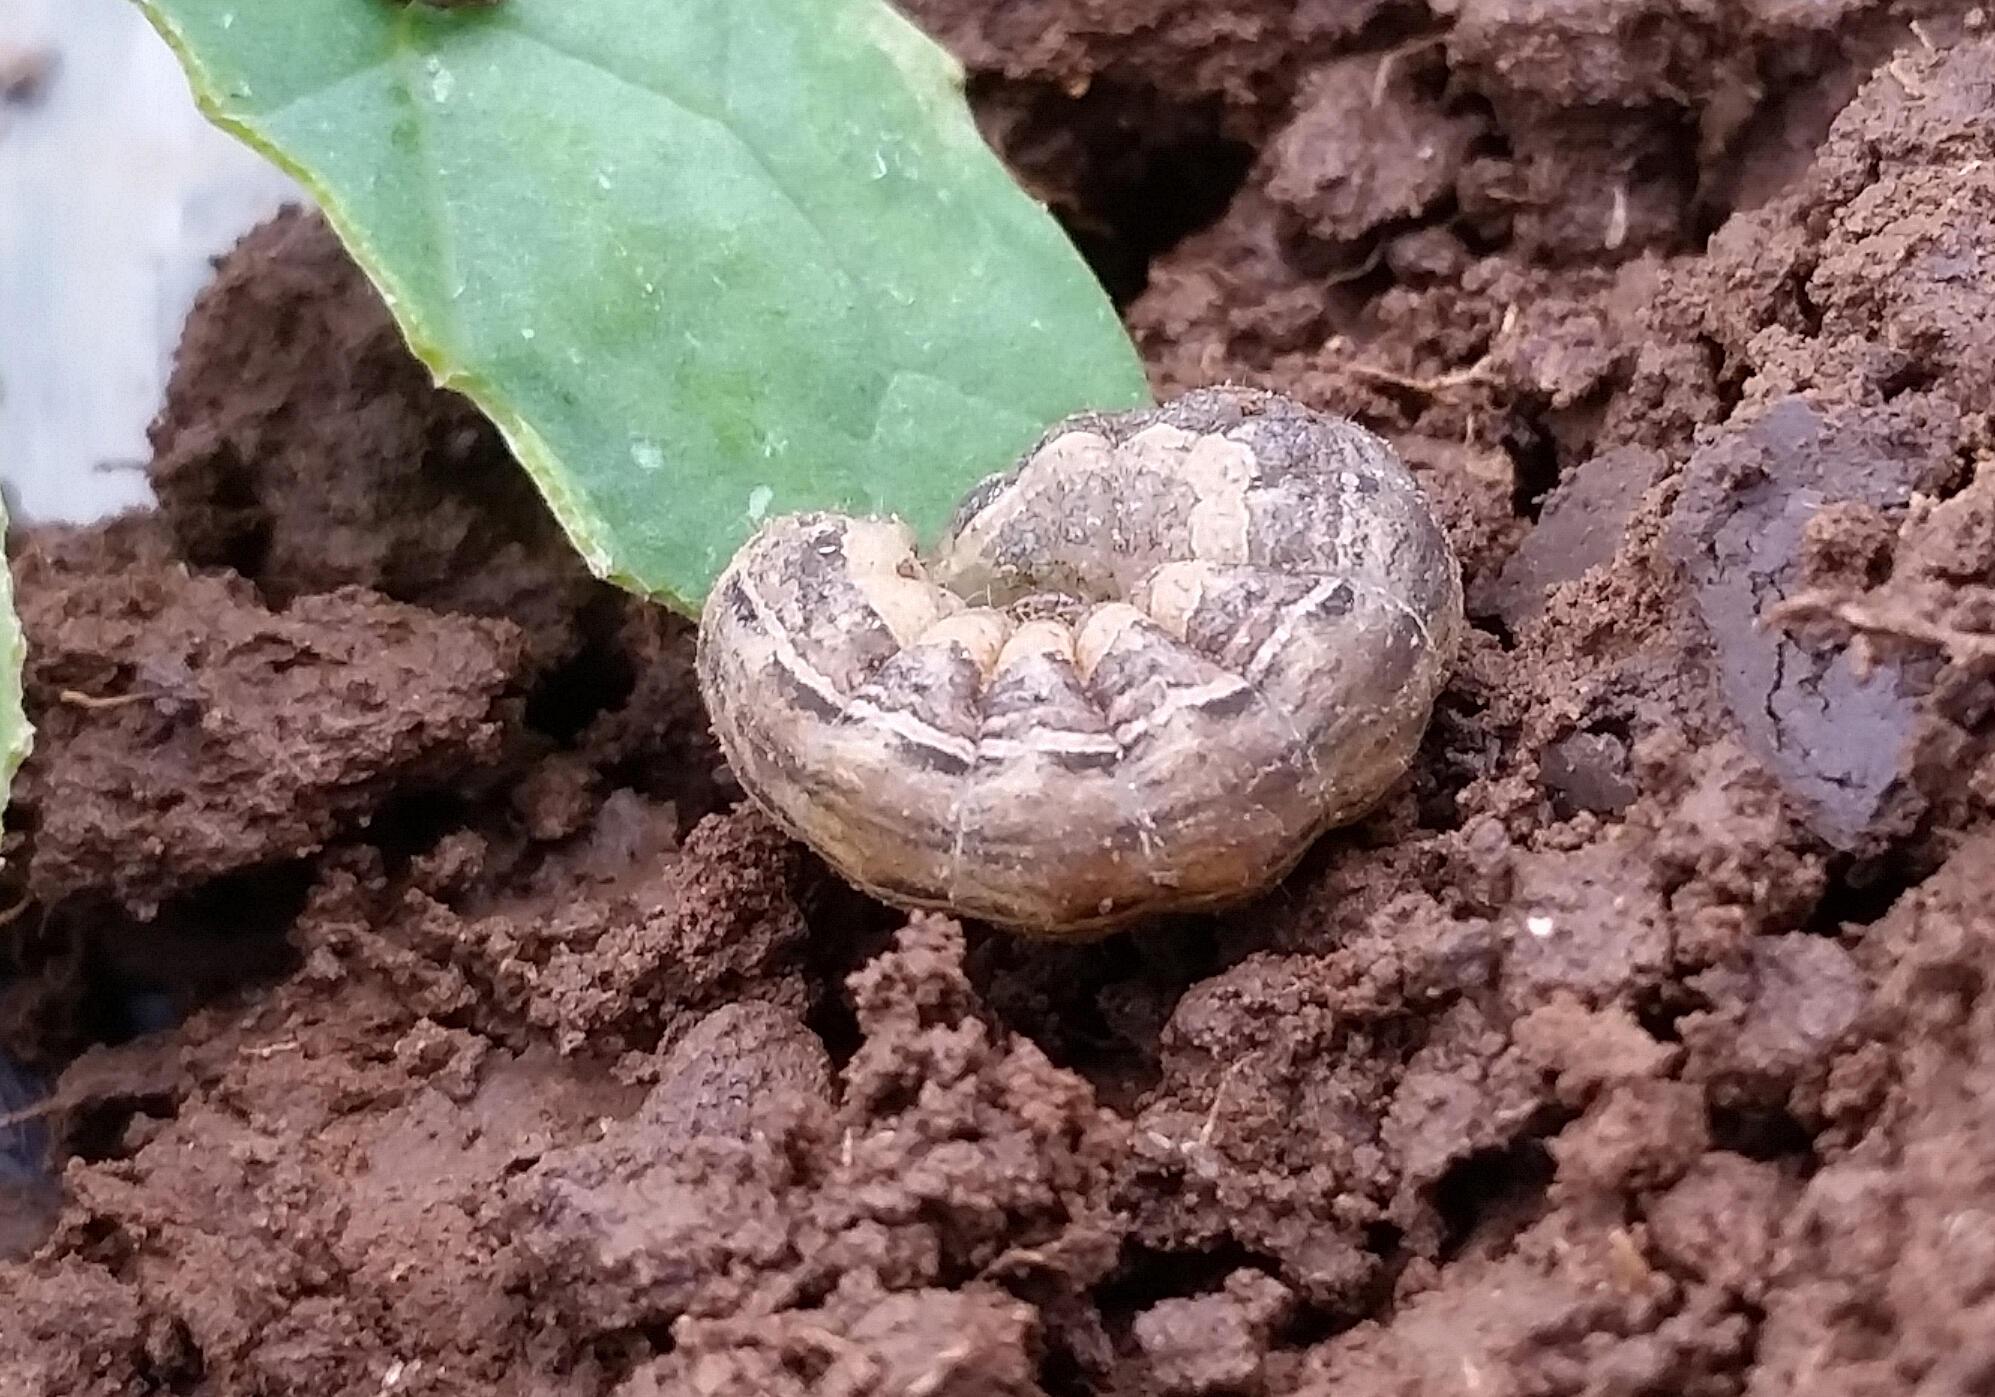
Look for a stout caterpillar, usually gray, brown, or dull green, often curled into a tight C-shape when disturbed.
Hand-pick and drop into a cup of soapy water.
Protect transplants the first week
If you only do one thing first, do this. Most cutworm heartbreak happens right after you set out tender starts like tomatoes, peppers, broccoli, cabbage, and lettuce. The stems are soft and irresistible, and the plant cannot bounce back if it is cut clean through.
Simple first-week routine
- Night 1 to 7: do a quick flashlight check every evening if you have had cutworms before.
- Water in the morning: it is a solid garden habit, and it can leave the soil surface a bit less inviting by nightfall. Moist soil and debris can make hiding easier for pests.
- Replace losses quickly: and add collars right away so you do not get stuck in a replanting loop.
Think of it like baby-proofing your garden. Once transplants toughen up, cutworms become far less devastating.
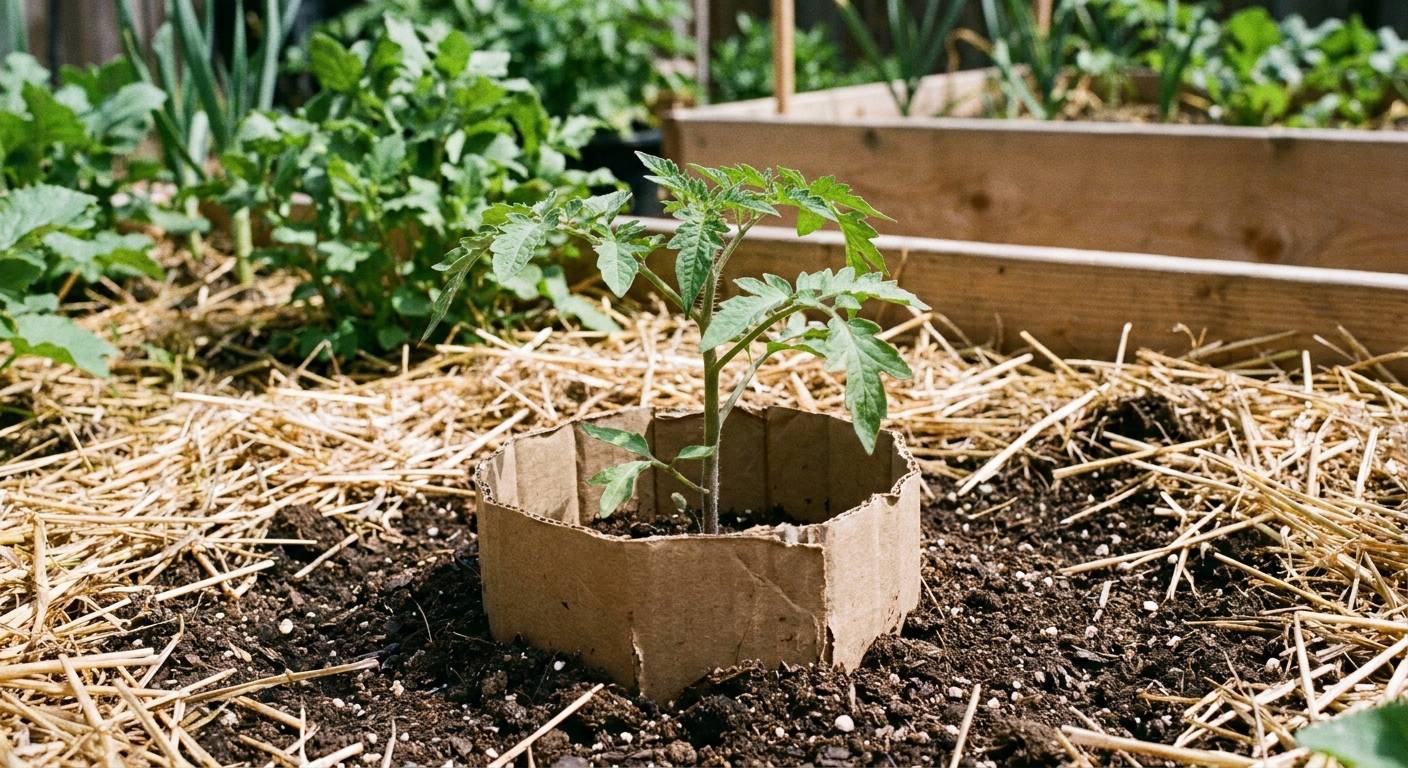
Collars and barriers
Physical barriers are one of the most reliable natural controls because they stop the cutworm from reaching the stem. They are especially helpful for tomatoes, peppers, eggplant, brassicas, and lettuce.
DIY stem collars
- Cardboard toilet paper rolls cut into 2 to 3 inch sections
- Paper cup rings with the bottom removed
- Flexible plastic (like a clean yogurt tub cut into a strip and taped into a circle)
How to install collars
Place the collar around the transplant stem.
Push it 1 inch into the soil.
Leave 1 to 2 inches above soil.
The “below soil” part matters. Cutworms do not always come from above. They often travel under surface debris and pop up right at the stem.
The toothpick trick
This is the simplest little hack, and it is surprisingly effective for small transplants. Insert a wooden toothpick vertically right up against the stem (or even two toothpicks, one on each side). The idea is to block the cutworm from wrapping around the stem to chew it through.
It is not as bulletproof as a collar in heavy infestations, but it is fast, cheap, and perfect when you are planting a lot of starts and need something immediate.
Extra barrier ideas
- Fine mesh or row cover can reduce egg-laying by moths when used early, especially over brassicas like cabbage, kale, and broccoli. Secure edges tightly.
- Copper tape is not a cutworm tool. It is aimed at slugs and snails, so do not rely on it here.
Bt and biological control
You will often hear Bt mentioned for caterpillar pests. For cutworms, timing is everything because they feed at night and hide during the day, and results can be mixed depending on the species and where they are feeding.
What Bt is
Bacillus thuringiensis var. kurstaki (Bt-k) is a naturally occurring soil bacterium used in organic gardening to target many leaf-feeding caterpillars. It works best when the caterpillar eats it soon after application.
How to use Bt for cutworms
- Apply in the evening, close to when cutworms feed.
- Target the soil line and lower stems, plus any low foliage they may nibble.
- Know what to expect: Bt tends to work best on small larvae and when cutworms are feeding on treated plant tissue. If your cutworms are mostly chewing right at the soil line and staying underground, collars and hand-picking are usually more reliable for immediate protection.
- Reapply after heavy rain because it can wash off, and remember it breaks down in sunlight.
- Follow the label for mixing and application, and avoid spraying flowering plants where you do not need it.
If you are trying to keep things pollinator-friendly, Bt has a narrower target than many broad-spectrum sprays, but it can still affect caterpillars that eat treated leaves. Use it only where you need it and avoid drift.
A helpful alternative: beneficial nematodes
Another “quiet helper” is beneficial nematodes. For cutworms, many gardeners use Steinernema carpocapsae (and in some cases other species recommended for soil-dwelling caterpillars). The right species matters, so check the product label for target pests.
They can reduce soil-dwelling larvae when applied correctly to moist soil and kept from drying out. They are best as a season-long support, not an overnight rescue.
Make beds less inviting
Cutworms thrive when they have perfect hiding spots and easy access to young stems. A few tweaks to your garden habits can tip the balance in your favor.
Reduce hiding places
- Pull back thick mulch 2 to 3 inches from the base of new transplants for the first week, then move it back once plants are sturdier.
- Keep weeds down, especially grassy weeds and chickweed, which can host young cutworms.
- Avoid leaving plant debris right against stems.
Smart planting
- Harden off transplants so stems are tougher and less tender.
- Plant into warm, active soil when possible. Stressed, slow-growing seedlings are easier targets.
- Consider a sacrificial trap in problem beds. A small patch of fast-germinating greens can lure feeding, then you scout and remove caterpillars. This is most useful if you have repeated outbreaks.
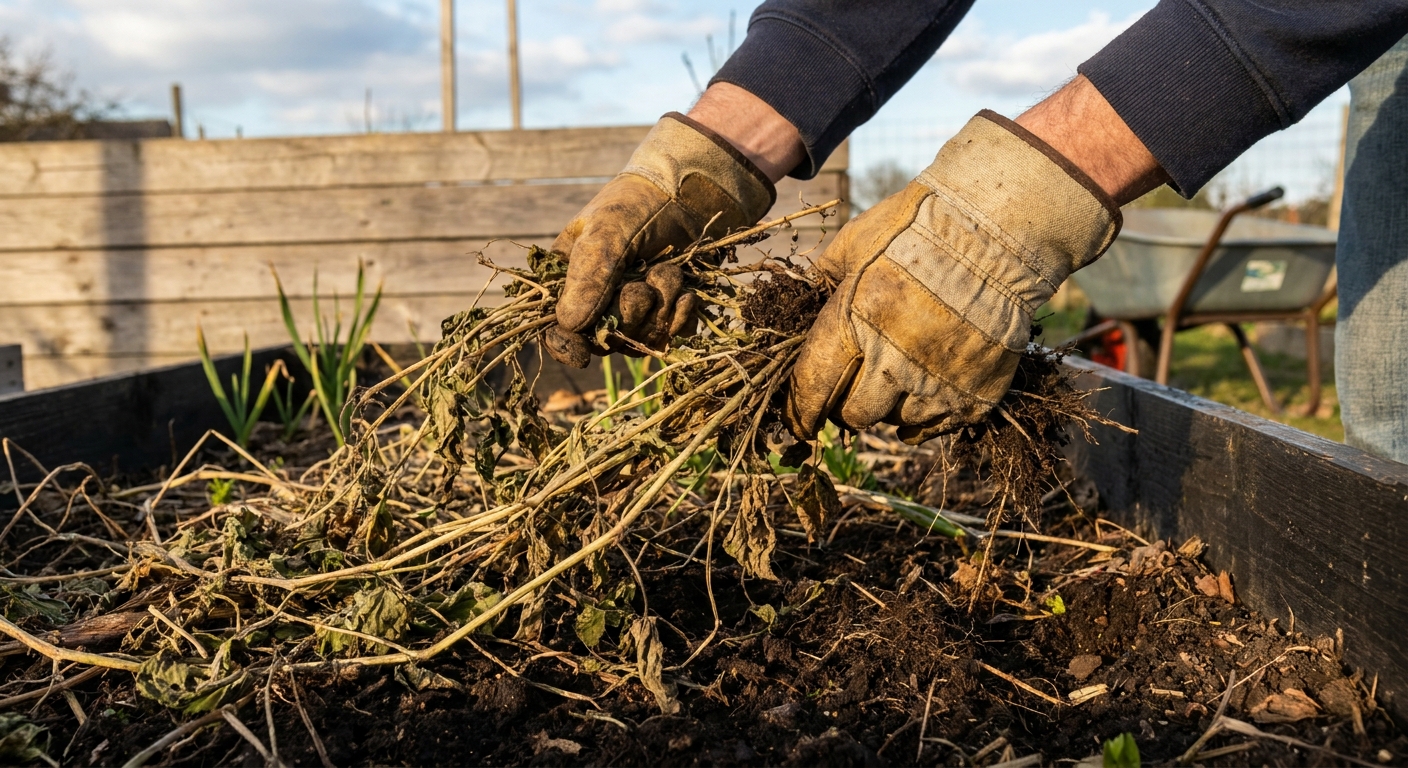
Cleanup that helps next year
This is the part most of us skip because we are tired and it is getting chilly, but it pays off. Adult moths often lay eggs in grassy, weedy areas and protected spots. Some species overwinter as larvae or pupae in the soil.
Fall and early spring habits
- Remove spent crops and weeds promptly, especially around the edges of beds.
- Compost thoughtfully. Hot composting is best for pest suppression. If you cold compost, keep it managed and away from seedling areas.
- Lightly cultivate the top inch or two in early spring to expose hiding larvae and pupae to birds and beneficial insects. Do not deep till if you can avoid it, because you want to protect soil structure and earthworm life.
- Clean up boards, pots, and dense debris piles near the vegetable garden where pests shelter.
Rescue plan
If you woke up to damage this morning, here is a quick plan that combines the most effective natural steps.
Scout immediately around damaged plants and hand-pick any cutworms you find.
Install collars on every vulnerable transplant in that bed, even the ones that look fine.
Pull mulch back from stems temporarily and remove nearby weeds.
Try the toothpick trick as a fast backup if you are short on collars or planting a big batch of starts.
Apply Bt at dusk to the soil line and low foliage if damage continues, and reapply as the label directs (especially after heavy rain).
Replant quickly so you do not lose weeks of growing time, especially for warm-season crops like tomatoes and peppers.
Most targeted veggies
Here at LeafyZen, we find these are the usual favorites on the cutworm menu.
- Tomatoes and peppers: collar every transplant in known problem beds.
- Broccoli, cabbage, kale, and cauliflower: collar plus early row cover can reduce moth egg-laying.
- Lettuce: protect starts, and keep the soil surface tidy because lettuce sits low and is easy access.
- Beans: direct-sown beans can be clipped. Scout rows early and re-sow thin spots right away.
- Squash and cucumbers: usually resilient once growing, but very young seedlings can be cut at the base.
When to worry
One or two cut seedlings does not mean your whole garden is doomed. Cutworms often hit in pockets, especially near weedy edges, freshly turned soil, or areas with lots of organic debris.
If you protect transplants for that first week, keep the soil line tidy, and do a few evening checks, you will usually break the cycle quickly. And if you lose a seedling or two, I promise it is not a black thumb. It is just nature reminding us to pay attention to the small, hidden things happening in the soil.