How to Divide and Transplant Bearded Irises
Bearded irises are the kind of perennial that make you feel like a garden wizard. One year they bloom politely, and a couple seasons later they are a crowded, leafy traffic jam with fewer flowers and more drama. The good news is that irises want to be divided. Done at the right time and planted at the right depth, they rebound quickly and often bloom better the next spring.
This is my favorite kind of garden task: practical, slightly messy, and deeply satisfying. Put on clothes you do not mind staining and let’s get your irises breathing again.

When to divide
The ideal time to divide most bearded irises is after they finish blooming, when they shift from flowering to rebuilding their rhizomes. In many gardens, that sweet spot is mid-summer through early fall, often:
- About 4 to 8 weeks after bloom
- Late spring through early fall, depending on your bloom time and climate
A quick climate reality check:
- Very cold regions: divide earlier in the window so divisions have time to root before hard frost.
- Very hot regions: late summer to early fall is often easier on the plants than peak heat, as long as you can keep them lightly watered while they re-root.
Why not spring? You can, but spring division often costs you that year’s flowers and can stress plants as they are trying to bloom. Post-bloom division gives them warm soil to regrow roots before winter.
Signs they are ready
- Fewer blooms than previous years
- A thick, crowded clump with lots of old rhizomes stacked together
- Dead or hollow rhizomes in the center of the clump
- Leaves flopping outward like a bad hair day
If your clump looks like it is trying to crawl out of the bed, it is time.
Tools and prep
Bearded irises can carry and spread bacterial soft rot and fungal leaf issues. A quick tool-cleaning habit is one of the easiest ways to avoid moving problems from one clump to the next.
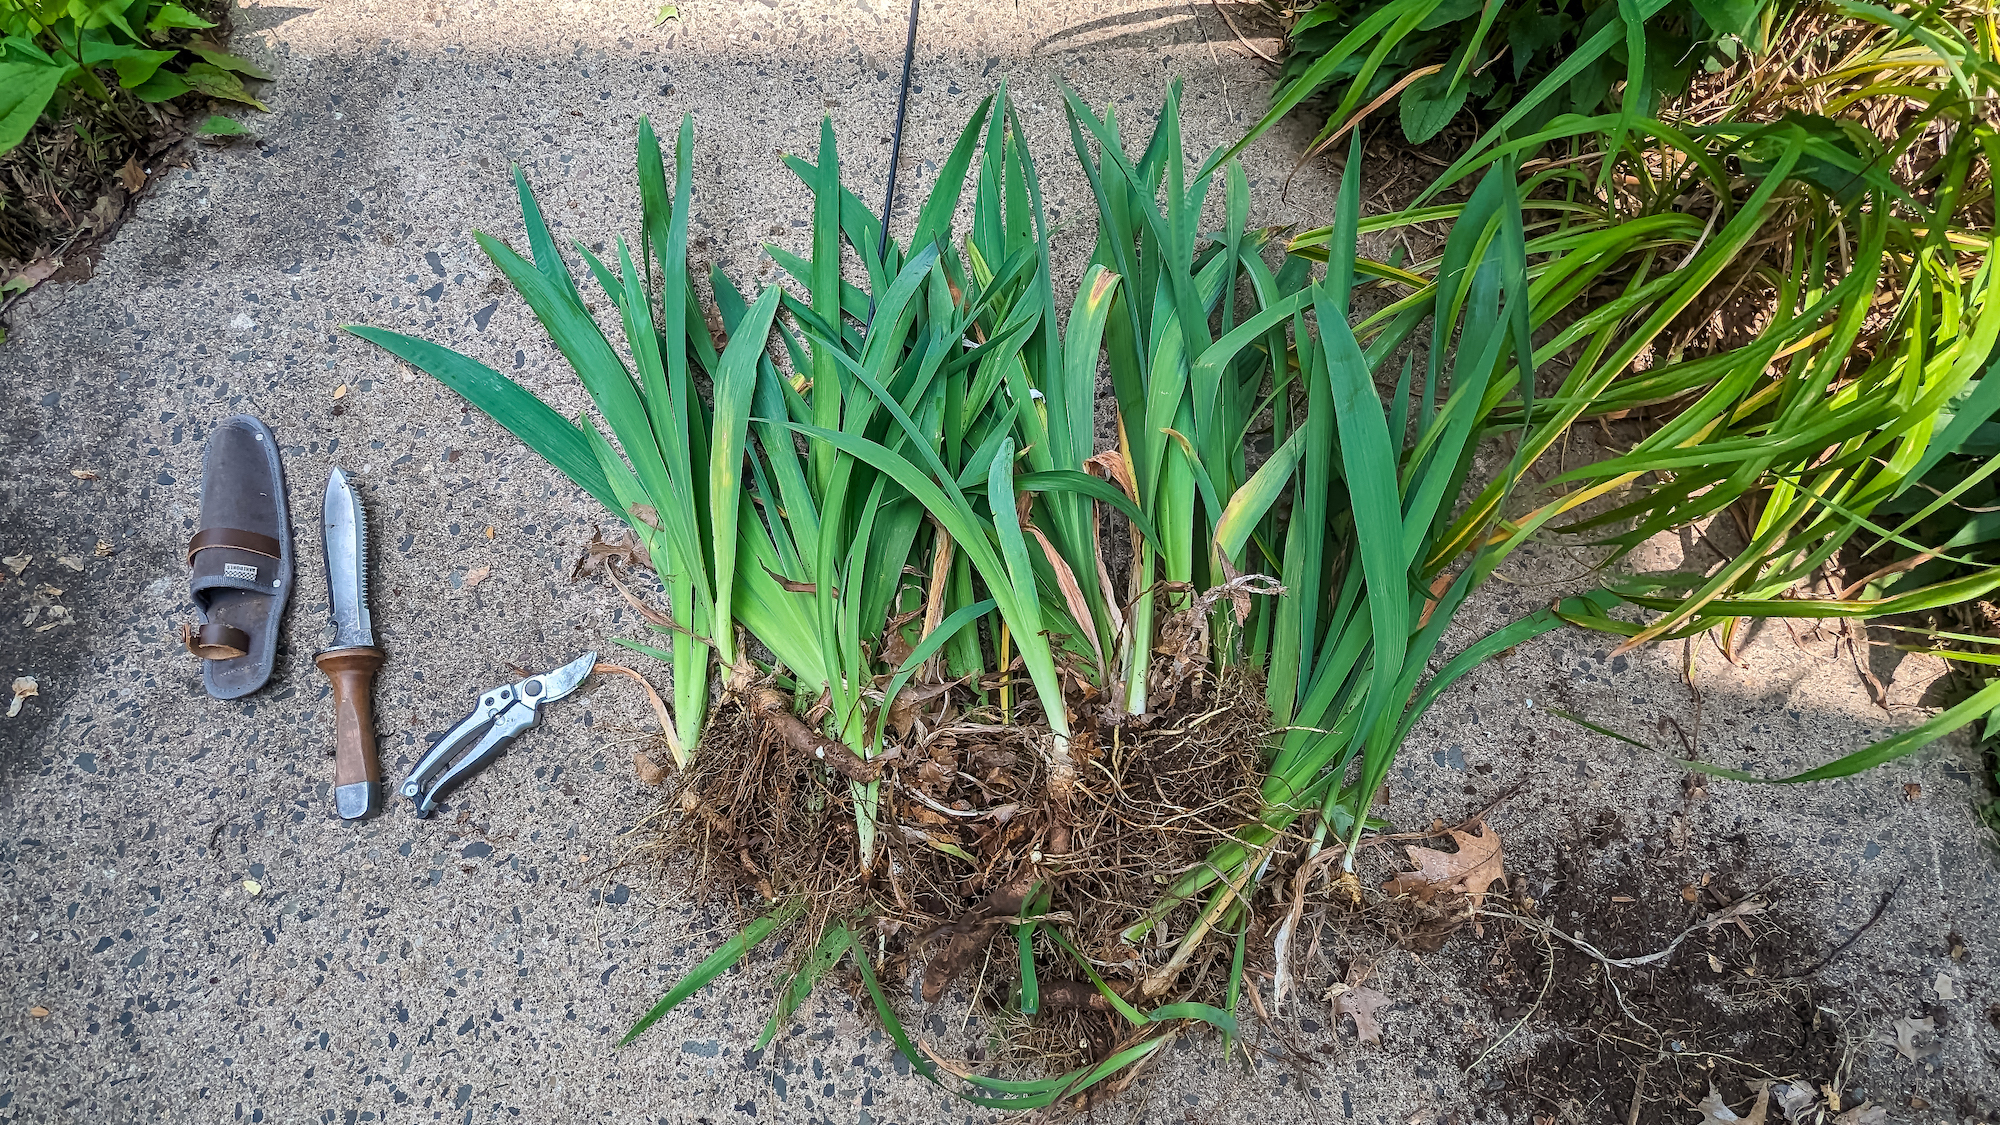
What you will need
- Garden fork or spade
- Sharp knife or pruners
- Bucket or hose for rinsing soil
- Disposable gloves (optional, but nice)
- Disinfectant for tools
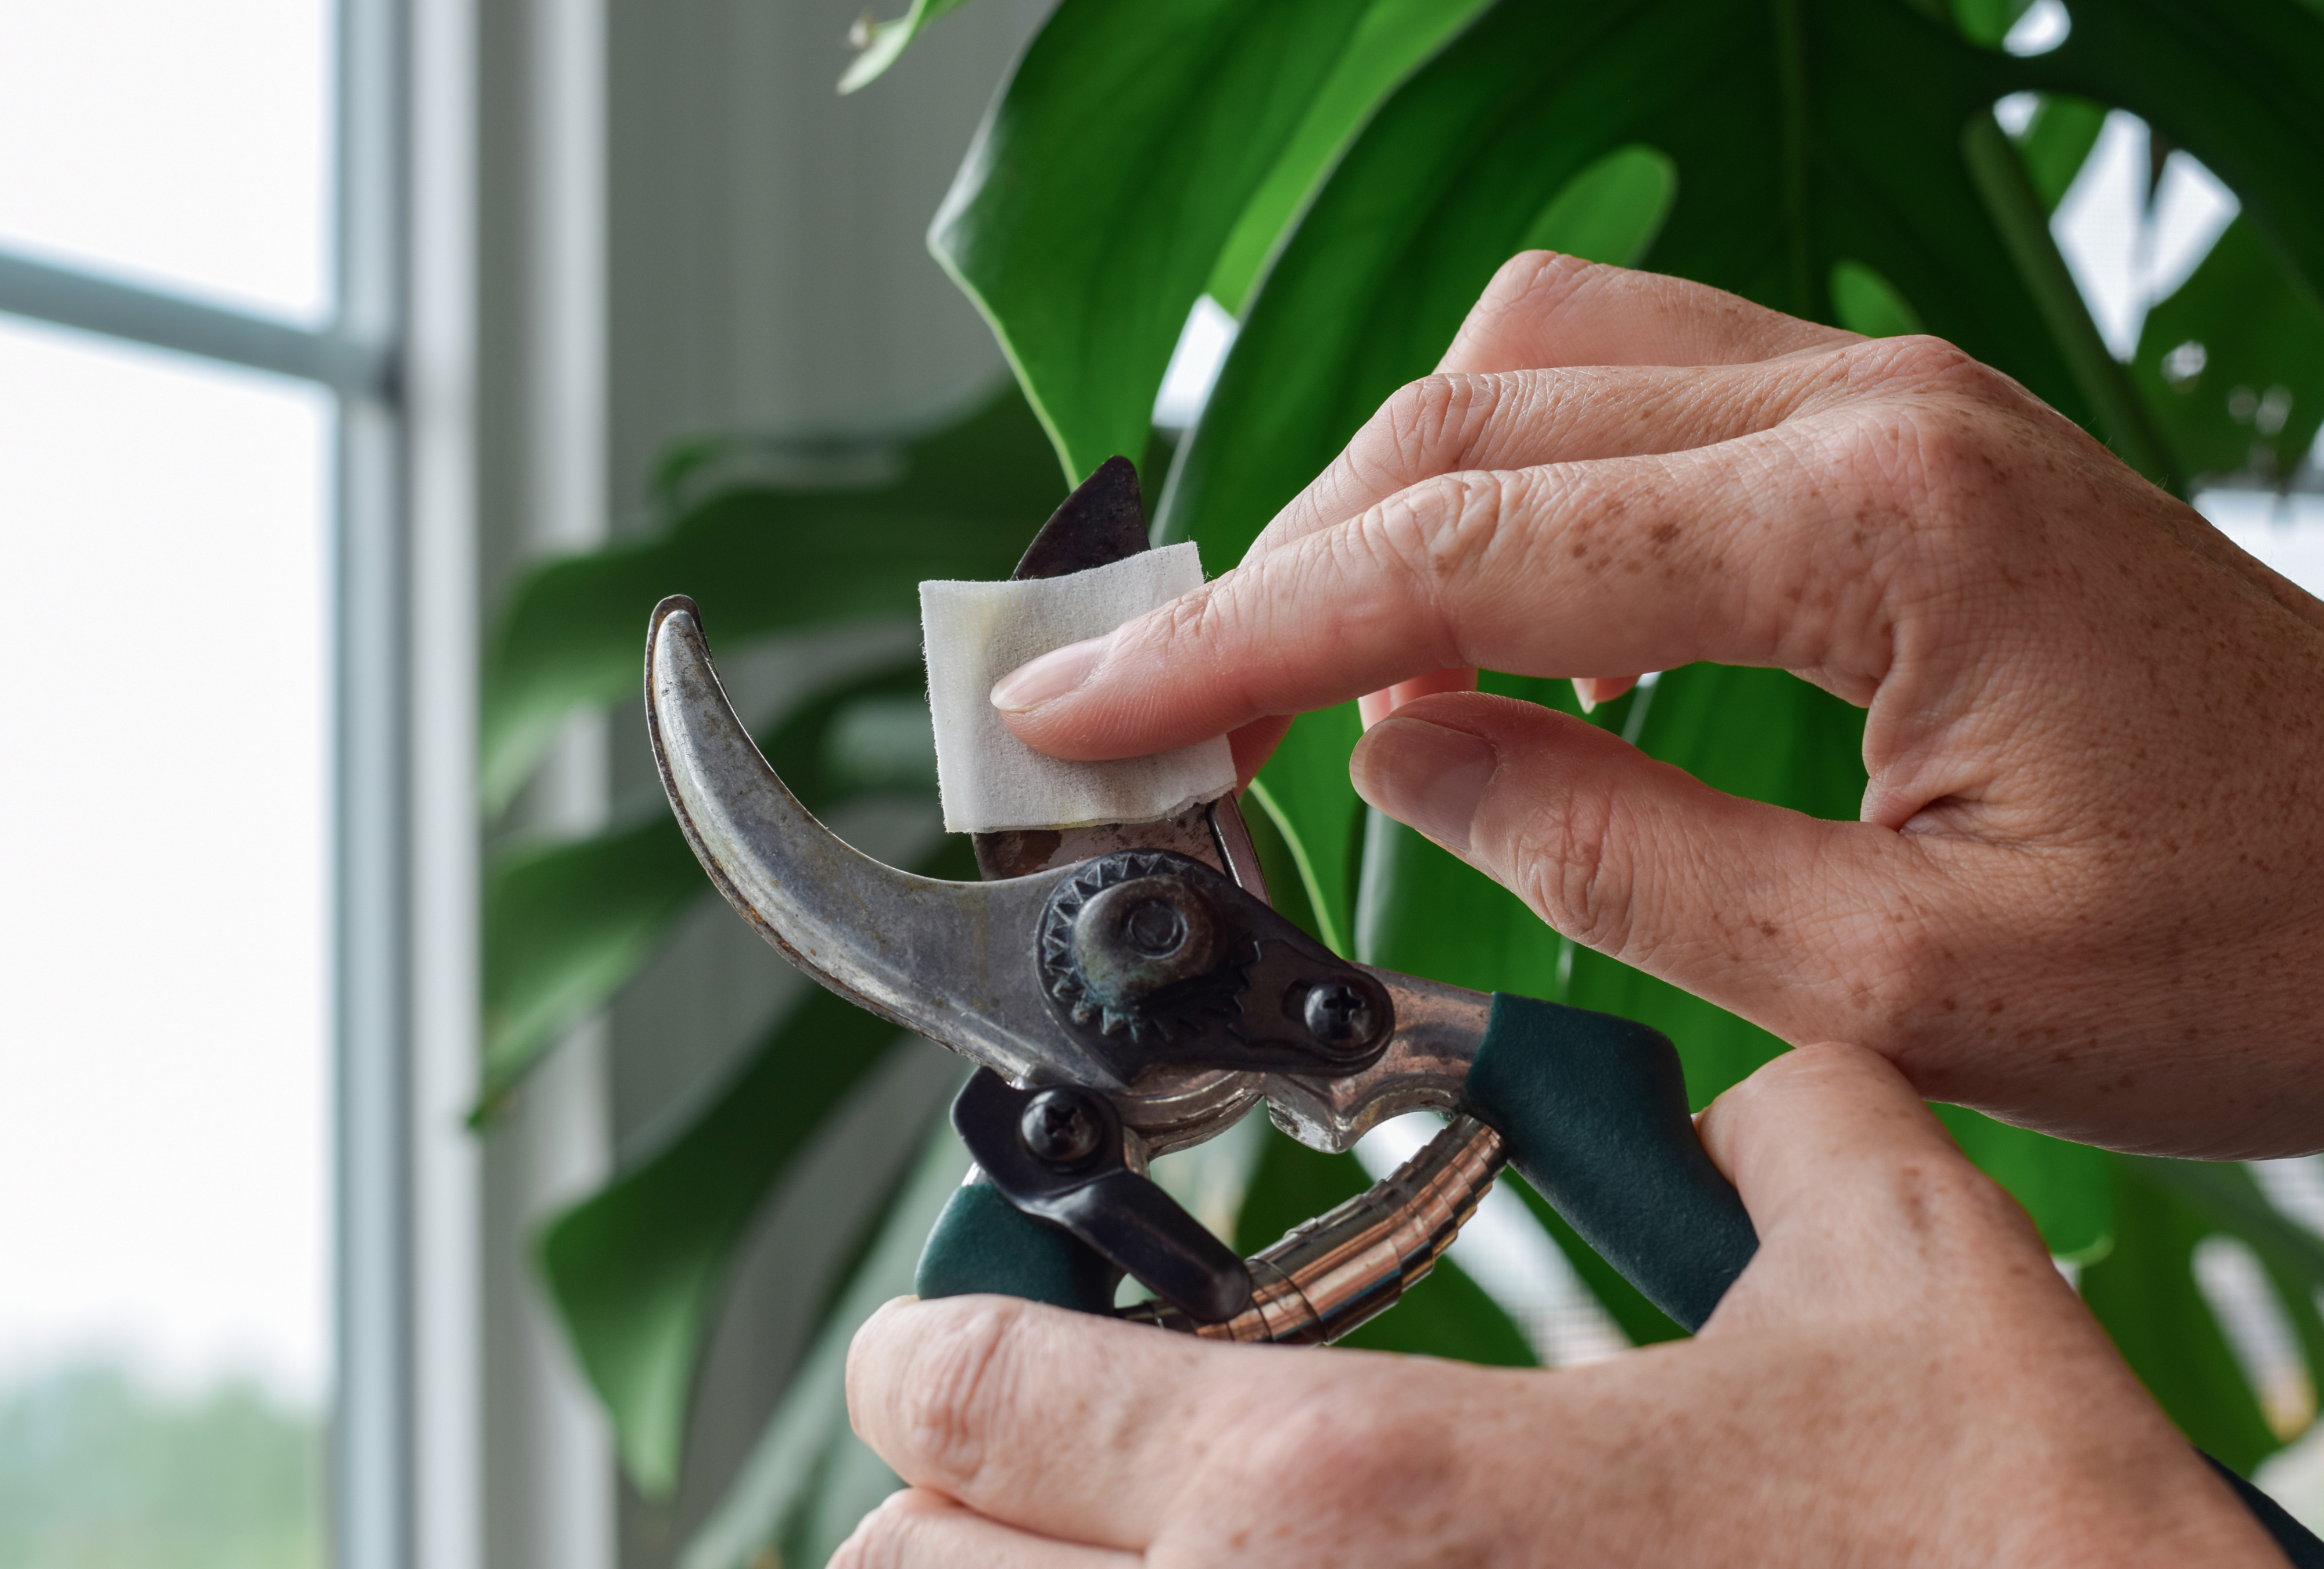
How to sanitize blades
Between clumps, wipe or dip blades in one of these options:
- 70% isopropyl alcohol (fast and easy, no rinse needed)
- Bleach solution (about 1 part household bleach to 9 parts water), with a brief wet contact, then rinse and dry to reduce corrosion
Also remove old leaf litter around the clump if you have had iris borer or significant leaf spot. If foliage is clearly diseased, bag it or trash it instead of composting. Clean starts matter.
Lift the clump
Start by trimming the leaves. This looks dramatic, but it reduces water loss and makes the clump easier to handle.
Step 1: Cut back the foliage
Trim leaves into a rough fan shape, leaving about 4 to 6 inches. I usually make a simple “V” point. No need for perfection.
Step 2: Dig wide and lift gently
- Insert your fork or spade several inches outside the clump edge (often 6 to 12 inches, depending on clump size).
- Work around the clump, loosening from multiple sides.
- Lift and slide the clump out, keeping as many roots intact as possible.
Shake off loose soil. Then rinse so you can actually see what you are doing.
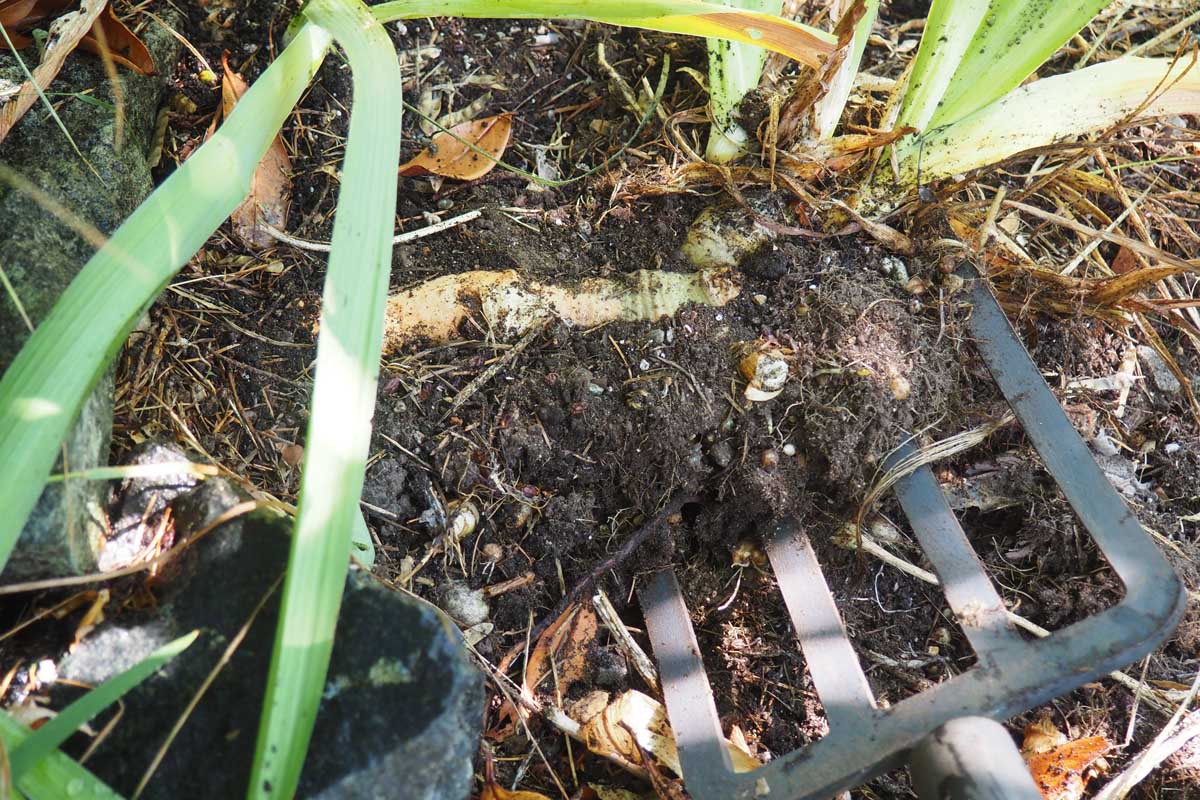
Divide the rhizomes
An iris rhizome is a thick, horizontal stem. The “eyes” are the growth points that form new fans of leaves and future flower stalks.
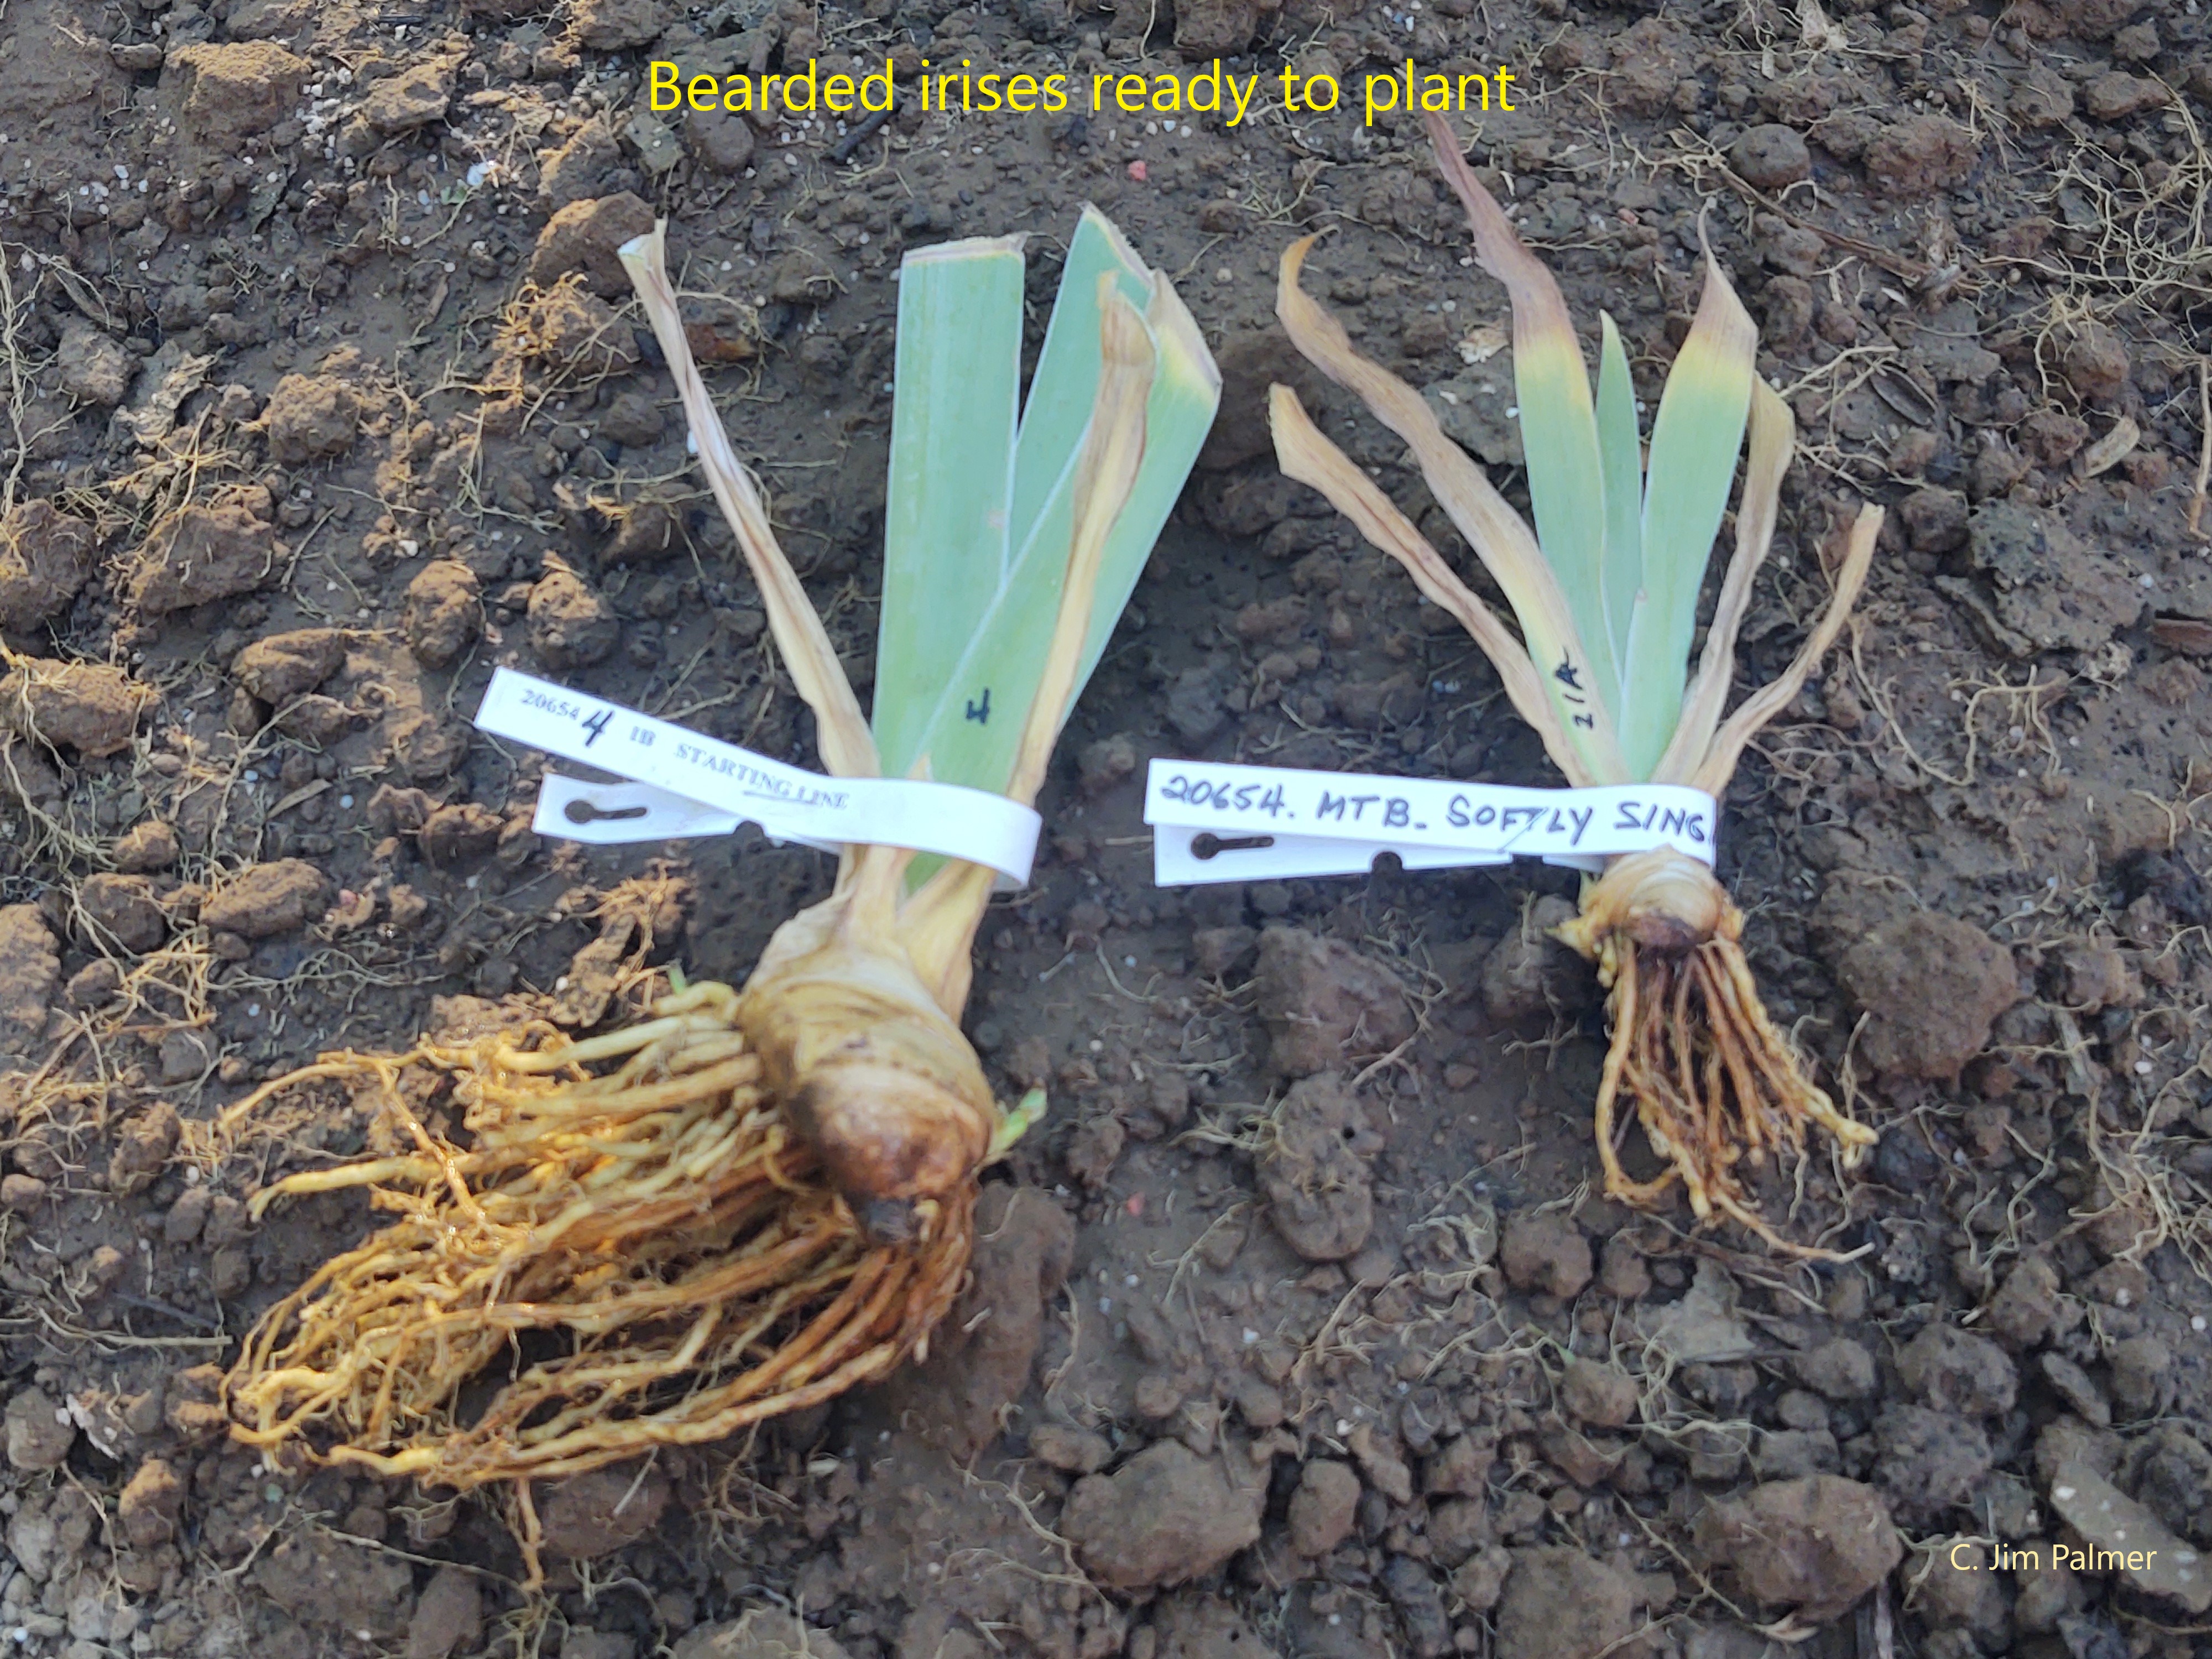
What to keep
A good division usually includes:
- One firm, healthy section (plump, not mushy)
- At least one strong fan of leaves
- Visible eyes (small bumps or pointed growth nodes)
- Healthy roots, if possible
What to toss
- Pieces that are soft, smelly, or oozing
- Old, woody, hollow centers that are clearly spent
- Anything with obvious borer tunnels or severe damage
Snap vs cut
You can often snap sections apart by hand right at the narrow “neck” between segments. If it does not snap cleanly, use a sanitized knife to cut.
After dividing, let the pieces sit in the shade, out of direct sun, for an hour or two, or until cut surfaces are dry to the touch. This simple step can lower the risk of rot after planting.

Replanting depth
If you remember one thing from this whole page, let it be this: bearded iris rhizomes should not be buried deeply. They are sun-lovers, and deep planting is a common cause of rot and poor bloom.
Site basics
- Full sun is best for strong bloom.
- Good drainage is non-negotiable. If water sits after a rain, consider a raised bed or amended soil.
How deep to plant
- In most soils, set the rhizome so the top is at soil level or slightly exposed.
- Roots go down into a shallow hole, with the rhizome sitting like a little boat at the surface.
- In very hot climates, a light dusting of soil over the top can prevent sunscald, but avoid burying it.
How to position the fan
Point the leaf fan outward in the direction you want the clump to grow. If you are planting multiple divisions, point fans away from each other so they expand without instantly colliding.
Spacing
Irises like a little personal space. Crowding holds moisture around leaves and rhizomes, which can encourage rot and leaf spot.
How far apart to plant
- 12 to 18 inches apart for most tall bearded irises
- 8 to 12 inches apart for smaller varieties
If you are working with a humid climate or you have had disease issues, err on the wider side. Airflow is free medicine.
Watering and aftercare
Fresh divisions need moisture to regrow roots, but soggy soil is their enemy, especially in heavy or poorly drained beds.
Right after planting
- Water thoroughly once to settle the soil around the roots.
- Make sure the rhizome top is still at soil level after watering.
Ongoing watering (first 4 to 6 weeks)
- Water when the top couple inches of soil are dry.
- Avoid frequent light sprinkling. Instead, water deeply and then let the surface dry.
Watch for loosening
Newly set divisions can wiggle loose or even heave a bit as roots establish and weather shifts. If you notice a rhizome lifting, press it gently back into place and firm the soil around the roots, keeping the top exposed.
Mulch or no mulch?
I use mulch sparingly around bearded irises. If you mulch heavily over the rhizomes, you trap moisture. If you want weed control, keep mulch a few inches away from the rhizome tops.
Fertilizer
If your soil is reasonably healthy, you can skip fertilizer at planting time. If you do feed, choose a balanced or lower-nitrogen option and apply lightly. Too much nitrogen can mean lots of leaves and fewer flowers.
Bloom expectations
Many divisions bloom the next spring, but smaller pieces or late-season planting can mean a lighter show, or a year of settling in before they hit their stride again.
Common mistakes
1) Planting too deep
Symptom: no blooms, mushy rhizomes, slow growth.
Fix: lift and reset so the rhizome top is at soil level, then improve drainage if needed.
2) Keeping weak divisions
Symptom: tiny fans that sulk for a year or more.
Fix: re-divide and keep the strongest pieces with clear eyes and firm tissue.
3) Skipping sanitation
Symptom: rot spreads through multiple clumps after dividing.
Fix: disinfect tools between clumps and discard infected pieces instead of composting them.
4) Overwatering
Symptom: rhizomes soften and smell unpleasant.
Fix: water less often, increase sun exposure if possible, and amend heavy soil to drain better.
Quick checklist
- Divide after bloom, usually mid-summer to early fall (adjust earlier for cold climates).
- Sanitize blades between clumps.
- Keep firm rhizomes with healthy eyes and strong fans.
- Replant shallow with rhizome tops at soil level.
- Choose a sunny spot with good drainage.
- Space divisions for airflow, generally 12 to 18 inches.
- Water to establish, then let the surface dry between soakings.
If you do this once every few years, your irises will reward you with those big, velvety blooms that stop you mid-walk. And if a division flops or fails, do not take it personally. Gardening is just a long conversation with your plants, and sometimes they ask you to try again.