Growing Dahlias in Containers
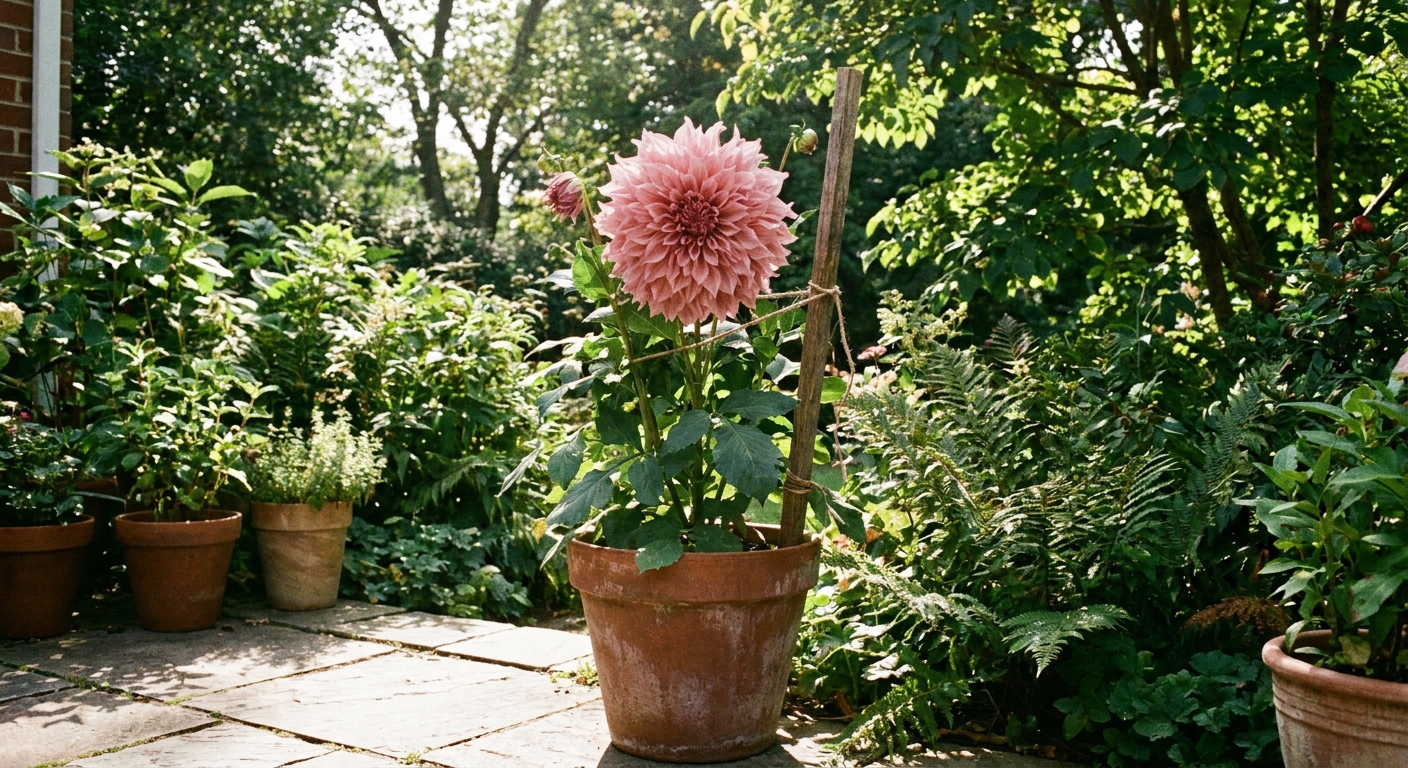
Dahlias in containers are my favorite kind of “small space luxury.” You get those big, dramatic blooms without committing a whole garden bed, and you can scoot pots into better light or out of harsh wind. The secret is to treat a pot like a tiny, high-performance garden bed: plenty of root room, a mix that drains fast but holds moisture, and support from day one.
One more truth up front: dahlias bloom best in full sun. Aim for 6 to 8+ hours a day if you can.

When to plant
Plant tubers outdoors after the danger of frost has passed and nights are reliably mild. If your spring is long and cold, you can start dahlias in pots in a sheltered spot (or indoors with bright light) and move them outside once weather settles. Dahlias hate freezing temperatures, and cold, wet mix is the fastest path to rot.
Best types for pots
Almost any dahlia can be grown in a container with a big enough pot, but some are simply easier to live with on patios and balconies. Look for compact habits, shorter stems, and labels like dwarf, bedding, or border. Many “gallery” style dahlias are also naturally container-friendly and bloom like they mean it.
If you want dinnerplate blooms in a pot, you can absolutely do it. Just plan for a bigger container, sturdier support, and more frequent watering.
Pick the right container
Dahlias can live in pots, but they do not want to feel cramped. Container-grown plants dry out faster and work harder to support heavy blooming, so root space matters more than you might think.
Recommended size by type
These are typical guidelines. Vigor varies by cultivar, so if you are choosing between “fine” and “generous,” go generous.
- Dwarf and bedding dahlias: 12 to 14 inches wide, at least 12 inches deep (about 5 to 7 gallons).
- Border and smaller decorative types: 14 to 18 inches wide, 14 to 16 inches deep (about 7 to 10 gallons).
- Tall, large-flowered, dinnerplate types: 18 to 24 inches wide, 16 to 20 inches deep (about 10 to 20+ gallons).
A larger volume of mix buffers temperature swings and buys you more time between waterings.
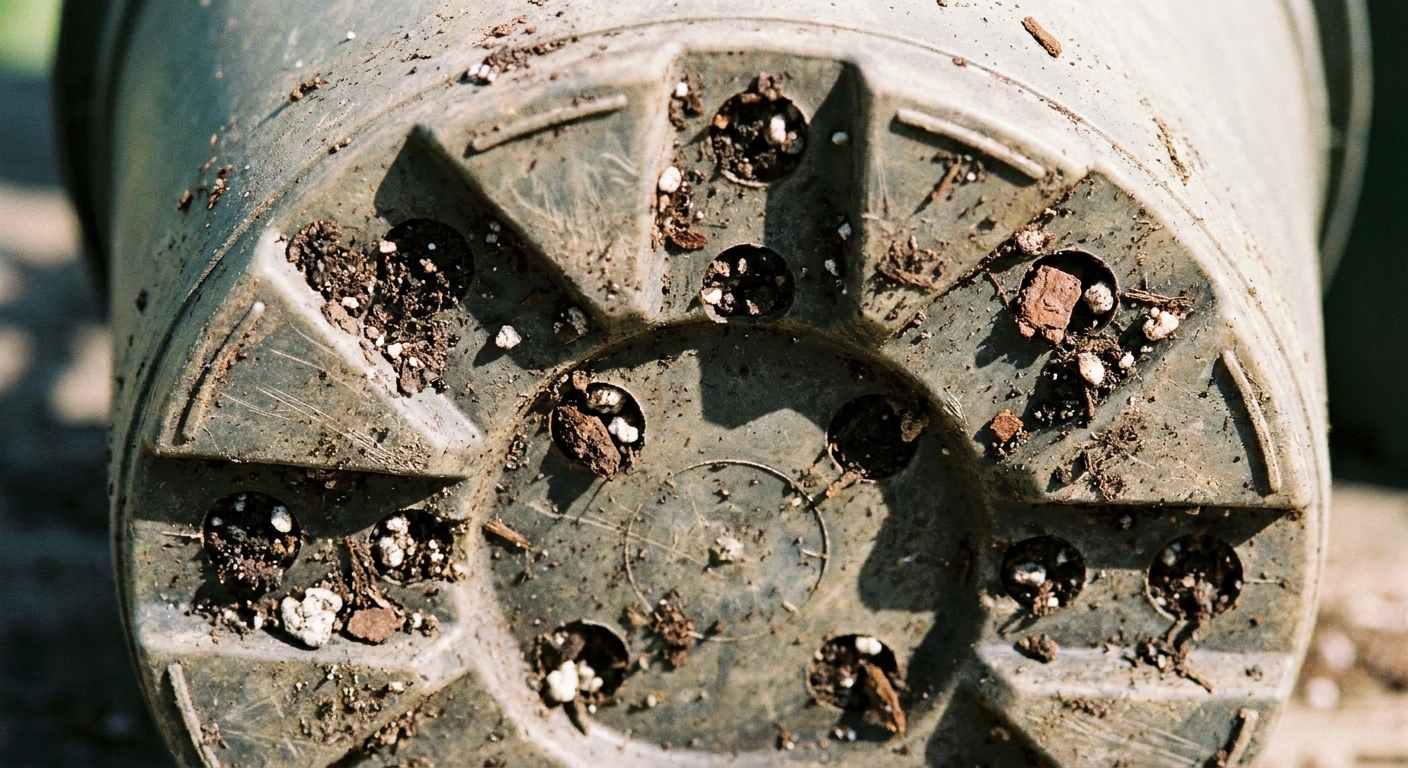
Drainage matters
Your container must have drainage holes. Not one tiny hole. Several, ideally a pattern of holes across the bottom. If you love a pot that has no hole, use it as a cachepot: keep your dahlia in a nursery pot with holes, then set it inside.
Potting mix
Garden soil is too heavy for containers and can suffocate dahlia tubers. You want a mix that drains quickly yet stays evenly moist after a deep soak.
A simple, reliable mix
For one large pot, aim for a blend like this:
- 60% high-quality potting mix (peat-free if you can find it, for sustainability)
- 20% compost for biology and steady nutrition
- 20% drainage booster such as perlite, pumice, or pine bark fines
If your summers are extremely hot and windy, swap a little of the drainage booster for coconut coir to hold moisture. If your summers are humid or you tend to overwater, keep the mix extra airy with more perlite or pumice.
Do you need gravel at the bottom?
No. A “drainage layer” of rocks does not improve drainage in containers. It usually reduces usable root volume, and the perched water in the potting mix still behaves like perched water. Use a well-draining mix and enough holes instead.
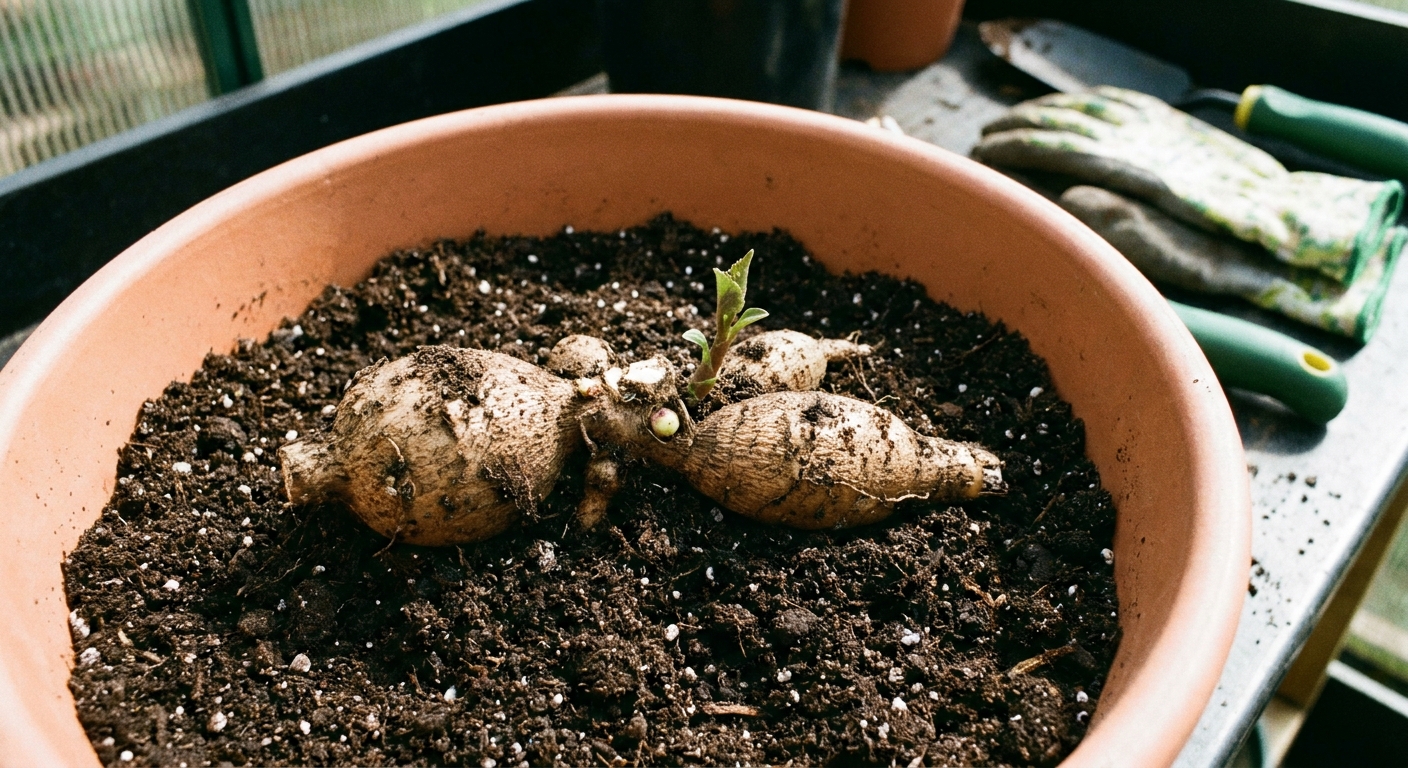
Planting tubers in a pot
Planting in containers is similar to in-ground planting, with two important differences: you must control moisture more carefully, and you should install support early so you do not skewer a tuber later.
Step by step
- Pre-moisten your mix so it is lightly damp, not soggy.
- Fill the pot about two-thirds full.
- Set the tuber horizontally with the eye or sprout facing up. The eye is usually at the crown, where the tuber meets the old stem stub. If you cannot find it, place the tuber so the crown is slightly higher and let the plant sort it out.
- Cover with about 2 to 4 inches of mix. You are aiming for a depth that keeps the tuber from drying out, but also does not leave it sitting in cold, wet mix early on. (In containers, that early wetness is the bigger risk.)
- Add your stake now (details below).
- Water gently to settle the mix.
Important container difference: Dahlia tubers can rot if kept wet before they have roots, but they can also shrivel if the pot dries bone-dry in warm weather. After the first settling-in water, keep the mix barely moist, not soggy, until sprouts are a few inches tall.
Watering rhythm
Once your dahlia is actively growing, think “deep soak, then let it breathe.” Frequent little splashes encourage shallow roots and floppy plants.
When to water
- Stick your finger 2 inches into the mix. If it is dry at that depth, water.
- Lift the pot slightly. A light pot is a thirsty pot.
- In peak summer, expect watering every 1 to 3 days for large plants in full sun, depending on heat and wind.
How to water deeply
Water slowly until you see a steady stream running out of the drainage holes, then stop. If water immediately pours out the bottom, your mix may be too dry and hydrophobic. Pause for a minute, then water again to fully re-wet the root zone.
Heat tip
If your pot is in blazing afternoon sun, consider a light-colored container, a pot wrap, or placing the pot inside a slightly larger outer pot to reduce root-zone heat stress. Hot roots can mean fewer blooms.
Feeding
Container dahlias burn through nutrients faster than in-ground plants because water flows through the pot and carries nutrients with it. The goal is consistent feeding without overdoing nitrogen, and without over-applying phosphorus.
A simple schedule
- At planting: Mix in a slow-release fertilizer labeled for flowers, following package rates. Avoid heavy “lawn” style nitrogen.
- When growth is 6 to 8 inches tall: Begin a liquid feed every 10 to 14 days.
- Once buds form: Use a bloom-leaning fertilizer (lower nitrogen). Many “bloom booster” products are very high in phosphorus, so follow label rates and do not assume more is better.
Container-specific note: Every 4 to 6 weeks, give the pot a clear-water flush. Water thoroughly with plain water to help rinse excess salts, especially if you fertilize frequently.
Staking
This is where container-grown dahlias differ a lot from in-ground ones. In the garden, a plant can anchor itself over a wide area. In a pot, the whole root ball can shift in wind, and tall stems can act like sails.
Best support options
- One sturdy stake: For smaller varieties. Use bamboo or fiberglass, and sink it to the bottom of the pot.
- Tomato cage: Works beautifully for bushier dahlias, especially if you set it in the pot at planting time.
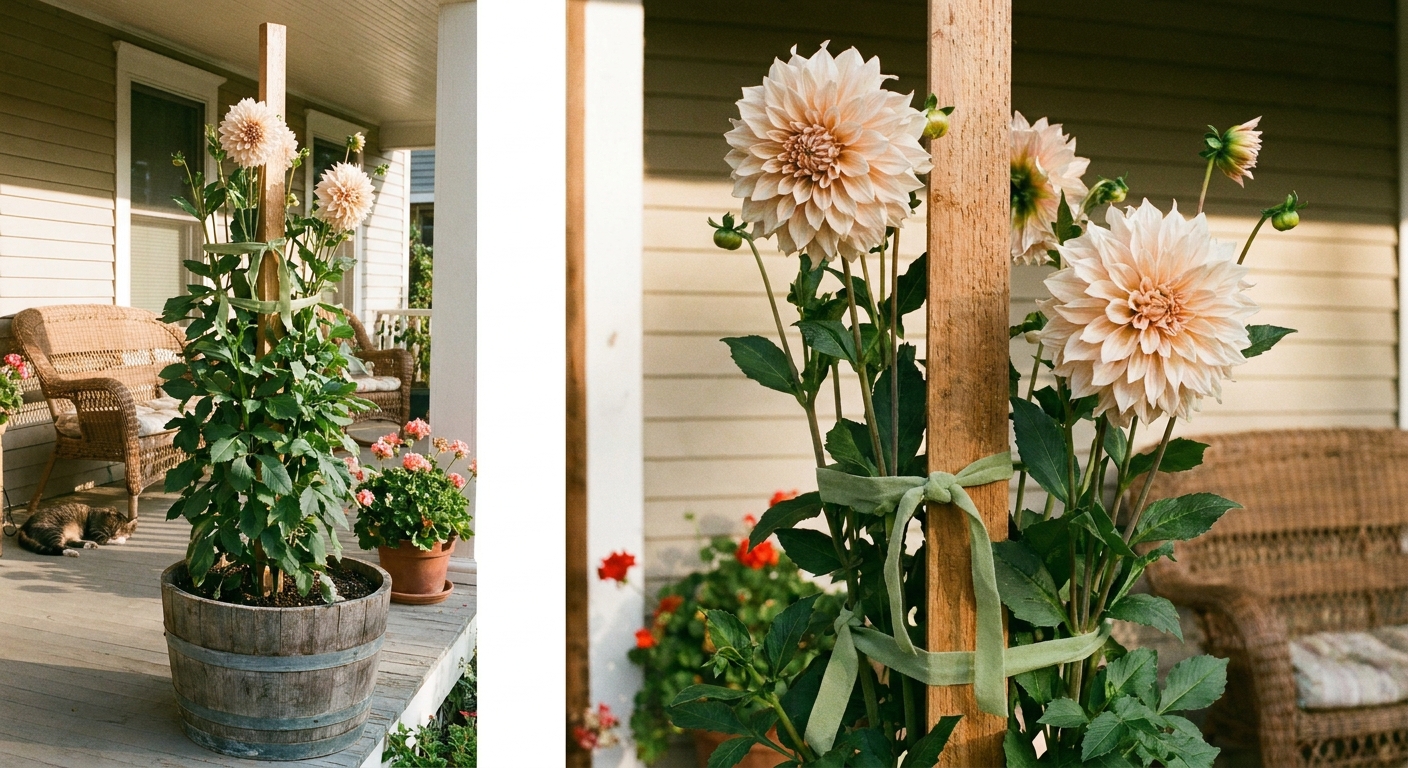
- Three-stake corral: For tall varieties. Place three stakes near the pot edge and tie twine around the outside as the plant grows.
How to tie
Use soft plant ties, cloth strips, or stretchy horticultural tape. Tie in a loose figure-eight: one loop around the stake, one around the stem, with a little room for growth. Check ties every couple of weeks.
Pinching and deadheading
If you want a pot absolutely covered in flowers, give it a little guidance.
Pinch once
When the plant is 12 to 16 inches tall, pinch out the top growth just above a set of leaves. This encourages branching and more flowering stems. Dwarf varieties may not need pinching, but most medium and tall dahlias respond beautifully.
Deadhead often
Remove spent flowers promptly by cutting back to the next set of leaves or a strong side shoot. This keeps the plant from putting energy into seed production.
Common problems
Lots of leaves, few flowers
- Likely causes: Too much nitrogen, too much shade, or not enough pinching.
- Fix: Move to 6 to 8 hours of sun, switch to a lower-nitrogen feed, pinch early next season.
Wilting in afternoon heat
- Likely causes: Pot drying too fast or roots overheating.
- Fix: Deep water in the morning, increase pot size next time, add a light mulch layer (straw or fine bark) on top of the potting mix.
Rotting tuber or collapsing shoots
- Likely causes: Mix staying too wet before the plant is rooted, poor drainage, or a pot with no holes.
- Fix: Keep early moisture light but consistent, use a lighter mix, ensure multiple drainage holes.
Pests and mildew
Containers do not magically prevent pests, but they do make monitoring easier because everything is right in front of you.
- Slugs and earwigs: Common on tender new growth. Hand-pick at dusk, keep the area around pots tidy, and consider traps if they are relentless.
- Aphids and spider mites: Blast off with a strong spray of water, especially on leaf undersides. If needed, use insecticidal soap according to label directions and avoid spraying in hot sun.
- Powdery mildew (late season): Improve airflow, avoid wetting foliage at night, and do not crowd pots. If it shows up, remove the worst leaves and consider an appropriate labeled treatment.
Fall care and storage
Here is the beautiful perk of container dahlias: lifting is cleaner, easier, and you are less likely to lose tubers to a shovel slice. The overall storage process is similar to in-ground, but the timing and handling are a bit different.
When to stop watering
As nights cool and the plant slows down, begin spacing out watering. After the first light frost blackens the foliage, stop regular watering. Let the potting mix dry down a bit so the tubers are not sitting in cold, wet soil.
After frost
Option A: Lift the clump (best for cold climates)
- Wait 2 to 7 days after frost so the plant fully dies back.
- Cut stems down to 2 to 4 inches.
- Tip the pot on its side and gently slide out the root ball.
- Brush off loose mix. You can lightly rinse, but only if you can dry thoroughly afterward.
- Let the clump cure in a dry, airy spot out of sun for 2 to 5 days.
- Label the variety now, while you still remember.
Option B: Overwinter the whole pot (only if it stays above freezing)
If you have an unheated garage, basement, or shed that stays cool but not freezing (roughly 35 to 50°F), you can often leave tubers right in their container. Cut back foliage, keep the pot mostly dry, and check monthly for rodents and rot. If your basement runs warmer, it can still work if the pot stays dry and dormant, but inspect more often for premature sprouting.
How to store lifted tubers
Store cured tubers in breathable containers like cardboard boxes, paper bags, or plastic totes with ventilation holes. Nestle them in a lightly dry packing material:
- Wood shavings (untreated)
- Dry coconut coir
- Vermiculite
- Shredded paper
Aim for cool temperatures and moderate humidity. Too dry and tubers shrivel. Too damp and they rot.
Monthly winter check
- If tubers look wrinkled, mist the packing material very lightly.
- If you see soft spots or mold, remove the affected tuber and improve airflow.
Quick checklist
- Sun: 6 to 8+ hours
- Pot: 5 to 20+ gallons with multiple drainage holes
- Mix: Potting mix plus compost plus perlite or pumice for airflow
- Water: Barely moist until sprouting, then deep soaks when the top few inches dry
- Feed: Slow-release plus liquid feed after active growth starts, avoid excess nitrogen and do not overdo phosphorus
- Support: Stake or cage at planting time
- Fall: After frost, dry down, lift and cure, then store cool and airy (or overwinter the pot if it never freezes)
If you try container dahlias once, you will start eyeing every sunny corner like it is a potential bloom party. And if something goes sideways, please do not call it a black thumb. It is just gardening, and gardening is a conversation. The plants always answer when we pay attention.