Gladiolus: Planting, Staking, and Lifting Corms
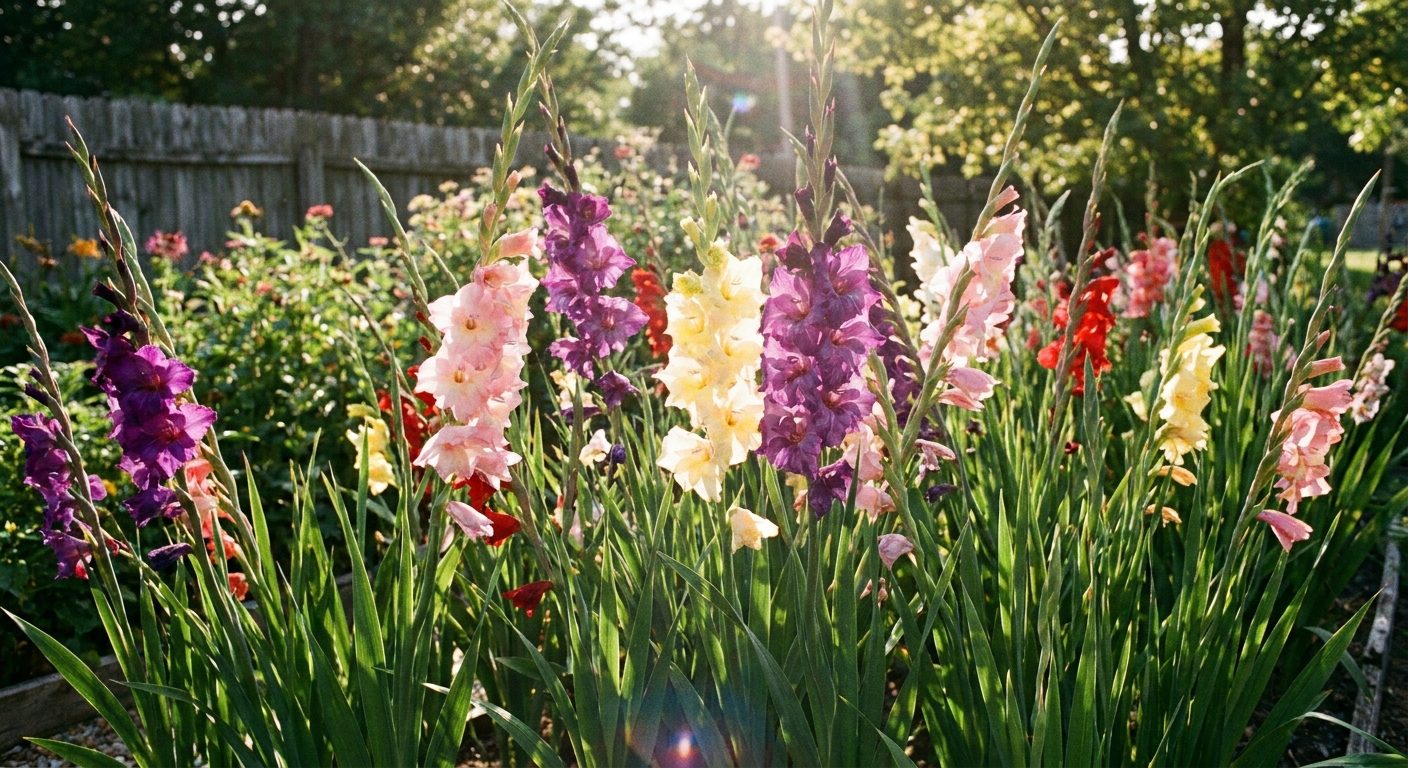
Gladiolus is the flower I plant when I need an instant mood lift. One day you have neat little sword leaves, and then suddenly you get these tall, candy-colored spikes that look like they belong in a florist cooler. The secret is not fancy gear. It is timing, a little planning for wind, and giving those corms a clean, dry place to sleep through winter.

Below you will find exactly how deep to plant, how far apart to space, how to succession plant for weeks of blooms, how to stake before storms turn your bouquet into a flop, and when to dig corms in fall so they store firm and healthy.
Quick basics: corms, not bulbs
Gladiolus grows from a corm, which is a solid, swollen stem base that stores energy. Every season, the plant uses last year’s corm, then forms a new corm on top of it plus a handful of small “cormels” around the base.
- Old corm: last year’s energy bank, usually flatter and more wrinkly after flowering.
- New corm: the plumper one you want to save for next season.
- Cormels: tiny baby corms that can be grown on, usually taking 1 to 2+ years to bloom.
Where gladiolus grows best
Sun and airflow
Give gladiolus full sun for strong stems and best color. A little afternoon shade is fine in very hot climates, but too much shade equals weak, floppy growth. Good airflow helps prevent leaf diseases like rust.
Soil that drains well
Glads love evenly moist soil, but they hate sitting in water. If you have heavy clay, consider a raised bed or amend generously with finished compost. For container growing, choose a potting mix that drains fast and use a deep container.
Overwintering note
In many warm-winter areas (often USDA zones 8 and up), gladiolus can overwinter in the ground, especially with a little mulch. In colder zones, plan to lift and store corms before winter.
Bed placement for cut flowers
If you plan to cut a lot, plant in a dedicated cutting patch where you will not mind “holes” in the border after harvest. I tuck mine behind shorter plants so the leaves are hidden a bit, but the blooms still rise like fireworks.
When to plant gladiolus
Plant gladiolus corms in spring after your last frost, when the soil has warmed a bit. In many gardens, that is when you are comfortable planting beans. Cold, soggy soil is the quickest route to rot.
- Cool climates: start planting a week or two after the last frost date, then continue with succession plantings.
- Mild winter climates: you can often plant earlier, but avoid long stretches of cold rain.
- Very hot summers: earlier planting can help blooms happen before peak heat, and light afternoon shade can protect color.
How deep and how far apart
Planting depth
A reliable range is to plant gladiolus corms about 3 to 6 inches deep, depending on corm size, soil, and how tall the variety gets. In average garden soil, 3 to 4 inches is often perfect. Going a bit deeper helps tall varieties stay upright and keeps roots cool and steady.
- Small corms: 3 to 4 inches deep
- Large corms: 4 to 6 inches deep
- Very sandy soil: lean deeper so they do not dry out too fast
- Heavy soil: stay closer to 3 to 4 inches and focus on drainage
Spacing
Space corms about 6 inches apart for sturdy plants and good airflow. If you are planting a dense cutting row, you can go a little tighter, but expect to stake more and watch for disease if humidity is high.
- Garden beds: 6 to 8 inches apart
- Cutting rows: 4 to 6 inches apart in a straight line for easy support
- Containers: 4 to 6 inches apart in a deep pot, with consistent watering
Container quick specs
- Minimum pot depth: 10 to 12 inches (deeper is better for tall varieties)
- How many per pot: about 5 to 7 corms in a 14-inch pot, or 8 to 12 corms in a 20-inch pot (space them 4 to 6 inches apart)
- Stability tip: use a heavier pot or add weight at the bottom, because glads get top-heavy fast
Step-by-step planting
- Choose firm corms. They should feel solid, not squishy or hollow. Papery husks are normal.
- Prep the bed. Loosen soil 8 to 10 inches deep if you can. Mix in compost. If drainage is slow, mound the row slightly.
- Dig a trench. I like a trench for a whole row because it makes depth consistent and staking easier later.
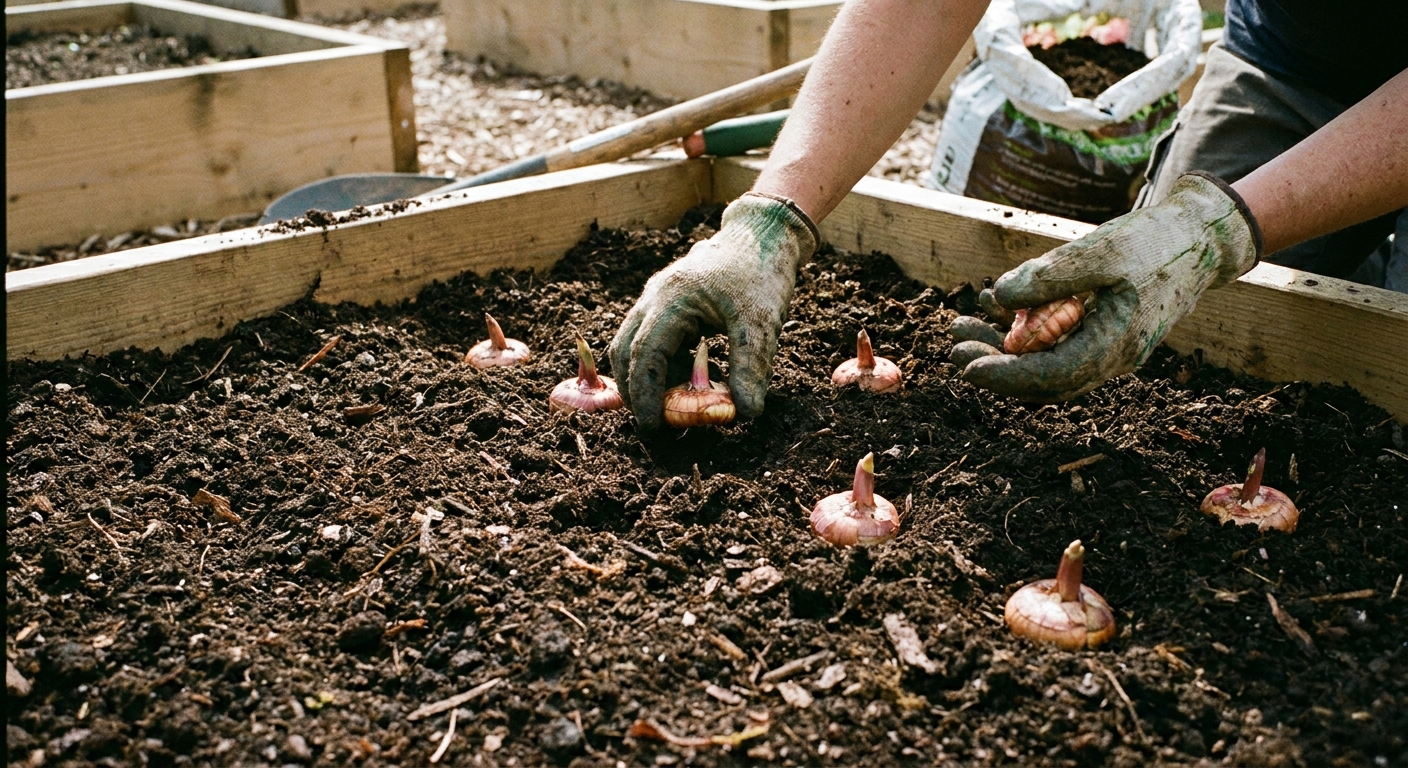
- Place corms pointy side up. If you cannot tell, set it on its side. It will figure it out.
- Backfill and water to settle. Water enough to settle soil. Until shoots appear, keep soil lightly moist, not soaked. After emergence, water more consistently, especially as the spike forms.
- Mulch lightly. A thin layer helps keep moisture steady and reduces weeds, but do not bury the area in thick, soggy mulch early in the season.
Succession planting
If you plant all your gladiolus at once, you get a glorious burst and then it is over. If you succession plant, you can keep spikes coming like a little parade.
Simple schedule
Plant a new batch every 10 to 14 days for 6 to 8 weeks. Gladiolus typically blooms about 70 to 100 days after planting (depending on variety and weather), which is why this spacing stretches your bloom season so nicely.
- Batch 1: right after last frost
- Batch 2: 2 weeks later
- Batch 3: 2 weeks later
- Keep going: until mid-summer in most climates
Color planning tip
For a garden that looks designed (even if it is delightfully not), plant each batch with a loose theme. One batch in warm sunset tones, one in creams and blush, one in purple and near-black, and suddenly your cutting bucket looks like you know what you are doing.
Water and feeding
Water
Gladiolus wants consistent moisture, especially as the flower spike forms. Aim for deep watering that reaches the root zone, then let the surface dry slightly between waterings.
- Too dry: short spikes and fewer florets
- Too wet: increased risk of corm rot and fungal issues
Fertilizer
If your soil is rich with compost, glads are usually happy. If you want to feed, the best first step is a soil test so you are not adding nutrients you do not need. If you do fertilize, choose a balanced fertilizer or one that leans a little toward potassium for strong stems and blooms. Avoid going heavy on nitrogen, which can push lush leaves at the expense of sturdy spikes.
A simple approach: feed once when shoots are a few inches tall, then again when spikes are starting to form, following label rates.
Staking
Gladiolus is basically a sail. One good gust and that tall spike can lean, crease, or snap. The trick is to stake early, before the spike is tall and top-heavy.
Three easy options
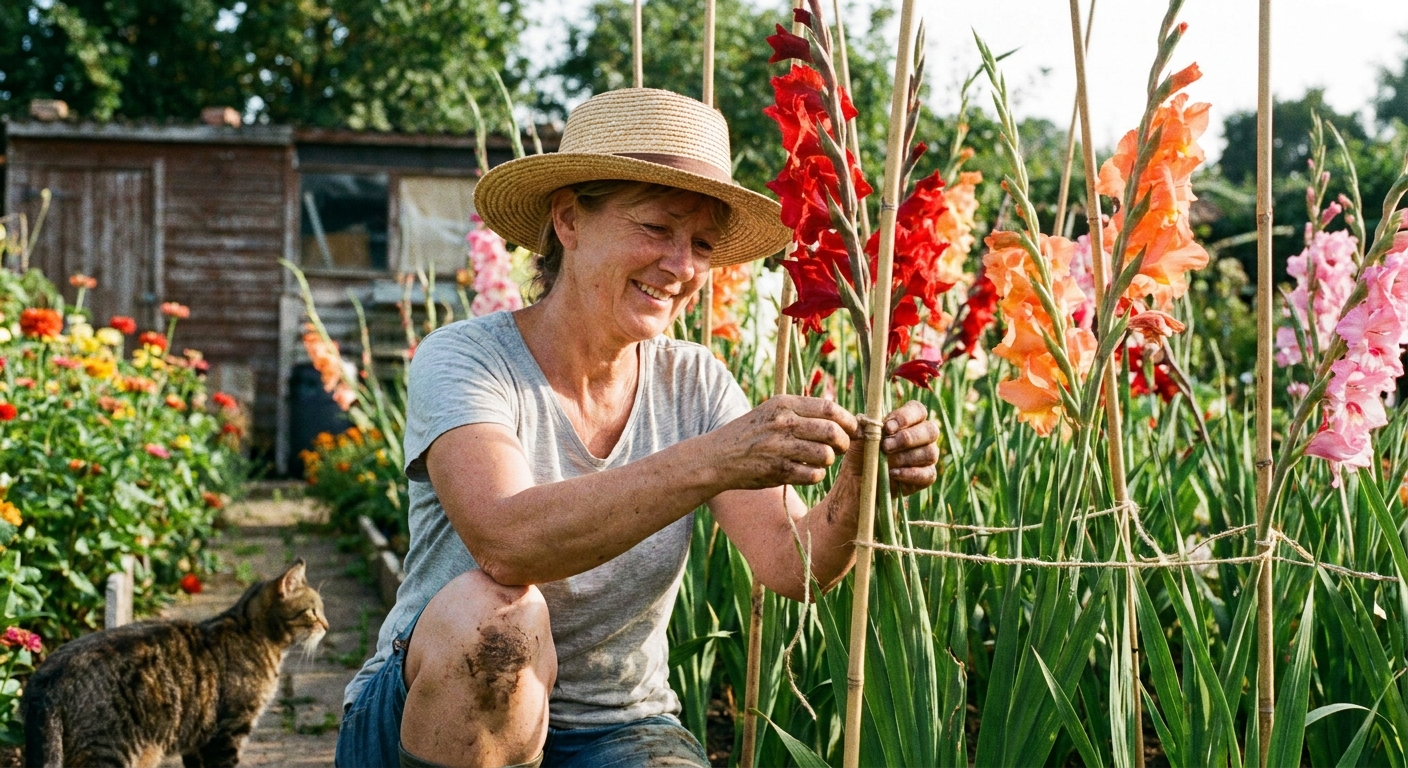
- Single stake per plant: Place a bamboo cane or sturdy stake 2 to 3 inches away from the corm at planting time or when plants are 8 to 12 inches tall. Tie loosely with soft garden twine in a figure-eight.
- Row support: For a cutting row, drive stakes at both ends and run twine in parallel lines along each side of the row, adding another line as plants grow. This is my favorite for lots of glads.
- Ring supports: In ornamental beds, plant supports early so foliage covers the hardware.
Clara note: If you wait until the spike is already leaning, you will never fully straighten it without damaging the stem. Stake when you think, “Eh, it might be fine.” That is the moment to do it.
Cutting for vase life
Cutting at the right stage is the difference between a bouquet that lasts three days and one that keeps opening florets for a week or more.
- Best time to cut: when the lowest 1 to 3 florets are showing color or just beginning to open
- Time of day: morning, after plants have rehydrated overnight
- Leave leaves behind: keep at least 4 to 6 leaves on the plant so it can recharge the new corm for next year
Place stems in clean water right away. Recut the bottoms once you are indoors and strip leaves that would sit below the waterline.
After-harvest care in the bed
Once you cut a spike, you can snip off spent florets for tidiness, but the real priority is the foliage. Keep watering lightly during dry stretches until leaves yellow naturally. That is the plant saving up for next year.
When to dig corms
In climates with freezing winters, gladiolus corms need to be lifted and stored. Timing matters because you want the new corm to mature, but you do not want frost damage.
General timing
- Wait about 6 weeks after flowering to dig, if possible.
- Let foliage yellow naturally as it feeds the new corm.
- Plan to lift before a hard freeze. A light frost is usually fine, but hard freezing can damage corm tissue.
If you are in a warm zone where gladiolus can overwinter in the ground, you may still choose to lift occasionally to divide, inspect for pests, and avoid gradual decline.
Lift and store corms
Step-by-step lifting
- Cut stems back to about 2 to 4 inches above the corm.
- Loosen soil with a garden fork a few inches away from the plant, then lift gently.
- Shake off loose soil. Do not wash unless you must, since extra moisture invites rot.
- Separate the old corm from the new one. The old corm is often flattened and may snap off easily. Remove it.
- Save cormels if you want to grow more. Store them separately since they dry differently.
Curing
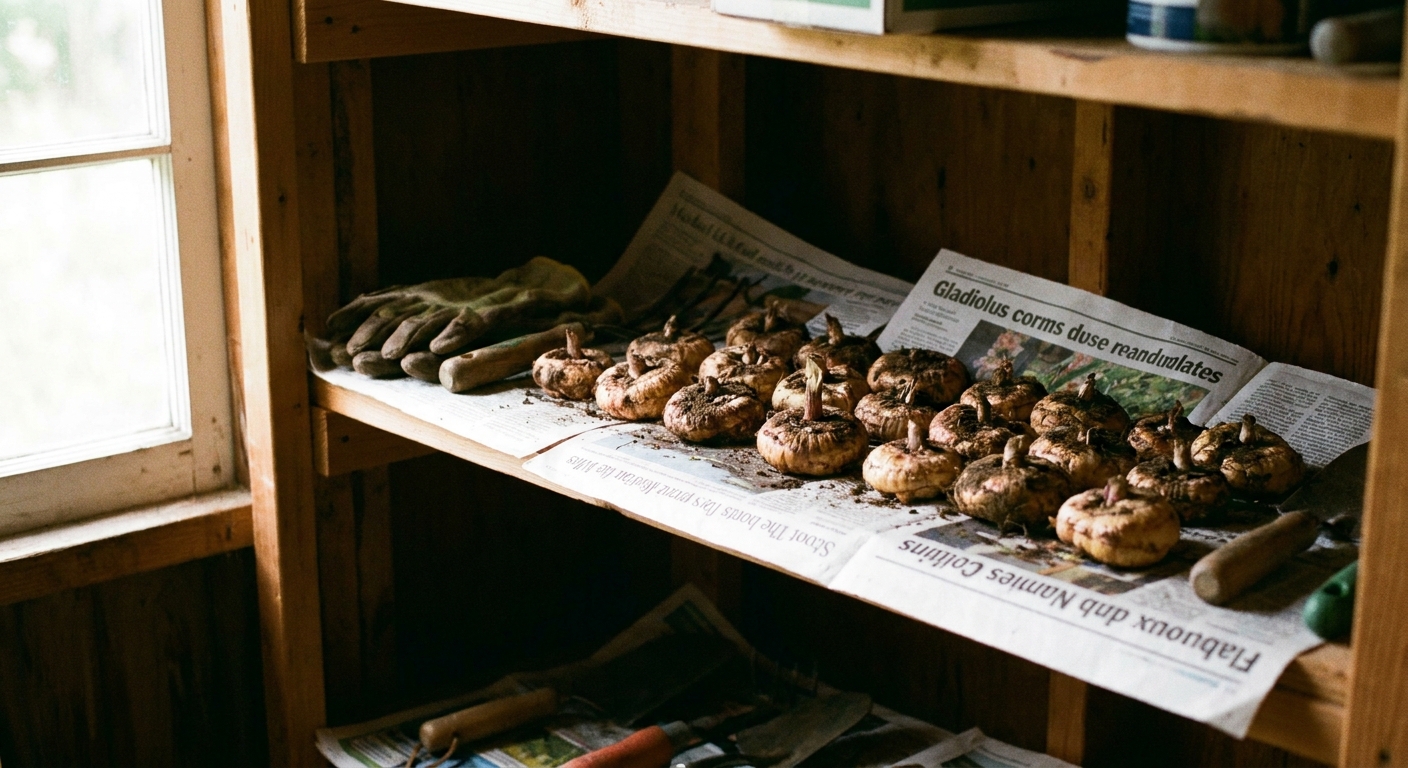
Lay corms in a single layer in a warm, dry, well-ventilated spot out of direct sun for 1 to 2 weeks. A garage shelf with a fan nearby works beautifully.
Storage conditions
After curing, store corms in a breathable container like paper bags, mesh bags, or crates lined with newspaper.
- Temperature: cool, usually around 40 to 50°F (4 to 10°C), and avoid freezing
- Humidity: dry, with airflow
- Darkness: helps prevent sprouting
Check monthly. Remove any that feel soft, show mold, or smell off. One rotting corm can spoil the whole little pile, like a bad potato in the pantry.
Troubleshooting
Thrips
Thrips are the classic gladiolus troublemaker. They rasp and suck, leaving silvery streaks on leaves and streaked, distorted petals. You might also see tiny dark specks of frass.
- Prevention: keep the patch weeded, avoid stressed droughty plants, rotate where you plant glads, and start with clean corms.
- First response: blast foliage with a strong stream of water in the morning to knock pests down.
- Spray options: insecticidal soap or horticultural oil can help, but coverage matters and you usually need repeat applications. Always follow label directions and avoid applying in hot sun.
- If it is severe: prioritize sanitation (remove badly damaged blooms, do not carry infested corms into storage). If you choose stronger controls, use products labeled for thrips and follow local rules.
Rust
Rust shows up as orange to rusty-brown spots or pustules, often on the underside of leaves. It spreads faster in humid weather with poor airflow.
- Do: remove badly infected leaves and dispose of them, improve spacing, and water at the soil level.
- Do not: compost infected foliage if you do not hot-compost.
- Next year: rotate planting location and start with clean, healthy corms.
Gladiolus checklist
- Plant after last frost in full sun.
- Depth: 3 to 6 inches, adjusted for soil and variety. Spacing: about 6 inches.
- Succession plant every 10 to 14 days for extended color.
- Stake early, before spikes get tall.
- After bloom, keep leaves until they yellow. Water lightly in dry weather.
- Lift before hard freeze, cure 1 to 2 weeks, then store cool, dry, and breathable.
- Check stored corms monthly and remove any soft ones.
If you want a small, gentle gardening challenge with a big, showy payoff, gladiolus is it. And if your first try is a little lopsided from wind, welcome to the club. Next season you will stake sooner, and your bouquet bucket will look like you have your life together, at least from across the yard.